
Project Audi B6 S4: Detailing Like a Pro
Text & Photos by Jason Teller
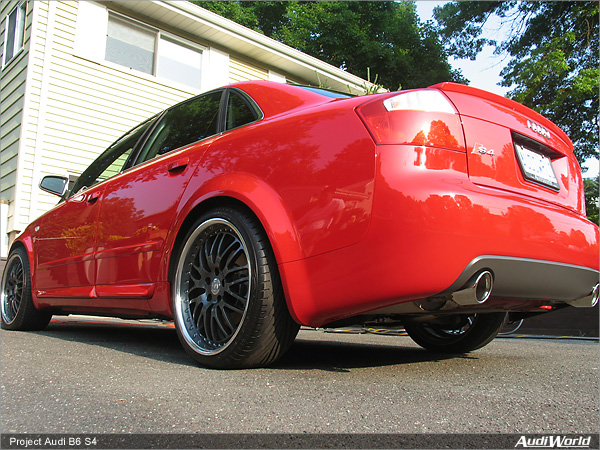
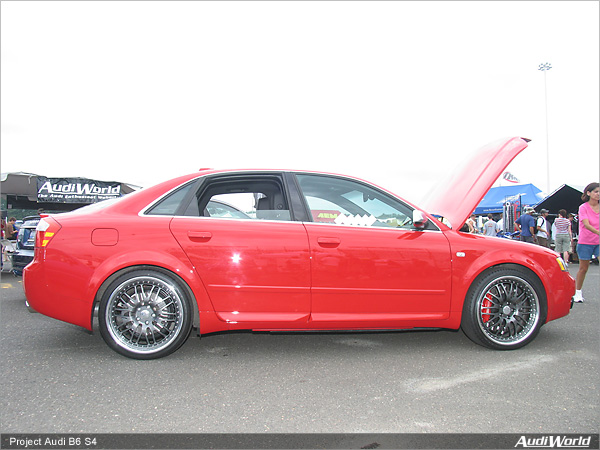
Back in July we chronicled the ever-growing Waterfest show which is considered by many to be the elite VW / Audi show of the season. Special both because of its size and diversity, we were proud this year to feature our very own Project B6 S4 in the AudiWorld booth.
One of the big challenges in show-prepping a car is that no matter how meticulous one might be, there will always be somebody else who would take the detailing just that much further. The trick, then, in avoiding the infinite round and round is to find good products and a very knowledgeable detailing crew. The combination of the two will get the car 95% there without spending more than a day working at it.
What most people probably did not know was that our S4 had just undergone a long drive from Toronto, Ontario down to Jersey just for the show. Some of this drive was done at night which, while allowing some speed limit exceeding fun, also meant that the car had become a very fast moving bug magnet. On top of that the daytime was very hot and sunny, meaning that the road grime and insects were baked onto the vehicle. Throw in coffee stained cupholders and wheels full of brake dust and you can start to envision a truly trashed S4.
The upside was that we had in fact secured the services of a top notch detailing company. The day before the show we met up with Phil Yiu at Mirror Image Detailers in Englewood Cliffs, NJ. The car was immediately turned over to Phil's trusty hands and his crew set to work. With the humidity making the day feel like a trip to the sauna it was a grueling day of sweat and tears. By the end of the day we broke bread together, enjoying a meal and reflecting on how well the car had come out.
Having watched the entire process with our own eyes it didn't take long to realize that a Project Car update was required to document everything. Further cementing this decision was the fact that many, many people at the show the next day took the time to point out how clean the S4 looked. It really was that good.
Products Used:
Exterior:
Interior:
Engine:
Other:
It's no secret that Phil's shelves are stocked with products from Adam's Polishes. In fact pretty much everything used - including the Grit Guard Detail Bucket Caddy and Firehose Spray Nozzle - are available from Adam's Polishes. As previously mentioned, getting the sought after detailed car "look" was a combination of quality product and quality workmanship. With that in mind we thought we would document some of the steps taken on Project B6 S4.
A few words of warning before jumping into the descriptives: we did not attempt to document the process in finite detail and fully acknowledge the well-developed capabilities of the folks at Mirror Image Detailers. Their experience made all the difference in the world. We would advise anybody who is contemplating a hardcore, DIY detailing job to contact Phil or a local professional detailer for guidance.
Process Observed:
1. Wheel and Tire Cleaning: The wheels and tires were cleaned first, while care was given not to get the body panels on the car wet (this helped prevent water spots - always a good thing). Next the wheels were scrubbed down with a brush, soap and water. We were told that you could also use wheel cleaners such as P21S, etc. for this task as well. The wheels were then rinsed down.

2. Engine Cleaning: Since our engine bay was actually fairly clean to begin with (don't know what to say - we can honestly say we never cleaned under there before), Phil chose to do a simple wipe down with Spray Away. The engine was then finished up with the application of Adam's VRT to bring life back into the rubber engine pieces and Adam's Inside Out spray for the hard to reach areas.
3. Exterior Wash: The next step was to actually wash the car, and this was of course performed from top to bottom in an effort to avoid bringing dirt and grime from the bottom towards the top. Phil noted at this point that swirls can result from dirty wash mitts (a fairly obvious yet sometimes overlooked fact), so make sure they are clean at all times. The entire car was then rinsed down in a flood of water and then immediately misted with Adam's Detail Spray. Finally it was dried top to bottom with a Waffle Weave Drying Towel. We thought the detailing might be over at this point because the car was already looking like a million bucks.
4. Claying: Claying sounds intimidating which is why it is not really commonplace in the home wash process. In actuality it is very simple. Detail Spray was used as lubricant and a sticky, clay-like putty was used over the car to help remove oxidation, dirt, overspray, etc. The sign of a good clay job: the paint will feel very smooth afterwards.
5. Polishing: Polishing was the next step and Phil chose Adam's Revive Polish since the car was fairly new. Revive Polish has no abrasives in it which might scratch the finish. The ever-popular Porter Cable was used during this step with excess polish wiped off with a micro fiber tower. The entire polishing step was intended to remove any imperfections / swirls in the paintwork.
6. Waxing: With everything extremely clean and smooth it was time to wax - in this case Adam's Butter Wax - which was also applied with the Porter Cable and taken off with another clean micro fiber towel. More detail spray was applied throughout this process to ensure that removal of the wax would be nice and easy.
7. Spray Glaze: A fully washed, polished and waxed car looks as good as showroom fresh - Project S4 certainly did. Again we thought the detailing process was complete, however Phil and crew were frowning. One final step remained in order to truly bring out depth and gloss in the paint. The crew applied Adam's Brilliant Spray Glaze by hand with a micro fiber applicator. Smiles abounded.
8. The Other Details: In order to finish the rest of the exterior it was time to go around the car in excruciating detail, cleaning out the door/trunk jams and checking for overlooked spots. All exterior glass was cleaned with Adam's Glass Cleaner.
9. Interior: As for the interior, many steps (involving a good helping of elbow grease) were taken and more products were used to clean and treat the entire interior. All surfaces were wiped / cleaned / treated / vacuumed and the interior looked immaculate. If you want more details feel free to ask Phil.
Contact info:
Detailer:
Mirror Image Detailers
Northern NJ
Call for appointments
Tel: 201-233-0003
Adam's Polishes sold by:
Eastars Car Care
560 Sylvan Avenue
Englewood Cliffs, NJ 07632
Tel: 201-816-7266 ext 100 or 0 for the operator
Fax: 201-816-7265
e-mail: phil@eastarsinc.com
www.adamspolishes.com
For Audiworld members ordering product from www.adamspolishes.com please use promo code: EAST for 10 percent off your order. Also check the Group Buys Forum for any current group buys.