When you click on links to various merchants on this site and make a purchase, this can result in this site earning a commission. Affiliate programs and affiliations include, but are not limited to, the eBay Partner Network.
It has been said that this MAF may not be worth modifying, however I disagree. As the MAF housing may be the single most restrictive point in the entire system, in only makes sense to do some work towards easing that restriction.
No post removal or boring here, just simple smoothing of the interior surfaces. Used just hand files to:
a.) blend the two main interior cone shapes (which form the largest part of housings interior surface) at their intersection such that they then form one long curve;
b.) eliminate the flat front face of the entry to the sampling tube by increasing the radiuus of the inside & outside curved edges;
c.) round off the flat front faces of the screw bosses on the centre-post;
d.) taper the sides of the centre-post in towards the centre, making it narrower towards the trailing edge (this also eliminates any transition between the centre-post & it's backing-plate);
e.) reduce the profile of both the cast screw bosses & the backing-plate that surround the screw heads to just the diameter of those heads; &
f.) improve the filleting everywhere the sampling tube attaches to the housing I.D by blending them together, making the fillets as generous as possible.
The above certainly results in a slightly larger effective diameter due to the enlargment of the two main "D" shaped holes on either side of the centre-post; & perhaps some increased flow due to reduced friction as well.
You may see the front end of my MAF at photo 3. of #8., the V-stack mod; above. You will there see how the leading face of the screw bosses on the sides of the centre post have been faired off.
<center><img src="http://pictureposter.audiworld.com/124134/b4_oem_noise_damper_outlet.jpg"></center><p>
I suspect that for a lot of us, this piece like many others, is more than adequate & can be made to provide yeoman service especially after some careful attention.
Purpose here:
a.) De-glaze the inside surface as per the Snorkel, previously;
b.) Remove the sharp lip which exists all around the I.D. at the downstream end of where the metal re-inforcing ring is driven into the inlet (where the accordian hose clamps onto);
c.) Remove moulding flash & stepped surfaces on the interior glued joints (see one of these running from 8 to 2 o'clock across the rear wall of the outlet, photo above);
d.) Smooth the "duct floor" on the short side where it transitions from round to oval, leading down to, in front of the throttle-body (reach up there with your finger & you will find what needs to be smoothed out); &
e.) Pay attention to up-stream edge of the ear-shaped seal flange (see photo above) which guides air to the T/B's inlet. I found it is instructive to put the Damper to T/B Rubber Gasket in place here; then see & feel the air path; & ensure the requisite edges are all rounded & smooth, no sharp edges for the airflow to catch on.
This is a sturdy piece, & its generous wall thickness allows for the fair amount of material removal required in achieving the above. I spent a good amount of time on this piece, more than I spent on the Filter-box Snorkel. However unlike the Snorkel, no real hand-file work here, just hand sanding & the deep reaching rotary sanding I/M tools.
Note: I have skipped over the Accordion Hose as other than ensuring it is crack free; & use a little grease inside either end to ensure it is mounted fully seated & secured; I left it otherwise alone.
Note also: Missing in the photo above are the two rubber post mounts. I glued mine in place in the above empty mount sockets. This will save you losing yours.
Please also go back & see inside the Damper at the photos for:
#3. Bucket (see smoothed inlet "ring" of Damper between Bucket & V-stack;
#6. Filter-box Snorkel (see end of "duct floor" here) &
also compare with the photo above.
Seal P/N: 078 133 367H
...fits into the "backside" of the OEM T/B Seal, shown above.
This fix allows the above rubber seal to better ensure no un-metered air leak occurs between the OEM Noise Damper & the T/B by enlarging the circumference of the rubber seal. Ensure that the seal is in good condition. Over time, they degrade due to heat exposure & will tear when you try to remove them from the T/B. Get a new one from the dealer, it will be unrecognizable beside your old one. Note the T/C fix won't really fix an old seal.
Get used to using the search function, a lot. See also original write-up here:
Please pay attention the the 45� angle Mance talks about in the thread below, as I want to use this same idea to do a seal fix on the front of the Air Filter-box.
Because, in terms of my near stock car at this particular point, and where the Throttle-Body appears on VAP's list of "most restrictive to least restrictive", I just don't think that it's worth my time to consider anything else.
Another potential air leak. It's just paper, it gets old, it's delicate. It most likely can't successfully be re-used. The new one needs aviation sealant.
This is by far where the majority of time will be consumed.
The possibly as early as vintage 1993 assembly that is your Intake Manifold somewhat resembles a large block of Swiss Cheese (with 17 places where it is probably leaking vacuum) at this point if it has never been over-hauled...
12v intake manifold
Why & How:
<b>a.) <u>Where to Start</u></b>
What to do, in order of importance. IMHO these first four should be completed before attempting the complete I/M workshop:
You can see (very 1st photo at the start of this thread) how I re-profiled the six bell-mouths to the high-speed ducts in the lid of the Intake Manifold to eliminate the transition from curving entry to the parallel walls of the duct's I.D. just prior to each butterfly; and the sharp machined edges at each bell lip. Compare against your stock piece.
The other supporting evidence I found for this idea was that I could see, relative to ours, that the entry-bells of the the short runners of the intake manifold on the Audi 4.2 V8 FSI engine (photo below), are a separately machined piece vs. our rough casting. I think there must be a reason they would bother.
This one (5.2 V10 FSI) below, has only short, high-speed passages, note the carefully crafted velocity-stacks providing smooth entry from each plenum into the intake ports (be sure to enlarge the photo):
If your injectors have never been professionally serviced, half of them probably never even close, and because the other ones still do, they are "in conflict" so to speak. Even if they do all close, over time their capability for throughput and their spray pattern diverges from what the other five are doing, so again this also causes them to be in conflict. Send your OEM injectors away for this:
One interesting detail of this purely maintenance item is the accompanying print-out you receive back with your injectors. You can see that after cleaning, all six injectors flow more closely, the same amount of fuel. The rest of your systems will have an easier time delivering the required fuel with these.
As some folks here have had good success WRT improving both performance and economy by replacing the OEM's with slightly <i>smaller</i> than the OEM rated injectors on their cars, I think credence is added to this standard servicing of the OEM's (as opposed to trying to fit <i>larger</i> injectors) as a very cost effective maintenance example of how less; is more.
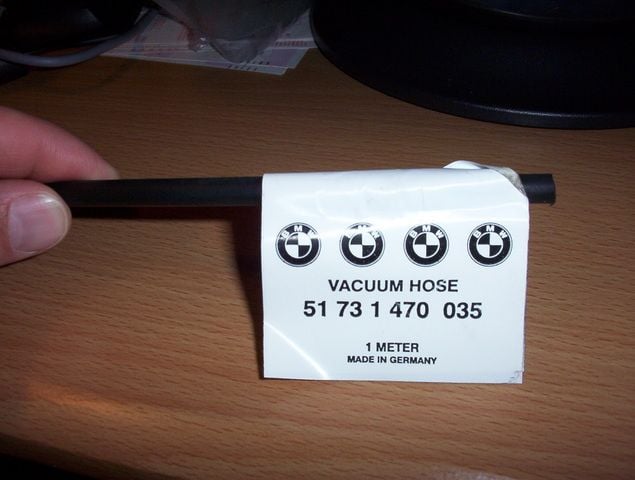
Yes, use the BMW vacuum hose. This older synthetic hose has the correct I.D., the required stiff side-wall to provide sufficient push-on security and to prevent collapse, and the durability to ensure a long leak-proof life unlike the original hose or cheap softer more decorative silicone hose; and will pay for itself everywhere it is used. Your car is less popular than a BMW, so obtaining this exact hose from a dealer should not pose a problem. Buy 3 meters worth. Simply replace all 27(?) hoses and move on. Apparently there is a newer version than this P/N, but this stuff is already really very good.
There are two sides to this system. Actuation; and Intervention.
The actuation side centres around the temperature sensor and the vacuum components. More specifically, the EGR Frequency Valve Solenoid (N18) Assembly and the top half of the EGR valve itself (vacuum diaphram and chamber). Know the physical faults that develop as a result of <i>not</i> incorporating the famous "EGR Mod". Yes, one outcome is that it often results in an un-metered air leak, but where? Do the mod. Do not let the vacuum side of the EGR System <i>become</i> an unregulated part of your Intake System.
See "Code 2411". Start here and work your way back through the links:
On the intervention side is the EGR Valve proper lower half and the I/M passage-way doing what the system is named for. Performing the EGR Passage Polish Procedure goes along way towards preventing further plugging due to "coked" engine oil (see also: the ski-pole mod). Having this working not only makes you smog-test legal and prevents needless CEL's, this system actually subtracts fuel during normal low-load engine operation, which means; better mileage which in turn makes doing the mod very worthwhile.
Last edited by Lago Blue; 03-11-2020 at 05:49 AM.
Reason: fixed solenoid number
 08-16-2010, 09:33 AM