DIY Brake Pads and Rotors 3.0T
 08-02-2016, 07:46 AM
#1
AudiWorld Senior Member
Thread Starter

There are a few threads and videos that show us how to change the pads but I'd figure I'd make another one based on my experience. Try at your own risk and feel free to contribute.
Total cost for rotors and pads was 500.00 shipped from placeforbrakes. Great price but it took two months for the EBC Sport rotors to arrive from the UK.
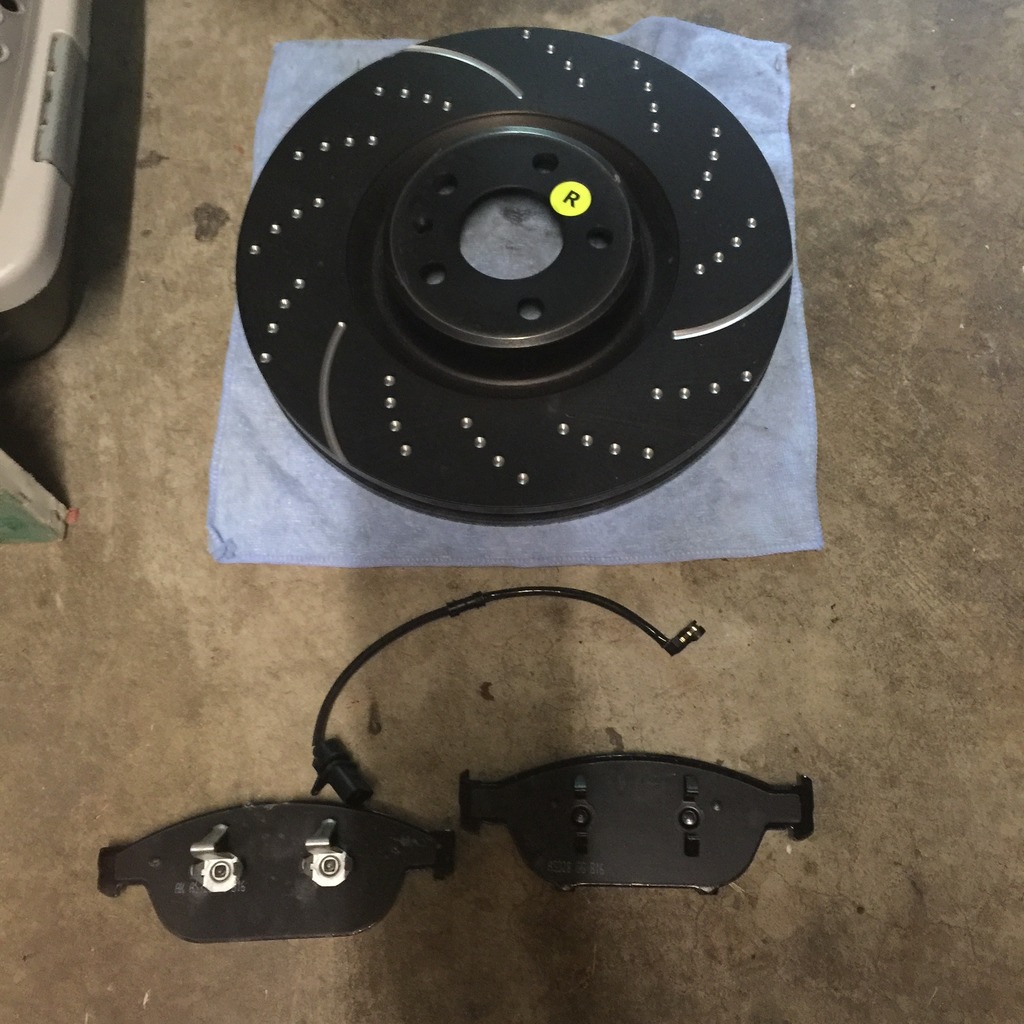
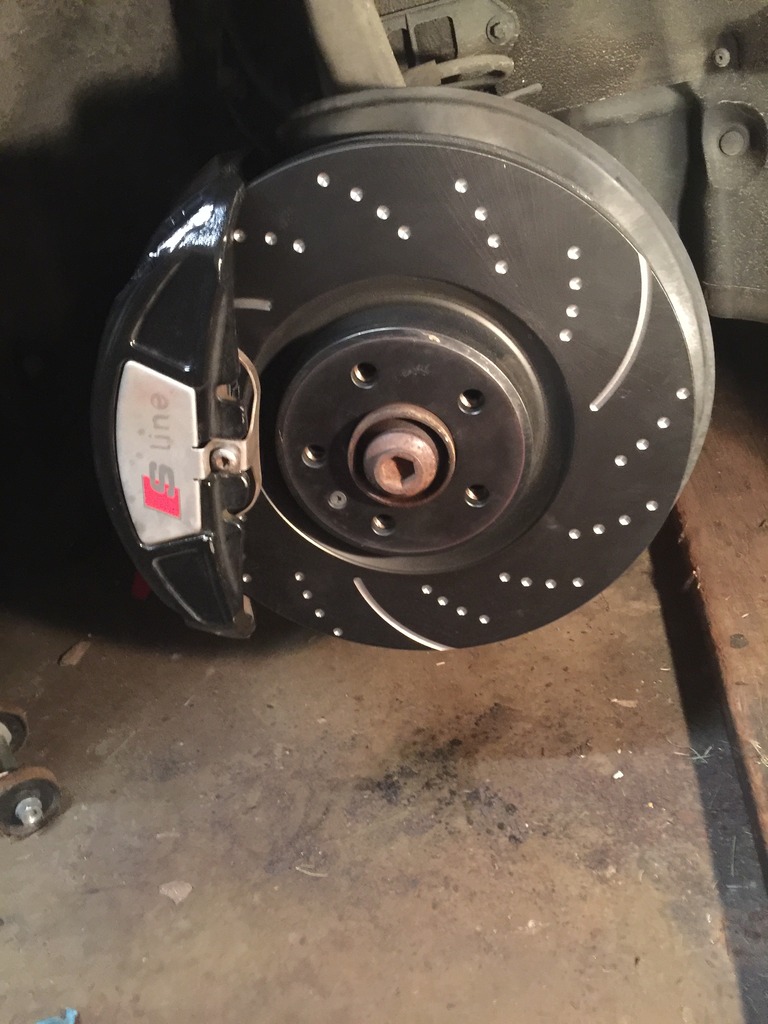
Front Pads and Rotors
What you need:
-Pads/Rotors with pad wear indicator
-22 mm socket (for carrier bolts if you plan on changing front rotors)
-Breaker bar or long handle wrench to remove bolts unless you're the Hulk
-9mm long hex bit (standard length will not work)
-T45 torx bit
-Flathead screwdriver
-T30 torx bit (for removal of rotor)
-Hammer (rusted on rotors)
-PB Blaster (carrier bolts/rotor)
-Something to rest caliper on (I used a small wash bucket)
-Syringe/turkey baster
-Gloves
-Torque Wrench
-Caliper tool
-Patience
Step 1:
Open the brake reservoir under the hood and wrap a towel around.
Step 2:
Loosen the lug bolts while car is still on the ground. Jack up the car as high as possible if you are replacing rotors. Put a stand underneath and remove wheel. Jacking it up as high as possible will allow more room to remove carrier bolts.
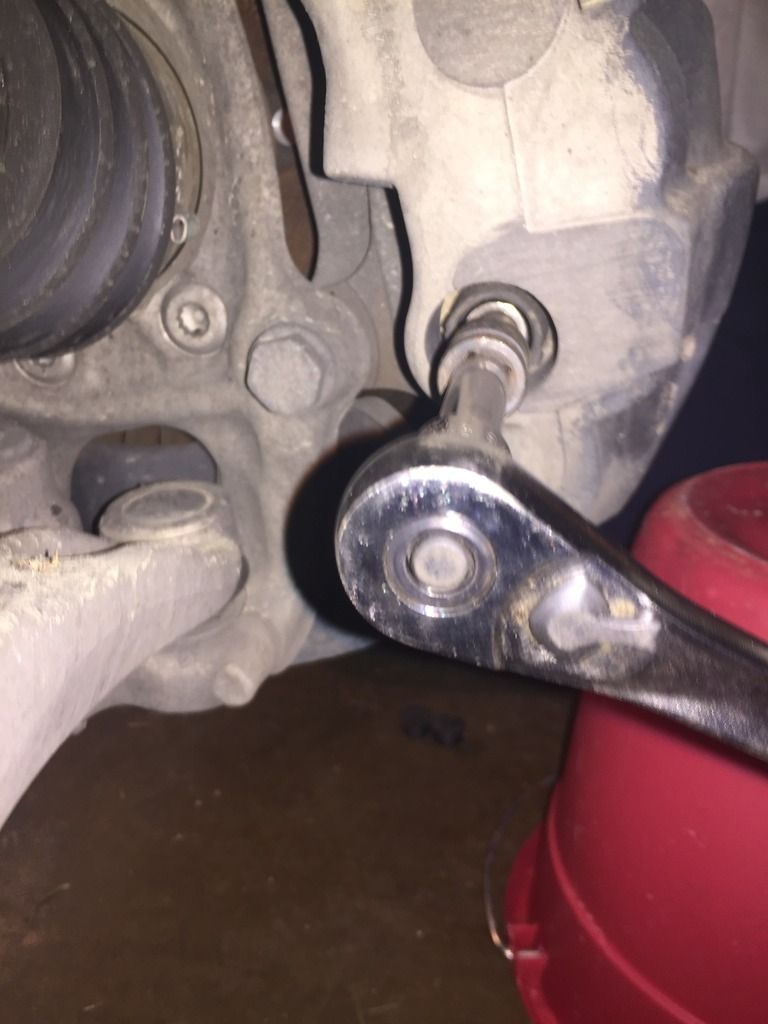
Step 3:
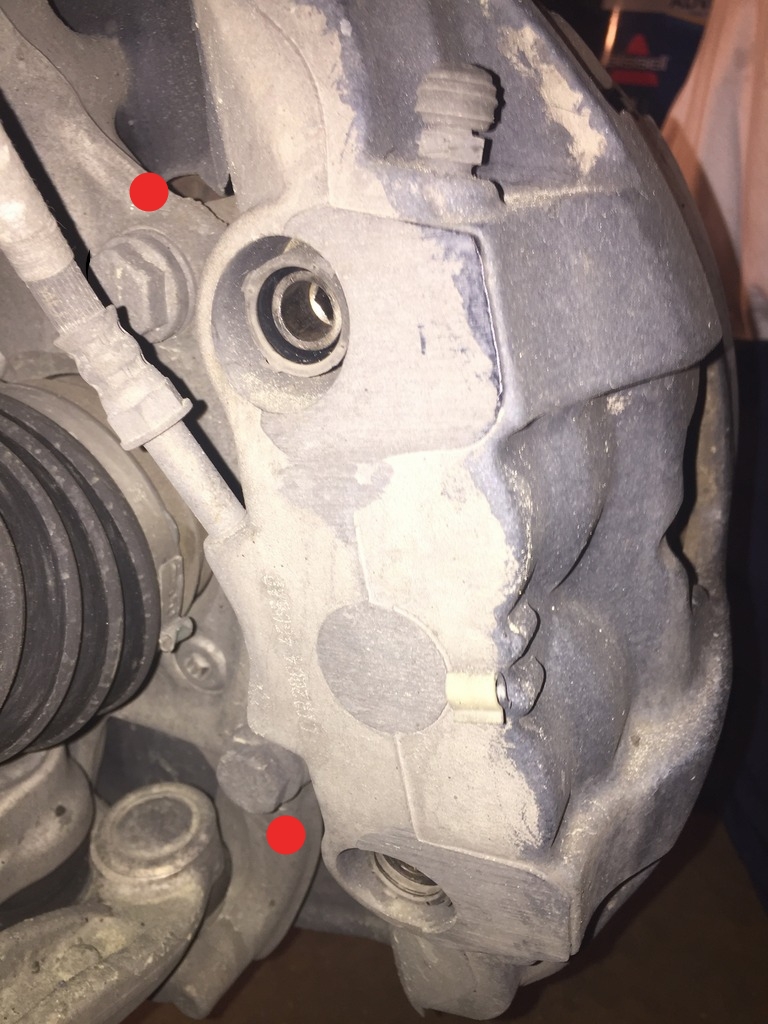
if you are replacing rotors, make sure you can loosen the carrier bolts (22mm socket) before you start if you plan on changing rotors. There's no point in doing anything else until you know you can get these bolts off. No need to touch them if you are only doing pads.
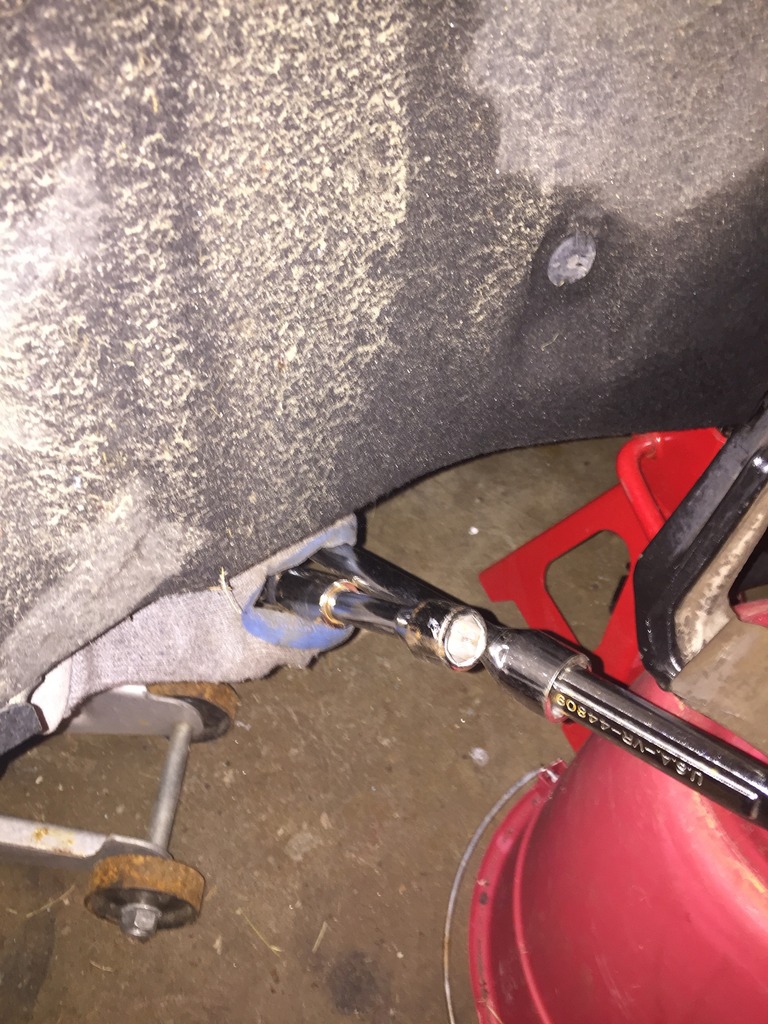
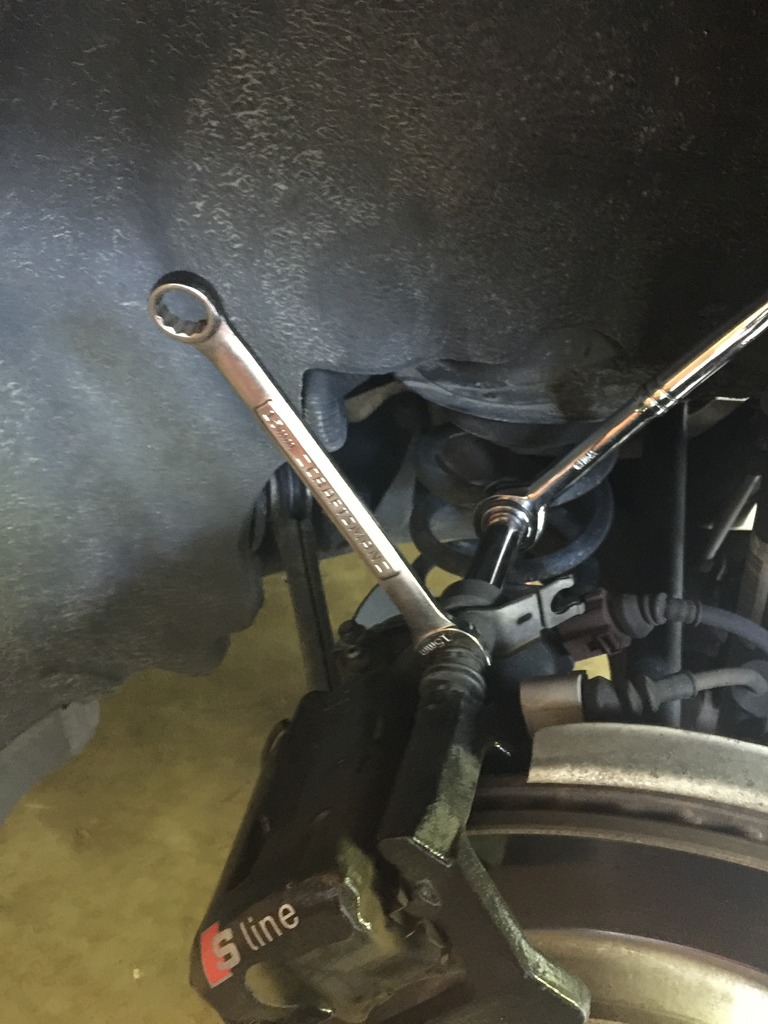
If the carrier bolts are too difficult to remove try to find something to give you leverage like a breaker bar, long handle ratchet/wrench or a metal tube to go over your wrench/ratchet. The key is it can't be too long or there will be no room in the wheel well/no ground clearance (jacking it up as high as possible gives you more room). In my case I used an adjustable nut wrench over the end of my ratchet to get more leverage.
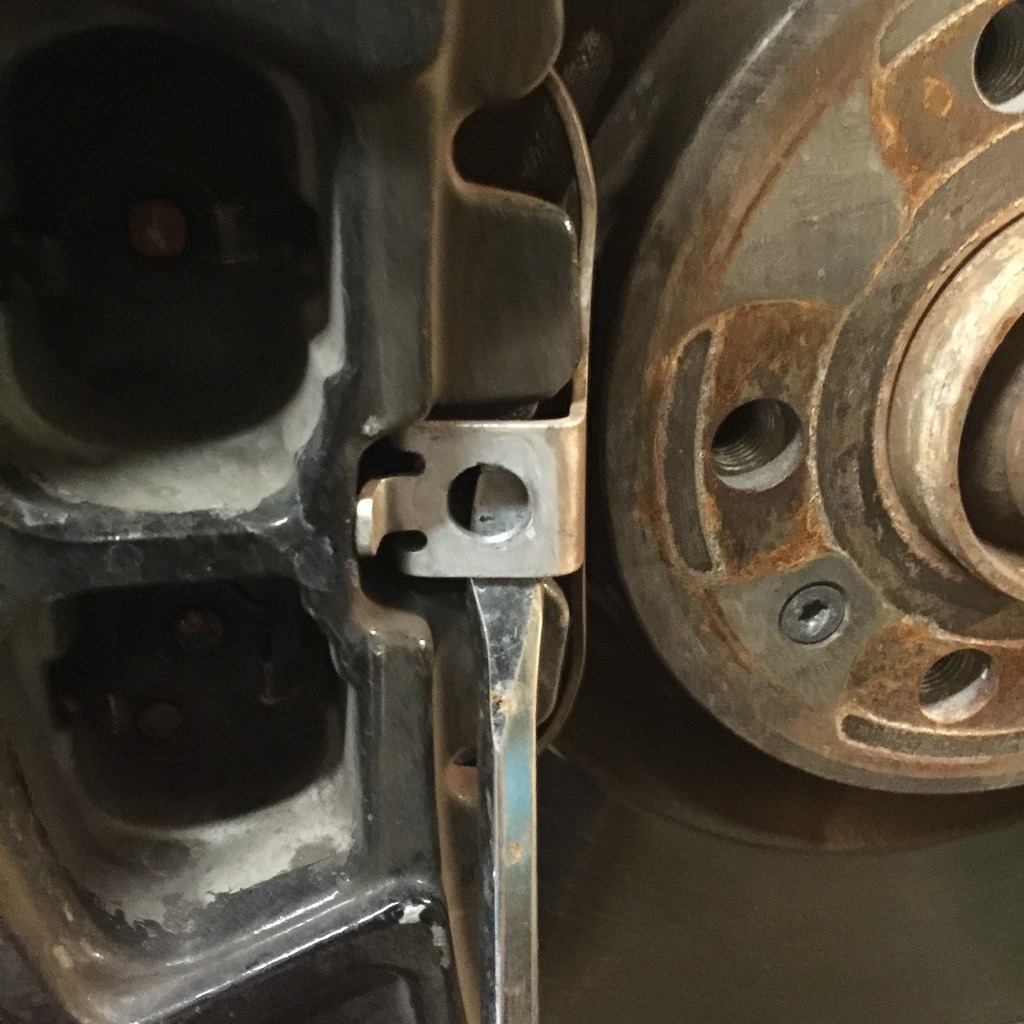
Step 4:
Note the position of the spring before you remove. Both ends are in contact with the carrier...remember this when you put it back on.
Remove the T45 torx screw from the caliper spring. Put a flathead underneath the spring and it will fly off towards you so be careful.
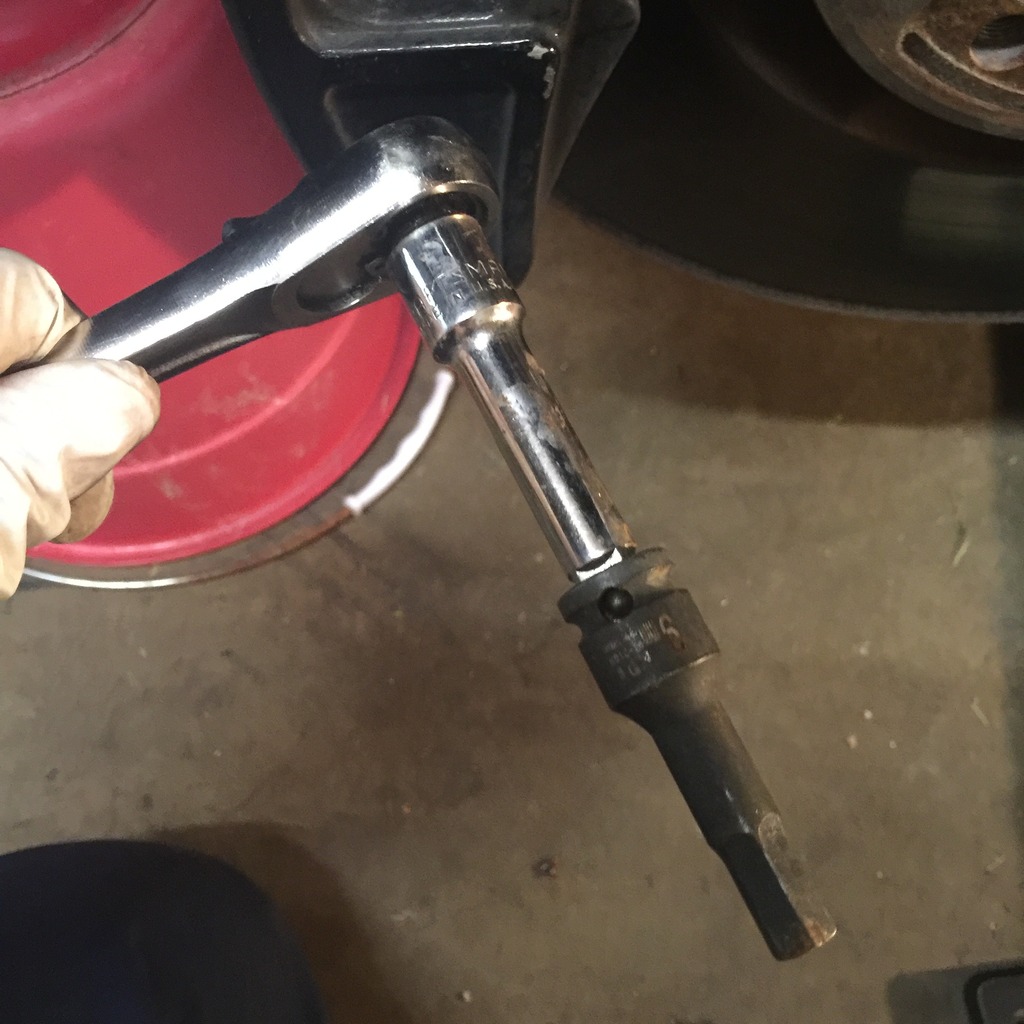
Step 5:
Remove the two plastic covers from the back of the caliper and then the two pins with the 9mm long hex bit. One tip to make it easier to remove them is to wiggle and turn them after they are unthreaded. I purchased the hex bit from NAPA. Clean them with some fine sandpaper/emery cloth/steel wool or whatever and put sum break grease on them before reinstalling.

Step 6:
Pull the pad wear sensor from the brake pad and disconnect harness (driver's side only). To remove from the bracket, turn it 90 degrees and pull it down. Just look at the new sensor and you should understand how to remove it from the bracket.
Step 7:
Pull the caliper off of the rotor. In my case I changed my pads at 20k miles and they were still very thick and pinned tight to the rotors so it was difficult to pull the caliper off. I ended up putting a flathead screwdriver to the soft part and chiseling and cracking a chunk off to relieve the tension and the caliper slid right off. Place the caliper on something so that it does not hang from the brake line.
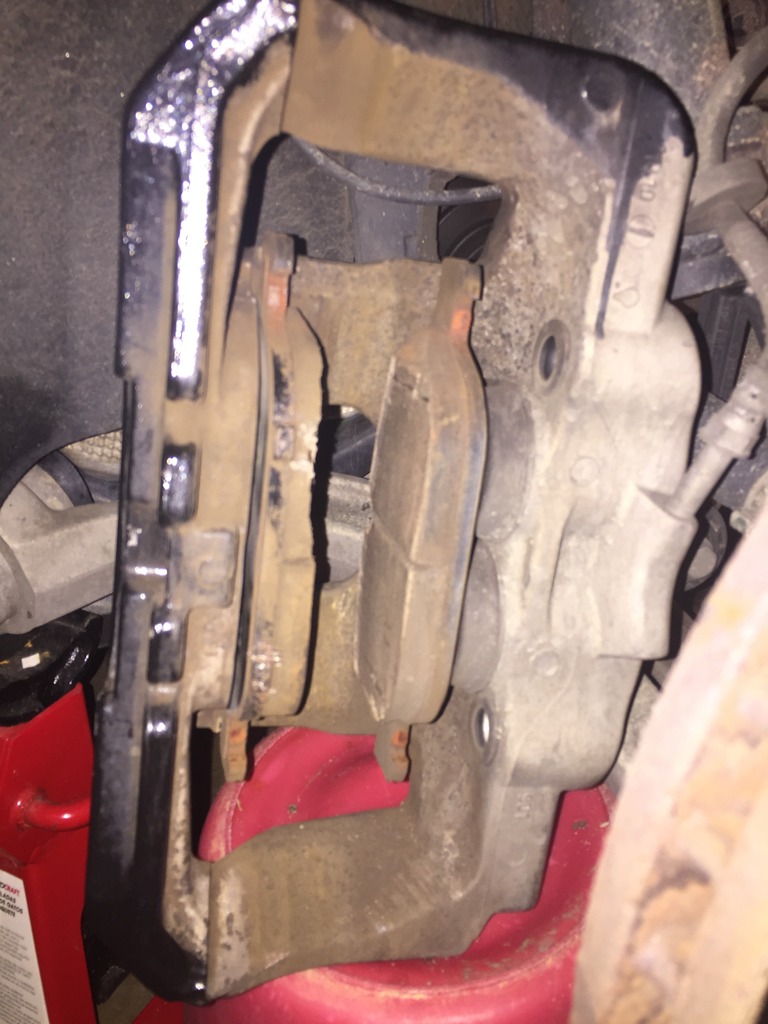
Step 8:
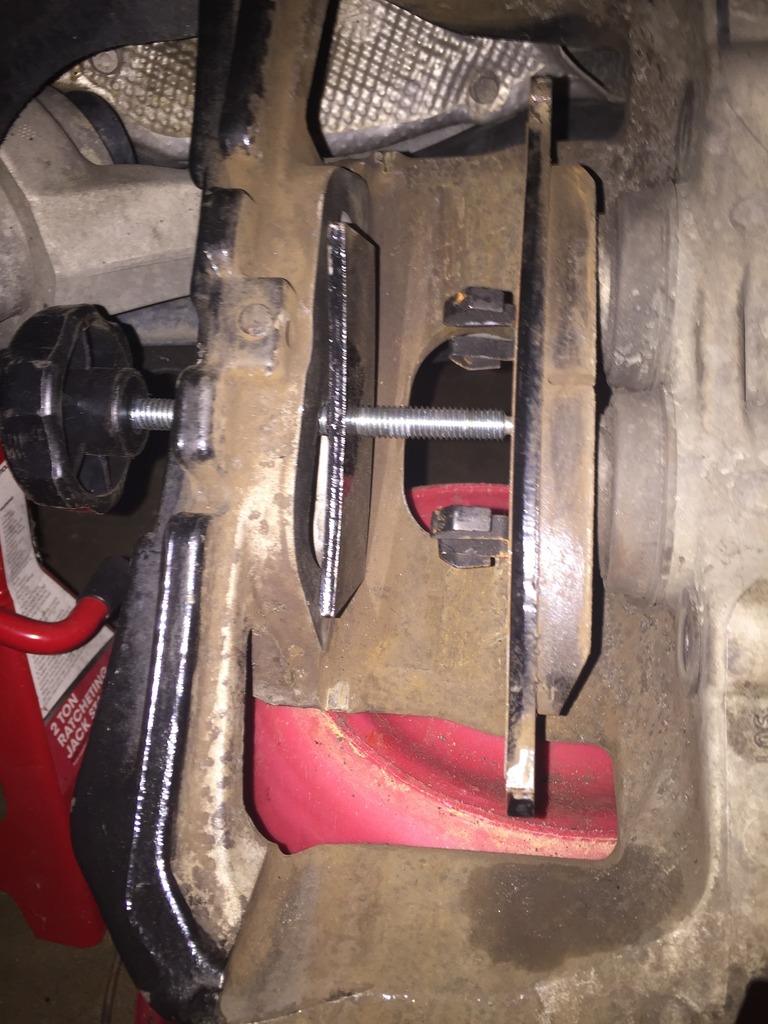
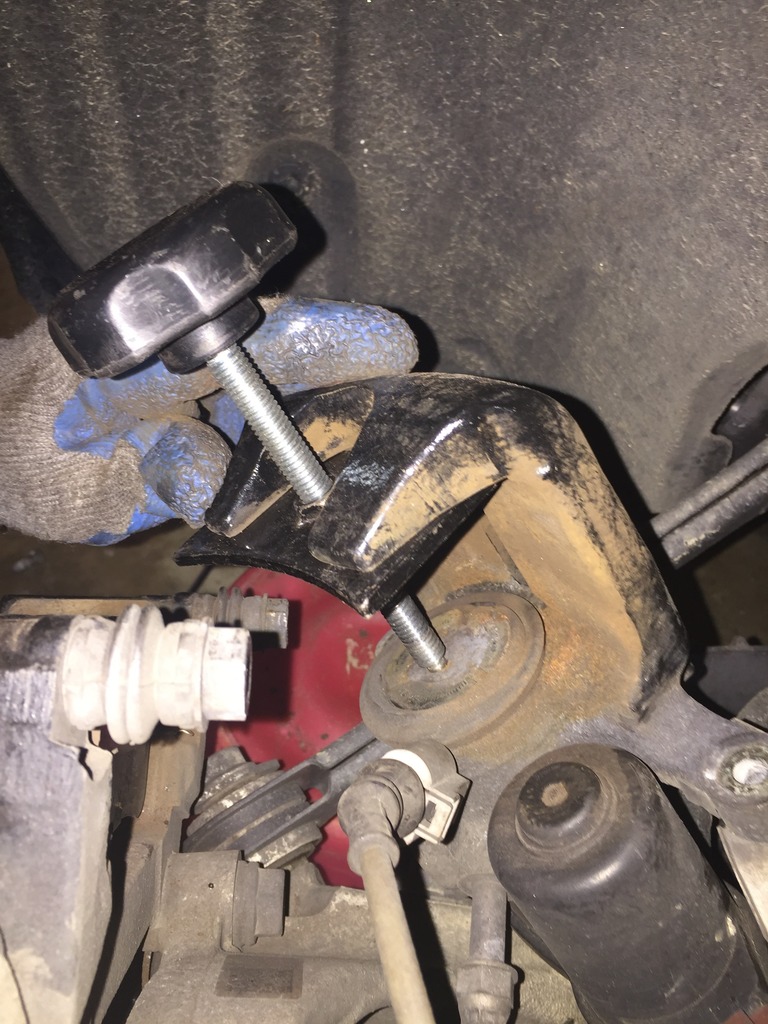
Pull the pads out and clean the caliper with mineral spirits (just used brake cleaner). Push the pistons ALL THE WAY back. I used a caliper tool and one of the old brake pads. Apply some grease to the back of the new pads and snap them back in.
Step 9:
If you are changing the rotors remove the already loosened brake carrier.
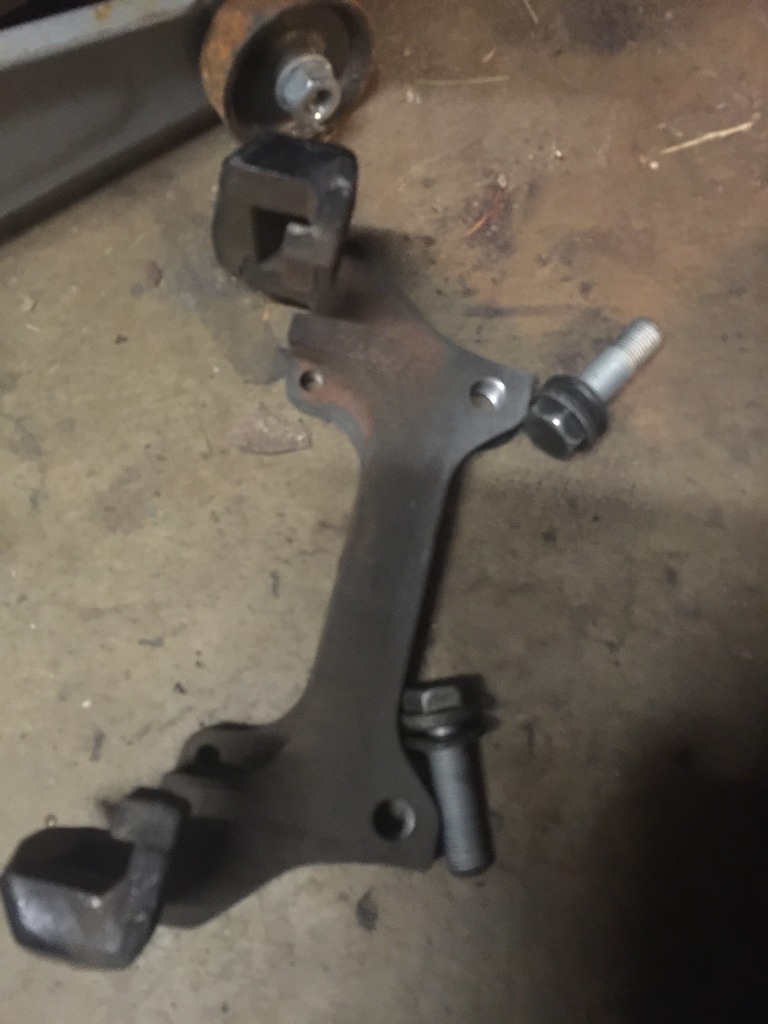
Step 10
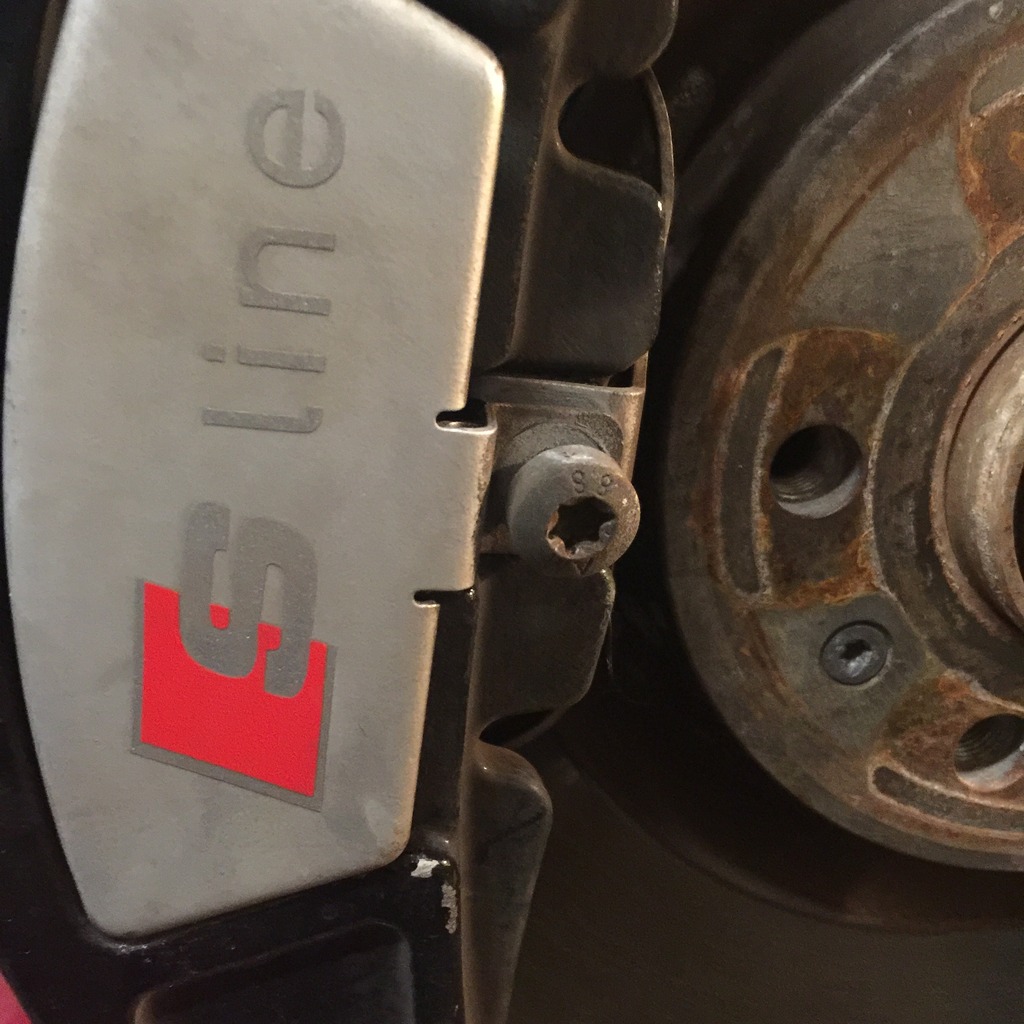
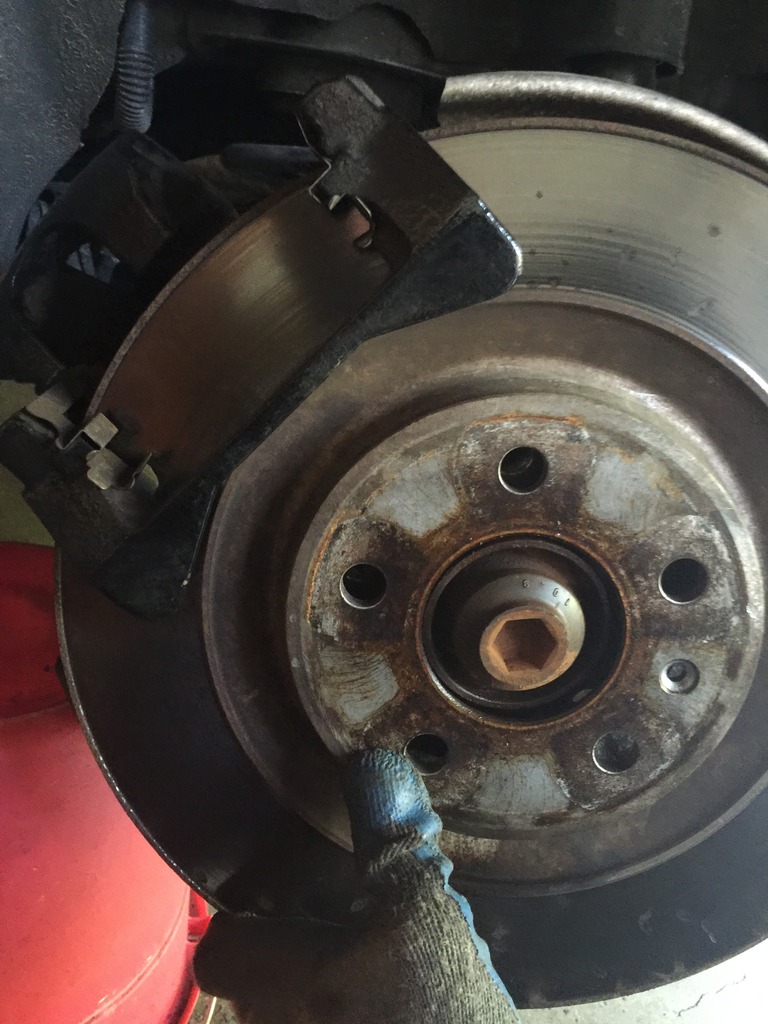
Using the T30 torx bit remove the screw from the rotor. Spray some PB blaster around the rotor if it's rusted on. Mine were stuck on pretty good. I took out a hammer and banged all around the surface as hard as I could for a few minutes before they popped loose. The key here is to have patience and not give up once you start banging on it. Worse case scenario have some sort of puller handy just in case hammering doesn't work for you.
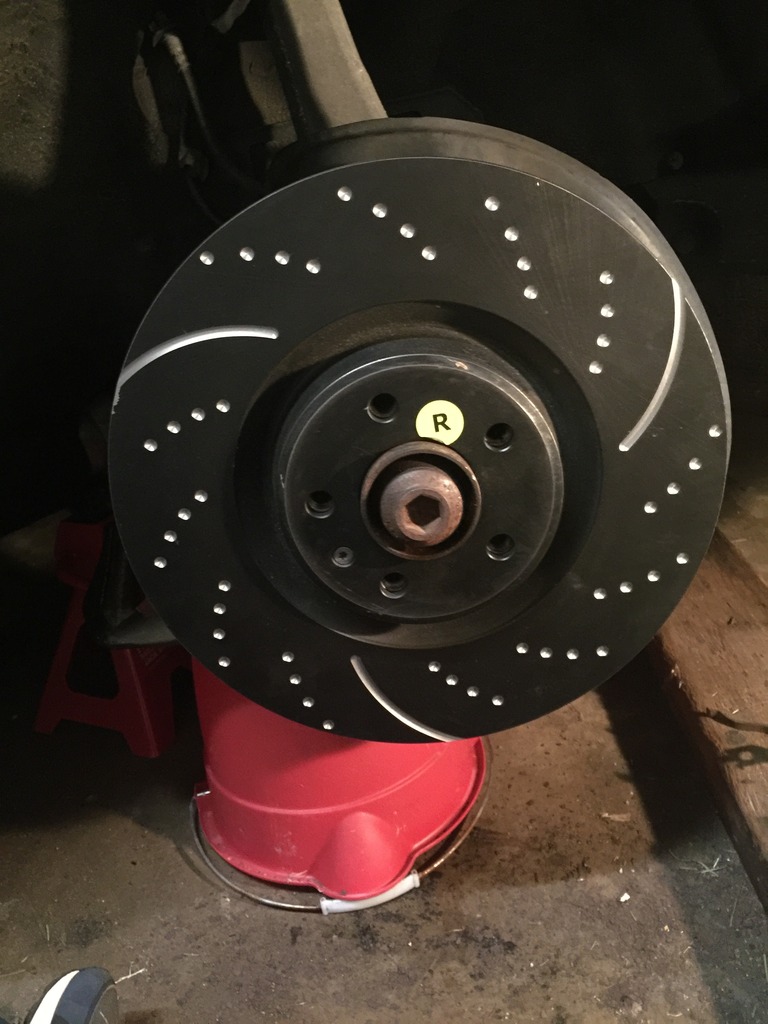
Step 11:
Put the new rotor and torx screw back on (make sure you put the correct rotor on the correct side).
Step 12:
Put the carrier back on (torques specs provided below by tenspeed). Be careful not to cross thread.
Step 13:
Slide the caliper back on and put the greased pins back in. Also grease the caliper where the brake pads slide (I like copper anti-seize here instead of grease). Connect the pad wear sensor to the pad and harness.
Step 14:
Put the spring back on making sure that it is aligned properly. Both ends of the pin should be in contact with each end of the carrier. Put the caliper cover on and then the torx screw back in.
Step15:
Check the brake fluid level...if it's too high from compressing the pistons take a small amount out with a syringe. That's about it.
Rear Pads and Rotors
What you will need:
-Vag Com
-12mm socket or wrench
-15mm wrench
-T30 torx bit (for removal of rotor)
-Hammer
-Non permanent Loctite or new caliper bolts
-Correct brake clips
Step 1:
Open the brake reservoir under the hood and wrap a towel around it.
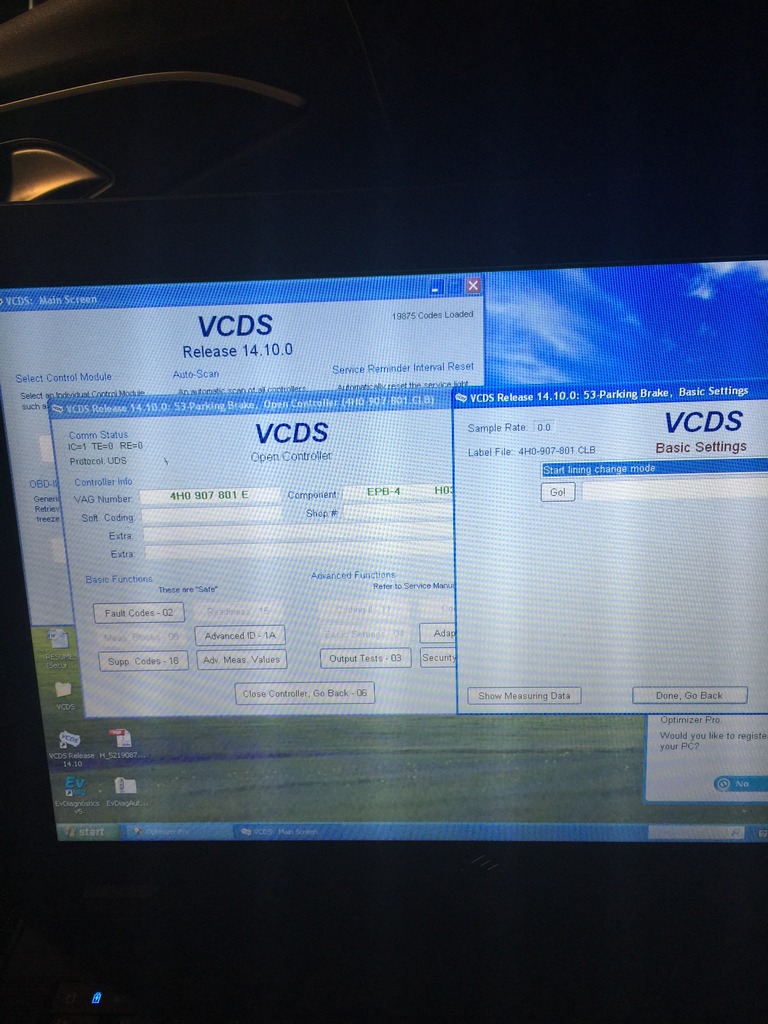
Cycle the parking brake on and then off. With the ignition on (car not running, a/c off, daytime lights off, mmi screen closed) open up Vag and go to Parking 53/Basic Settings/Start lining change mode and then press Go! You will hear the parking brake retract for a few seconds. Leave Vag open.
Hook up a battery tender before you start if you think it will take you more than a couple hours.
Step 2:
After you remove the wheel make sure your brake hardware is correct. Akebono sent the wrong clips twice so I have had to use the original.
Step 3:
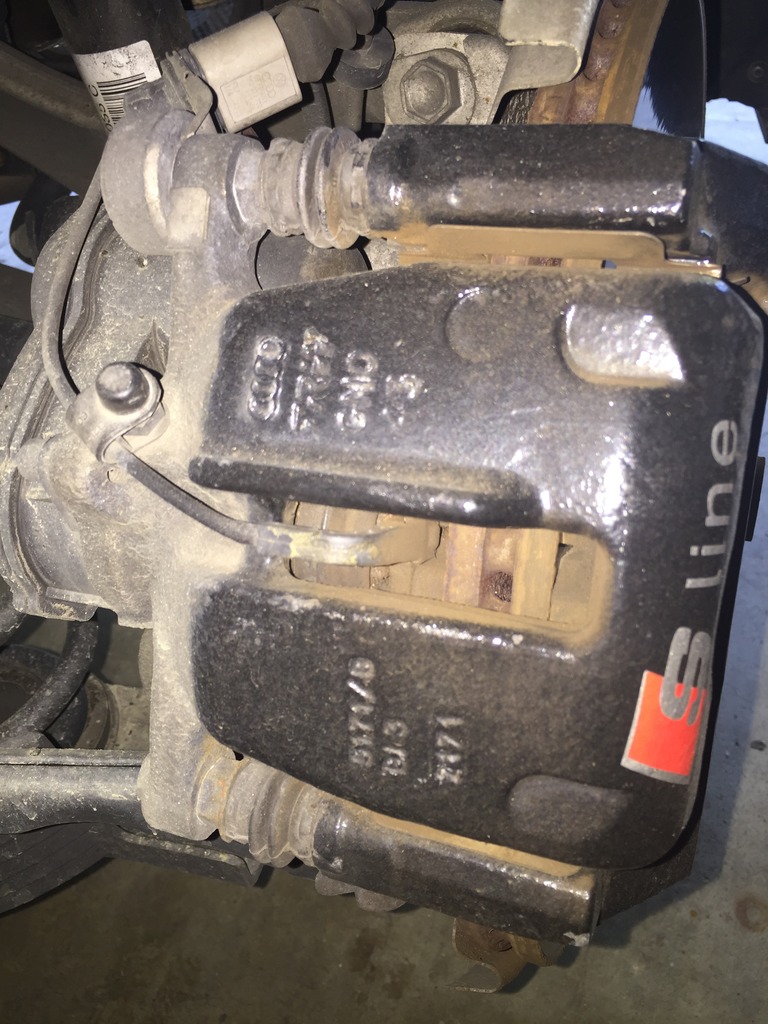
Remove the wear sensor from the harness (left side only) and the two screws on the back of the caliper using a 12mm and 15mm wrench. Do not remove the carrier bolts. Although it doesn't look like it, you can replace the rotor with the carrier still on. This makes me question if you can do the same with the fronts.
Step 4:
Pull the caliper off, remove the pads, and press the piston all the way back and clean up everything with brake cleaner.
Step 5:
Remove the torx screw (T30) and replace the rotor and then the clips (if replacing).
Step 6:
Grease the back of the new pads and put them back into the carrier.
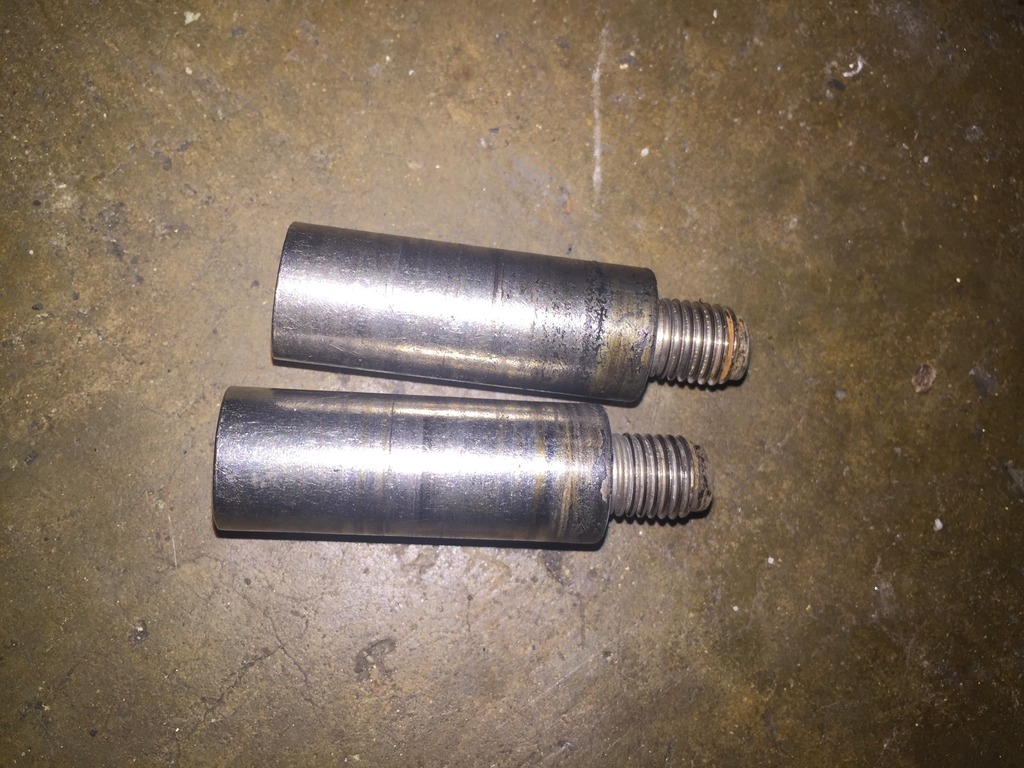
Step 7:
Reinstall the caliper with new bolts or use Loctite on the ends if reusing the old bolts (torque specs below provided by tenspeed).
Step 8:
Check the reservoir for correct level and then go back to Vag and select End lining change mode. You will hear the parking break adjust. If you get a "BRAKE" light in the dash cycle the parking brake a few times, start and turn off or reset any ABS fault codes. I did all three and it went away. No break-in/bedding required with Akebonos.
Total cost for rotors and pads was 500.00 shipped from placeforbrakes. Great price but it took two months for the EBC Sport rotors to arrive from the UK.
Front Pads and Rotors
What you need:
-Pads/Rotors with pad wear indicator
-22 mm socket (for carrier bolts if you plan on changing front rotors)
-Breaker bar or long handle wrench to remove bolts unless you're the Hulk
-9mm long hex bit (standard length will not work)
-T45 torx bit
-Flathead screwdriver
-T30 torx bit (for removal of rotor)
-Hammer (rusted on rotors)
-PB Blaster (carrier bolts/rotor)
-Something to rest caliper on (I used a small wash bucket)
-Syringe/turkey baster
-Gloves
-Torque Wrench
-Caliper tool
-Patience

Step 1:
Open the brake reservoir under the hood and wrap a towel around.
Step 2:
Loosen the lug bolts while car is still on the ground. Jack up the car as high as possible if you are replacing rotors. Put a stand underneath and remove wheel. Jacking it up as high as possible will allow more room to remove carrier bolts.
Step 3:
if you are replacing rotors, make sure you can loosen the carrier bolts (22mm socket) before you start if you plan on changing rotors. There's no point in doing anything else until you know you can get these bolts off. No need to touch them if you are only doing pads.
If the carrier bolts are too difficult to remove try to find something to give you leverage like a breaker bar, long handle ratchet/wrench or a metal tube to go over your wrench/ratchet. The key is it can't be too long or there will be no room in the wheel well/no ground clearance (jacking it up as high as possible gives you more room). In my case I used an adjustable nut wrench over the end of my ratchet to get more leverage.


Step 4:
Note the position of the spring before you remove. Both ends are in contact with the carrier...remember this when you put it back on.
Remove the T45 torx screw from the caliper spring. Put a flathead underneath the spring and it will fly off towards you so be careful.


Step 5:
Remove the two plastic covers from the back of the caliper and then the two pins with the 9mm long hex bit. One tip to make it easier to remove them is to wiggle and turn them after they are unthreaded. I purchased the hex bit from NAPA. Clean them with some fine sandpaper/emery cloth/steel wool or whatever and put sum break grease on them before reinstalling.


Step 6:
Pull the pad wear sensor from the brake pad and disconnect harness (driver's side only). To remove from the bracket, turn it 90 degrees and pull it down. Just look at the new sensor and you should understand how to remove it from the bracket.
Step 7:
Pull the caliper off of the rotor. In my case I changed my pads at 20k miles and they were still very thick and pinned tight to the rotors so it was difficult to pull the caliper off. I ended up putting a flathead screwdriver to the soft part and chiseling and cracking a chunk off to relieve the tension and the caliper slid right off. Place the caliper on something so that it does not hang from the brake line.

Step 8:
Pull the pads out and clean the caliper with mineral spirits (just used brake cleaner). Push the pistons ALL THE WAY back. I used a caliper tool and one of the old brake pads. Apply some grease to the back of the new pads and snap them back in.

Step 9:
If you are changing the rotors remove the already loosened brake carrier.

Step 10
Using the T30 torx bit remove the screw from the rotor. Spray some PB blaster around the rotor if it's rusted on. Mine were stuck on pretty good. I took out a hammer and banged all around the surface as hard as I could for a few minutes before they popped loose. The key here is to have patience and not give up once you start banging on it. Worse case scenario have some sort of puller handy just in case hammering doesn't work for you.
Step 11:
Put the new rotor and torx screw back on (make sure you put the correct rotor on the correct side).

Step 12:
Put the carrier back on (torques specs provided below by tenspeed). Be careful not to cross thread.
Step 13:
Slide the caliper back on and put the greased pins back in. Also grease the caliper where the brake pads slide (I like copper anti-seize here instead of grease). Connect the pad wear sensor to the pad and harness.
Step 14:
Put the spring back on making sure that it is aligned properly. Both ends of the pin should be in contact with each end of the carrier. Put the caliper cover on and then the torx screw back in.
Step15:
Check the brake fluid level...if it's too high from compressing the pistons take a small amount out with a syringe. That's about it.


Rear Pads and Rotors
What you will need:
-Vag Com
-12mm socket or wrench
-15mm wrench
-T30 torx bit (for removal of rotor)
-Hammer
-Non permanent Loctite or new caliper bolts
-Correct brake clips
Step 1:
Open the brake reservoir under the hood and wrap a towel around it.
Cycle the parking brake on and then off. With the ignition on (car not running, a/c off, daytime lights off, mmi screen closed) open up Vag and go to Parking 53/Basic Settings/Start lining change mode and then press Go! You will hear the parking brake retract for a few seconds. Leave Vag open.
Hook up a battery tender before you start if you think it will take you more than a couple hours.

Step 2:
After you remove the wheel make sure your brake hardware is correct. Akebono sent the wrong clips twice so I have had to use the original.
Step 3:
Remove the wear sensor from the harness (left side only) and the two screws on the back of the caliper using a 12mm and 15mm wrench. Do not remove the carrier bolts. Although it doesn't look like it, you can replace the rotor with the carrier still on. This makes me question if you can do the same with the fronts.


Step 4:
Pull the caliper off, remove the pads, and press the piston all the way back and clean up everything with brake cleaner.


Step 5:
Remove the torx screw (T30) and replace the rotor and then the clips (if replacing).

Step 6:
Grease the back of the new pads and put them back into the carrier.
Step 7:
Reinstall the caliper with new bolts or use Loctite on the ends if reusing the old bolts (torque specs below provided by tenspeed).
Step 8:
Check the reservoir for correct level and then go back to Vag and select End lining change mode. You will hear the parking break adjust. If you get a "BRAKE" light in the dash cycle the parking brake a few times, start and turn off or reset any ABS fault codes. I did all three and it went away. No break-in/bedding required with Akebonos.
Last edited by r1racer; 05-03-2018 at 12:59 PM.
 08-02-2016, 01:56 PM
#2
AudiWorld Super User
Nice write up! I alway review DIY threads because I might pick up another pearl of wisdom.
One thing I might add is to turn the front wheels for better access to those tough bolts. Turn on the ignition (don't start the motor) and crank the steering wheel. It turns easy on one wheel. I did it when I was painting calipers.
Here's the fastener tightening specs:
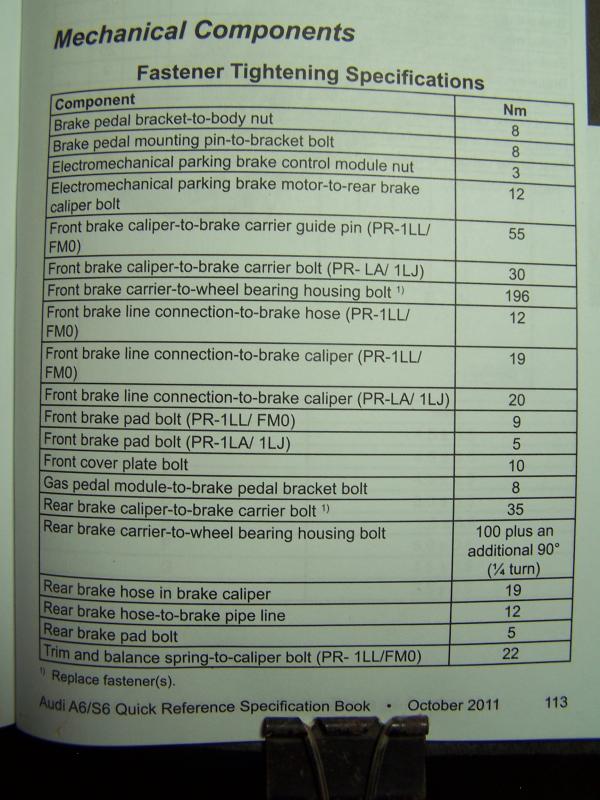
One thing I might add is to turn the front wheels for better access to those tough bolts. Turn on the ignition (don't start the motor) and crank the steering wheel. It turns easy on one wheel. I did it when I was painting calipers.
Here's the fastener tightening specs:

Last edited by tenspeed; 08-02-2016 at 02:01 PM.
08-03-2016, 11:54 AM
#3
AudiWorld Member

FYI - You should lube the caliper guide pins with green, blue, or purple goo (ceramic antiseize). I have never put loctite on the bolts for brake stuff. On the contrary, I also put the ceramic lube on those threads as well. Torque correctly and they won't come loose.
That Phillips screw that holds the rotor on is not needed. It is made of soft metal. If it is stripped or you can't get it out you just break it off by pulling out on the opposite side of the rotor. The head will snap off and usually the remaining screw protrudes a bit and will thread right out.
That Phillips screw that holds the rotor on is not needed. It is made of soft metal. If it is stripped or you can't get it out you just break it off by pulling out on the opposite side of the rotor. The head will snap off and usually the remaining screw protrudes a bit and will thread right out.
08-04-2016, 03:29 AM
#4
AudiWorld Senior Member
Thread Starter
I believe per the service manual that you are supposed to replace the rear bolts. They cone with some sort of thread lock on them from the manufacturer.
If you don't have a rotor screw when you go to change a flat tire/wheel there's a good chance it will be difficult to put it back on without someone pressing the brake pedal as it will spin. They are needed IMO to keep the lug holes aligned.
If you don't have a rotor screw when you go to change a flat tire/wheel there's a good chance it will be difficult to put it back on without someone pressing the brake pedal as it will spin. They are needed IMO to keep the lug holes aligned.
Last edited by r1racer; 08-04-2016 at 03:35 AM.
08-04-2016, 06:44 AM
#5
AudiWorld Super User
Use the wheel hanger to keep the rotor aligned with the hub.
09-20-2016, 04:54 AM
#6
AudiWorld Junior Member
There are a few threads and videos that show us how to change the pads but I'd figure I'd make another one based on my experience. Try at your own risk and feel free to contribute.
Total cost for rotors and pads was 500.00 shipped from placeforbrakes. Great price but it took two months for the EBC Sport rotors to arrive from the UK.
Total cost for rotors and pads was 500.00 shipped from placeforbrakes. Great price but it took two months for the EBC Sport rotors to arrive from the UK.
Last edited by snagitseven; 09-20-2016 at 06:19 AM. Reason: No need to post a response including the original photos and/or long text. Makes it difficult for others to find your repsonse and follow the thread.
09-28-2016, 01:27 PM
#7

Nice write-up on the DIY.
Quick question:
1. What's your review on those EBC sports rotors? Difference in braking power with the drill/slotted features vs OE flat surface rotors? Is it worth it?
2. Which pads did you go with for your set up?
3. $500 was it for all front and rear, rotors and pads?
Thanks in advance!
Quick question:
1. What's your review on those EBC sports rotors? Difference in braking power with the drill/slotted features vs OE flat surface rotors? Is it worth it?
2. Which pads did you go with for your set up?
3. $500 was it for all front and rear, rotors and pads?
Thanks in advance!
Trending Topics
09-28-2016, 02:28 PM
#8

I believe per the service manual that you are supposed to replace the rear bolts. They cone with some sort of thread lock on them from the manufacturer.
If you don't have a rotor screw when you go to change a flat tire/wheel there's a good chance it will be difficult to put it back on without someone pressing the brake pedal as it will spin. They are needed IMO to keep the lug holes aligned.
If you don't have a rotor screw when you go to change a flat tire/wheel there's a good chance it will be difficult to put it back on without someone pressing the brake pedal as it will spin. They are needed IMO to keep the lug holes aligned.
09-28-2016, 04:42 PM
#9
AudiWorld Member
I have never in my life seen a car with loose caliper bolts. usually the opposite is the problem.
Also I just noticed that you will also want to grease the back of the stainless steel anti-rattle shims that snap in to the caliper bracket. And if you live in the rust belt you may want to scotchbrite, wire wheel, or sandblast that bracket surface first.
Rust builds up in there and pushes the stainless shim out and seizes the pads in the bracket.
09-30-2016, 07:32 AM
#10
AudiWorld Senior Member
Thread Starter
Nice write-up on the DIY.
Quick question:
1. What's your review on those EBC sports rotors? Difference in braking power with the drill/slotted features vs OE flat surface rotors? Is it worth it?
2. Which pads did you go with for your set up?
3. $500 was it for all front and rear, rotors and pads?
Thanks in advance!
Quick question:
1. What's your review on those EBC sports rotors? Difference in braking power with the drill/slotted features vs OE flat surface rotors? Is it worth it?
2. Which pads did you go with for your set up?
3. $500 was it for all front and rear, rotors and pads?
Thanks in advance!
I went with Akebono pads...they are great on any rotor IMO. They do not feel as responsive as OEM pads but the difference is insignificant and the dust and squealing issues with OEM pads are virtually non-existent.
Invoice below...you can probably get them even cheaper if you catch them on sale or find a promo code. Again, the only catch is that you may or may not be waiting a while for the rotors so order a couple months in advance if you go through placeforbrakes.com.

Last edited by r1racer; 09-30-2016 at 07:58 AM.