When you click on links to various merchants on this site and make a purchase, this can result in this site earning a commission. Affiliate programs and affiliations include, but are not limited to, the eBay Partner Network.
The OEM plugs are NGK's. I stayed with OEM only because I didn't feel like experimenting...
As for the belt... I'll admit I'm confused. I know I had found some info in the past that specified different intervals for the 2 belts, but the maintenance book is clear that it's the front belt (which I now know is the SC belt) is to be replaced at 55k... Can't find anything on the rear (accessory) belt. Well... I guess I'll be ordering the SC belt and doing them both then! :-)
Ah, I found it... it seems I had them swapped. The accessory belt is due at 75k. Confusing, as the maintenance schedule describes both as "ribbed V-belt". Oh well...
My 2012 A6 3.0T is out of warranty and, thanks to learning on my previous car (2002 A4), I've decided to tackle as much of the maintenance as possible. I'm approaching 55k miles, and that service is one of the big ones. Included in that is replacement of the spark plugs. I know there's a writeup or two in the B8 S4 forum, but I haven't seen any specifically for the C7 A6, so I figured I'd have a go at it.
I spent a couple hours on the Audi "erwin" site and downloaded all of the relevant repair & maintenance manuals in PDF form - not bad for $35 as long as I'm not missing anything. They seem pretty comparable to the level of detail in the old Bentley manuals.
On to the job!
I started with the passenger side. First I loosened the clamps on each end of the air intake tube and removed the end connected to the filter box and moved it out of the way. That gives enough clearance to access everything easily.
I then removed the 2 torx screws holding the coil pack harness down, unhooked each of the connectors, and slid the whole harness down and off the coil packs.
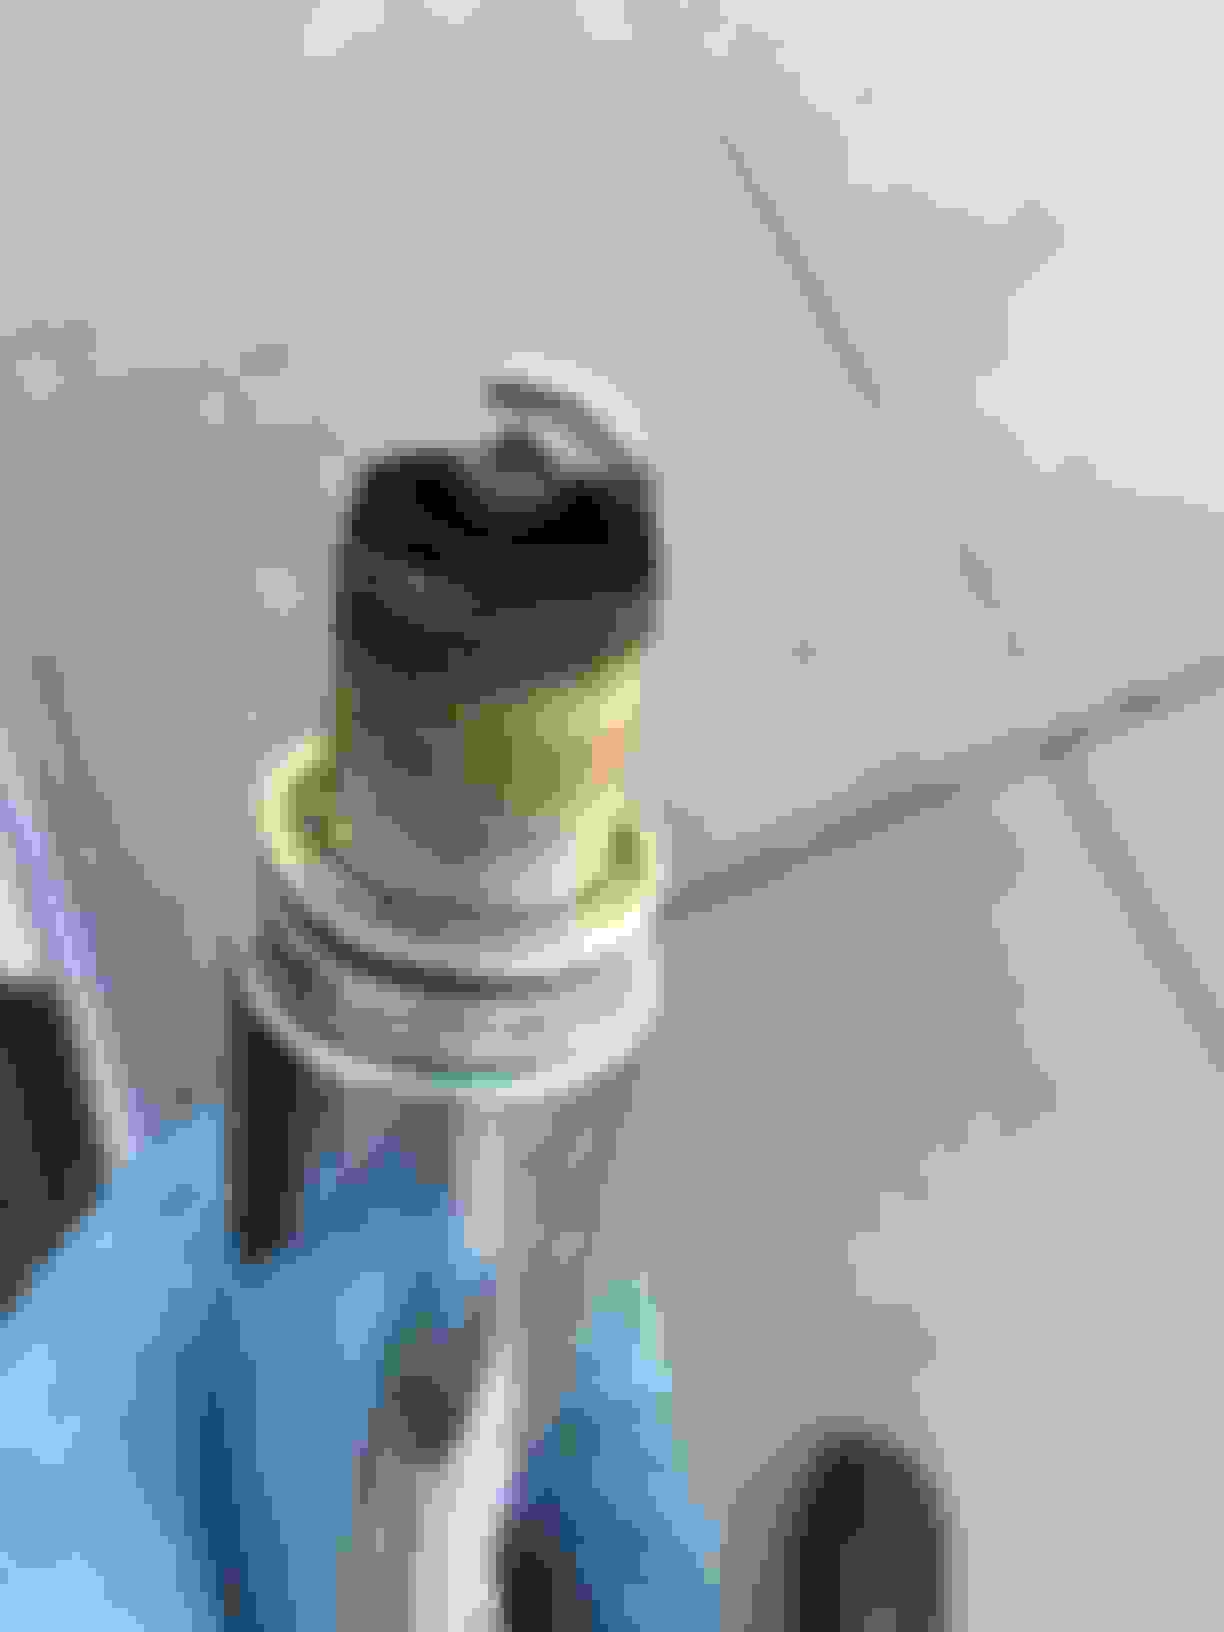
Removal of the coil packs themselves was a bit tricky, only because they were stuck in there pretty good. I didn't have a removal tool, so I used channel lock pliers on the red casing and pulled straight out. I replaced each plug one at a time so I could keep track of the condition of each plug, just in case I found one that looked unusual. Fortunately, they all looked identical:
I used OEM plugs as replacements, using anti-seize on the threads and dielectric grease on the inside lip of the coil pack boot as instructed by the manual. Tightening torque is 30 Nm, or 22 foot pounds.
The driver's side was a little trickier because the coolant reservoir needs to be moved in order to get clear access to the coils/plugs, but the main coolant hose on the bottom doesn't provide much leeway. I unscrewed it from the bracket and disconnected the level sensor on the bottom. I was able to move it enough forward and to the side to get sufficient access - not as good as the passenger side but good enough.
I also unhooked the clip that holds part of the coil pack harness to the head in order to get more slack in the harness.
Overall, the job was very straightforward. I estimate it took me about 1.5 hours, mostly because this was the first time on this car.
Hope this is helpful to someone... Next up is the accessory belt!
-Mark
Fantastic instructions. I am having issues getting the coolant reservoir sensor removed. Any special trick since can't see the bottom of the clip? Cant move the tank without unclipping it and see yours was off. Thanks
Fantastic instructions. I am having issues getting the coolant reservoir sensor removed. Any special trick since can't see the bottom of the clip? Cant move the tank without unclipping it and see yours was off. Thanks
Many of those connectors require a push first then pull as you are holding the lock.
Many of those connectors require a push first then pull as you are holding the lock.
This. I always end up doing a push-pull dance trying to get these connectors to unlock. And this one is a bit stickier since it gets a lot of the water splashed up from the bottom of the car. Move the reservoir the best you can to get the best view/grip before trying to remove it, then move the connector around to break it free from any dried dirt that might be holding it in place. I hate that they require so much force sometimes...
Out of curiosity, when are you changing the spark plugs? I know the service is recommended at 55K according to the manual, but I figure the original plugs must be iridium and they should last 100K?? I have a 2013 3.0L A6.
Spark plug changes are based on actual conditions that vary based on individual driving patterns and unpredictable related component failures.
If fuel injector performance changes... spark plugs will foul at different rate.
If O2 begin to fail.. performance of spark plugs will differ.
If dramatic temperature difference is measured... the AFR will change required performance of spark plugs
If altitude or Barometric pressure changes... spark plugs will fire differently.
If fuel (based on previous mentioned changes) is different, AFR will change the way fuel ratio is ignited causing different ignition patterns on plugs.
The various metals in spark plugs retain heat at different levels. Spark plugs made of metal that retains heat longer (harder to dissipate) are horrible for forced induction engines as they create detonation and reduced timing.
I.E. platinum and iridium retain heat longer, and bad for forced induction. Copper plugs don't retain heat as much and are better for forced induction engines to reduce detonation and improve timing curves.
How did you get the lower torx bit off (on the passenger side closest to the air box). I can't seem to get my torx driver in there without having to take the whole airbox out.
How did you get the lower torx bit off (on the passenger side closest to the air box). I can't seem to get my torx driver in there without having to take the whole airbox out.
If your driver is a little longer, you can take the cover off where the air filter sits (perpendicular to the car). That'd give you more room, I believe its just two plastic screws holding it in
 06-25-2015, 06:40 PM