
 08-05-2016, 09:38 AM
Last edit by: IB Advertising
See related guides and technical advice from our community experts:
- Audi A4 B7 How to Replace Tail Light Bulbs<br>Step by step instructions for do-it-yourself repairs.

Intermittant Rear Brake/Turn Signal Light Outage

 04-24-2012, 06:22 PM
#112
AudiWorld Member

Join Date: Mar 2000
Posts: 329
Likes: 0
Received 0 Likes
on
0 Posts
Had the same problem on both sides (6 months apart).
You can try to change the bulb first, then the the bulb holder (about $35 if I recall correctly) and finally the entire assembly for about $135 I think.
The second time I did not waste any more time or money and went for the entire assembly directly.
You can easily change it yourself.
You can try to change the bulb first, then the the bulb holder (about $35 if I recall correctly) and finally the entire assembly for about $135 I think.
The second time I did not waste any more time or money and went for the entire assembly directly.
You can easily change it yourself.
04-27-2013, 10:25 AM
#113
I was having the same issue as all of you with my turn signal/brake light intermittently going out on the driver side, then coming back, then going out etc. All of my LEDs work, so I knew that the actual LED strip could not have been the problem. I had tried everything on this post to no avail. So I did the following and the problem is solved for good. This will probably void any warranty and is a little ghetto, but its free and a permanent fix. The true fix is to spend $200 and replace the light, but I don't have $200 and you probably don't either so here you go.
This is what you will need to do the job.
1. Solder Gun
2. Solder
3. Wire Splicer
4. 16 guage wire
5. Butt Splices 22-16 guage
<a href="http://photobucket.com/" target="_blank"><img src="http://i27.photobucket.com/albums/c188/deejayeb/supplies_zpsf84c4998.jpg" border="0" alt=" photo supplies_zpsf84c4998.jpg"/></a>
So my ground pin holder originally broke and I placed a zip-tie which worked temporarily(48 horus), now I see the plastic on the power pin also broke. So this is how my tail light looked at the start.
<a href="http://photobucket.com/" target="_blank"><img src="http://i27.photobucket.com/albums/c188/deejayeb/BrokenPins_zps5e9800e8.jpg" border="0" alt=" photo BrokenPins_zps5e9800e8.jpg"/></a>
To start I followed the brown ground wire and power wire from the car to the lights connection. I then followed the trail in the light assembly to identify the power and ground on the lights power board.
<a href="http://photobucket.com/" target="_blank"><img src="http://i27.photobucket.com/albums/c188/deejayeb/PowerandGroundlabeled_zps55ede040.jpg" border="0" alt=" photo PowerandGroundlabeled_zps55ede040.jpg"/></a>
Next I soldered an 18 gauge wire to both the ground and power locations on the lights board. Be sure you use just enough wire as too much excess will make it tougher to put the 2 pieces of the tail light back together. I used about 4" and probably should have went with 2" or 3"
<a href="http://photobucket.com/" target="_blank"><img src="http://i27.photobucket.com/albums/c188/deejayeb/solderinglabeledupclose_zps65e2f488.jpg" border="0" alt=" photo solderinglabeledupclose_zps65e2f488.jpg"/></a>
Next I removed the LED's ground and power wires from the broken plastic holders. You can see where they attach to the LED board inside of the tail light which you cannot access without cutting the light housing. I also cut off the top of the plastic holders so they would bang up against my solder on the power board.
<a href="http://photobucket.com/" target="_blank"><img src="http://i27.photobucket.com/albums/c188/deejayeb/LEDconnections_zpsa44db279.jpg" border="0" alt=" photo LEDconnections_zpsa44db279.jpg"/></a>
Next I stripped the LED power and ground wires and attached the butt splices. ***CAUTION*** - BE VERY CAREFUL HANDLING THE LED POWER AND GROUND WIRES. Their connection to the LED board is fragile and if you break these wires off the LED board it could be difficult to solder them back onto the LED board.
<a href="http://photobucket.com/" target="_blank"><img src="http://i27.photobucket.com/albums/c188/deejayeb/ButtSplceslabeled_zpsda9387cb.jpg" border="0" alt=" photo ButtSplceslabeled_zpsda9387cb.jpg"/></a>
Next I placed my newly soldered on 16 gauge wires from the power board into the other end of the butt splicer to create a direct connection. Be sure you connect P-P and G-G.
<a href="http://photobucket.com/" target="_blank"><img src="http://i27.photobucket.com/albums/c188/deejayeb/FinalConnectionslabeled_zps7dda5591.jpg" border="0" alt=" photo FinalConnectionslabeled_zps7dda5591.jpg"/></a>
Here you can see the connections before closing the two portions back together.
<a href="http://photobucket.com/" target="_blank"><img src="http://i27.photobucket.com/albums/c188/deejayeb/Finalconnectionsbeforeclosure_zps3e41e217.jpg" border="0" alt=" photo Finalconnectionsbeforeclosure_zps3e41e217.jpg"/></a>
Then just tuck in your excess wire and snap back together and you're done!
This whole project took me about 20 minutes to complete and I had all the supplies in my garage. I have lived with the light failures for 6 months and can't believe I waited this long to fix it.
Its been 24 hours and no brake light/turn signal failures yet. I would normally get them every trip I took multiple times a day. I will update you guys in few weeks to be sure this is the long term fix.
Good Luck!
04-27-2013, 10:31 AM
#114
Sorry I couldn't figure out how to edit my post. Its supposed to say:
Next I removed the LED's ground and power wires from the broken plastic holders. You can see where they attach to the LED board inside of the tail light which you cannot access without cutting the light housing. I also cut off the top of the plastic holders so they wouldn't bang up against my solder on the power board.
Next I removed the LED's ground and power wires from the broken plastic holders. You can see where they attach to the LED board inside of the tail light which you cannot access without cutting the light housing. I also cut off the top of the plastic holders so they wouldn't bang up against my solder on the power board.
 04-30-2013, 02:55 AM
#116
AudiWorld Junior Member
07-03-2013, 03:18 AM
#117
Audiworld Junior Member
Join Date: Mar 2013
Location: Michigan
Posts: 83
Likes: 0
Received 0 Likes
on
0 Posts
Ok, I am pretty positive I fixed my issue, though I do seem to have one set of two LEDs on the driver's side that doesn't always illuminate. This however doesn't short the lighting and the other lights work. I may see if I can get into where the LEDs are somehow to look at that, but it's a minor issue.
So, my particular problem was a crack in the plastic on one of the connectors. I took some pics:
Hopefully others have the same problem and resolution.
So, my particular problem was a crack in the plastic on one of the connectors. I took some pics:
- What the connectors should look like
- Out of focus picture of what the bulb holder connections look like
- Side 1 of one connector
- Side 2 of the same connector with damaged plastic
- How I fixed it
Hopefully others have the same problem and resolution.
I removed the tail light assembley which took no time.. And i had the same exact connector plactic broken.. So i used electric tape and fixed it... Havent had it since! Been about 3 days now.. Hopefully it doesnt come back!
Thanks for your help, wouldnt of done it without you
01-18-2014, 07:48 PM
#118
AudiWorld Member
Thanks to all for helping me fix my issue with this. Dealer wanted $400 to replace the whole assembly.
Issue: Idiot light was going on sporadically for many months. Rear passenger directional seemed to work sporadically. Stopped by dealer a few times when oil was low and the directional always seemed to work. Recently the directional stopped working all the time.
I found this link and went at it. Attached below are some pics and words describing how I fixed it. Very similar to what everyone else did. Some things I didn't realize at the beginning:
1. The directional lights are LED's. You cannot see them. Once disassembled there are two wires coming out to posts. One of these posts cracked and broke the connection to the LED's. All the rest of the bulbs are for brakes, etc. (I started out by buying replacement bulbs)
2. The LED's are NOT replaceable due to really long life so that alone points to connectors & connections.
3. Removal of light assembly is straight forward EXCEPT do NOT pry the red lamp assembly at the body exterior side (even though it is kind of necessary). The red lamp assembly chips very easily and looks bad when done. I slightly chipped mine but fixed it with crazy glue (only a little) which spread over and into the cracks. Remove the black "flap" (near the trunk latch) to expose some back surface area to pry the red lamp assembly out without touching the body exterior side at all.
4. Be as gentle as possible cause Audi still suffers from "easily broken plastic clip syndrome".
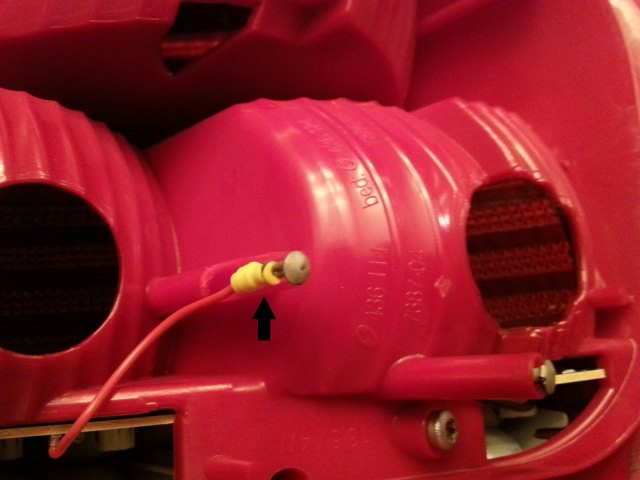
Disassembled red lamp assembly with pointer to broken post

Zoomed in
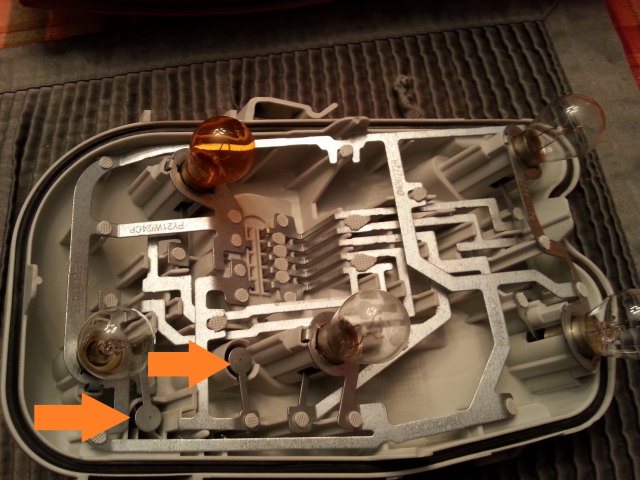
The other assembly which mates with this (pointers to post connections)
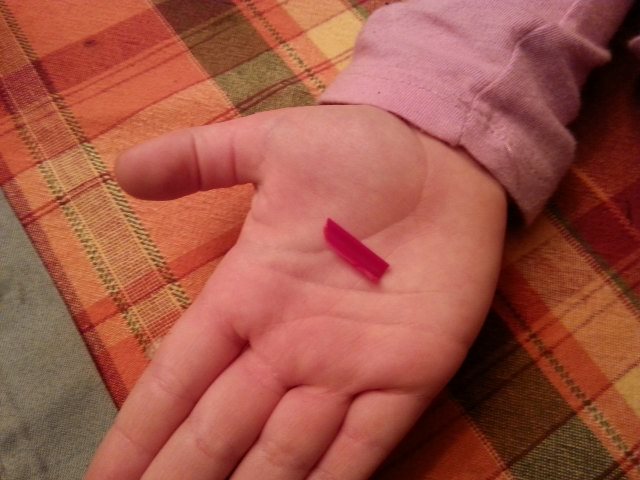
Broken piece found by my little girl (Lizza)
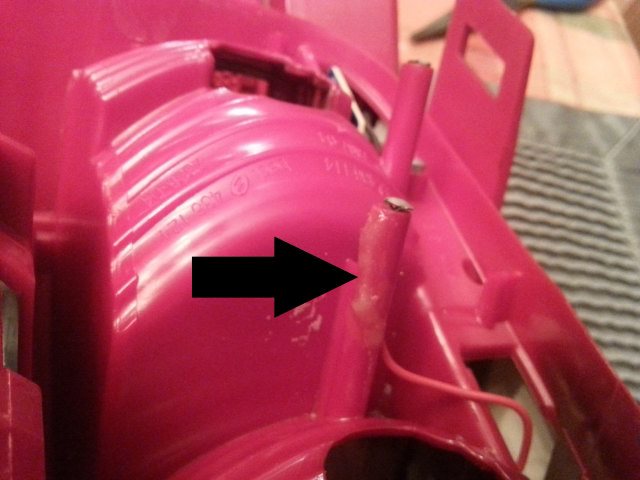
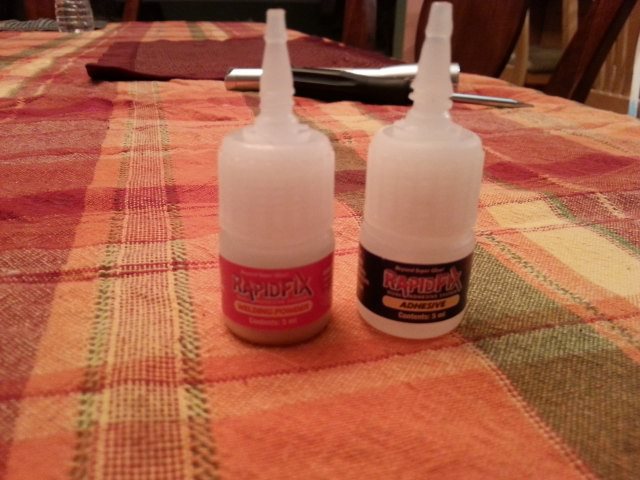
Crazy glued up with RapidFix (with some of their fine sand)
Attachment 36441
Put some duct tape (on both) for some added "help"
Attachment 36442
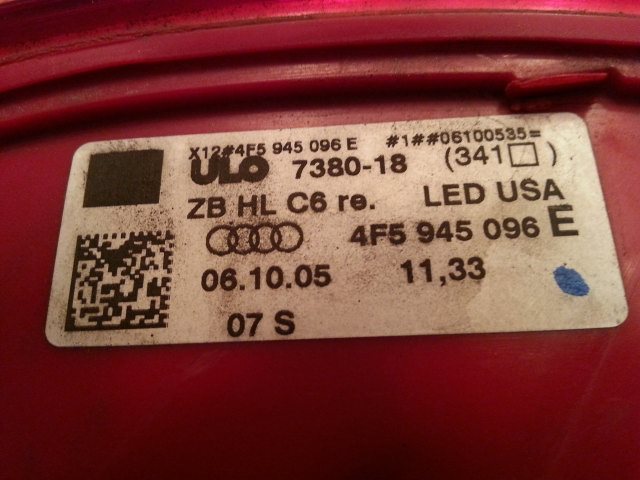
Part Number (for reference)
Attachment 36444
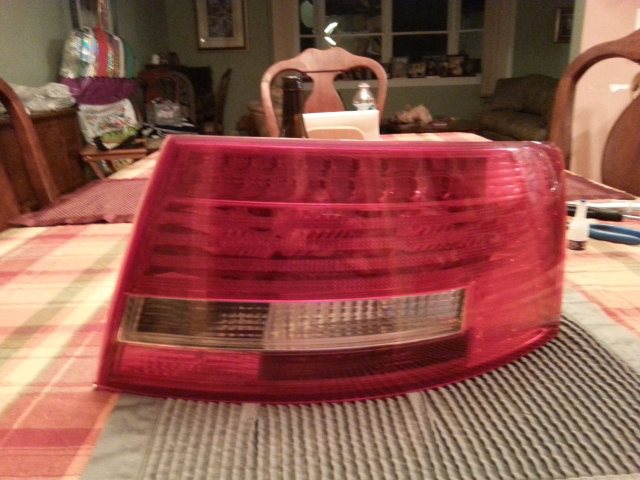
Ready for reinstall
Attachment 36445
Issue: Idiot light was going on sporadically for many months. Rear passenger directional seemed to work sporadically. Stopped by dealer a few times when oil was low and the directional always seemed to work. Recently the directional stopped working all the time.
I found this link and went at it. Attached below are some pics and words describing how I fixed it. Very similar to what everyone else did. Some things I didn't realize at the beginning:
1. The directional lights are LED's. You cannot see them. Once disassembled there are two wires coming out to posts. One of these posts cracked and broke the connection to the LED's. All the rest of the bulbs are for brakes, etc. (I started out by buying replacement bulbs)
2. The LED's are NOT replaceable due to really long life so that alone points to connectors & connections.
3. Removal of light assembly is straight forward EXCEPT do NOT pry the red lamp assembly at the body exterior side (even though it is kind of necessary). The red lamp assembly chips very easily and looks bad when done. I slightly chipped mine but fixed it with crazy glue (only a little) which spread over and into the cracks. Remove the black "flap" (near the trunk latch) to expose some back surface area to pry the red lamp assembly out without touching the body exterior side at all.
4. Be as gentle as possible cause Audi still suffers from "easily broken plastic clip syndrome".
Disassembled red lamp assembly with pointer to broken post
Zoomed in
The other assembly which mates with this (pointers to post connections)
Broken piece found by my little girl (Lizza)
Crazy glued up with RapidFix (with some of their fine sand)
Attachment 36441
Put some duct tape (on both) for some added "help"
Attachment 36442
Part Number (for reference)
Attachment 36444
Ready for reinstall
Attachment 36445

 03-26-2015, 04:50 PM
#120
AudiWorld Newcomer

Join Date: Mar 2015
Posts: 3
Likes: 0
Received 0 Likes
on
0 Posts
Same issue as many. My problem was related to the grounding causing all errors. One terminal in the male end of the plug showed signs of arcing. Cleaned it and that fixed it for one day. Took a pair of pairs and twisted the terminal about ten degrees and plugged it back in. Problem solved.