It's my turn... low rider

 02-25-2017, 03:04 PM
#52
AudiWorld Super User

1. Ginormous crescent wrench
2. Big gas pipe ("Channel Lock") pliers--found in up to 3 or 4" jaw pretty easily
3. large common pipe wrench put (carefully) on nut
4. something in "reverse" where you clamp the big nut into a vise, and then turn area below it where it normally has that casting/ plate with control arms attached; probably can't get a grip on anything there though and clamping in vise means you probably can't have that plate bolted on. Thus would need to be like a fabricated flat tool that bolts between some of those studs around sides of upper part of the strut.
I own and use all of 1, 2 and 3. My biggest crescent wrench has like an 18" handle on it. Worked for W12 oil filter end nut too... Used it on a late 90's GMC Pitman arm the other day.
Last edited by MP4.2+6.0; 02-25-2017 at 03:07 PM.
02-26-2017, 06:06 PM
#53
AudiWorld Super User
Thread Starter
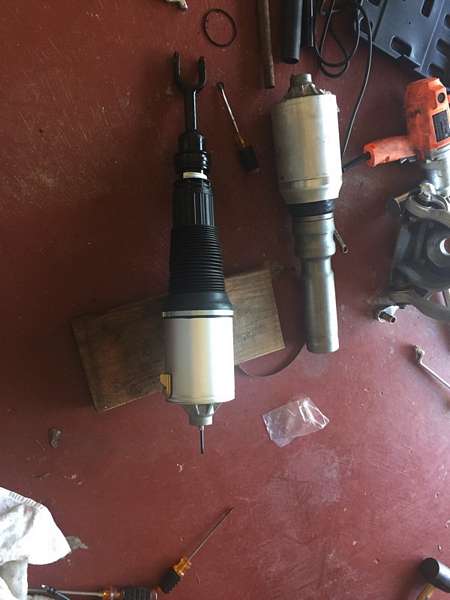
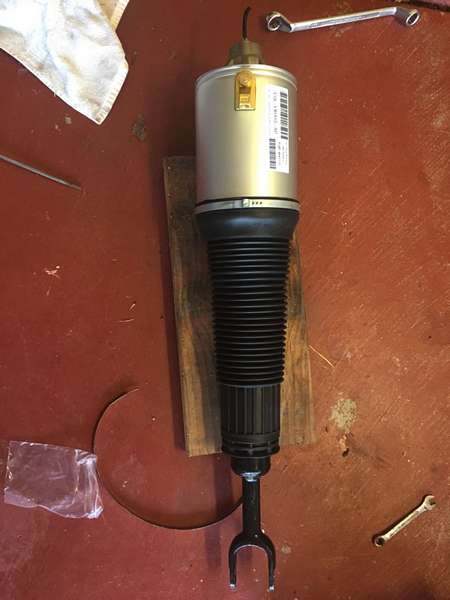
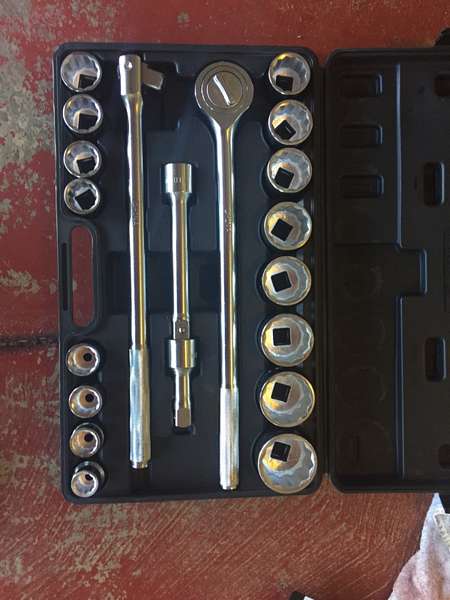
Now I know why people just paid $500-800 for the whole rebuilt unit. It's not hard, just there is no documentation on the net, I think this is kinda new with replacing with just the air bag. Everything works, the pump pumped fast and all thing rises perfectly. I was stupid leaving the brake unit hanging by itself after removing the strut, the outer boot torn, grease is out, I don't know how to patch it up besides replacing the boot and I don't really want too, the boot looks very new. Will have a full video on how to replace the BAG only for $200 + $60 harbor freight 20 piece 3/4 socket set that includes 41mm and 36mm for my Q7 + $5 impact socket adaptor 1/2-3/4.
Up until this morning, I thought sending it to RMT for a whole unit (it's worth $300 more just replacing the whole unit, but there are stories of trials and errors until the working one is found does scare me), but thinking about the other side soon to be, I decided to try it, hate to give up on something simple. It's not the money, it's the feelings of conquering the job.
Thanks for all your inputs.
Cheers,
Louis
02-26-2017, 09:08 PM
#54
AudiWorld Senior Member
Hello Louis,
See this link for boot removal and replacement, remove the inner boot, then slide the outer boot off and slide the new one on.
See page 3 and post #42.
Pulleed my Engine - Page 3 - 6SpeedOnline - Porsche Forum and Luxury Car Resource
.
See this link for boot removal and replacement, remove the inner boot, then slide the outer boot off and slide the new one on.
See page 3 and post #42.
Pulleed my Engine - Page 3 - 6SpeedOnline - Porsche Forum and Luxury Car Resource
.
02-26-2017, 09:28 PM
#55
AudiWorld Senior Member
02-27-2017, 05:24 AM
#56
AudiWorld Senior Member
02-27-2017, 02:23 PM
#57
AudiWorld Super User
Thread Starter
Hello Louis,
See this link for boot removal and replacement, remove the inner boot, then slide the outer boot off and slide the new one on.
See page 3 and post #42.
Pulleed my Engine - Page 3 - 6SpeedOnline - Porsche Forum and Luxury Car Resource
.
See this link for boot removal and replacement, remove the inner boot, then slide the outer boot off and slide the new one on.
See page 3 and post #42.
Pulleed my Engine - Page 3 - 6SpeedOnline - Porsche Forum and Luxury Car Resource
.
Thanks GG,
Louis
02-27-2017, 02:32 PM
#58
AudiWorld Super User
Thread Starter
Think of it this way, I think majority of the rebuilt places just need your shock, they buy these bags by bulk, I'm sure in the $100's from China, you send in the strut, they remove the bag, put it on a new one, put it back and there it is $400-500 profit. Made in China, that's the reason why someone here had to trial and error until he got the working one from one of the rebuilt place - Quality is not well controlled or the rebuilt place assembly screwed it up.
It's extremely simple, just everything is tight, you need to correct tool.
I just plugged mine in to test, amazingly how high the back and front raised up on lift mode - never seen it that high before - amazing - air tight. Now I can do this with my wife in less than 1/2 hr.
Cheers,
Louis
02-27-2017, 05:24 PM
#59
AudiWorld Super User
If the connectors are heat soaked, the plastic shatters pretty easily. Otherwise, you can sometimes cut into plastic with a utility knife to free them up. The dealer sells virtually every connector once found on a parts diagram, and most aren't a lot of money. The terminals just push in to the new one and lock as long as you don't pry at them in earlier failed attempts to free up. Sometimes there is a secondary colored plastic locking clip you slide into connector on side, but often only when the number of terminals gets to a higher count. You have to order up the connector end, but I can usually replace one now in 15 minutes or so and result is straight factory look and function.
Last edited by MP4.2+6.0; 02-27-2017 at 05:28 PM.
02-27-2017, 07:02 PM
#60
AudiWorld Super User
Thread Starter
Since I'm pretty handy with soldering wires and only care about functionality, I did it without thinking. Anyhow, whoever buys my car in the future would know what I did with it.
Thanks again,
Louis
Thanks again,
Louis