allroad Suspension Compressor Rebuild
 02-02-2013, 07:13 PM
#1
AudiWorld Member
Thread Starter
Today was a rare nice, sunny, dry day here in Oregon so I decided to fix the suspension compressor with the kit I bought from bagpipingandy. Here are the tools that you'll need:
10mm socket
extension
10mm wrench
cutters
#27 torx bit
cleaning spray
rags
safety glasses (a MUST!)
First you need to get the rear up in the air. I just put it on level 4 and jack mode with a couple of jack stands under it just in case. If the compressor is really bad then just jack it up or use ramps.
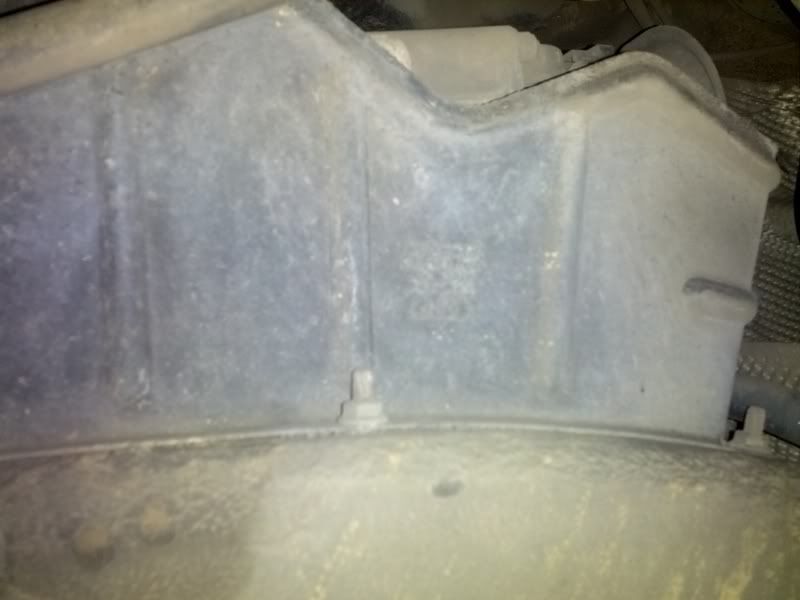
Next you'll find the compressor guard just in front of the spare tire well and it is held in by three 10mm nuts. If yours is like mine there will be a ton of dirt trapped in there and it will all fall down so I highly suggest some safety glass.
Super close up of the guard.
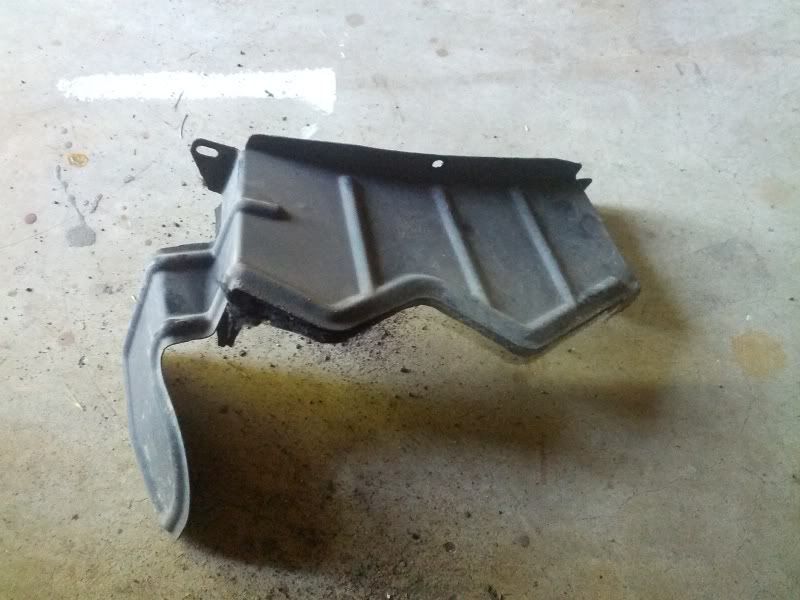
and removed.
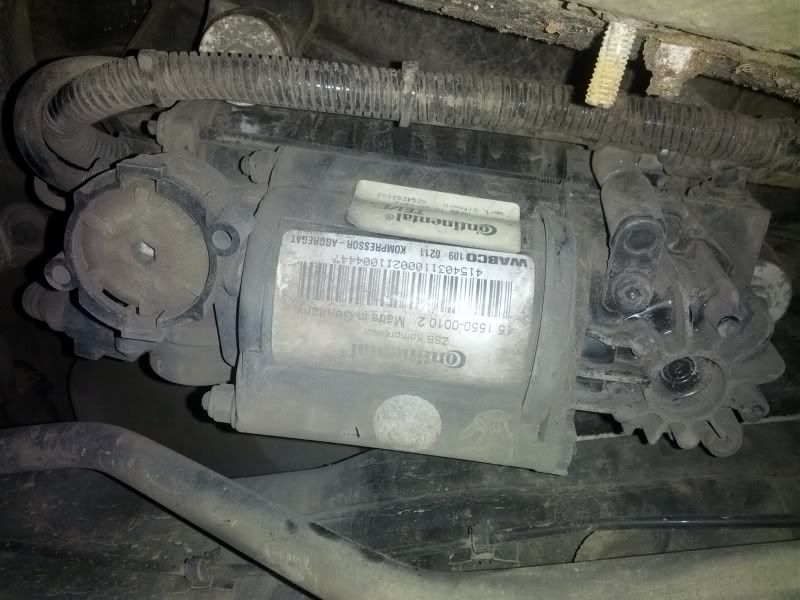
Next you need to unhook the electrical connections. There is one connection on the DS of the compressor and two on a bracket on the PS of the valve body. You'll want to clip all the zip ties as well. Once the electrical is out of the way I next disconnected the larger black air feed hose. This is a little tricky as it's a snap in style air line. You need to push in the little collar while pulling out the air line. I did this twice where it T's at the PS of the compressor. Once to disconnect the J shaped line and once to disconnect the T from the compressor. Be patient and don't force it out. When you get it right it will just slide out. In the picture below the T connection is hidden right behind that wire cover near that stud for the guard.
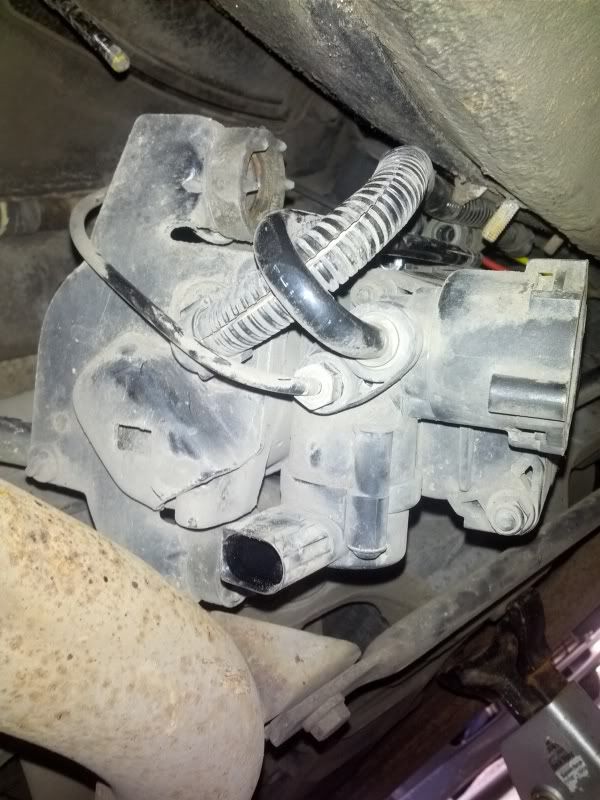
Now you need to drop the compressor. It is held on with three 10mm nuts on vibration dampers. Take the one off towards the front of the car first as it's the most difficult to reach. Careful when you pull it off as there are four parts to the vibration damper (nut, sleeve, spring, washer) so don't loose any of the pieces. Next take off the PS nut and lastly the DS. While taking off the last nut support the compressor with your hand and slowly lower it a little since the output air line (the smaller black air line) is still attached. I found it easier to take off this air fitting with the compressor dropped. It's a 10mm brass fitting so it is very soft. Be careful not to round it off and don't loose the fitting or O-ring on that line.
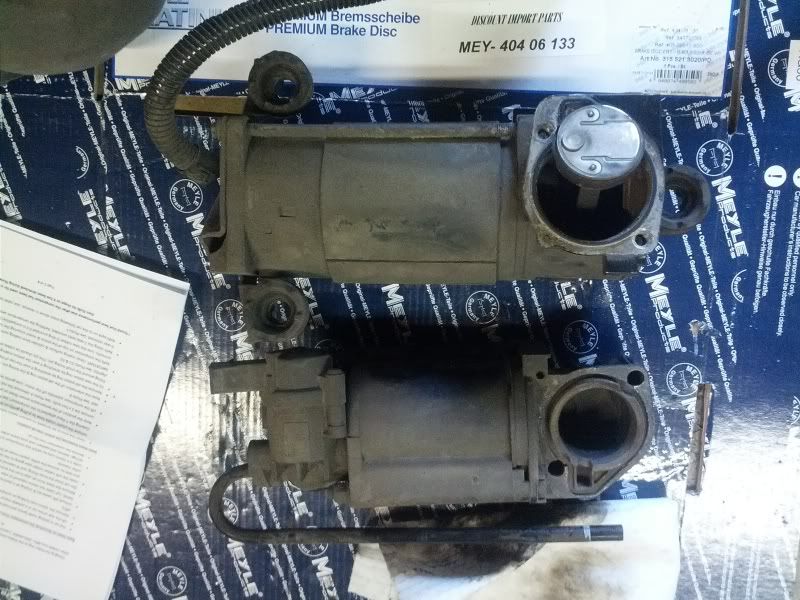
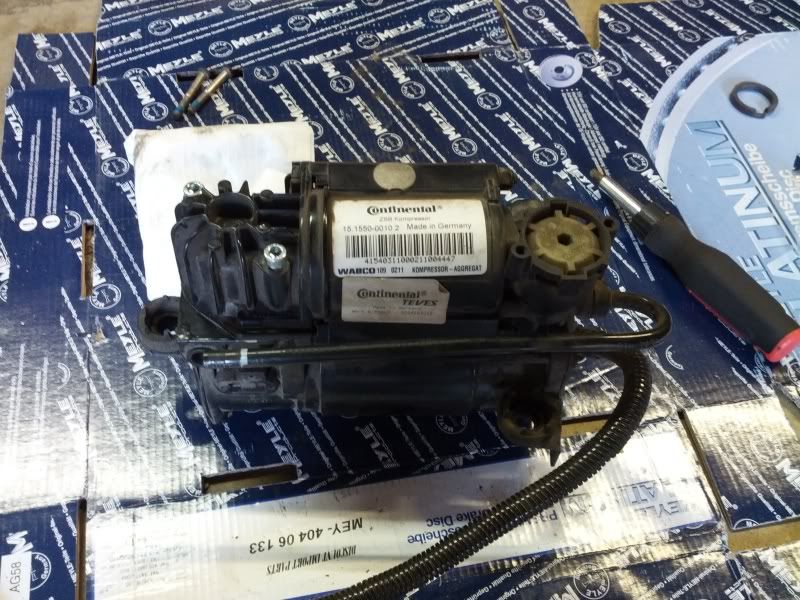
Now you should be able to pull out the compressor with a little wiggling around the sway bar. With it on the bench (or a nice piece of cardboard) give it a little clean up around the piston side. The piston sided of the compressor is the side with the two torx bolts and the ribbed casing. I've also already taken off the temperature sensor on the lower torx bolt.

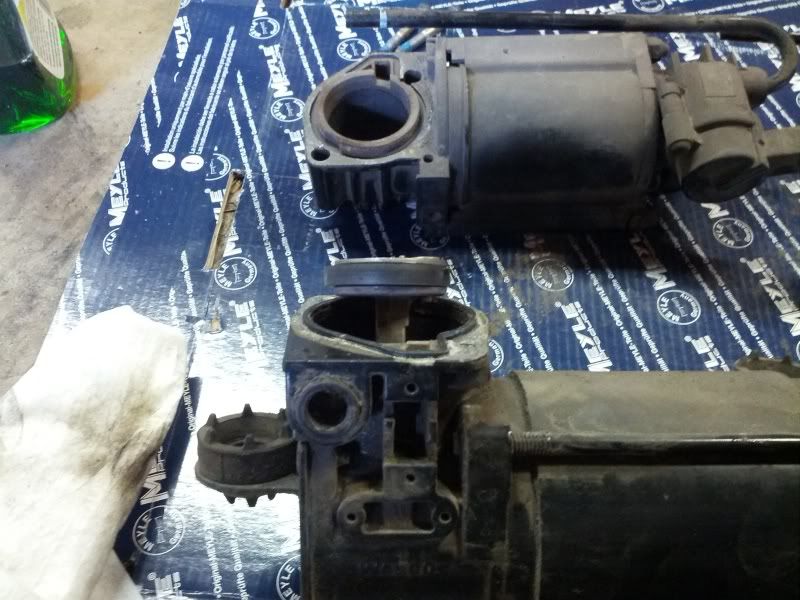
It is time to get to the real job here and tear into the compressor. Remove the two Torx bolts to get ready to split the cylinder from the piston. Once the bolts out carefully pull off the top section being careful of the piston and the sealing O-ring.
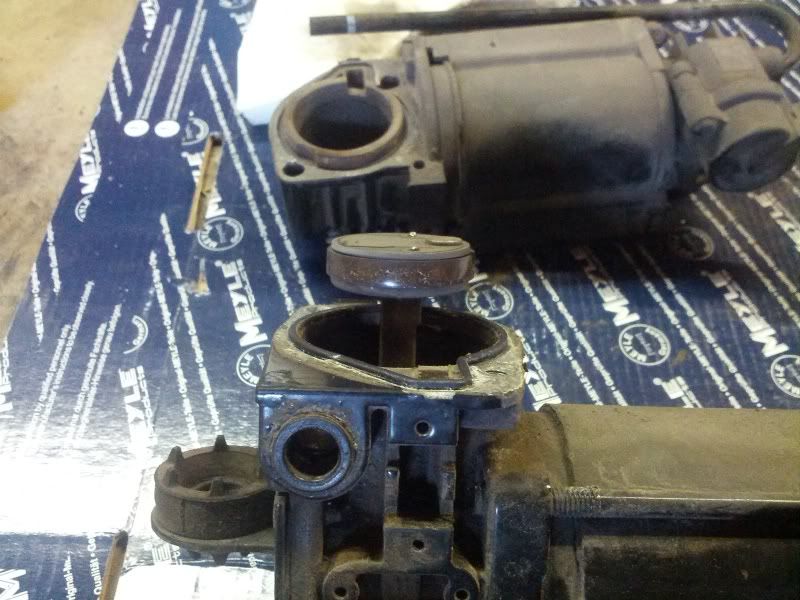
Give both mating surfaces a good clean be sure not to get any dirt in the cylinder. Clean out both cylinders as well and check out the O-ring (shaped like an O with a little triangle on one side). Also take a look at the piston ring and how it is located on the piston. There is a locating pin on one side that the piston ring goes around. My piston ring looked in all right shape but I could see scoring on the cylinder wall from piston slap.
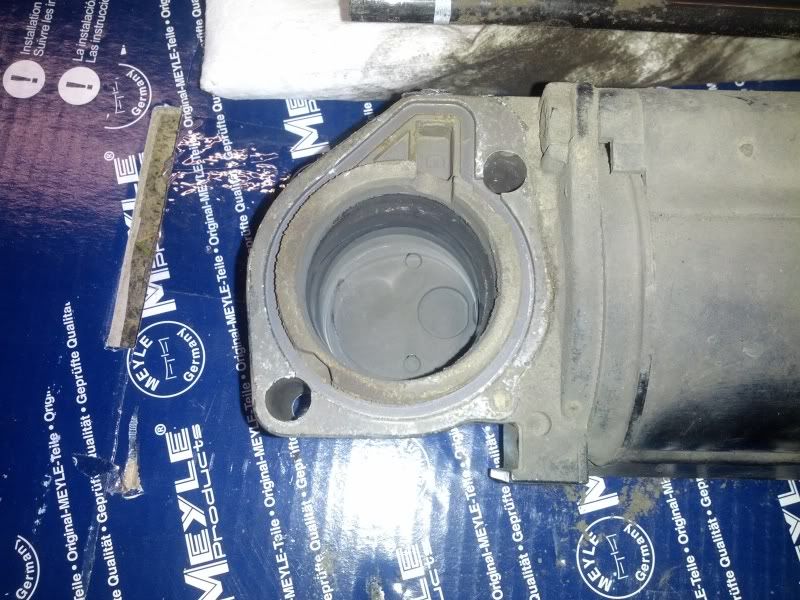
This picture you can see the piston ring has a little debris on it so that wasn't helping performance. Also you can see where the T fitting is located just below the piston.
The piston ring is fairly flexible so to remove it just stretch it out and around the piston and it should just come off. Once you pull off the old piston ring give the piston a good cleaning and try to wipe down the lower cylinder as well. Dirt is the enemy here so clean is good. Here you can see the old and the new next to each other. Andy did a great job making these piston rings.
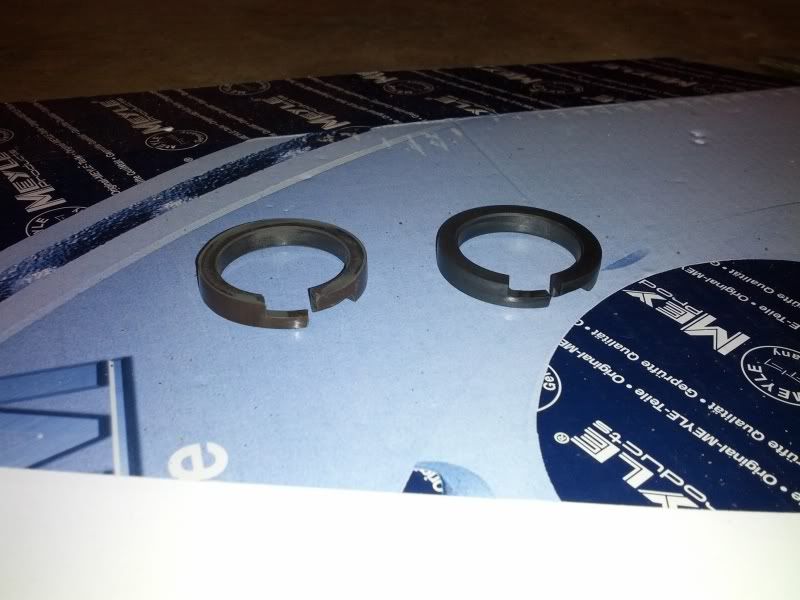
Now you can put the new piston ring on the same way you took the old one off. Be sure the new ring is on the location pin correctly. The new piston ring will be loose on the piston but that is normal and will form to the cylinder wall when it's all back together.
Now you can put it all back together. Andy's kit comes with an extra O ring but my original one was in good shape so I kept it as a spare. Be sure the O ring is in the correct place and put the top cylinder back on the piston. You may need to slightly squeeze the piston ring to get it into the cylinder bore. Tighten down with the two new bolts in the kit and don't forget the temperature sensor on the bolt close to the T fitting port.
Now that it's all buttoned up you can put the compressor back in the car. I first attached the smaller air line back on the compressor. The hardest part I found was to get the first vibration damper installed. It goes like this from top to bottom: washer, rubber grommet on compressor, spring, collar, nut. The hard part is that the washer has nothing to hold it up so you need to hold the compressor while trying to fish the washer over the threaded stud and then get the compressor up on the stud. Then get the spring and collar on and tighten down the nut. Before you put the other two dampers on connect the T fitting for the larger air line. Now you can finish off the other two dampers. Reconnect the wiring and zip tie everything back together. Replace the guard with the three nuts and you are done.
Now start up the car and take it out of Jack Mode. Cycle the compressor from Level 1 to Level 4 to see how it does. Andy says that it needs a few cycles to fully seat the new ring but I saw immediate results. It worked great.
Andy's directions in the kit goes over most of this and were very helpful for the process. He did a great job with this kit and is well worth the money.
Also, here's the embarrassing picture of me after coming in from the garage. This is why you should where safety glass. [facepalm] [wrench]
10mm socket
extension
10mm wrench
cutters
#27 torx bit
cleaning spray
rags
safety glasses (a MUST!)
First you need to get the rear up in the air. I just put it on level 4 and jack mode with a couple of jack stands under it just in case. If the compressor is really bad then just jack it up or use ramps.
Next you'll find the compressor guard just in front of the spare tire well and it is held in by three 10mm nuts. If yours is like mine there will be a ton of dirt trapped in there and it will all fall down so I highly suggest some safety glass.
Super close up of the guard.
and removed.
Next you need to unhook the electrical connections. There is one connection on the DS of the compressor and two on a bracket on the PS of the valve body. You'll want to clip all the zip ties as well. Once the electrical is out of the way I next disconnected the larger black air feed hose. This is a little tricky as it's a snap in style air line. You need to push in the little collar while pulling out the air line. I did this twice where it T's at the PS of the compressor. Once to disconnect the J shaped line and once to disconnect the T from the compressor. Be patient and don't force it out. When you get it right it will just slide out. In the picture below the T connection is hidden right behind that wire cover near that stud for the guard.
Now you need to drop the compressor. It is held on with three 10mm nuts on vibration dampers. Take the one off towards the front of the car first as it's the most difficult to reach. Careful when you pull it off as there are four parts to the vibration damper (nut, sleeve, spring, washer) so don't loose any of the pieces. Next take off the PS nut and lastly the DS. While taking off the last nut support the compressor with your hand and slowly lower it a little since the output air line (the smaller black air line) is still attached. I found it easier to take off this air fitting with the compressor dropped. It's a 10mm brass fitting so it is very soft. Be careful not to round it off and don't loose the fitting or O-ring on that line.
Now you should be able to pull out the compressor with a little wiggling around the sway bar. With it on the bench (or a nice piece of cardboard) give it a little clean up around the piston side. The piston sided of the compressor is the side with the two torx bolts and the ribbed casing. I've also already taken off the temperature sensor on the lower torx bolt.
It is time to get to the real job here and tear into the compressor. Remove the two Torx bolts to get ready to split the cylinder from the piston. Once the bolts out carefully pull off the top section being careful of the piston and the sealing O-ring.
Give both mating surfaces a good clean be sure not to get any dirt in the cylinder. Clean out both cylinders as well and check out the O-ring (shaped like an O with a little triangle on one side). Also take a look at the piston ring and how it is located on the piston. There is a locating pin on one side that the piston ring goes around. My piston ring looked in all right shape but I could see scoring on the cylinder wall from piston slap.
This picture you can see the piston ring has a little debris on it so that wasn't helping performance. Also you can see where the T fitting is located just below the piston.
The piston ring is fairly flexible so to remove it just stretch it out and around the piston and it should just come off. Once you pull off the old piston ring give the piston a good cleaning and try to wipe down the lower cylinder as well. Dirt is the enemy here so clean is good. Here you can see the old and the new next to each other. Andy did a great job making these piston rings.
Now you can put the new piston ring on the same way you took the old one off. Be sure the new ring is on the location pin correctly. The new piston ring will be loose on the piston but that is normal and will form to the cylinder wall when it's all back together.
Now you can put it all back together. Andy's kit comes with an extra O ring but my original one was in good shape so I kept it as a spare. Be sure the O ring is in the correct place and put the top cylinder back on the piston. You may need to slightly squeeze the piston ring to get it into the cylinder bore. Tighten down with the two new bolts in the kit and don't forget the temperature sensor on the bolt close to the T fitting port.
Now that it's all buttoned up you can put the compressor back in the car. I first attached the smaller air line back on the compressor. The hardest part I found was to get the first vibration damper installed. It goes like this from top to bottom: washer, rubber grommet on compressor, spring, collar, nut. The hard part is that the washer has nothing to hold it up so you need to hold the compressor while trying to fish the washer over the threaded stud and then get the compressor up on the stud. Then get the spring and collar on and tighten down the nut. Before you put the other two dampers on connect the T fitting for the larger air line. Now you can finish off the other two dampers. Reconnect the wiring and zip tie everything back together. Replace the guard with the three nuts and you are done.
Now start up the car and take it out of Jack Mode. Cycle the compressor from Level 1 to Level 4 to see how it does. Andy says that it needs a few cycles to fully seat the new ring but I saw immediate results. It worked great.
Andy's directions in the kit goes over most of this and were very helpful for the process. He did a great job with this kit and is well worth the money.
Also, here's the embarrassing picture of me after coming in from the garage. This is why you should where safety glass. [facepalm] [wrench]


 03-14-2013, 11:09 PM
#5
 03-17-2013, 03:41 AM
#6
AudiWorld Member

Or on Here too!! 
quick link to ebay:
http://www.ebay.co.uk/sch/bagpipinga...&_trksid=p3686
if you have any questions, please just ask,
regards
Andy
quick link to ebay:
http://www.ebay.co.uk/sch/bagpipinga...&_trksid=p3686
if you have any questions, please just ask,
regards
Andy
01-24-2014, 01:42 PM
#7
AudiWorld Junior Member

Join Date: Jan 2013
Posts: 42
Likes: 0
Received 0 Likes
on
0 Posts
Hi GOto60,
I was just wondering..how did you know your compressor just needed the rebuild kit? I have 07 A8 that has the "lift" mode grayed out on my MMI. The car sits mostly level, but I have noticed that it rubs the sidewalk when I pull out, which it never did before. It is not slammed to the ground, just stuck in "automatic". (dynamic & comfort are still lit up) If this is the repair for it, I am so relieved. Any help would be great. Thanks
I was just wondering..how did you know your compressor just needed the rebuild kit? I have 07 A8 that has the "lift" mode grayed out on my MMI. The car sits mostly level, but I have noticed that it rubs the sidewalk when I pull out, which it never did before. It is not slammed to the ground, just stuck in "automatic". (dynamic & comfort are still lit up) If this is the repair for it, I am so relieved. Any help would be great. Thanks
Trending Topics
01-24-2014, 02:32 PM
#8
AudiWorld Member
Thread Starter
On my allroad, as with many that have a tired compressor, it would take a long time between each suspension level and sometimes the compressor would time out and I would get an error light on the dash. The compressor was also louder then it should have been. What happens is that the piston ring in the compressor isn't sealing against the cylinder due to age and use so it can't supply the necessary air to raise the suspension.
In your case you may need to scan for codes to see if there are any issues with the computer or sensors. I would do this first before I rebuild the compressor. If you find that the compressor has timed out due to over heating then a rebuild could fix that.
In your case you may need to scan for codes to see if there are any issues with the computer or sensors. I would do this first before I rebuild the compressor. If you find that the compressor has timed out due to over heating then a rebuild could fix that.
Last edited by G0to60; 01-24-2014 at 02:45 PM.
01-25-2014, 03:13 AM
#9
AudiWorld Member
As G0to60 says if unsure best to get a fault code read to make sure there are no other issues,
error code 01400 is very likely it is the compressor tired,
if it is the compressor please see my new repair kit install video guide here:
http://www.bagpipingandy.com/installation.html
best regards
and
error code 01400 is very likely it is the compressor tired,
if it is the compressor please see my new repair kit install video guide here:
http://www.bagpipingandy.com/installation.html
best regards
and
01-28-2014, 06:59 AM
#10
Audiworld Junior Member

Join Date: Sep 2011
Location: St. Louis
Posts: 40
Likes: 0
Received 0 Likes
on
0 Posts
As G0to60 says if unsure best to get a fault code read to make sure there are no other issues,
error code 01400 is very likely it is the compressor tired,
if it is the compressor please see my new repair kit install video guide here:
http://www.bagpipingandy.com/installation.html
best regards
and
error code 01400 is very likely it is the compressor tired,
if it is the compressor please see my new repair kit install video guide here:
http://www.bagpipingandy.com/installation.html
best regards
and

