
 08-09-2016, 09:22 AM
Last edit by: IB Advertising
See related guides and technical advice from our community experts:
- Audi How to Replace Interior Lights with LEDs<br>Step by step instructions for do-it-yourself repairs.

Interior LED swap DIY with Pics
10-29-2011, 07:06 PM
#1
AudiWorld Member
Thread Starter

Join Date: Aug 2011
Location: Jupiter, Florida
Posts: 233
Likes: 0
Received 0 Likes
on
0 Posts
Hey guys...I purchased the LED interior kit from A&A Euro Tuning (http://www.aaeurotuning.com) and installed them this afternoon. Took me about 90 minutes to do them all only because I had my laptop reading threads trying to find out instructions.
I figured I would do a write up with pictures since that would have helped me. So..here it goes...

First off....with each change, turn on the light to make sure you have the right polarity so you don't have to go through this twice.
I actually had a hard time finding the right tool. I didn't have a plastic tool with the right dimensions. I had tweezers and all different sizes of screwdrivers. A cheap pumpkin carving tool actually turned out to be the best tool I had (don't ask but it just happened to by out and about). It was very thin at the tip, flimsy enough not to do any damage but just rigid enough to pry open (had almost a plastic feel to it).
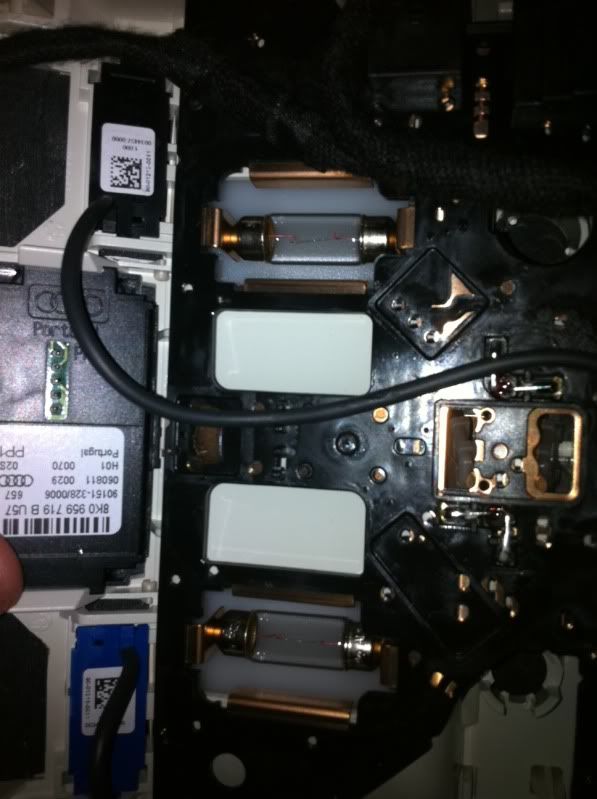
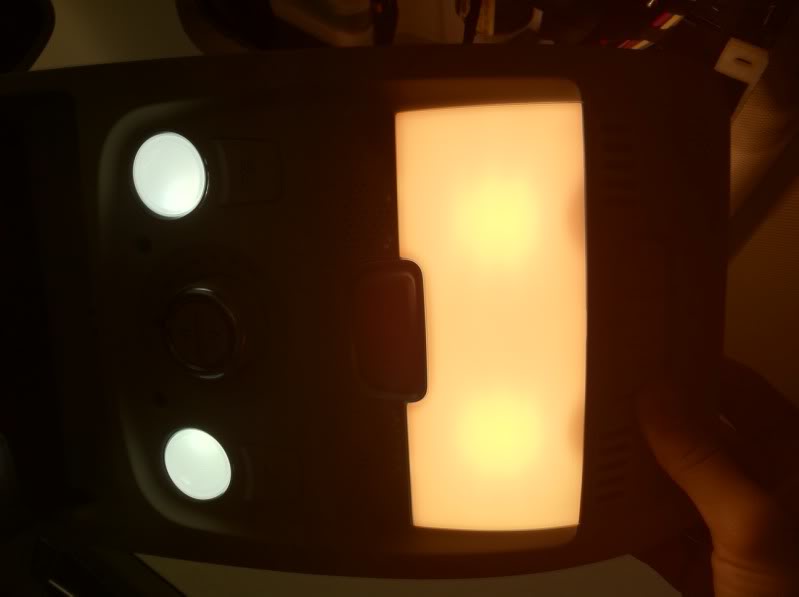
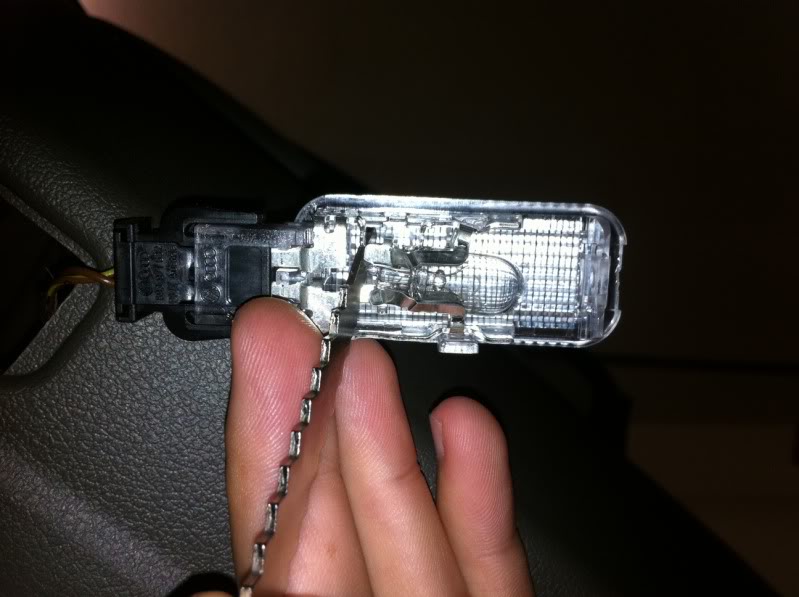
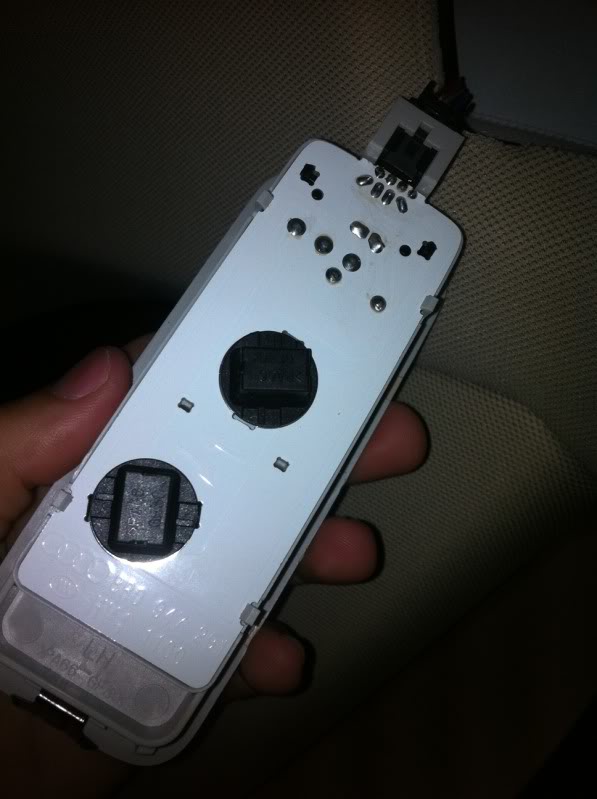
Started with the front map / dome. Open up the sunglasses holder and look up. You will see a T20 screw. Remove screw. Once you have that screw out, the whole housing will come down.
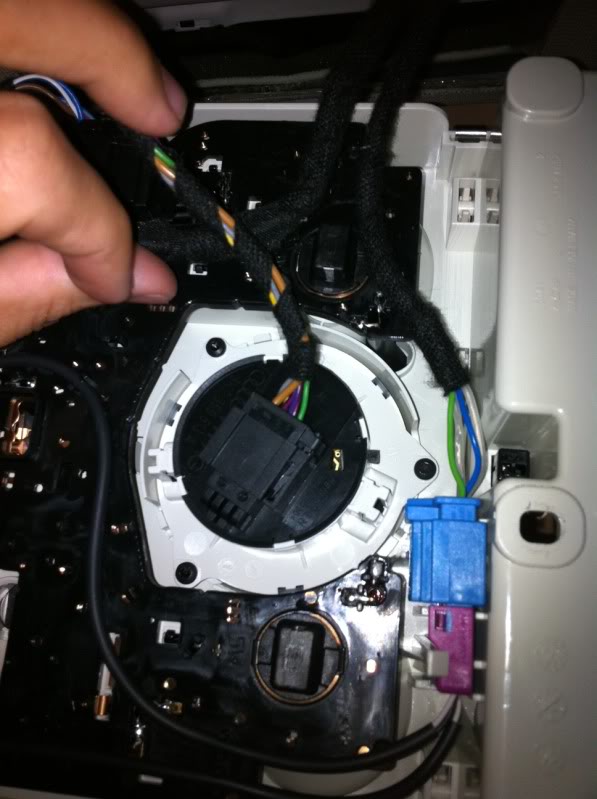
Once you have the housing down (I didn't unclick any power wires. Just let it hang down). You will see the following:
For the bulbs that have the plastic cover....just push the cover out with your fingers (from inside the housing out to the outside). Once you have the cover out, it's really easy to switch those 2 bulbs.
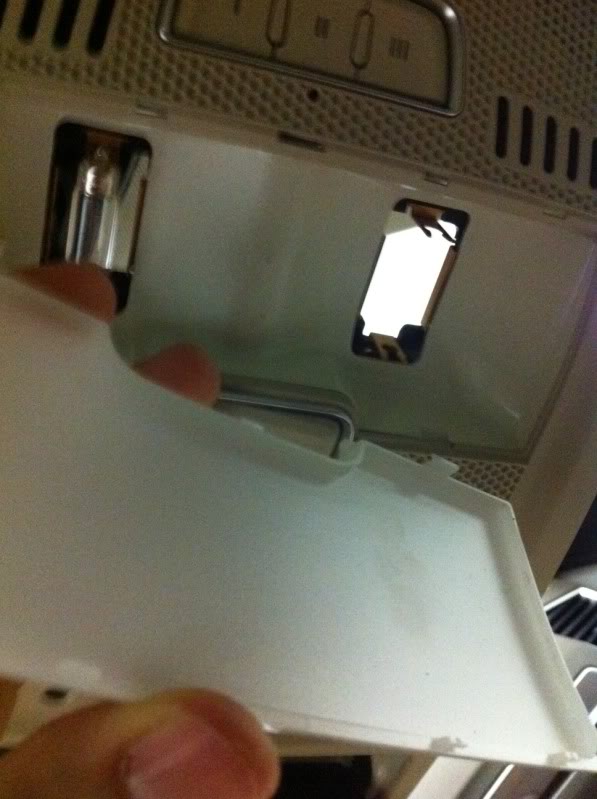
Once you switch out those bulbs, look behind those and you will see 2 black housings. Just turn those and it will pop out. Switch the bulbs and put back in.
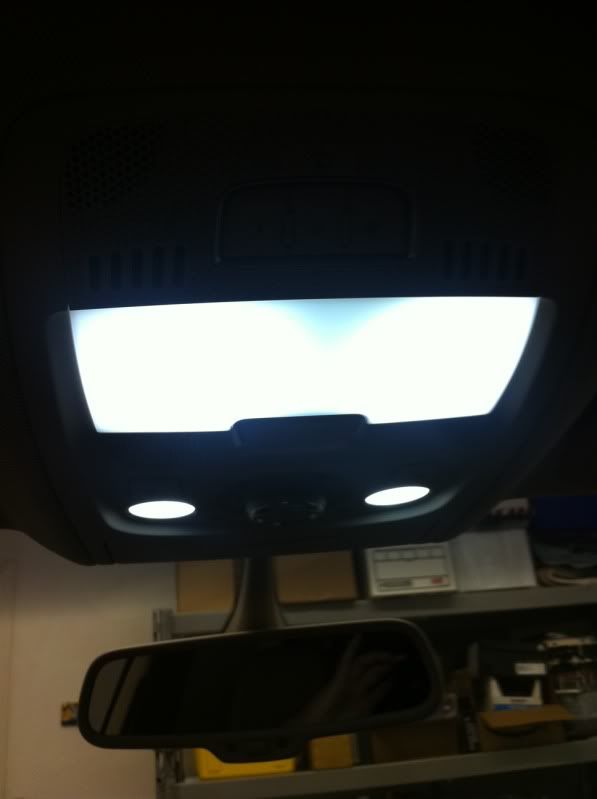
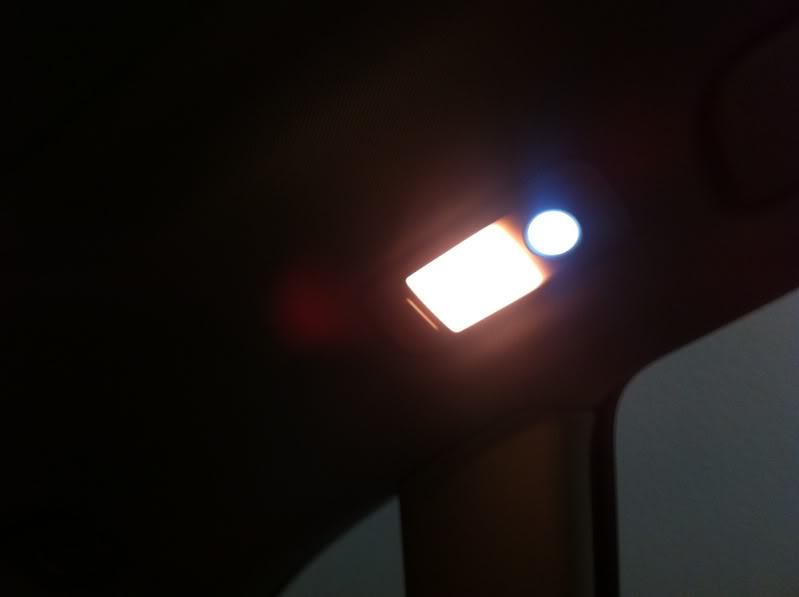
For those who want to see the difference, here are some pics:
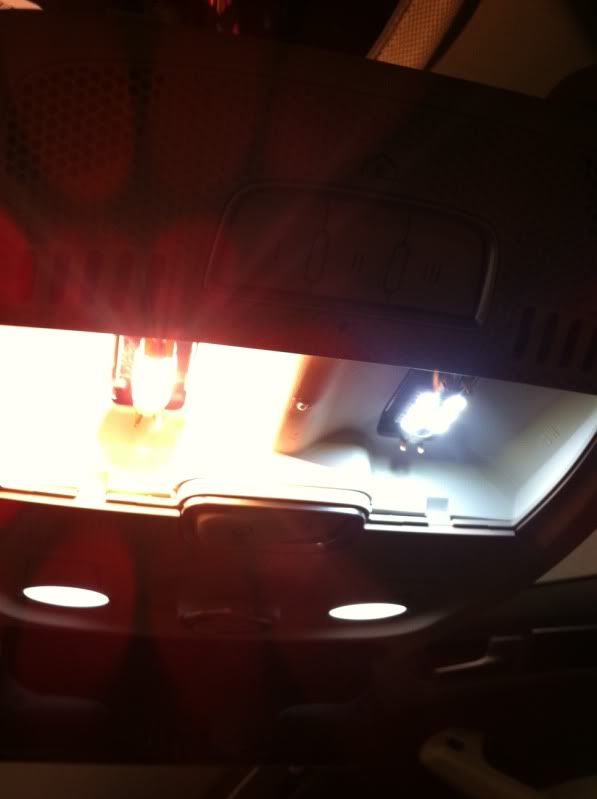
And a pic with all the bulbs now LED:
Then I went on to the door puddle lights (The lights that are on the door lighting up the ground when opened.
First thing you want to do is "trick" the door into thinking its closed. (That way the bulb turns off when doing the switch). Just use something to push in the mechanism where the door latch would close.
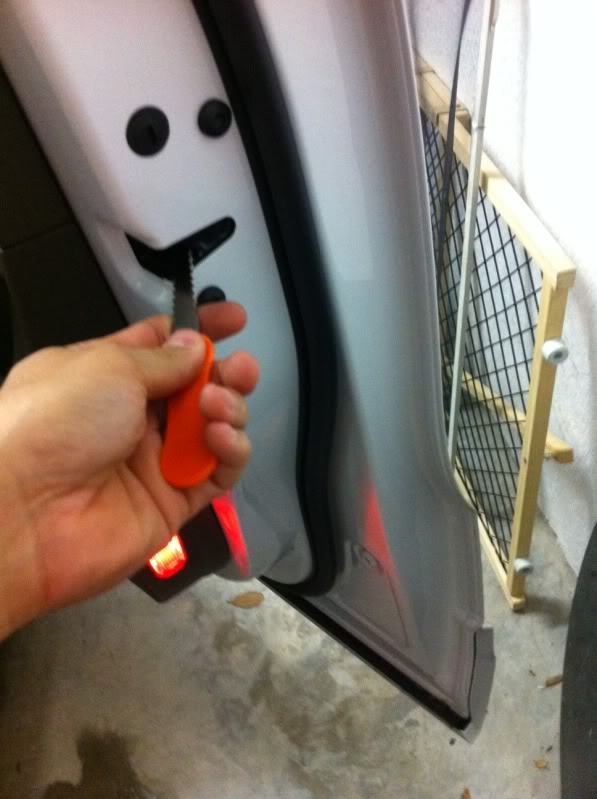
Then...you take your flat tool and pry open the light housing. You can see which end has the clip by looking at the lens and seeing one end have a little notch.
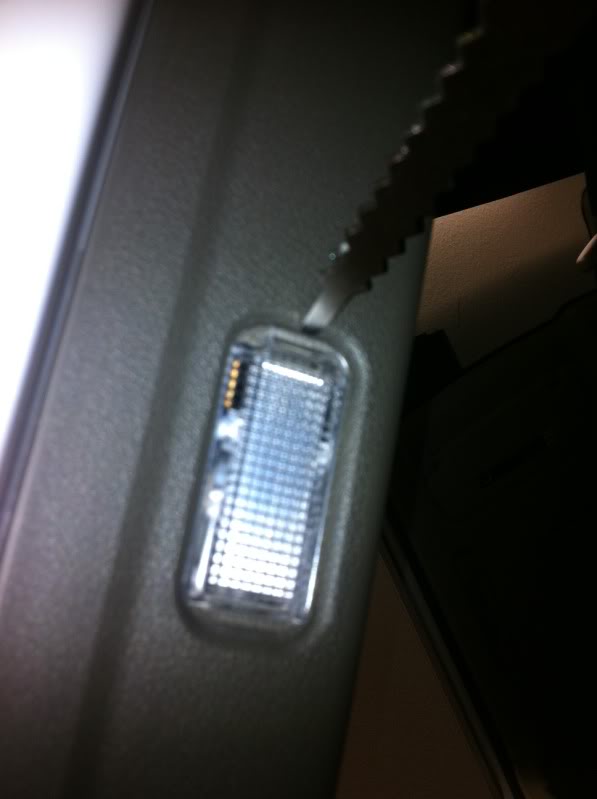
Once you do that, you will see a black covering. (The one's in the trunk have the same black covering). Wedge the black covering off then you will see the bulb in the housing. I used the same tool to push it out from the base out.
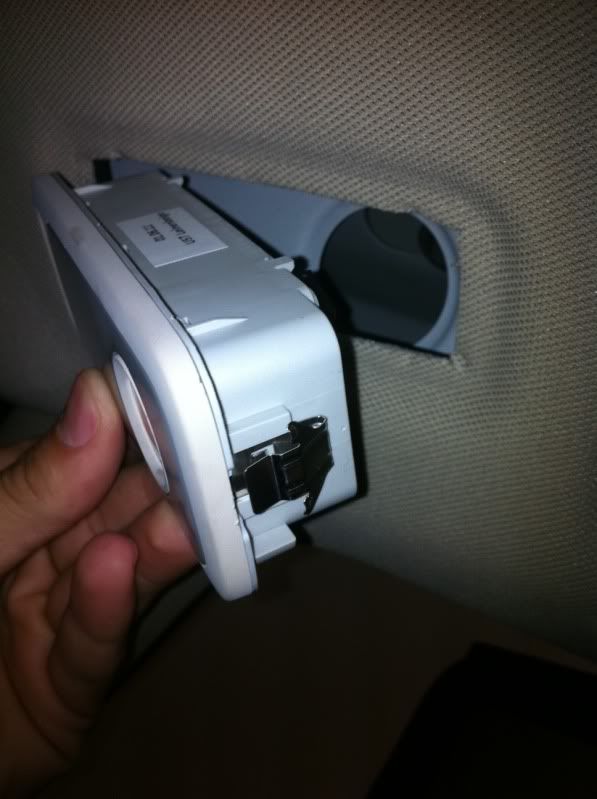
I then went on to the Visor lights. They are the same type of housing as the door puddle lights. The clip was on the left side. Just wedge a tool in there and pry it off.
These lights have an additional metal covering. Just clip those off and you will see the bulb.

Just replace the bulb and viola! (make sure you open the vanity mirror to turn on the light to make sure it works).
These type of housings are also the same for the trunk and glove lights. ie: Pry open the housing on one side and switch out the bulbs. Pretty straight forward. So, I didn't take any pictures of those.
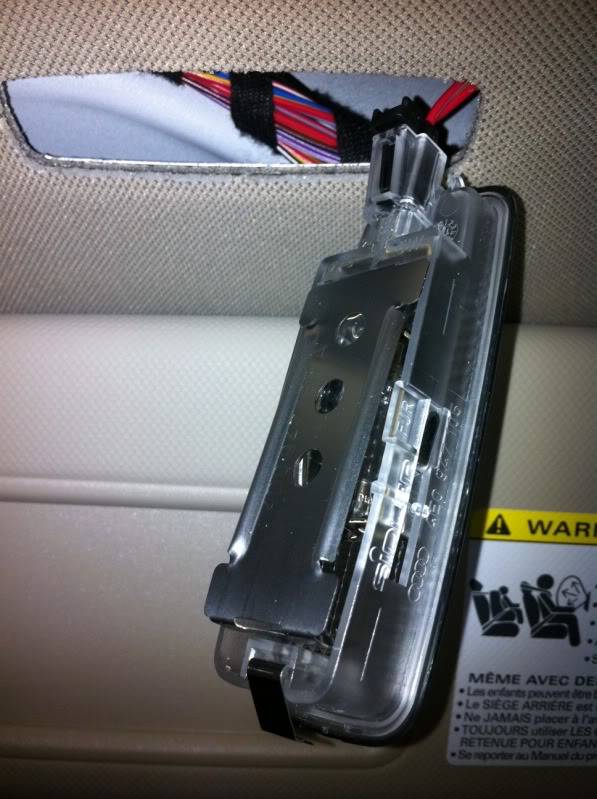
Then I went on to the rear map lights. These actually were the hardest for me only because I couldn't find any information on how to remove it. Ended up being the same as the rest. Pry it from one side (the side that is closer to the front of the car) and it will pop off.
Once out, you will see 2 black housings. Just unscrew them and take them out. Switch the bulbs and replace. Easy.
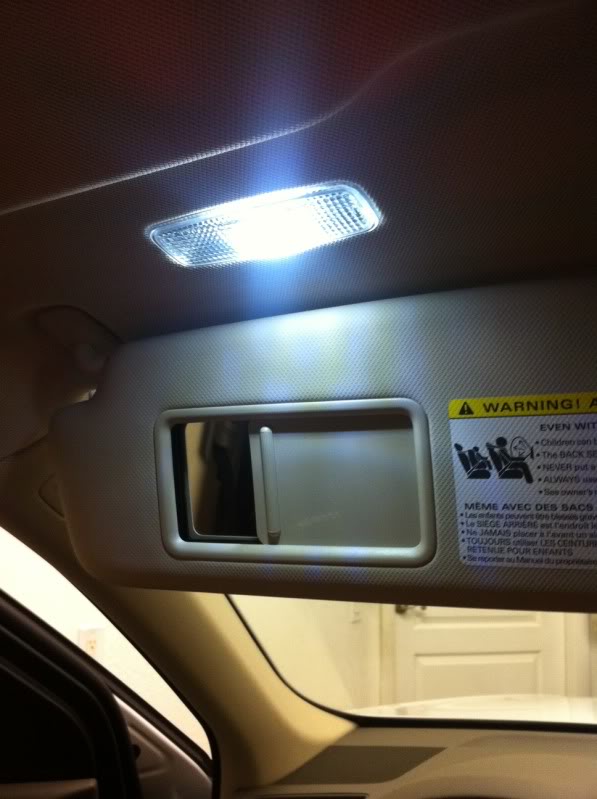
Here is a picture showing the two different colors in the rear
I also changed out the fog lights to the Hoen H11 bulbs. There are other threads about that so I didn't take any pictures. I didn't want to fiddle with the front grill so I went through the wheel well. Took like 5 minutes per side.
I also did not take any pictures of the license plate change because there are other threads on that. Once you figure out the side with the clip (right side on both), it comes out pretty easy.
Anyways...hope somebody finds these informative. Love the LED look. Did it on my G35 and couldn't wait to do it on the Q.
Looks so much better with the white light.
(In 1 afternoon, I did the fog light exchange, interior LED exchange and all VAG codes I wanted changed...whats next? ideas?) Hehe
I figured I would do a write up with pictures since that would have helped me. So..here it goes...
First off....with each change, turn on the light to make sure you have the right polarity so you don't have to go through this twice.
I actually had a hard time finding the right tool. I didn't have a plastic tool with the right dimensions. I had tweezers and all different sizes of screwdrivers. A cheap pumpkin carving tool actually turned out to be the best tool I had (don't ask but it just happened to by out and about). It was very thin at the tip, flimsy enough not to do any damage but just rigid enough to pry open (had almost a plastic feel to it).
Started with the front map / dome. Open up the sunglasses holder and look up. You will see a T20 screw. Remove screw. Once you have that screw out, the whole housing will come down.
Once you have the housing down (I didn't unclick any power wires. Just let it hang down). You will see the following:
For the bulbs that have the plastic cover....just push the cover out with your fingers (from inside the housing out to the outside). Once you have the cover out, it's really easy to switch those 2 bulbs.
Once you switch out those bulbs, look behind those and you will see 2 black housings. Just turn those and it will pop out. Switch the bulbs and put back in.
For those who want to see the difference, here are some pics:
And a pic with all the bulbs now LED:
Then I went on to the door puddle lights (The lights that are on the door lighting up the ground when opened.
First thing you want to do is "trick" the door into thinking its closed. (That way the bulb turns off when doing the switch). Just use something to push in the mechanism where the door latch would close.
Then...you take your flat tool and pry open the light housing. You can see which end has the clip by looking at the lens and seeing one end have a little notch.
Once you do that, you will see a black covering. (The one's in the trunk have the same black covering). Wedge the black covering off then you will see the bulb in the housing. I used the same tool to push it out from the base out.
I then went on to the Visor lights. They are the same type of housing as the door puddle lights. The clip was on the left side. Just wedge a tool in there and pry it off.
These lights have an additional metal covering. Just clip those off and you will see the bulb.
Just replace the bulb and viola! (make sure you open the vanity mirror to turn on the light to make sure it works).
These type of housings are also the same for the trunk and glove lights. ie: Pry open the housing on one side and switch out the bulbs. Pretty straight forward. So, I didn't take any pictures of those.
Then I went on to the rear map lights. These actually were the hardest for me only because I couldn't find any information on how to remove it. Ended up being the same as the rest. Pry it from one side (the side that is closer to the front of the car) and it will pop off.
Once out, you will see 2 black housings. Just unscrew them and take them out. Switch the bulbs and replace. Easy.
Here is a picture showing the two different colors in the rear
I also changed out the fog lights to the Hoen H11 bulbs. There are other threads about that so I didn't take any pictures. I didn't want to fiddle with the front grill so I went through the wheel well. Took like 5 minutes per side.
I also did not take any pictures of the license plate change because there are other threads on that. Once you figure out the side with the clip (right side on both), it comes out pretty easy.
Anyways...hope somebody finds these informative. Love the LED look. Did it on my G35 and couldn't wait to do it on the Q.
Looks so much better with the white light.
(In 1 afternoon, I did the fog light exchange, interior LED exchange and all VAG codes I wanted changed...whats next? ideas?) Hehe
Last edited by g8tor20; 11-02-2011 at 01:03 PM.
 10-29-2011, 09:08 PM
#2
AudiWorld Senior Member

good deal g8tor !!!
Had done the trunk, fogs, and lic plate, but ran out of time and hadn't gotten back to it !!!
may have to do it tmo afternoon - pics are much appreciated !
Had done the trunk, fogs, and lic plate, but ran out of time and hadn't gotten back to it !!!
may have to do it tmo afternoon - pics are much appreciated !
 10-30-2011, 04:52 PM
#6
AudiWorld Super User


Good work but needs pics of the LED bulbs themselves and power rating. Even a pic of the kit or a link to supplier. Can you edit something into your OP please
10-30-2011, 07:02 PM
#7
AudiWorld Member
Thread Starter
Join Date: Aug 2011
Location: Jupiter, Florida
Posts: 233
Likes: 0
Received 0 Likes
on
0 Posts
I forgot to take any pictures of the bulbs. Its the same kit this poster purchased from A&A Eurotuning (except for the Q5 of course).
https://www.audiworld.com/forums/sho...&highlight=LED
Perhaps A&A can chime in with the power ratings or what not.
https://www.audiworld.com/forums/sho...&highlight=LED
Perhaps A&A can chime in with the power ratings or what not.
Trending Topics
10-31-2011, 05:59 AM
#8
AudiWorld Member

Join Date: Aug 2010
Location: Matawan, NJ
Posts: 115
Likes: 0
Received 0 Likes
on
0 Posts
I also changed out the fog lights to the Hoen H11 bulbs. There are other threads about that so I didn't take any pictures. I didn't want to fiddle with the front grill so I went through the wheel well. Took like 5 minutes per side.
Did you just swap out the bulbs or installed the kit as well? A&A has the kit so was curious if I needed that or just the H11's? How does it look compared to the OEM?
Did you just swap out the bulbs or installed the kit as well? A&A has the kit so was curious if I needed that or just the H11's? How does it look compared to the OEM?
10-31-2011, 06:27 AM
#9
AudiWorld Member
Thread Starter
Join Date: Aug 2011
Location: Jupiter, Florida
Posts: 233
Likes: 0
Received 0 Likes
on
0 Posts
I just replaced the bulb. The stock bulb is in its own little housing that twists right off.
I bought the Hoen ones for like $35 bucks and they come with the bulb / housing. You just turn the old housing out and put the new one in. Plug and play.
No kit.
They look pretty close. I think Johnboytoo had some pics of the result. It's as close to stock HID as I think you can get with a Non HID fog light. Close enough for me at least....
11-01-2011, 01:23 PM
#10
AudiWorld Newcomer

Join Date: Sep 2011
Posts: 6
Likes: 0
Received 0 Likes
on
0 Posts
I also changed out the fog lights to the Hoen H11 bulbs. There are other threads about that so I didn't take any pictures. I didn't want to fiddle with the front grill so I went through the wheel well. Took like 5 minutes per side.
Did you just swap out the bulbs or installed the kit as well? A&A has the kit so was curious if I needed that or just the H11's? How does it look compared to the OEM?
Did you just swap out the bulbs or installed the kit as well? A&A has the kit so was curious if I needed that or just the H11's? How does it look compared to the OEM?
