How To: Audi RS7 Spare Tire Install
 04-10-2015, 05:09 PM
#1
Audiworld Junior Member
Thread Starter

Join Date: Nov 2014
Posts: 33
Likes: 0
Received 0 Likes
on
0 Posts
I decided to do a how to install and setup the Audi RS7 with a spare tire in the trunk space with the Bose Sound System.
Audi Part Numbers used:
- 4G0601027 20" spare wheel with 145/65-20 Continental spare tire
- 4G0860381 body hardware, rear body & floor, jack & components, end cover
- 4G0012109C body hardware, rear body & floor, jack & components, tool compartment w/air suspension
Tools needed: NONE!!!
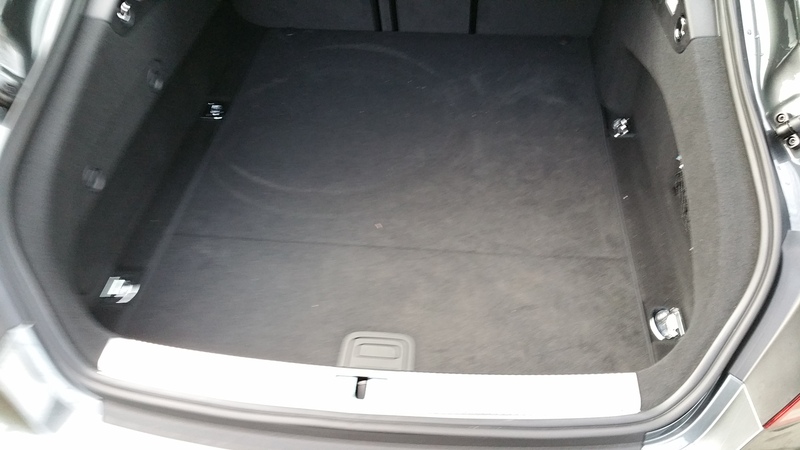
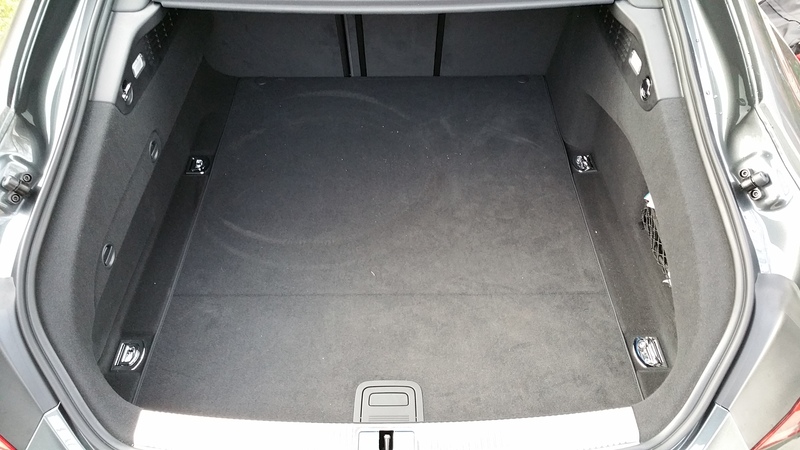
Step 1: Empty the trunk from everything and lift the carpet/cover.
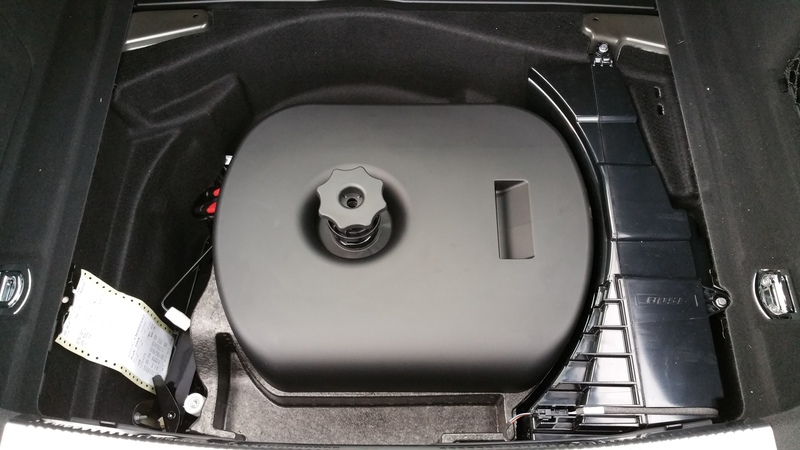
Step 2: Unsrcrew the plastic **** so you can remove the toolbox cover
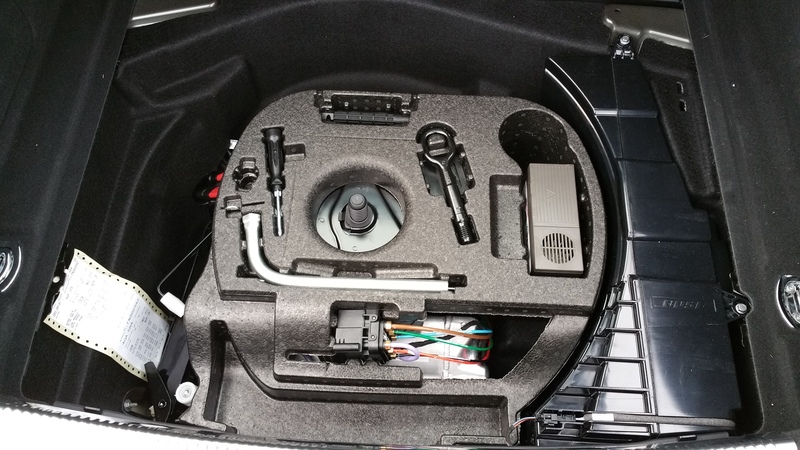
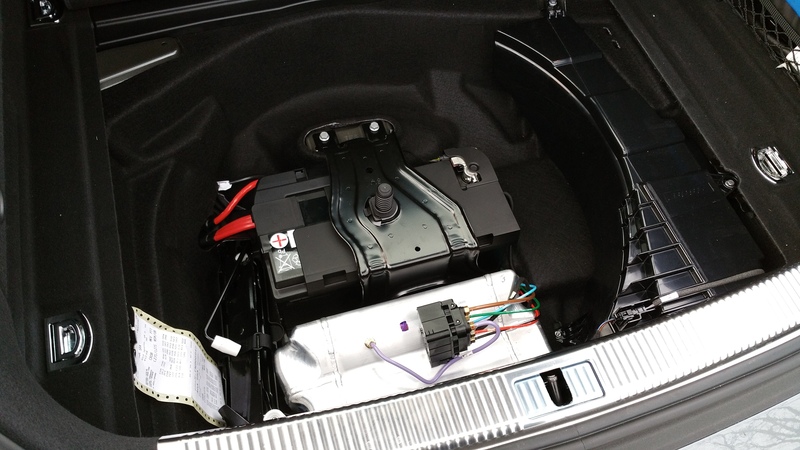
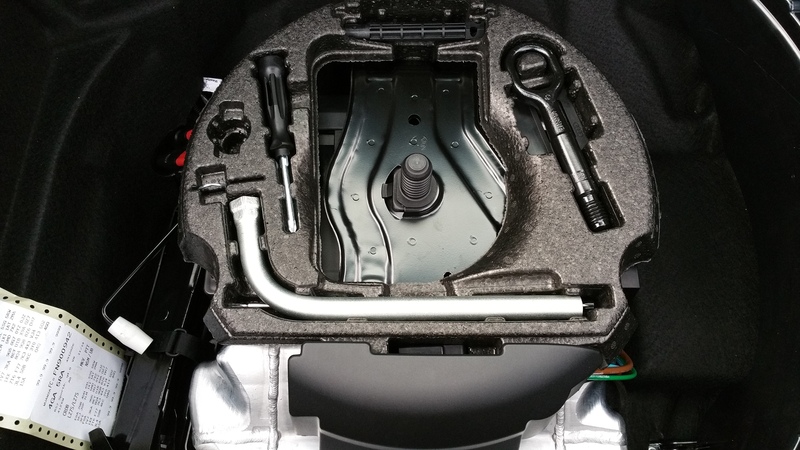
Step 3: After removing the plastic protective cover, you will be able to see the tool caddy and the air suspension box with the air lines. You can slowly lift it from the caddy and put it on the side so you can remove the caddy
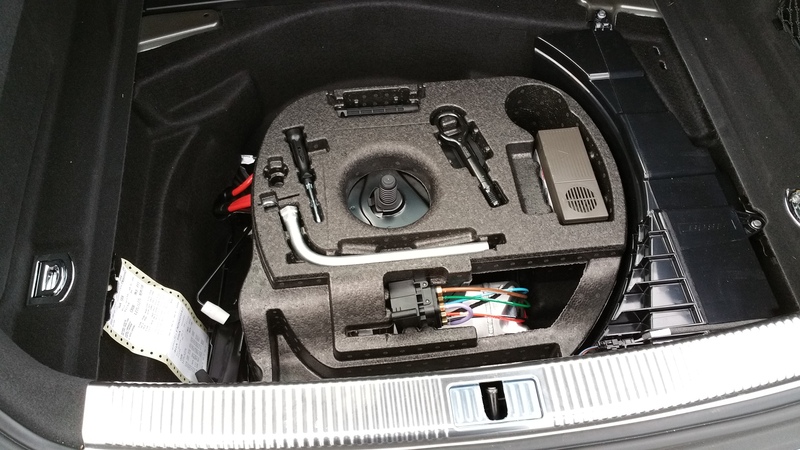
Upon removal of the caddy this is what you will see. You can opt to remove all the tools from the caddy before you remove it so they don't fall and damage the car, but I don't think is necessary
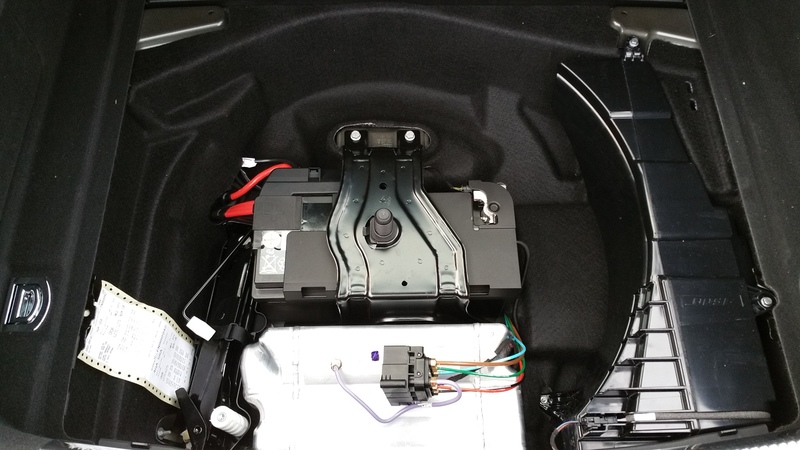
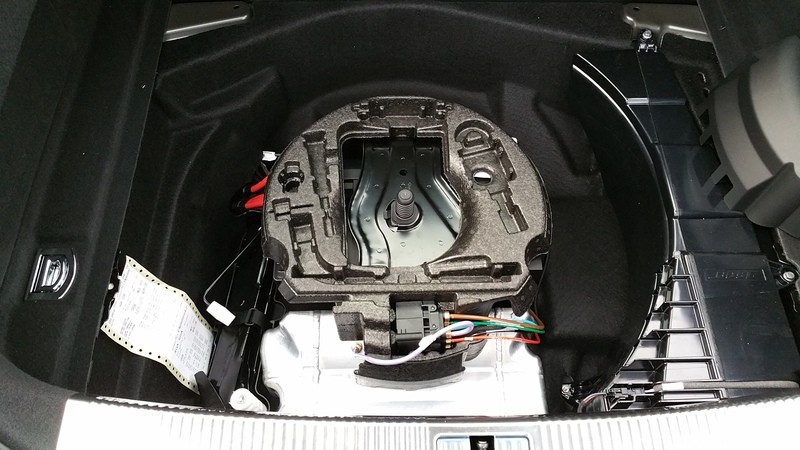
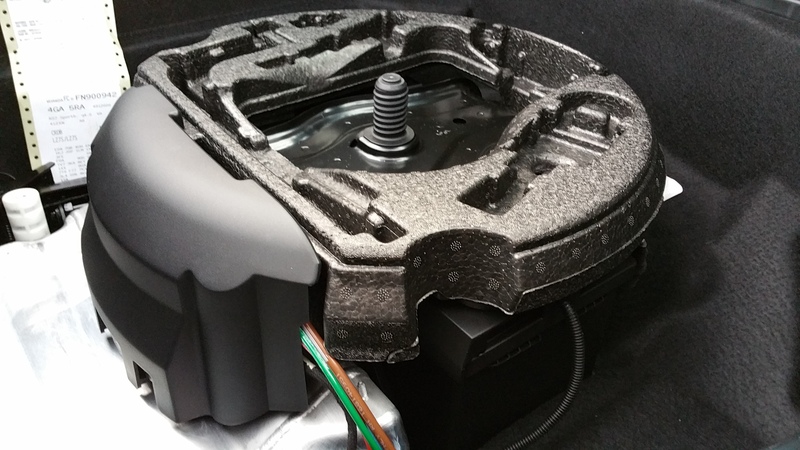
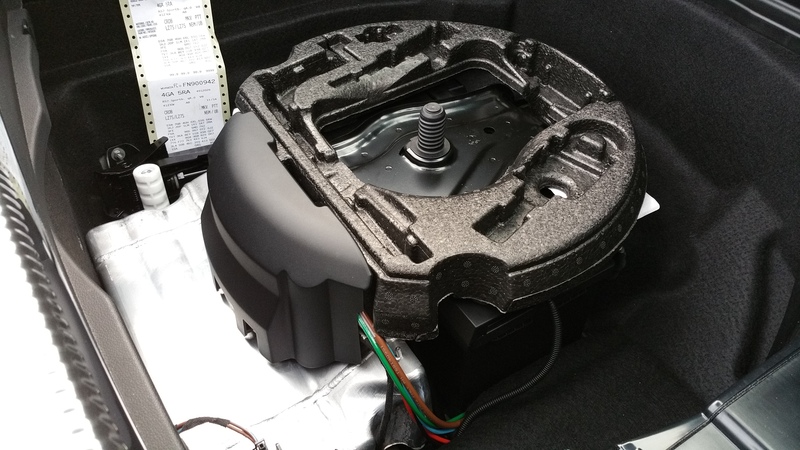
Step 4: Not it's time to install the new skinny tool caddy. Notice how the air suspension lines are setup. It took me a while to figure it out since i did not have any reference. The purple line will remain outside. The suspension box with the lines slides right in the specific opening in the caddy.
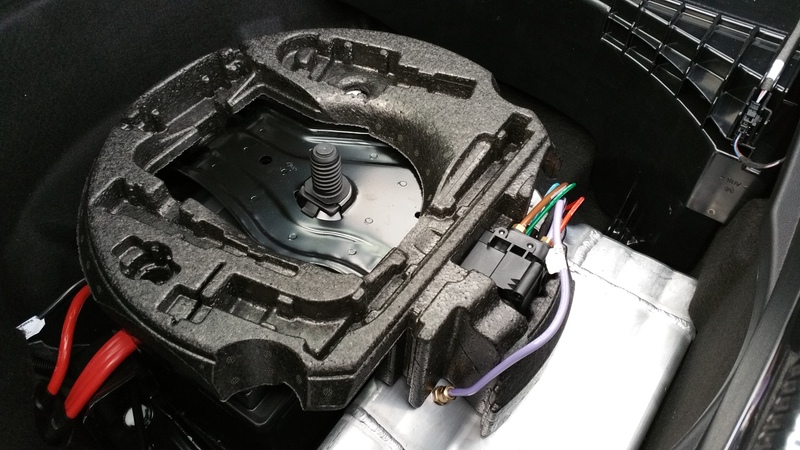

Step 5: Here you will install the second part you ordered, which is the plastic cover of the air suspension lines. The way it fits is shelf explanatory, as it clips into place on the caddy. There are specific gaps and lips for it to hook�
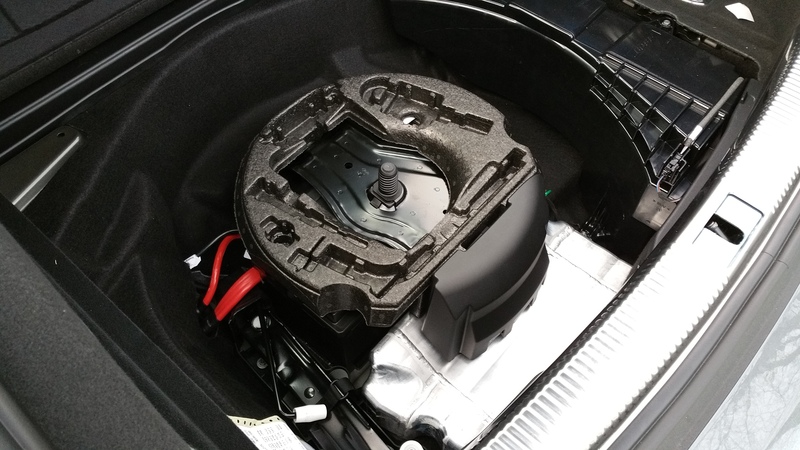

Step 6: Here you will transfer the tools from the original caddy to the new one. Note that there is no space for the air pump and bottle with the liquid, but there is plenty of room in the trunk to store it. I put mine on the right side where the little net is there to hold things in place.
Step 7: Lift your spare tire and place it in the space you just created.
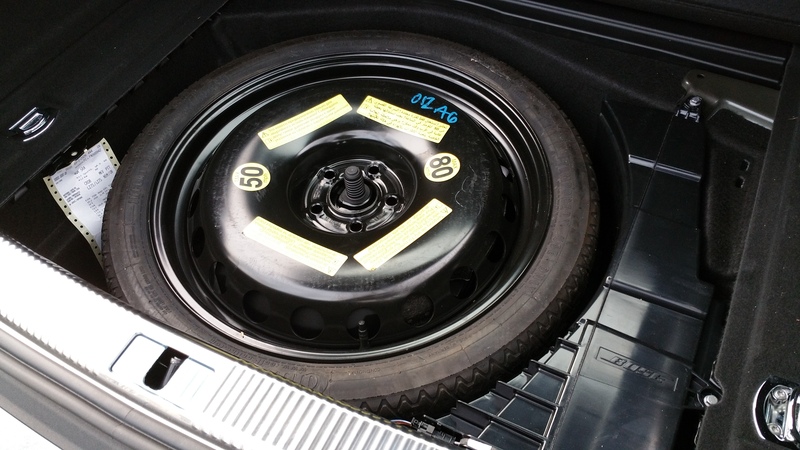
Step 8: Use the original plastic **** to secure the spare wheel in place.
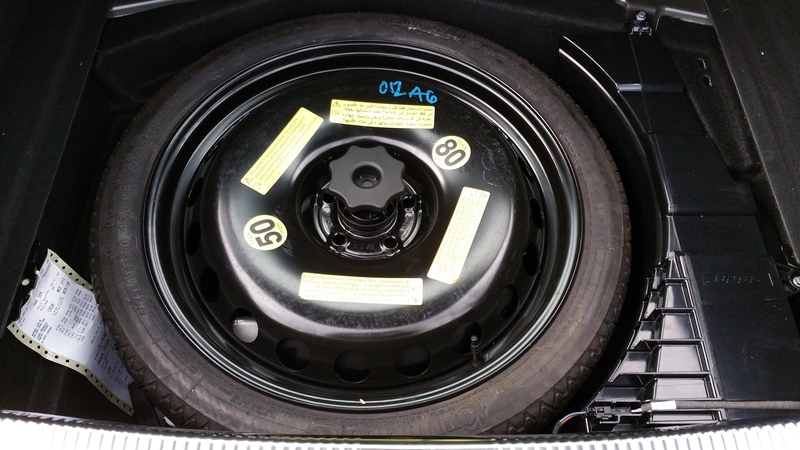

Step 9: Close the cover and DONE!!!
Total time should take you less than 30 minutes, taking your time!!!
Good luck!!!
Audi Part Numbers used:
- 4G0601027 20" spare wheel with 145/65-20 Continental spare tire
- 4G0860381 body hardware, rear body & floor, jack & components, end cover
- 4G0012109C body hardware, rear body & floor, jack & components, tool compartment w/air suspension
Tools needed: NONE!!!
Step 1: Empty the trunk from everything and lift the carpet/cover.

Step 2: Unsrcrew the plastic **** so you can remove the toolbox cover

Step 3: After removing the plastic protective cover, you will be able to see the tool caddy and the air suspension box with the air lines. You can slowly lift it from the caddy and put it on the side so you can remove the caddy

Upon removal of the caddy this is what you will see. You can opt to remove all the tools from the caddy before you remove it so they don't fall and damage the car, but I don't think is necessary


Step 4: Not it's time to install the new skinny tool caddy. Notice how the air suspension lines are setup. It took me a while to figure it out since i did not have any reference. The purple line will remain outside. The suspension box with the lines slides right in the specific opening in the caddy.


Step 5: Here you will install the second part you ordered, which is the plastic cover of the air suspension lines. The way it fits is shelf explanatory, as it clips into place on the caddy. There are specific gaps and lips for it to hook�


Step 6: Here you will transfer the tools from the original caddy to the new one. Note that there is no space for the air pump and bottle with the liquid, but there is plenty of room in the trunk to store it. I put mine on the right side where the little net is there to hold things in place.

Step 7: Lift your spare tire and place it in the space you just created.

Step 8: Use the original plastic **** to secure the spare wheel in place.


Step 9: Close the cover and DONE!!!


Total time should take you less than 30 minutes, taking your time!!!
Good luck!!!

 04-20-2015, 10:38 AM
#3
AudiWorld Member

Very well done, indeed.
This is just the level of detail (especially the part numbers) I was looking for to move forward with a similar project on my 2014 RS7.
Great work!
This is just the level of detail (especially the part numbers) I was looking for to move forward with a similar project on my 2014 RS7.
Great work!
04-20-2015, 05:12 PM
#4
Audiworld Junior Member
Thread Starter
Join Date: Nov 2014
Posts: 33
Likes: 0
Received 0 Likes
on
0 Posts
this is the reason that i did such a detailed write up with part #s and everything. To make it easier for the next guy or girl!
05-18-2015, 07:44 PM
#5
AudiWorld Member
Parts finally came in last week and I added the spare tire to my RS7 following kouzman's instructions. Everything worked as documented.
FYI, the final parts list I used follows:
1 x 4G0-601-027-E Wheel
1 x 4G0-012-109-C Toolbox
1 x 4G0-860-381 Cover
1 x DT0-350-634 CST 17 Tire
1 x JESTEM Valve Stem
FYI, the final parts list I used follows:
1 x 4G0-601-027-E Wheel
1 x 4G0-012-109-C Toolbox
1 x 4G0-860-381 Cover
1 x DT0-350-634 CST 17 Tire
1 x JESTEM Valve Stem
05-19-2015, 05:30 PM
#7
AudiWorld Member

The 4GO-061-027 is the 20" spare tire, so what is the part DT0-350-634?
Trending Topics
05-20-2015, 01:09 AM
#8
AudiWorld Member
The only thing I would add to my earlier post is a recommendation to review kouzman's photography of fitting the cover over the air suspension box. If you arrange the air lines as kouzman demonstrates, the cover fits easily - otherwise you have to move the lines around a bit as you press down on the cover to place it over air suspension box in order to align the cover so that the attachment points on the bottom of the cover hook into the base of the mini-toolbox.
05-20-2015, 02:41 PM
#10
AudiWorld Member
The spare tire (tyre) assembly comes in two parts: 4GO-061-027 is the 20" wheel. DTO-350-634 is the Continental spare tire. Audi service at Jim Ellis Audi Marietta Georgia charged me $30 to mount the tire on the wheel and inflate to spec.
The only thing I would add to my earlier post is a recommendation to review kouzman's photography of fitting the cover over the air suspension box. If you arrange the air lines as kouzman demonstrates, the cover fits easily - otherwise you have to move the lines around a bit as you press down on the cover to place it over air suspension box in order to align the cover so that the attachment points on the bottom of the cover hook into the base of the mini-toolbox.
The only thing I would add to my earlier post is a recommendation to review kouzman's photography of fitting the cover over the air suspension box. If you arrange the air lines as kouzman demonstrates, the cover fits easily - otherwise you have to move the lines around a bit as you press down on the cover to place it over air suspension box in order to align the cover so that the attachment points on the bottom of the cover hook into the base of the mini-toolbox.
one more question...DO u have Bose or B&O System? I know Kouzman has Bose System and just want to know if this can be done with B&O Bass in the spare tire well instead of Bose.
Thx.