B&O Subwoofer Upgrade Install Guide
 12-20-2014, 04:27 PM
#251
AudiWorld Member

Join Date: Apr 2014
Posts: 207
Likes: 0
Received 0 Likes
on
0 Posts
In one my classical cd, there was break in the music and a resounding bass passage came through, I was astounded on how good is sounded.No system really does not have a true sub woofer, but it sound very good on real music with naturally occurring bass. Well worth the $850 premium. W/O further modification. IMHO.
 11-24-2015, 09:19 AM
#252
AudiWorld Super User

Join Date: Oct 2005
Posts: 3,268
Likes: 0
Received 0 Likes
on
0 Posts
I've given the Lanzar sub a year and it's just meh, only marginally better than stock. It needs an amp since there is no way to adjust the gain. I'm going to buy a generic sub that requires very little power and try that.
11-21-2016, 06:00 PM
#253
AudiWorld Member

Join Date: Mar 2000
Posts: 254
Likes: 0
Received 0 Likes
on
0 Posts
What did you end up with, and was it an improvement over the Lanzar?
07-05-2017, 04:05 PM
#254
Audiworld Junior Member
Join Date: Dec 2015
Posts: 11
Likes: 0
Received 0 Likes
on
0 Posts
After a ton of research and endless forum post reading, I recently performed this subwoofer upgrade. I went a slightly different route component-wise, but I'm pretty happy with the end result, which caters to my personal preferences with regard to the music I like to listen to. I tried to take as many pics of relevant/noteworthy items unique to this installation, and I'm happy to answer any questions! I'll try to avoid rambling, so here's the gear I used:
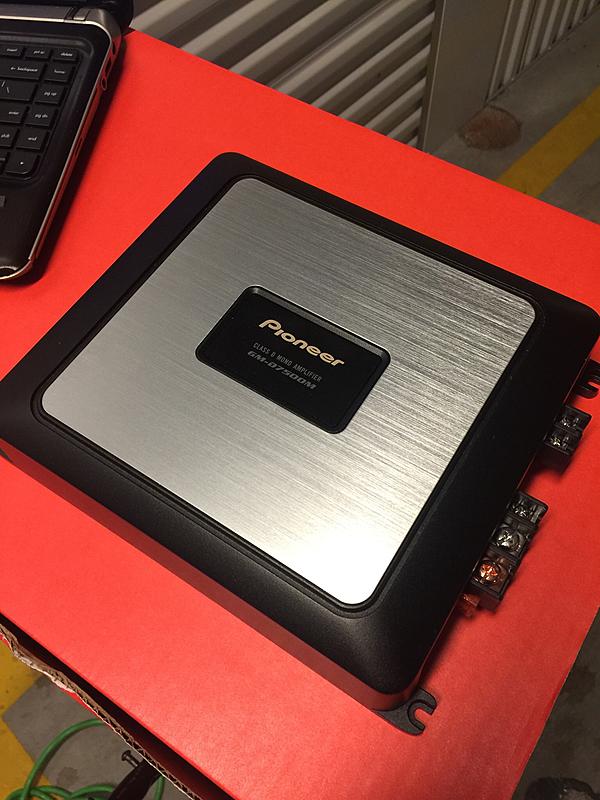
-Pioneer GM-D7500M Mono amp
-Planet Audio 2 Farad capacitor
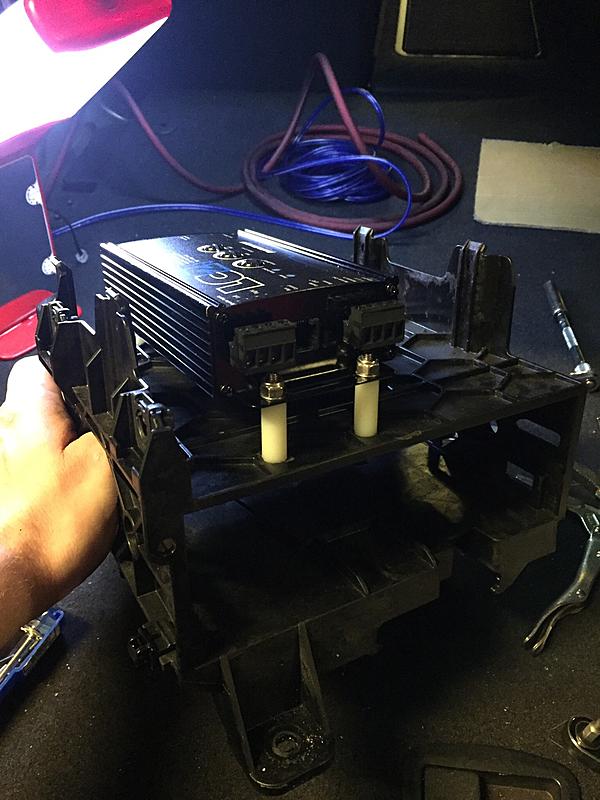
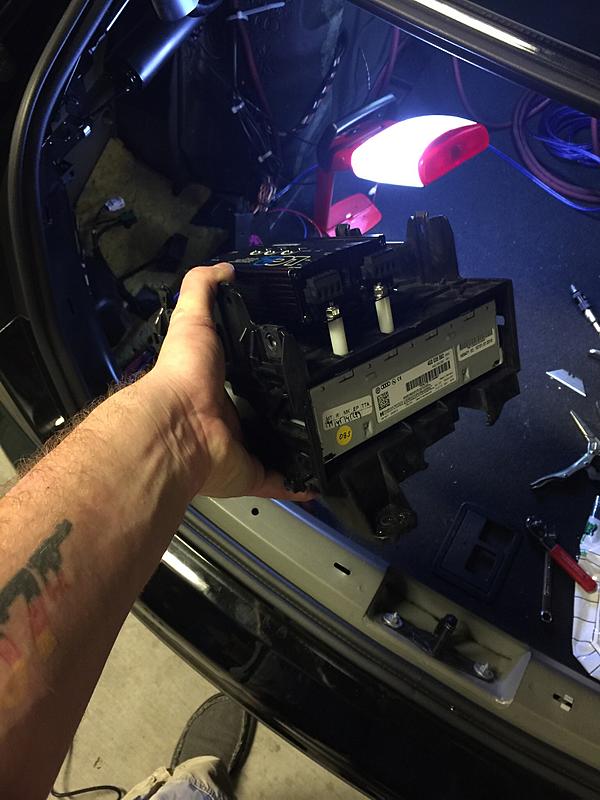
-Audio Control LC2i line output converter (with optional ACR1 remote level control)
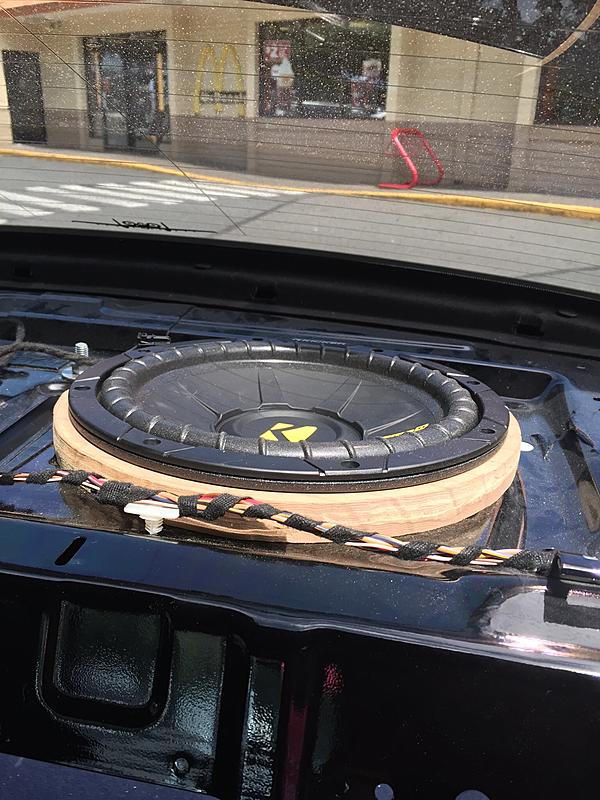
-Kicker 40CWD104 Comp D 10" sub
Items of interest:
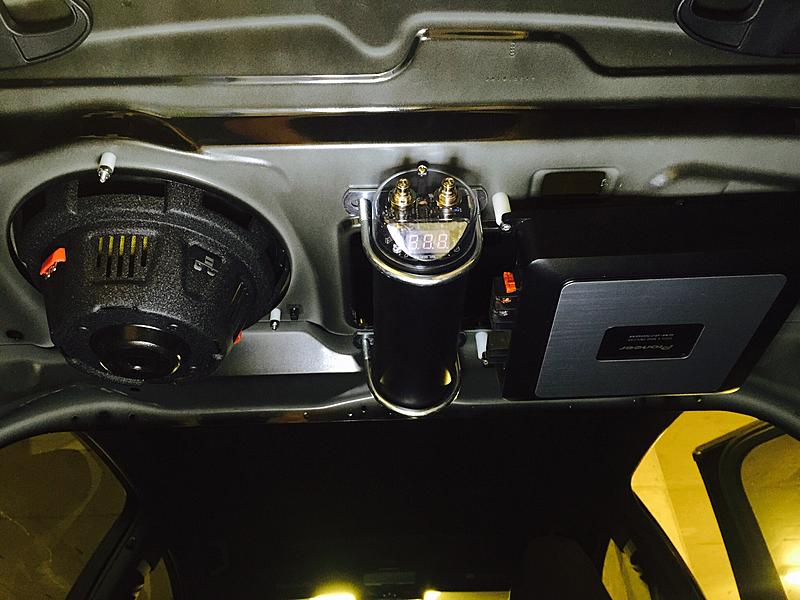
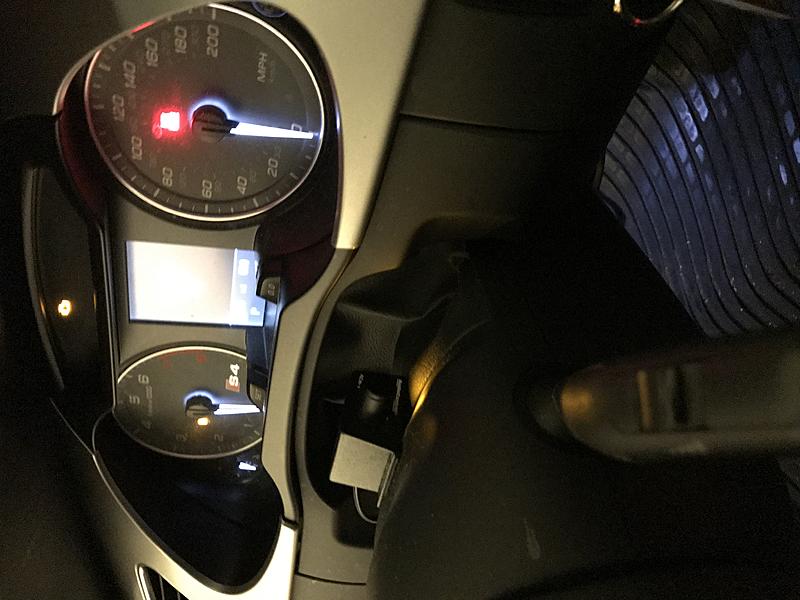
-The 2 farad cap is admittedly huge overkill.....but at $28 I thought it might help to spare the car's electrical system when the stereo is cranked. Plus the digital voltage display is cool to look at: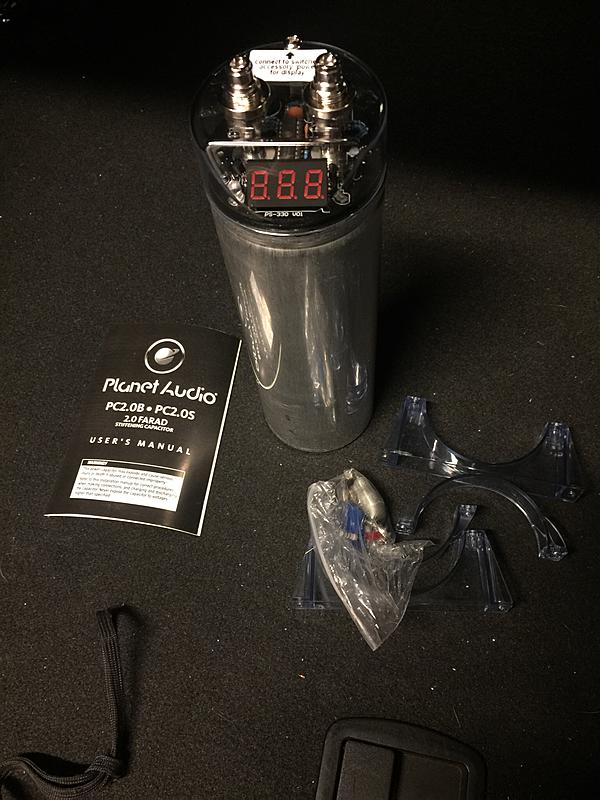
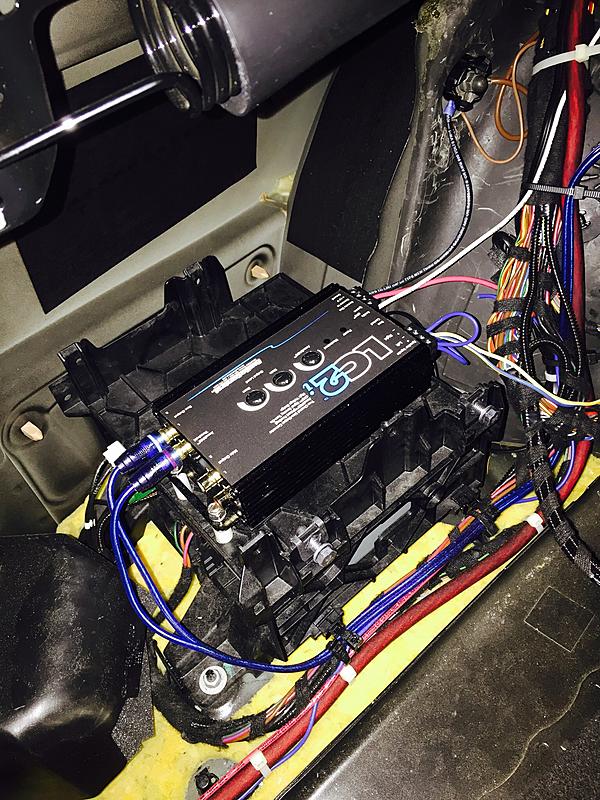
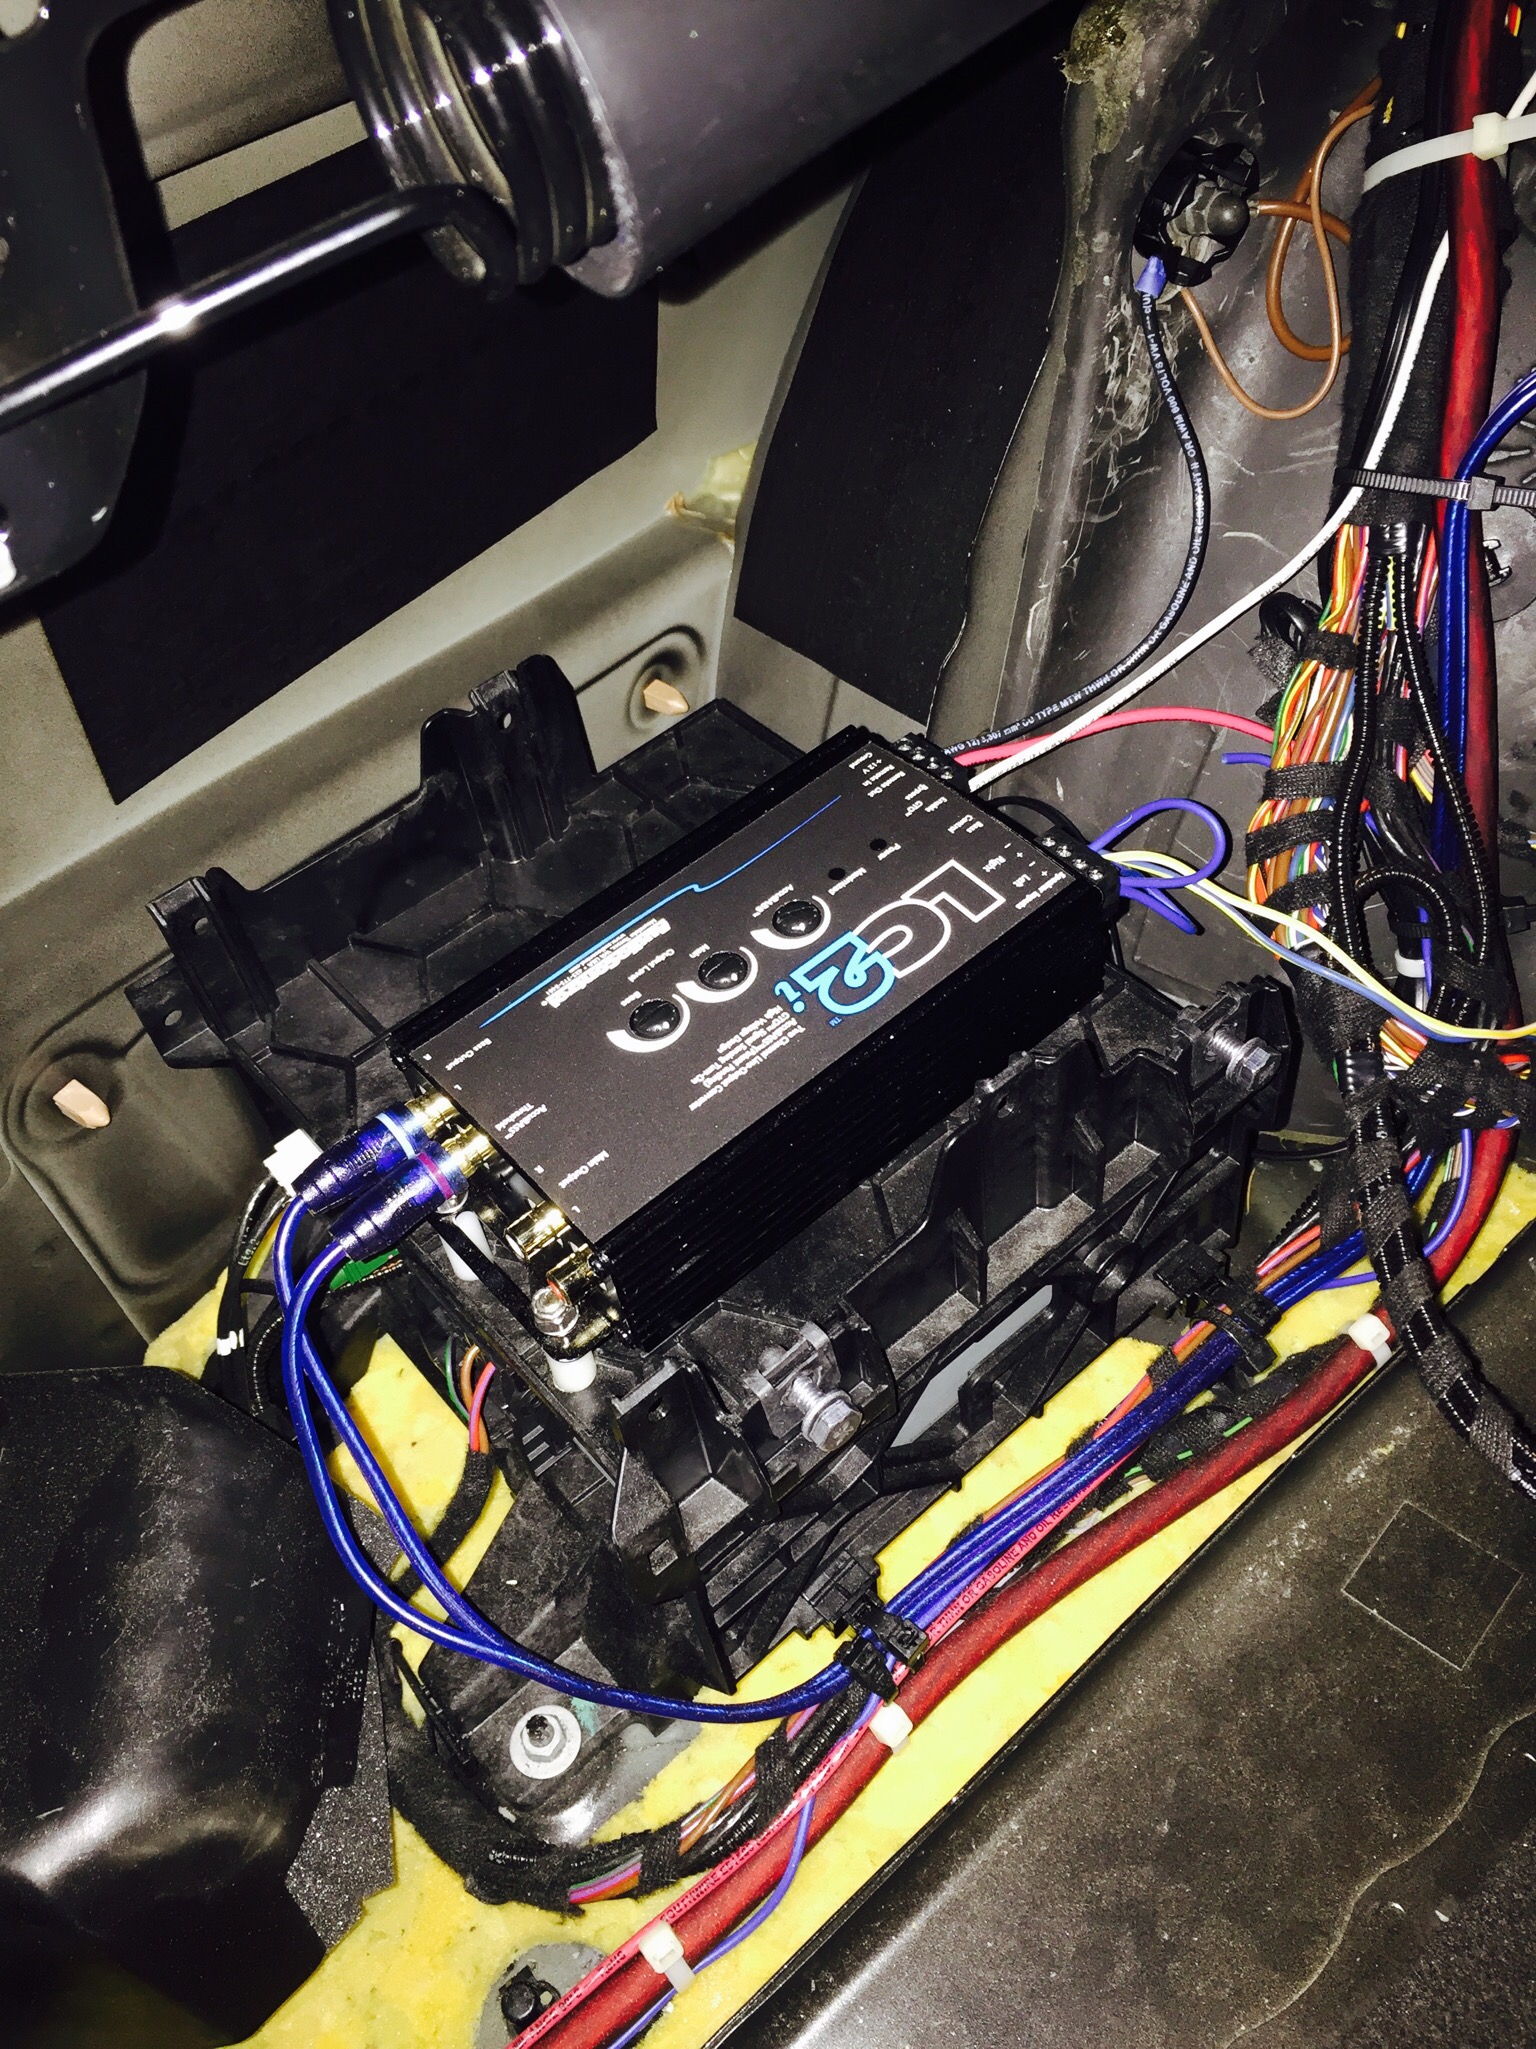
-I used the LC2i based on the overwhelmingly good reviews and features, especially the "GTO-Great Turn On" feature, which powers up the unit (and therefore the amp) when it senses an audio signal from the stereo. In theory this means I wouldn't need to find a +12vdc switched power wire since the unit should wake up the second the car is started. Well, it didn't work out that way. For whatever reason, that feature didn't work and I had to track down a switched +12vdc wire after all and run it to the LOC. I found some switched power at the fuse panel in the right (passenger) side of the trunk. Also, you might wonder why I used 1" spacers when mounting the LOC to the middle equipment rack in the left side of the trunk. It was done with cooling in mind. I wasn't sure how hot the LOC would get and I didn't want to melt the plastic tray:
-Pioneer GM-D7500M Mono amp
-Planet Audio 2 Farad capacitor
-Audio Control LC2i line output converter (with optional ACR1 remote level control)
-Kicker 40CWD104 Comp D 10" sub
Items of interest:
-The 2 farad cap is admittedly huge overkill.....but at $28 I thought it might help to spare the car's electrical system when the stereo is cranked. Plus the digital voltage display is cool to look at:

-I used the LC2i based on the overwhelmingly good reviews and features, especially the "GTO-Great Turn On" feature, which powers up the unit (and therefore the amp) when it senses an audio signal from the stereo. In theory this means I wouldn't need to find a +12vdc switched power wire since the unit should wake up the second the car is started. Well, it didn't work out that way. For whatever reason, that feature didn't work and I had to track down a switched +12vdc wire after all and run it to the LOC. I found some switched power at the fuse panel in the right (passenger) side of the trunk. Also, you might wonder why I used 1" spacers when mounting the LOC to the middle equipment rack in the left side of the trunk. It was done with cooling in mind. I wasn't sure how hot the LOC would get and I didn't want to melt the plastic tray:


 07-05-2017, 04:34 PM
#255
Audiworld Junior Member
Join Date: Dec 2015
Posts: 11
Likes: 0
Received 0 Likes
on
0 Posts
continued-
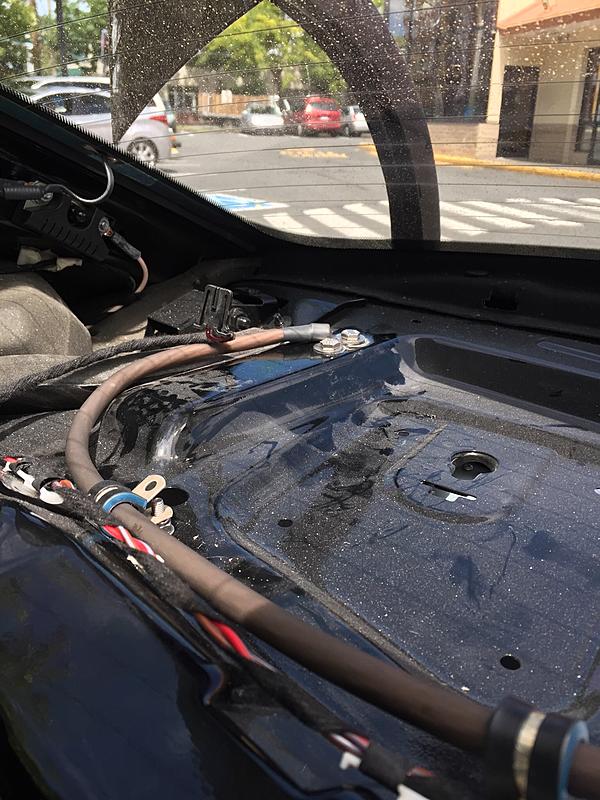
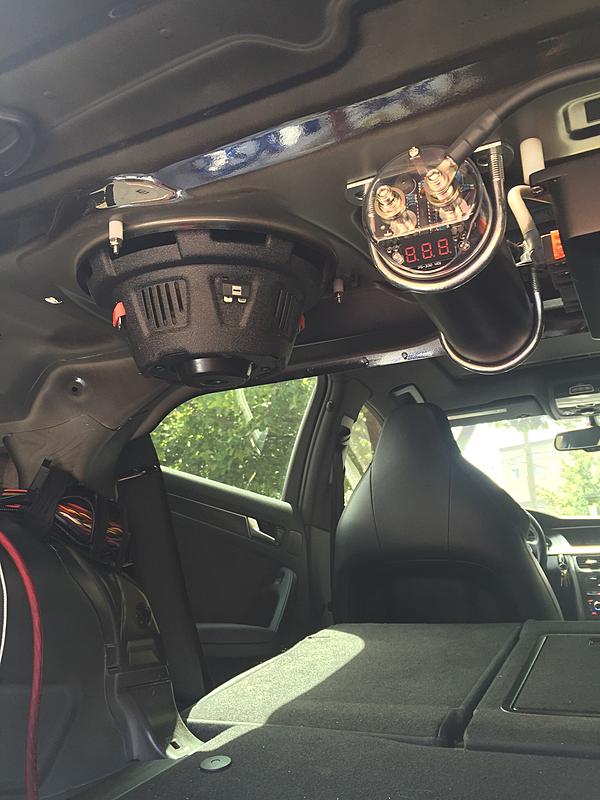
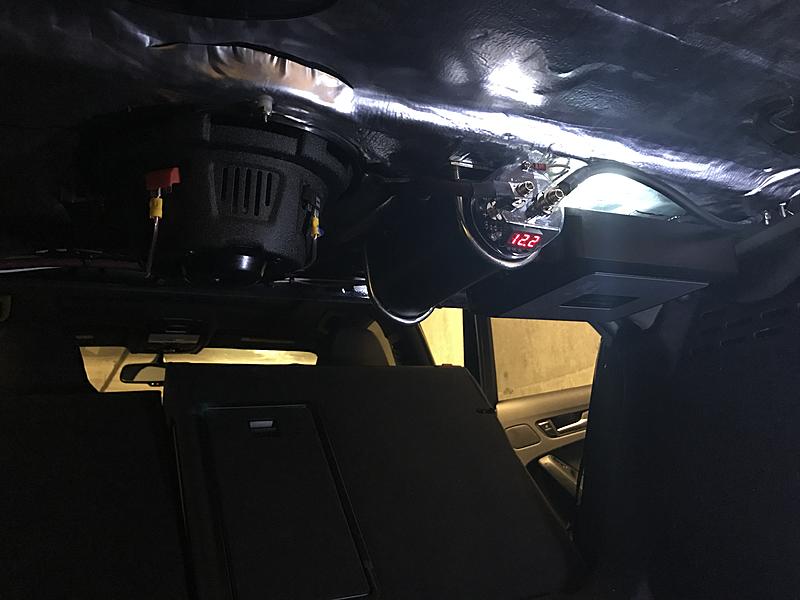
-I made my own ground studs for the big 4AWG amp/capacitor cables. This meant I could keep the ground cable run short and had grounds dedicated to the amp to ensure there wouldn't be any interference. I wanted to avoid drilling holes in the car but made an exception for these studs:
In the end I'm pretty satisfied with how it turned out. Though not pictured, I bought a roll of 80 mil sound deadening matting which worked great in reducing rattles.....I found a 10-square foot roll for $21 on Amazon....much cheaper than Dynamat but did the job.
-I made my own ground studs for the big 4AWG amp/capacitor cables. This meant I could keep the ground cable run short and had grounds dedicated to the amp to ensure there wouldn't be any interference. I wanted to avoid drilling holes in the car but made an exception for these studs:


In the end I'm pretty satisfied with how it turned out. Though not pictured, I bought a roll of 80 mil sound deadening matting which worked great in reducing rattles.....I found a 10-square foot roll for $21 on Amazon....much cheaper than Dynamat but did the job.


 07-05-2017, 04:39 PM
#256
Audiworld Junior Member
Join Date: Dec 2015
Posts: 11
Likes: 0
Received 0 Likes
on
0 Posts
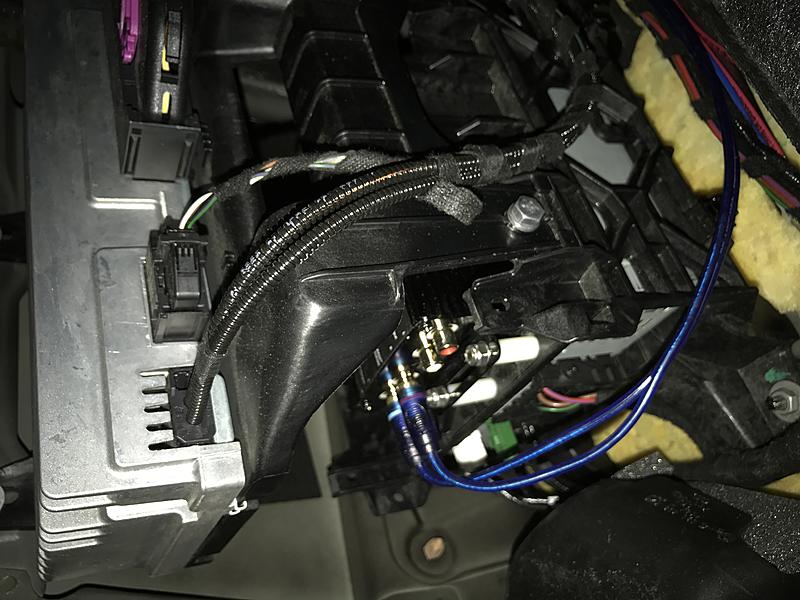
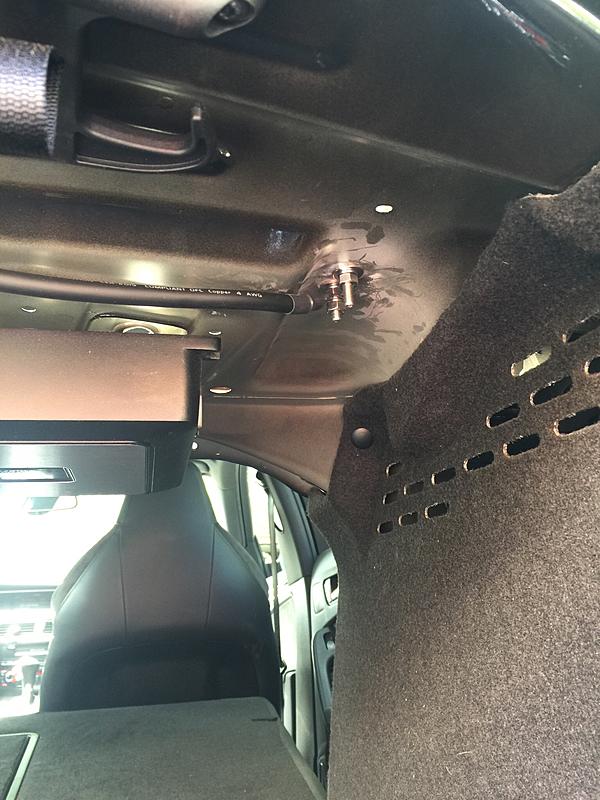
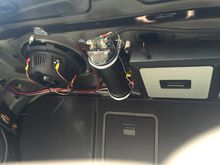
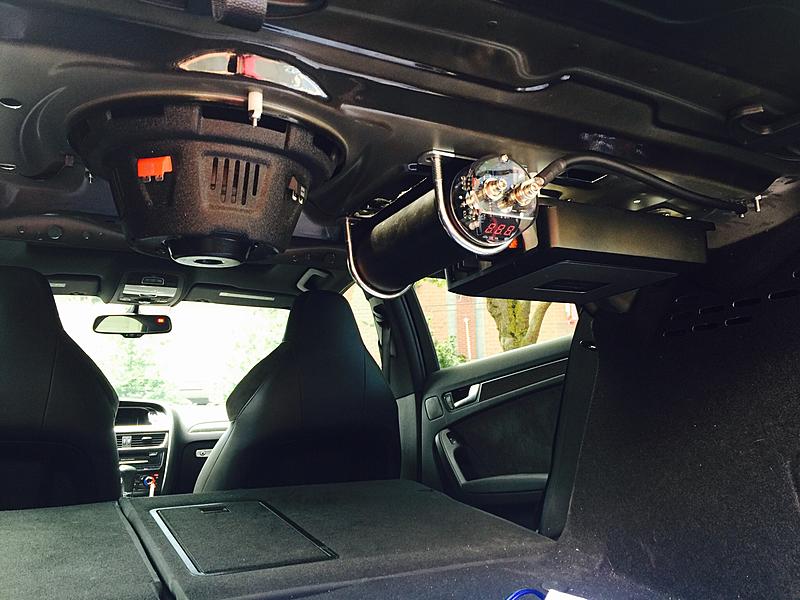
More miscellaneous pics... the first one isn't great but shows where I mounted the remote sub level control **** which connects to the LC2i. The cable for that was the longest run I had to make for the entire project...


Last edited by jetfixr07; 07-05-2017 at 04:42 PM.
06-26-2018, 09:54 AM
#257
AudiWorld Newcomer

Join Date: Jun 2018
Posts: 1
Likes: 0
Received 0 Likes
on
0 Posts
Thank you so much for this guide. Bought an audi a4 2010 2.0T quattro and the people didnt tell me it had a blown sub... thanks to you I didnt have to take it in to get a new one installed, was fairly quick and easy, and one of the best guides I've ever seen! Thank you!
07-06-2018, 07:25 PM
#258
AudiWorld Newcomer

Join Date: Jun 2015
Posts: 1
Likes: 0
Received 0 Likes
on
0 Posts
After a ton of research and endless forum post reading, I recently performed this subwoofer upgrade. I went a slightly different route component-wise, but I'm pretty happy with the end result, which caters to my personal preferences with regard to the music I like to listen to. I tried to take as many pics of relevant/noteworthy items unique to this installation, and I'm happy to answer any questions! I'll try to avoid rambling, so here's the gear I used:
-Pioneer GM-D7500M Mono amp
-Planet Audio 2 Farad capacitor
-Audio Control LC2i line output converter (with optional ACR1 remote level control)
-Kicker 40CWD104 Comp D 10" sub
Items of interest:
-The 2 farad cap is admittedly huge overkill.....but at $28 I thought it might help to spare the car's electrical system when the stereo is cranked. Plus the digital voltage display is cool to look at:Attachment 68095
-I used the LC2i based on the overwhelmingly good reviews and features, especially the "GTO-Great Turn On" feature, which powers up the unit (and therefore the amp) when it senses an audio signal from the stereo. In theory this means I wouldn't need to find a +12vdc switched power wire since the unit should wake up the second the car is started. Well, it didn't work out that way. For whatever reason, that feature didn't work and I had to track down a switched +12vdc wire after all and run it to the LOC. I found some switched power at the fuse panel in the right (passenger) side of the trunk. Also, you might wonder why I used 1" spacers when mounting the LOC to the middle equipment rack in the left side of the trunk. It was done with cooling in mind. I wasn't sure how hot the LOC would get and I didn't want to melt the plastic tray:
Attachment 68097Attachment 68098Attachment 68099Attachment 68100
Also, why run the ground above the rear deck? I like the idea of the Cap and the separate ground, just curious why you ran the one ground wire above the rear deck.
07-14-2018, 12:55 PM
#259
AudiWorld Junior Member

Join Date: Oct 2012
Posts: 11
Likes: 0
Received 0 Likes
on
0 Posts
Just finished doing the install as you laid out. Probably would not have attempted it if you had not done such a good job with the instructions and pics. Very happy with the result and big thanks to You!!!
07-16-2018, 03:54 AM
#260
AudiWorld Newcomer

Join Date: Jan 2003
Posts: 6
Likes: 0
Received 0 Likes
on
0 Posts
Just completed the upgrade on my 2016 S4 with the Pioneer TS-W261D4 and the change is remarkable. As others have, I fabricated a spacer and did some modest dremel work on the deck cover, but everything went together beautifully and the system sounds like it should have from the factory now. GTMat kept everything tight and rattle free.
Thank you for this great write-up and discussion. Not sure if it was mentioned here, but using a fork on the left behind C-Pillar clips made extracting them a breeze.
Thank you for this great write-up and discussion. Not sure if it was mentioned here, but using a fork on the left behind C-Pillar clips made extracting them a breeze.