85 UR quattro
 11-26-2014, 08:49 AM
#91
AudiWorld Member
Thread Starter
I may be back on Quattro duty! The brief disruption to service was caused by us taking on more space and building a new home for the cars. There's space for a red Quattro too:

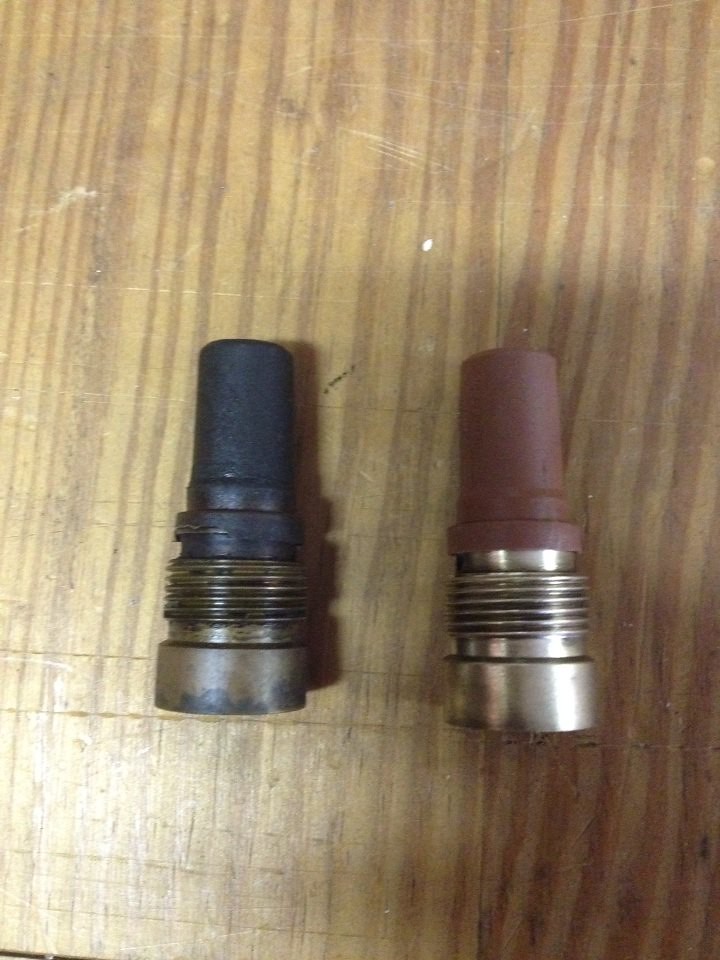
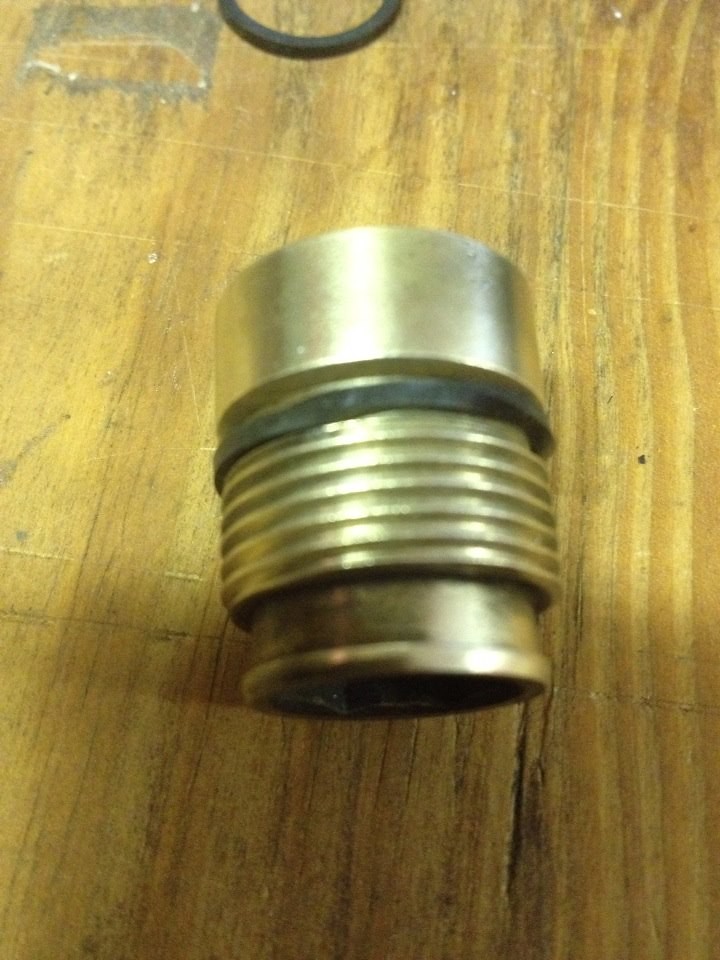
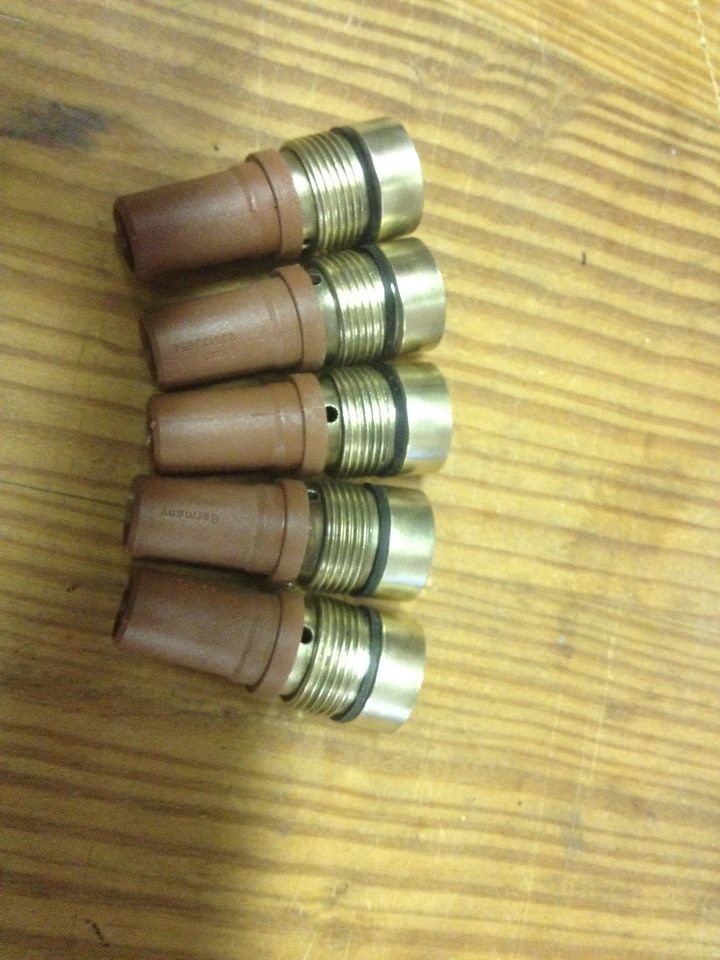
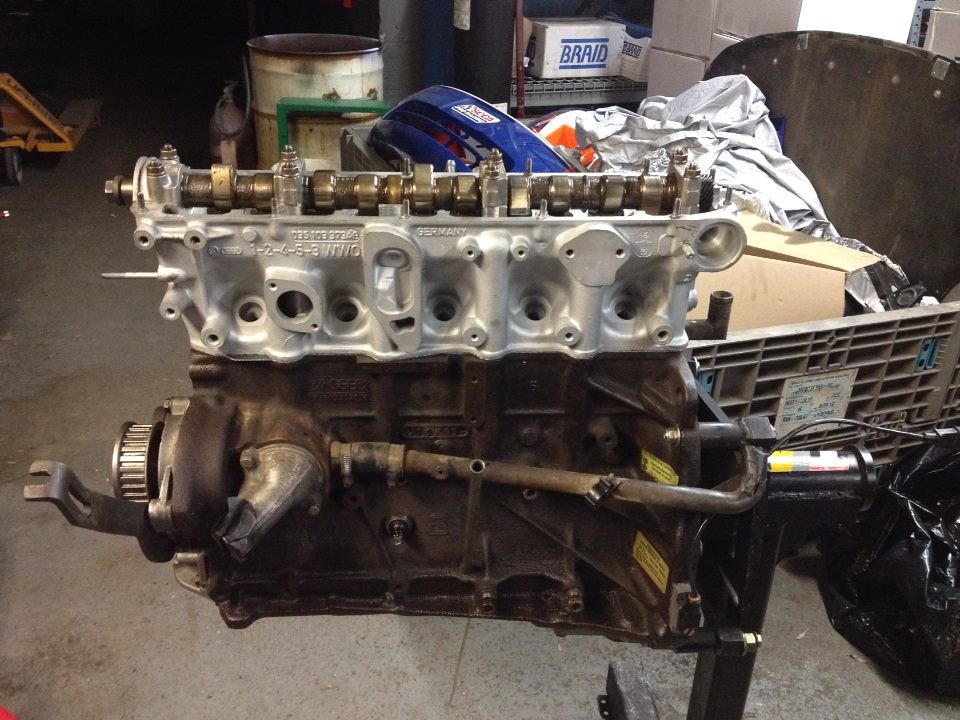
That done I got stuck into the Quattro this week. Cleaned up the injector holders, added new seals and reinstalled the cam. Whatever next?
 10421360_4983024029916_5750247918984850872_n by Team Illuminata Motorsport, on Flickr
 10547650_4983023989915_8188935954119229409_n by Team Illuminata Motorsport, on Flickr
 10417466_4983024109918_2381330989501507744_n by Team Illuminata Motorsport, on Flickr
 10405371_4983024069917_6905935358714217510_n by Team Illuminata Motorsport, on Flickr
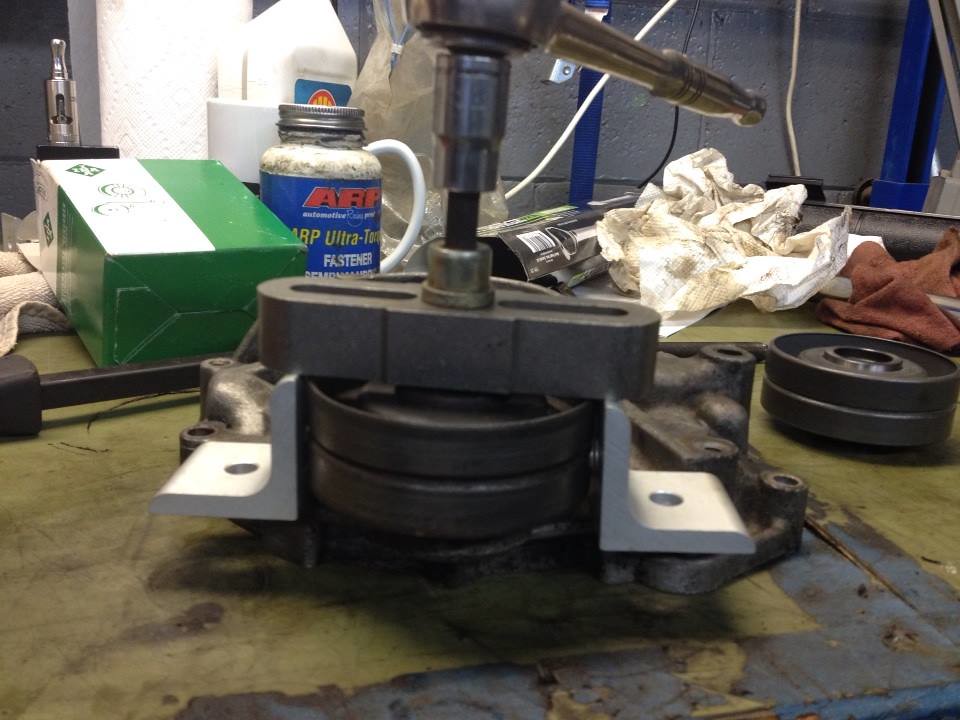
Rigged up idler pulley puller. Very effective.
 1898048_4988955498199_3503304297882499277_n by Team Illuminata Motorsport, on Flickr
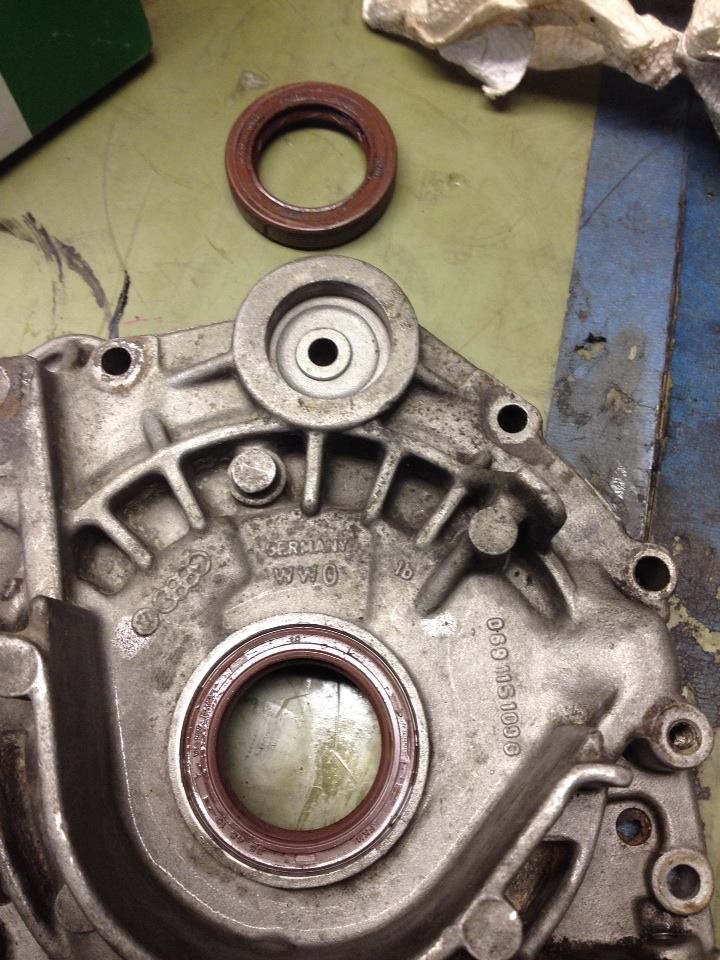
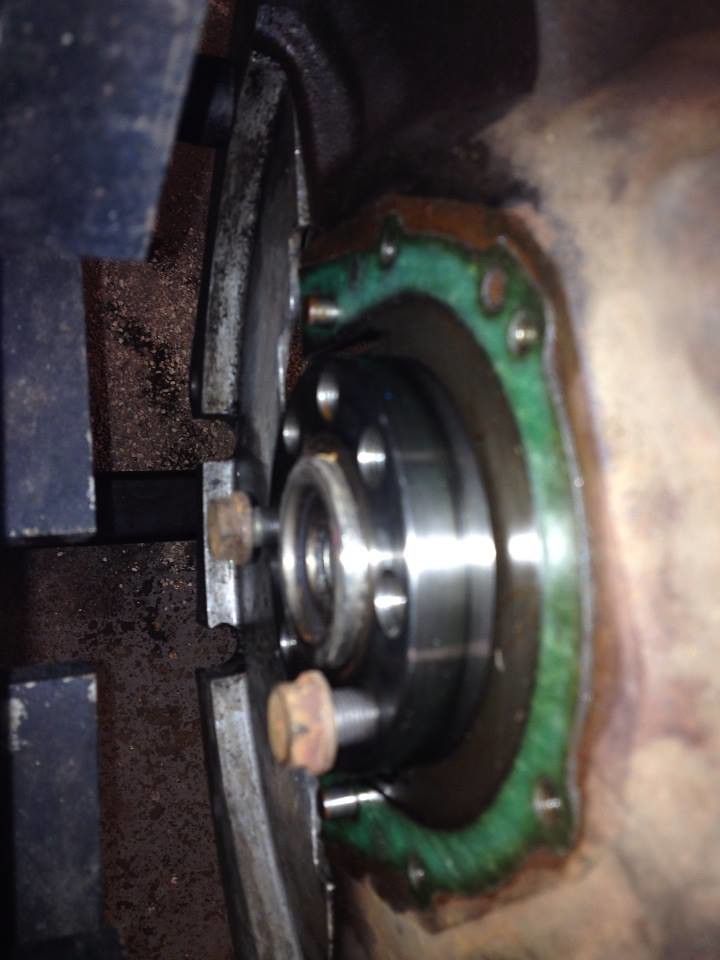
Installed new seal and pulley and reinstalled the oil pump.
 10516841_4995859950806_7764989237165593525_n by Team Illuminata Motorsport, on Flickr
 10418930_4995859870804_8554211402051516207_n by Team Illuminata Motorsport, on Flickr
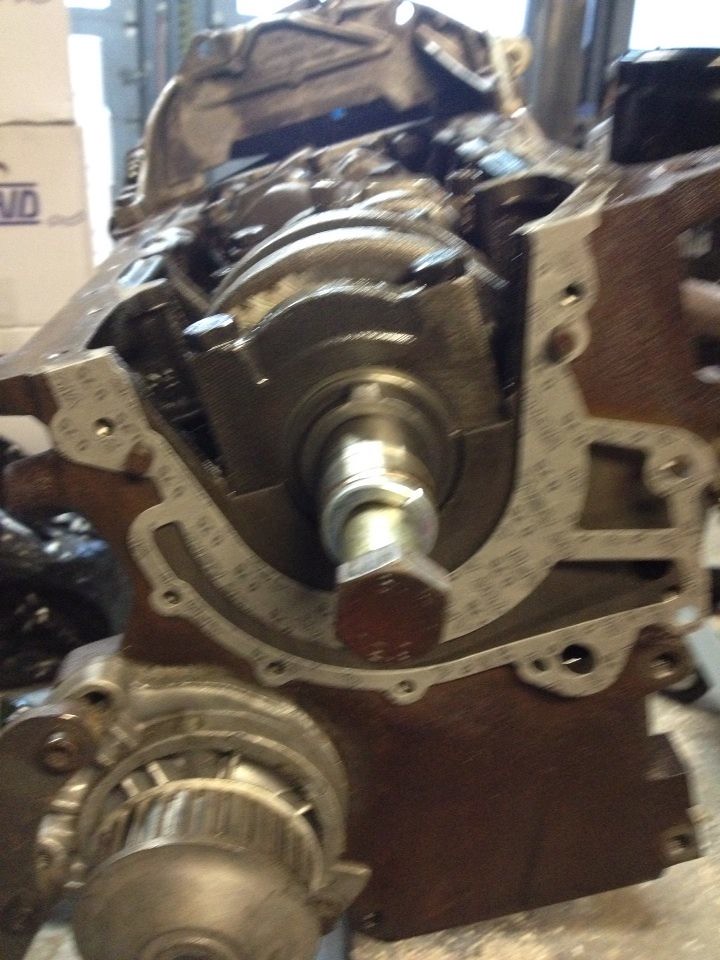
I couldn't find any marks to line up right now so this is a close to #1 at TDC as I could eyeball:
 10801853_4995860030808_8338472303711305872_n by Team Illuminata Motorsport, on Flickr
and with #1 valves all closed that should be close enough for now right? Head is on but not torqued down yet.
 1796693_4995860710825_8579514944658249121_n by Team Illuminata Motorsport, on Flickr
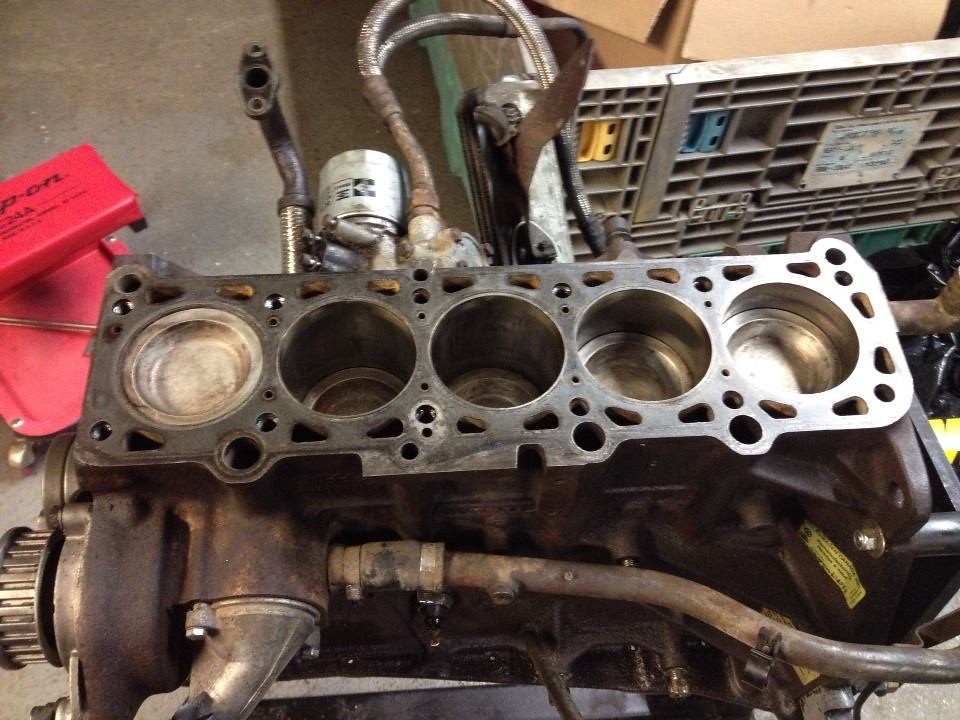
Missing some parts so will have to work on other aspects of the project over the holiday. Is it true it's best to use TWO crankshaft seal cover gaskets to move the lip of the seal out of the old wear groove?
 10251926_4995859990807_8421117288609436862_n by Team Illuminata Motorsport, on Flickr
That done I got stuck into the Quattro this week. Cleaned up the injector holders, added new seals and reinstalled the cam. Whatever next?
10421360_4983024029916_5750247918984850872_n by Team Illuminata Motorsport, on Flickr10547650_4983023989915_8188935954119229409_n by Team Illuminata Motorsport, on Flickr10417466_4983024109918_2381330989501507744_n by Team Illuminata Motorsport, on Flickr10405371_4983024069917_6905935358714217510_n by Team Illuminata Motorsport, on FlickrRigged up idler pulley puller. Very effective.
1898048_4988955498199_3503304297882499277_n by Team Illuminata Motorsport, on FlickrInstalled new seal and pulley and reinstalled the oil pump.
10516841_4995859950806_7764989237165593525_n by Team Illuminata Motorsport, on Flickr10418930_4995859870804_8554211402051516207_n by Team Illuminata Motorsport, on FlickrI couldn't find any marks to line up right now so this is a close to #1 at TDC as I could eyeball:
10801853_4995860030808_8338472303711305872_n by Team Illuminata Motorsport, on Flickrand with #1 valves all closed that should be close enough for now right? Head is on but not torqued down yet.
1796693_4995860710825_8579514944658249121_n by Team Illuminata Motorsport, on FlickrMissing some parts so will have to work on other aspects of the project over the holiday. Is it true it's best to use TWO crankshaft seal cover gaskets to move the lip of the seal out of the old wear groove?
10251926_4995859990807_8421117288609436862_n by Team Illuminata Motorsport, on Flickr
Last edited by team illuminata; 08-25-2016 at 02:07 PM.
 11-30-2014, 03:05 PM
#92
AudiWorld Member
Thread Starter
I've been thinking about how to set valve timing on this engine. The manual says to align the mark on the flywheel with the indicator on the bell housing and the mark on the camshaft pulley with the top of the head. I really don't want to have to install the gearbox before I can set timing; is there another way? There is also mention of setting the mark on the crankshaft pulley with a boss on the oil pump but I have read this can be unreliable. Does anyone know the number of teeth on the belt between the two marks once the cam belt is on?

One more question: does the black seal go on the plastic or on the brass?


I did make some progress this weekend but got distracted by some bright and shiny things that turned up:


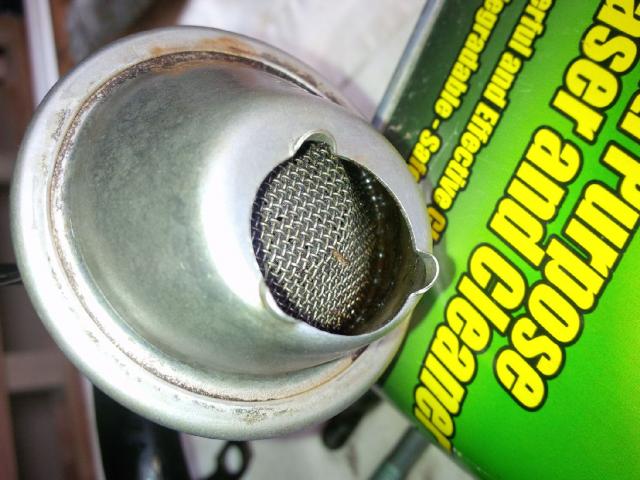
Once that bit of fun was over I started to refurbish the engine's tin ware. Degreased, wire brushed and treated with rust eater:

Tomorrow I'll source some POR15 and finish them in black.
One more question: does the black seal go on the plastic or on the brass?
I did make some progress this weekend but got distracted by some bright and shiny things that turned up:
Once that bit of fun was over I started to refurbish the engine's tin ware. Degreased, wire brushed and treated with rust eater:
Tomorrow I'll source some POR15 and finish them in black.
12-01-2014, 06:01 PM
#93
AudiWorld Member
Thread Starter
Made a little progress today but before we get to that a little housekeeping: I have been hosting most of my pictures on Facebook for this thread but I've recently noticed that they a not loading. It seems that they are still on my Facebook page but the urls have changed! There is no way I can go back and re-link them all so if you want to see them try my Snapfish account instead.
Now then, back to the business in hand. I torqued down the head bolts today. Boy, what a lot of effort. I hate torqueing head bolts. I always expect one to strip but they never have, yet. No pics; it looked just the same afterwards, sorry. I did paint the tinware though. Used Rustoleum instead of POR15. Way cheaper and probably fine for this application.

Tomorrow, if time permits, I will try to get this and the timing belt on. Or maybe the oil pan, or perhaps the valve cover. Something will get bolted to something.
Now then, back to the business in hand. I torqued down the head bolts today. Boy, what a lot of effort. I hate torqueing head bolts. I always expect one to strip but they never have, yet. No pics; it looked just the same afterwards, sorry. I did paint the tinware though. Used Rustoleum instead of POR15. Way cheaper and probably fine for this application.
Tomorrow, if time permits, I will try to get this and the timing belt on. Or maybe the oil pan, or perhaps the valve cover. Something will get bolted to something.
12-03-2014, 10:33 AM
#94
AudiWorld Member
Thread Starter
So, true to my word, I did bolt some things to other things today. Got the cam belt cover on. I would say "back on" but the engine didn't have one before!

and the cam pulley, crank pulley and cam belt.

and the valve cover

and even the oil pick up tube!

However, I'm not sure the timing is right yet so everything is still loose. What do you think, close enough:


I'm thinking maybe 1 tooth off on the cam end. Will it still turn safely one tooth out?
and the cam pulley, crank pulley and cam belt.
and the valve cover
and even the oil pick up tube!
However, I'm not sure the timing is right yet so everything is still loose. What do you think, close enough:
I'm thinking maybe 1 tooth off on the cam end. Will it still turn safely one tooth out?
12-06-2014, 01:26 PM
#95
AudiWorld Member
Thread Starter
Got some new engine mounts yesterday. These should do the trick.

Bolted the oil pan on. Had to replace a few missing screw!

Then bolted some things onto the left side

and then to the right side

I'm going to try to make one of these heat shields because I can't find one anywhere. Does anyone know what color they were painted?

Last thing today I moved the car off the hoist and staged it in our showroom. The 911 that was there needs transmission work and has to be running soon so it's time to switch focus. I do intend getting the intake and exhaust mounted and mating up the transmission first though. If nothing else just to make some room in the shop. Cars in bits seem to take up a lot of space.


Bolted the oil pan on. Had to replace a few missing screw!
Then bolted some things onto the left side
and then to the right side
I'm going to try to make one of these heat shields because I can't find one anywhere. Does anyone know what color they were painted?
Last thing today I moved the car off the hoist and staged it in our showroom. The 911 that was there needs transmission work and has to be running soon so it's time to switch focus. I do intend getting the intake and exhaust mounted and mating up the transmission first though. If nothing else just to make some room in the shop. Cars in bits seem to take up a lot of space.
 12-09-2014, 05:53 PM
#97
AudiWorld Member
Thread Starter
Much progress today:
Painted the heat shield and installed it. Yep, went with silver for more heat reflectance.

Replaced the seals in the transmission while the paint was drying.


Installed the exhaust manifold and turbo.

and the down pipe.

I tried to install the waste gate but I'm going to need new studs. They don't semm to have part numbers though. How do I order them?

Painted the heat shield and installed it. Yep, went with silver for more heat reflectance.
Replaced the seals in the transmission while the paint was drying.
Installed the exhaust manifold and turbo.
and the down pipe.
I tried to install the waste gate but I'm going to need new studs. They don't semm to have part numbers though. How do I order them?
12-10-2014, 03:34 PM
#98
AudiWorld Member
Thread Starter
I had a very productive afternoon then suffered what may or may not be a major setback. Read on.
I installed the intake manifold.

engine mounts

Then was installing the chains to lift it off the engine stand when it suddenly spun over and knocked off the down pipe!

As you might imagine I was quite devastated but upon inspection I think I may be alight. There's a slip fit and a weld just after the turbo which is where it broke. I think I can get it welded back together. The orientation is critical though so I left the rest of it bolted to the turbo. I'm going to wait till I get the hardware for the wastgate, dry fit it all then mark the orientation before having someone weld it up. Hopefully.
I had a cup of tea then carried on. Installed the flywheel next

then the clutch

followed by the clutch release bearing

Fortunately I got my chain lengths just right so they lined up pretty well.

and slid together without much of a fight.

I checked the timing marks and it was spot on

so put the timing cover on for the first time since I have owned the car.

So, I have now bolted together as many parts as I could and so I'm going to take a break for a few weeks while I fix the transmission in my 911. More broken German stuff!
I installed the intake manifold.
engine mounts
Then was installing the chains to lift it off the engine stand when it suddenly spun over and knocked off the down pipe!
As you might imagine I was quite devastated but upon inspection I think I may be alight. There's a slip fit and a weld just after the turbo which is where it broke. I think I can get it welded back together. The orientation is critical though so I left the rest of it bolted to the turbo. I'm going to wait till I get the hardware for the wastgate, dry fit it all then mark the orientation before having someone weld it up. Hopefully.
I had a cup of tea then carried on. Installed the flywheel next
then the clutch
followed by the clutch release bearing
Fortunately I got my chain lengths just right so they lined up pretty well.
and slid together without much of a fight.
I checked the timing marks and it was spot on
so put the timing cover on for the first time since I have owned the car.
So, I have now bolted together as many parts as I could and so I'm going to take a break for a few weeks while I fix the transmission in my 911. More broken German stuff!
12-17-2014, 07:24 AM
#99

Great pics - allows me also to see what is up and under the engine bay of my car eg how all the timing belts are routing. Yr pic of the suction pipe made me smile; I had to drop the sump and clean out the wife's Polo this summer. Pics below of before and after
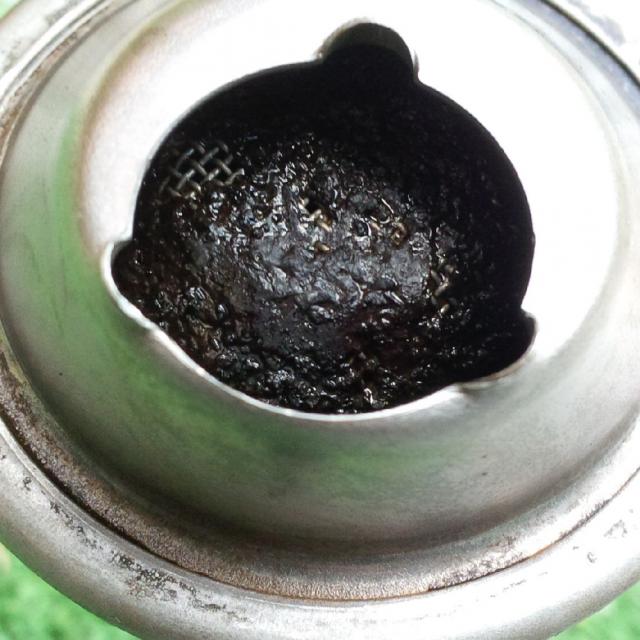
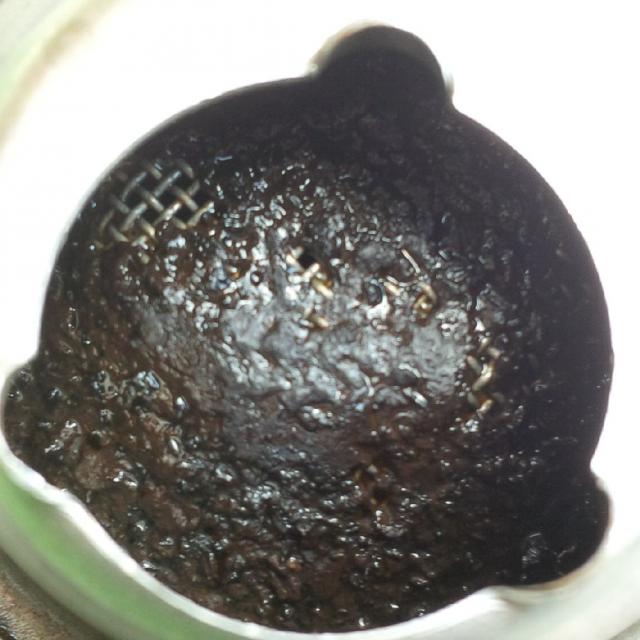
No wonder the red light came on!


No wonder the red light came on!