Audi A3: How to Install Backup Camera
Backup cameras are a common feature on most new cars, but you're out of luck on many older models. If your car doesn't have a backup camera, you can add one for a relatively inexpensive cost.
This article applies to the Audi A3 (2012-Present).
Backup cameras are quite useful and make backing up not only easier, but safer as well. That's the reason behind the requirement that all cars should have them installed from the factory by 2018, and it's why you can find them as standard equipment on even economy cars these days. But the commonality of backup cameras is still relatively new, which means that even your not-so-old Audi might not have come with one from the factory. Thankfully, however, that doesn't mean you can't add one for a relatively low cost. Here's how to retrofit a backup camera on your Audi A3.

Materials Needed
- Radio removal keys
- Flat head screwdriver
- Ratchet and common socket sizes
Step 1 – Remove the radio MMI
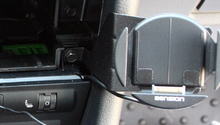
Begin by removing the side panel on the passenger side of the dash by gently prying it loose with a flat head screwdriver (look for the slot near the bottom). Remove the eight bolts inside the glove box (three on the top, two on the bottom corners, two in the rear, and one on the side). Pry the two plastic snap fittings loose, which are located on the left and right front edge of the glove box. Remove the radio/MMI unit using the radio keys, then remove the blue and green sockets by prying up on the small tabs inside them. Pull the MMI out and remove the wiring harness from the back.
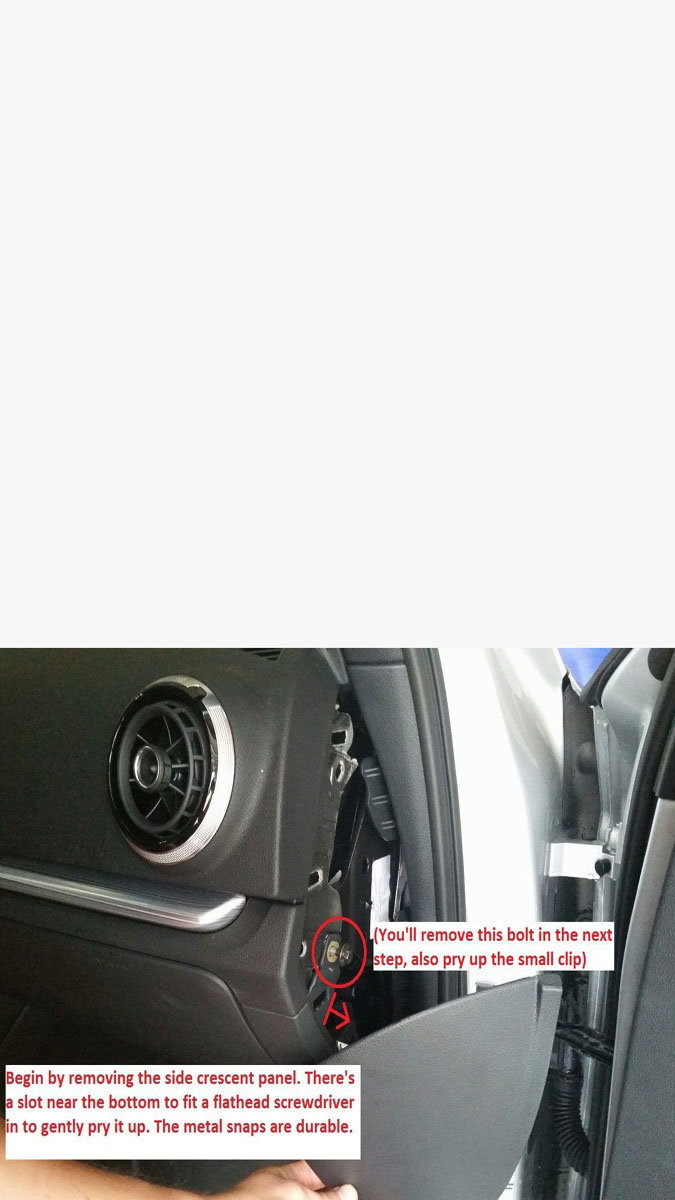
Figure 1. Remove the side panel on the passenger side of the dash. 
Figure 2. Remove the bolts in the glove box. 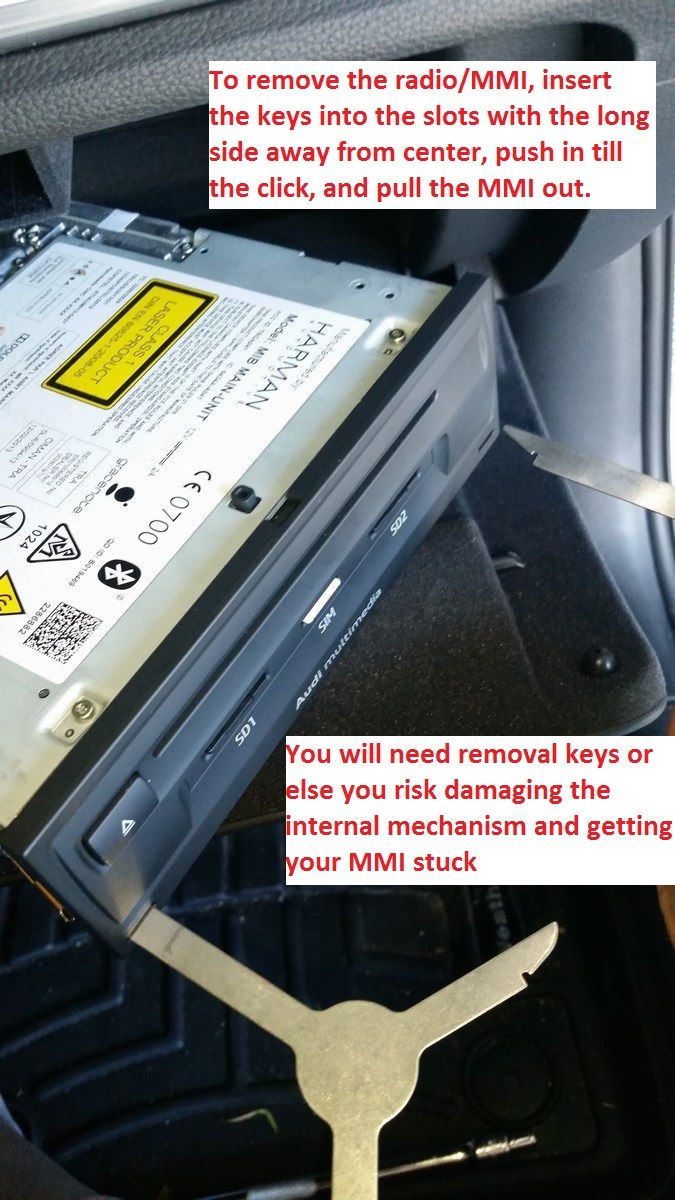
Figure 3. Remove the radio/MMI. 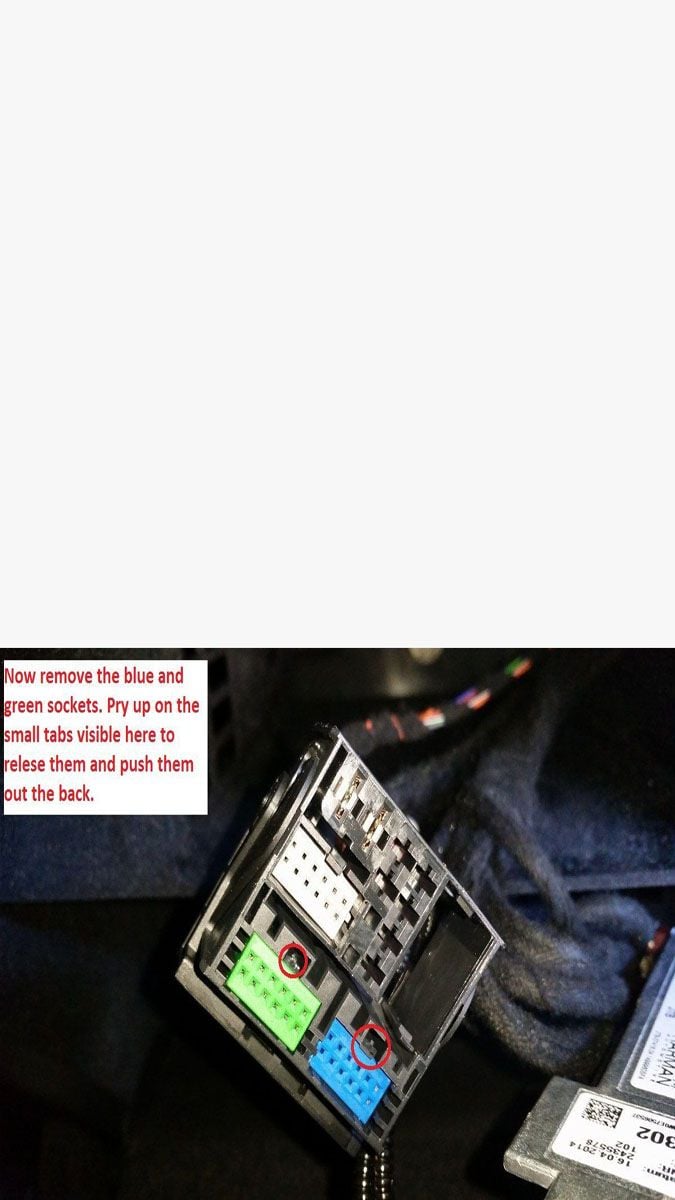
Figure 4. Remove the green and blue tabs. 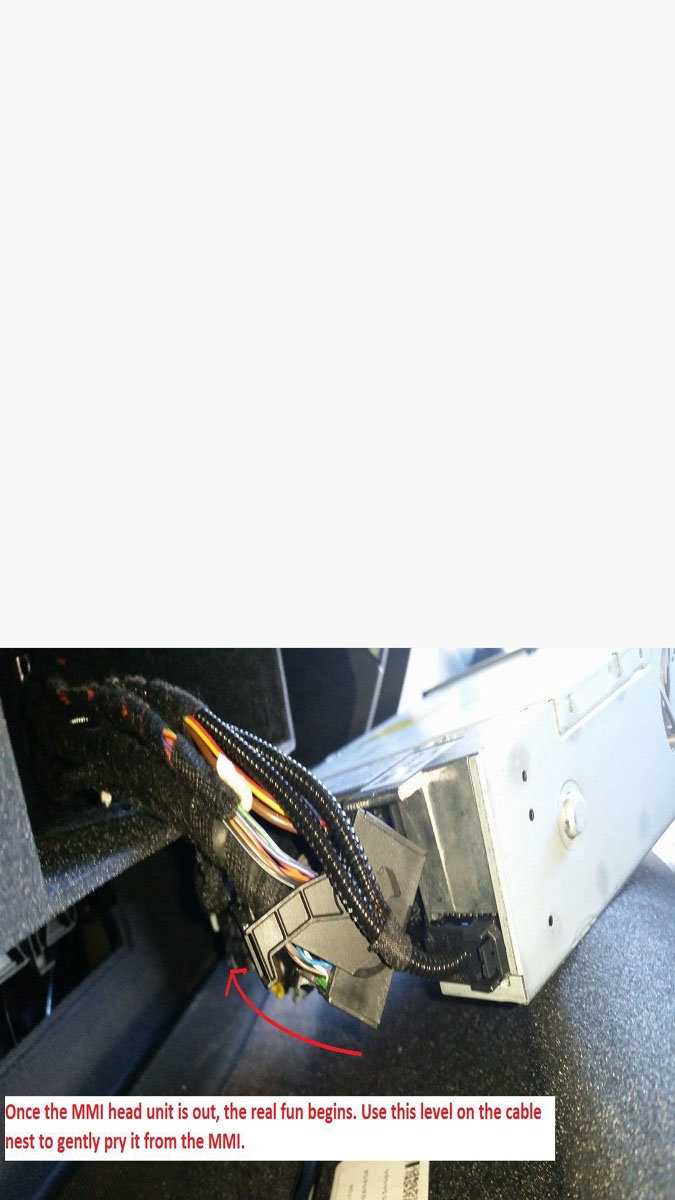
Figure 5. Remove the wiring harness from the back of the MMI.
Step 2 – Connect the backup camera wiring
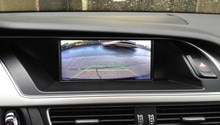
Take the video module included with the backup camera kit and install the supplied wiring as shown in Figure 6. At this point, it's a good idea to test the camera and make sure that it is working properly. Disconnect the camera and feed the wiring through the MMI slot in the glove box, which can prove to be a big challenge. With the glove box loose, you will be able to move it around if necessary.
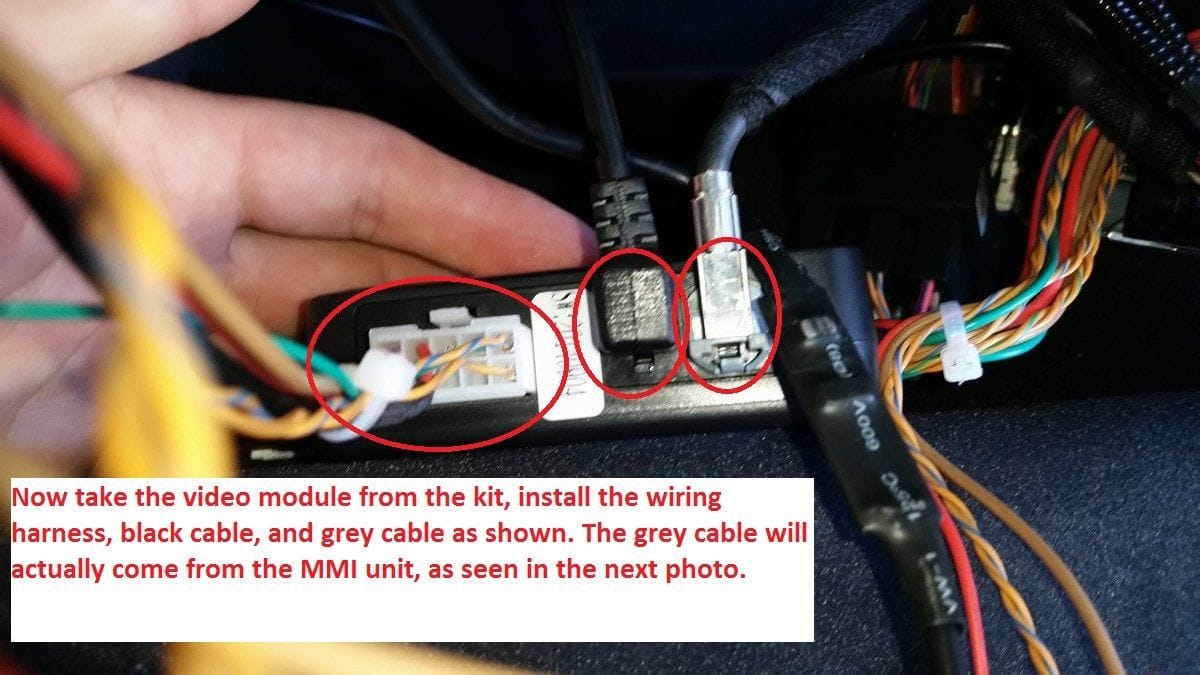
Figure 6. Install the wiring for the video module. 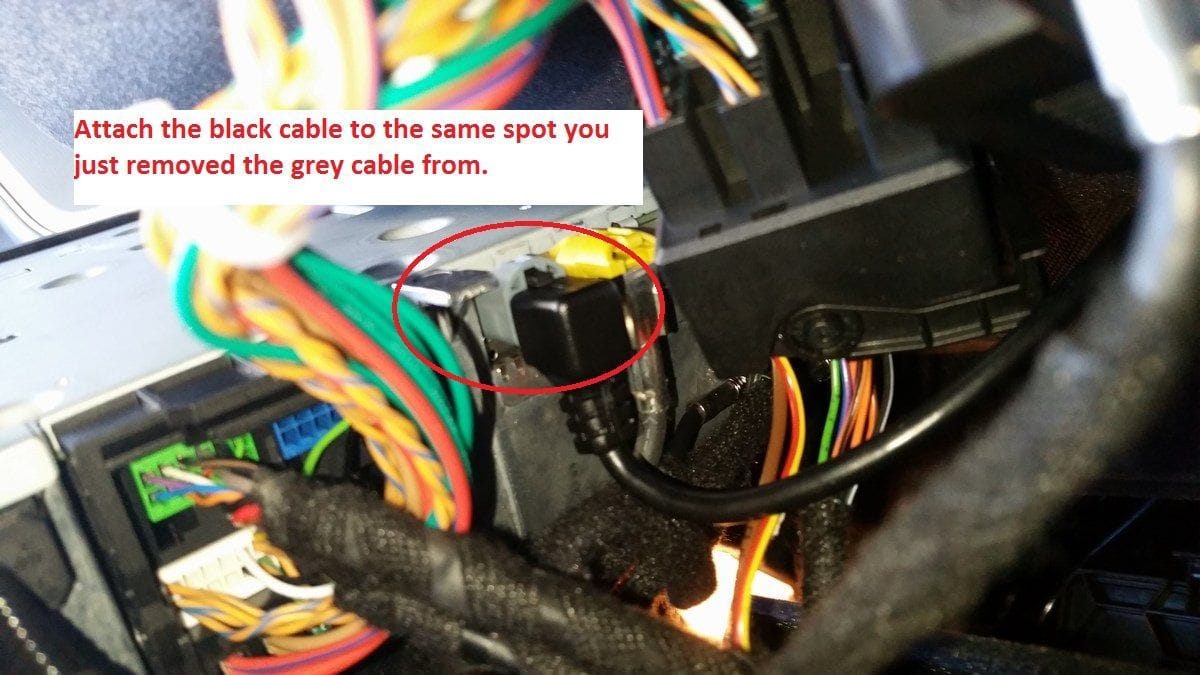
Figure 7. Install the black cable. 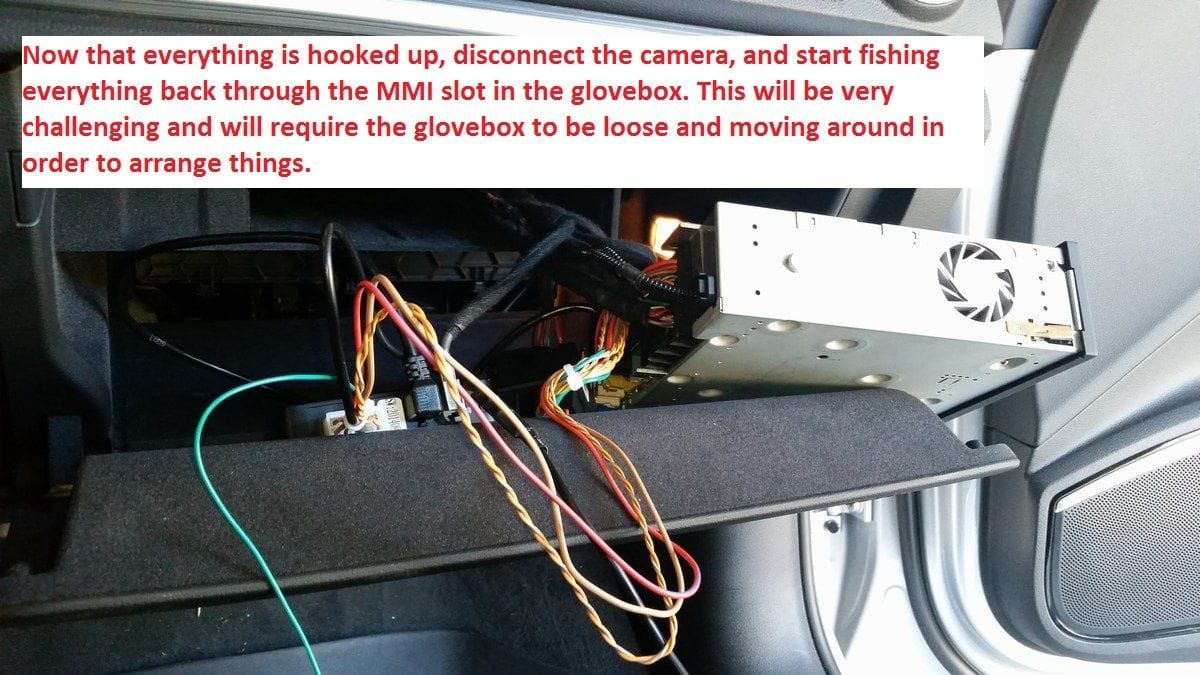
Figure 8. Feed the wiring through the MMI slot in the glove box.
Step 3 – Install the backup camera
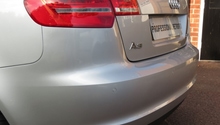
Pop the trunk and remove the trunk lid liner by first removing the plastic bits that hold it in place, then prying up to release them. You don't have to remove the entire cover, just enough to the point where you can fit your arm inside. Remove the two nuts that hold the trunk handle in place, then install the camera handle in its place. Run the wire for the camera through the trunk's extension arm and through the car, tucking it inside of the sill plates to hide it. Connect the wire to the MMI and reinstall the MMI, then the glove box bolts and dash side panel.

Figure 9. Remove the plastic pieces and pry the trunk lid liner out. 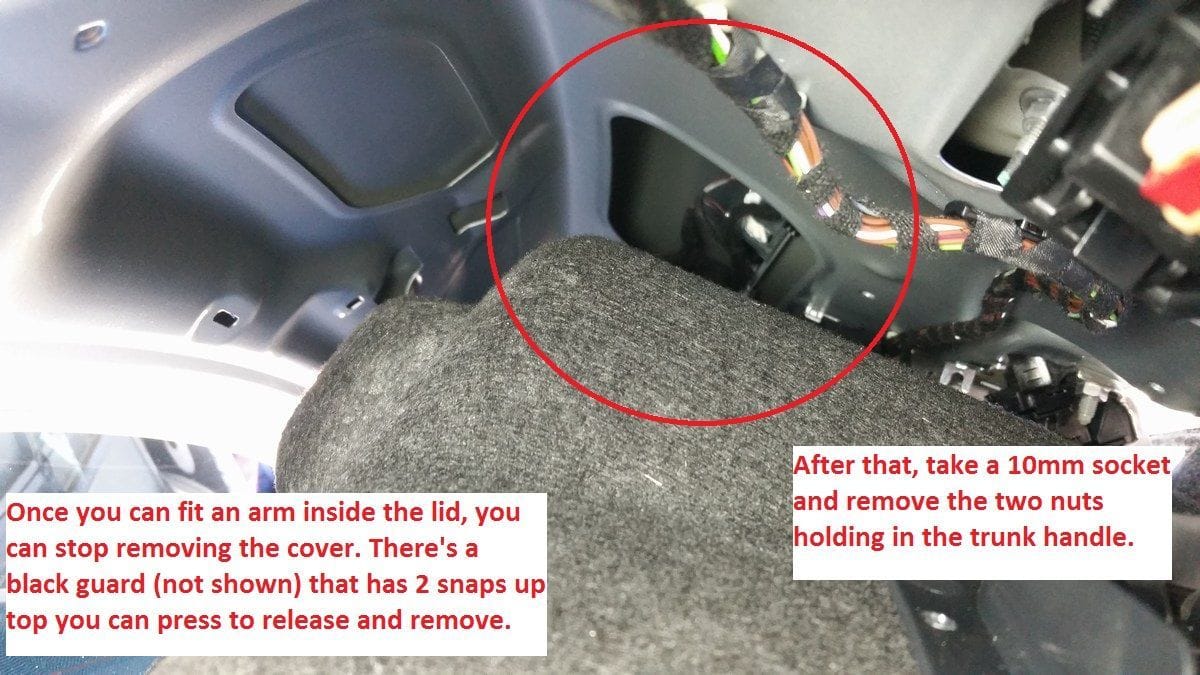
Figure 10. Remove the bolts from the trunk handle and pull it out. 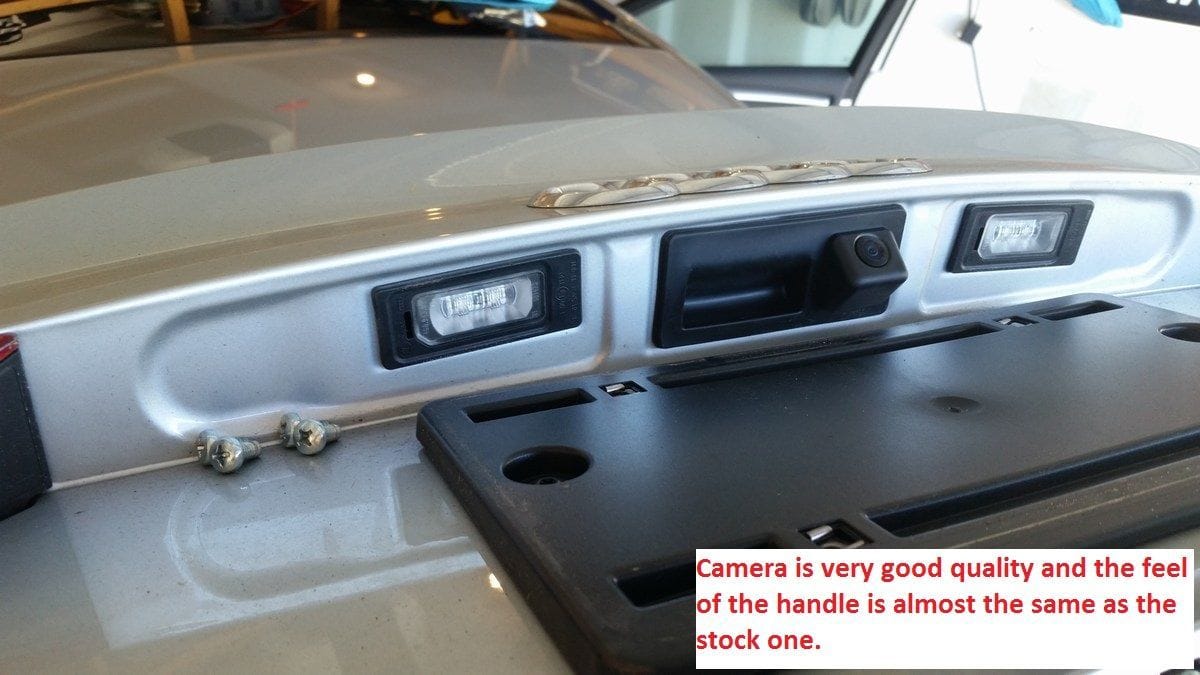
Figure 11. Install the new trunk handle. 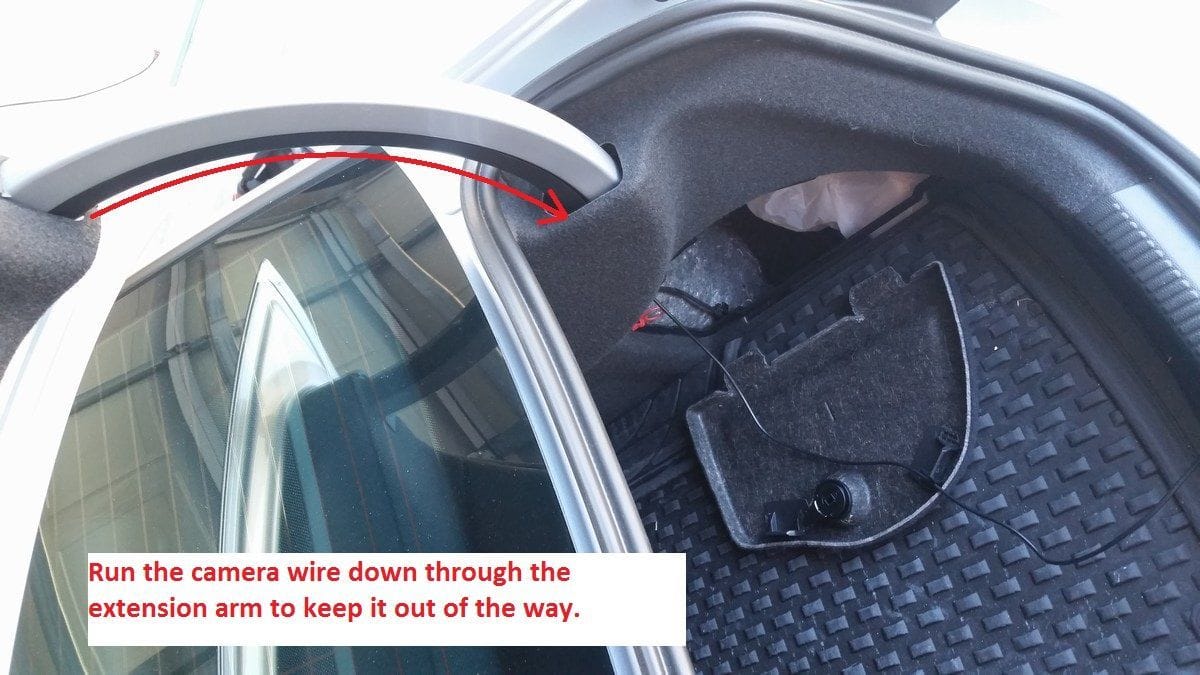
Figure 12. Run the camera's wire through the trunk's extension arm. 
Figure 13. Run the wire through the car and hide it under the sill plates.
Related Discussion
- Reverse Backup Camera Kit Install - AudiWorld