Audi A4 B7: How to Replace EVAP Purge (N80) Valve
You keep hearing that loud clicking noise coming from the engine compartment. Is it a serious internal engine problem? There's a good chance it's only the EVAP Purge Valve, and replacing it is simple job no one should be afraid to tackle.
This article applies to the Audi A4 B7 2.0t (2005-2008).
The N80 EVAP Purge Valve is a prime piece of emissions equipment that is known to fail on the 2.0t FSI engine. A failed N80 can manifest itself in many different ways, some of which include:
- P0456 fault code: EVAP System Small Leak Detected
- Loud clicking noise from the engine department
- Check Gas Cap light illuminated on the dash
Replacement of the N80 valve is a very simple task and these same instructions can be used to replace the N80 on several different VW/Audi vehicles that use the 2.0t FSI engine; Audi makes it easier due to the orientation of the engine and a simplification of the equipment tied into the engine cover. There's really no reason even those at the bottom rung of the DIY ladder would not want to tackle this job.

Materials Needed
- Several 1" worm type hose clamp
- Screwdriver
- Diagonal cutters
Step 1 – Remove engine cover
If your A4 still has the engine cover, pop it off. It should have snug fit fasteners that push into place in rubber grommets and pull right out with a little tug. You can see and get to the N80 valve without the cover removal, this just makes it a little easier.
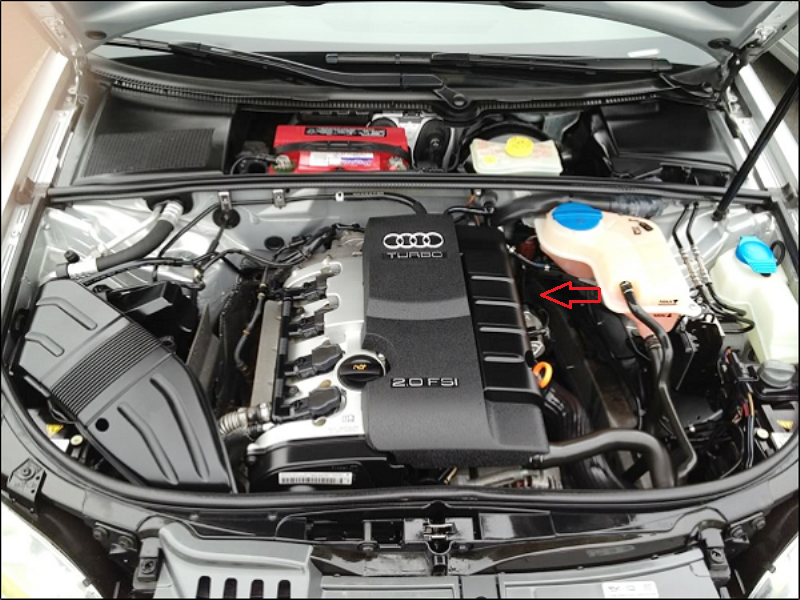
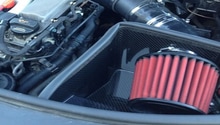
Figure 1. A4 engine compartment with cover. 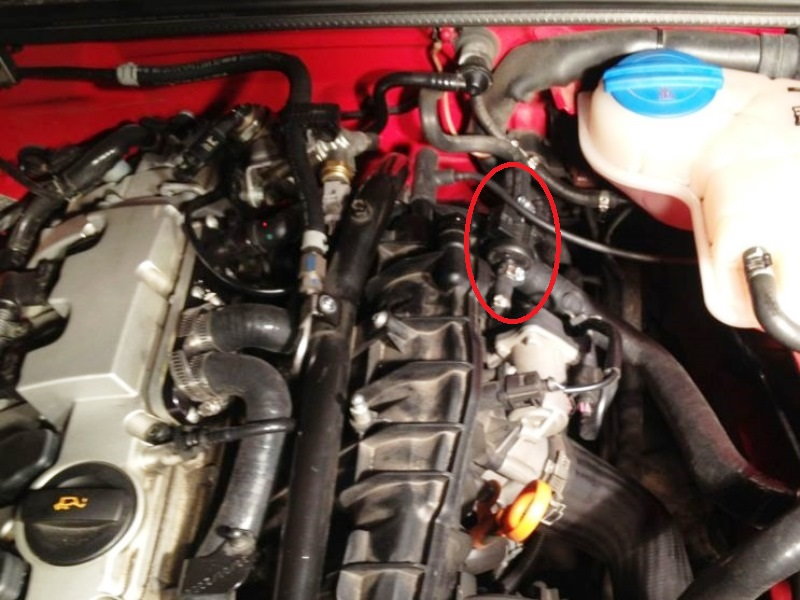
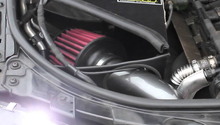
Figure 2. Evap valve location.
Step 2 – Remove N80 valve
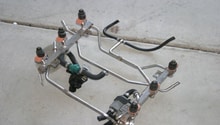
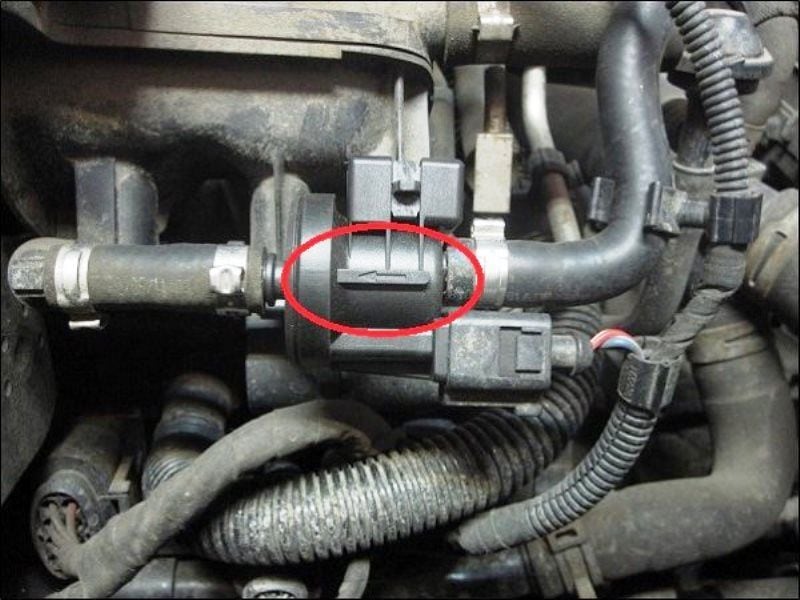
The N80 valve is located on the driver's side of the engine, near where the master cylinder is located. When you find the valve, there will be two band clamps, which firmly connect the two associated hoses onto the valve (Figure 3). These are stock clamps which will be there if the valve has never been replaced before. If there, remove them by using your diagonal cutters where the crimp is. Be careful not to damage the rubber hose underneath. This will destroy the clamps, but it is the only way to remove them and why you'll need a pair of replacement hose clamps.
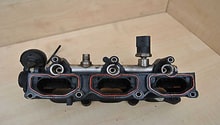
Once the clips are removed, remove the hoses from each end of the valve. Pull the valve off of its engine mount (red box in Figure 4) and disconnect the wiring harness (green box).
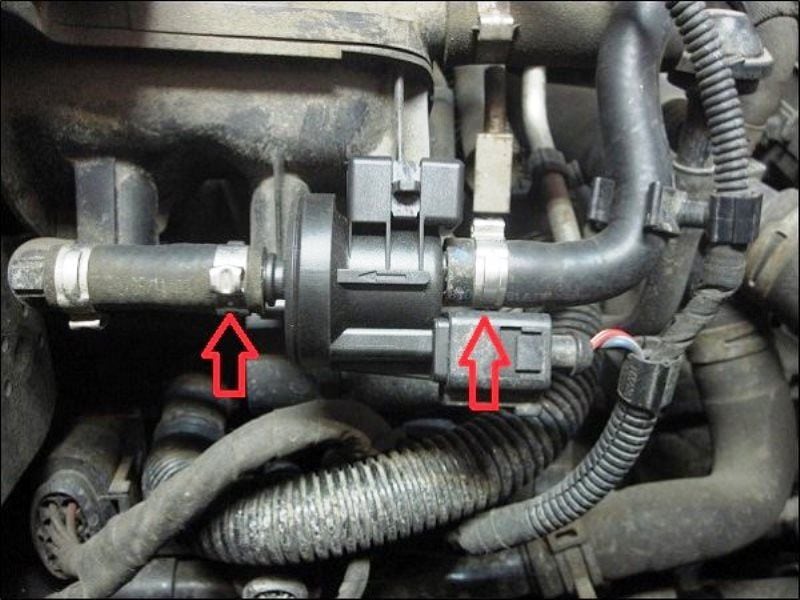
Figure 3. N80 valve hose clamps. 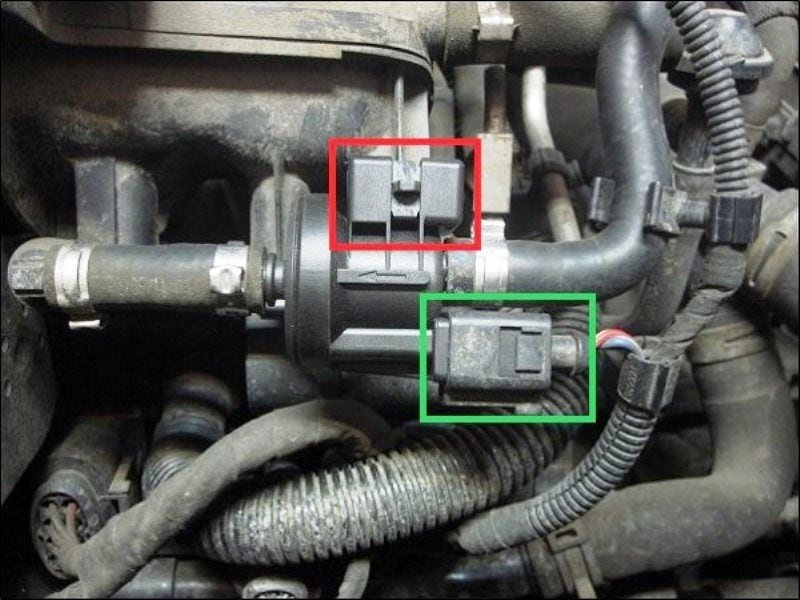
Figure 4. N80 valve connections.
Pro Tip
Twisting the hose to break it free before attempting to remove them will make the job a lot easier.
Step 3 – Replace N80 valve
On the valve, you'll notice there is an arrow (Figure 5). The point of the arrow should be inline with the flow, or going towards the engine.
If installing new hose clamps, put them on the rubber hoses before you install the new valve. Push the rubber hoses onto the nipples of both ends of the N80 valve. Push the valve onto the engine mount. Orient the wiring harness to the valve and insert it in, listening for an audible click telling you it is firmly connected. Tighten the hose clamps with the screwdriver.
Pro Tip
When re-tightening hose clamps, placing them back in the same position they were before helps avoid leaks. If the hose clamp comes over the end of the hose, the connection is likely to leak.
Step 4 – Replace engine cover
Place the engine cover back into place. You can use the oil filler as a guide. Once located, the connectors will pop down into place with a firm hand. If the cover looks out of place, it probably is. Re-align and try again.
Featured Video: N80 Valve DIY Install on 2.0t FSI
Related Discussions
- Evap Purge Valve Location - AudiWorld.com
- Small Leak EVAP System CEL P0456 - AudiWorld.com
- EVAP Problems Diagnostics - AudiWorld.com