Audi A6 C6 3.2L V6: How to Inspect and Clean Intake Valve Carbon Deposits
If your vehicle isn't running as well as it used to, don't assume that it's just because it's getting older. Carbon buildup is a relatively common issue among higher mileage A6 vehicles, especially those with 3.2-liter V6 engines. Here are some tips for inspecting and cleaning engines with carbon deposits.
This article applies to the Audi A6 C6 (2005-2011).
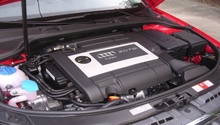
Late model Audi A6 vehicles feature Direct Injection (DI) engines. In this type of engine, fuel is sprayed into the combustion chamber of the engine under high pressure. The result is an increase in carbon deposits, an issue that becomes increasingly problematic as the engine accumulates miles. Carbon deposits build up on the top of the intake valves and can lead to performance and drive-ability problems. Common symptoms include stumbling, misfiring, hard starting, and hesitation. The good news is that it's possible to clean dirty intake valves on your own, even if you don't have extensive mechanical knowledge or experience.

Materials Needed
- Intake system cleaner
- Small brush or pick
- Rag or shop towel
- Allen bits, 6mm 8 mm or 12 point spline bits
- Torx wrench
- Aluminum foil and paper towesls
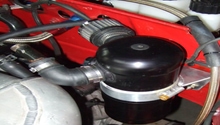
Step 1 – Apply the intake system cleaner
Depending on the type of cleaner you use, you'll likely need to spray it into the throttle body with the vehicle's engine running or disconnect a vacuum hose, such as the PCV hose, that connects to the intake manifold valve. If this is the case, slowly pour the cleaner into the hose with the engine running. You may need to use a small funnel to avoid spills. Then, rev the engine between 1000 and 1500 RPMs as you pour the cleaner into the intake manifold.
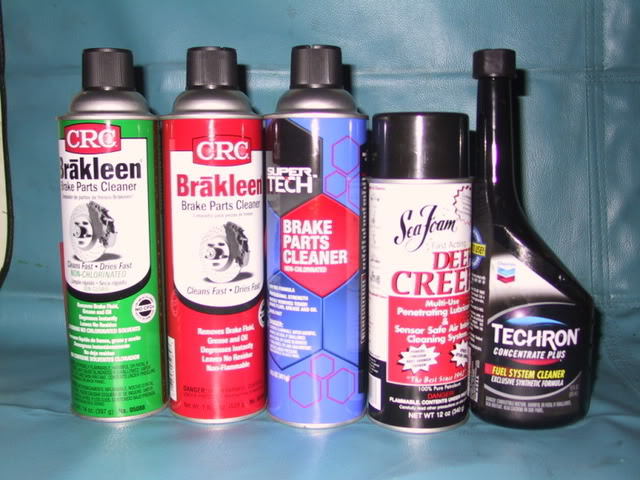
Pro Tip
Some owners recommend CRC brake parts cleaner, Sea Foam, and Green CRC.
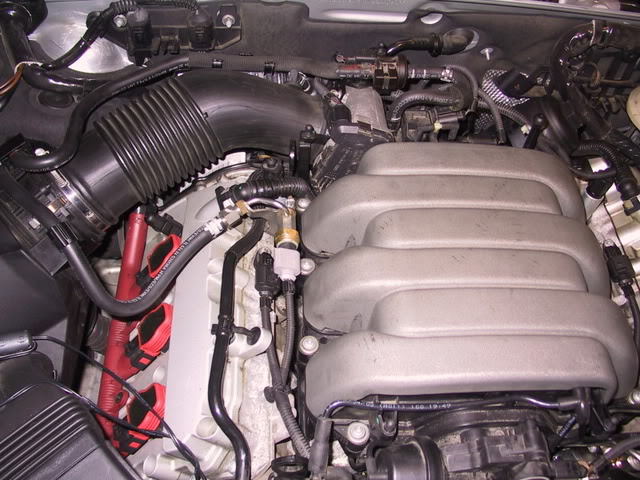
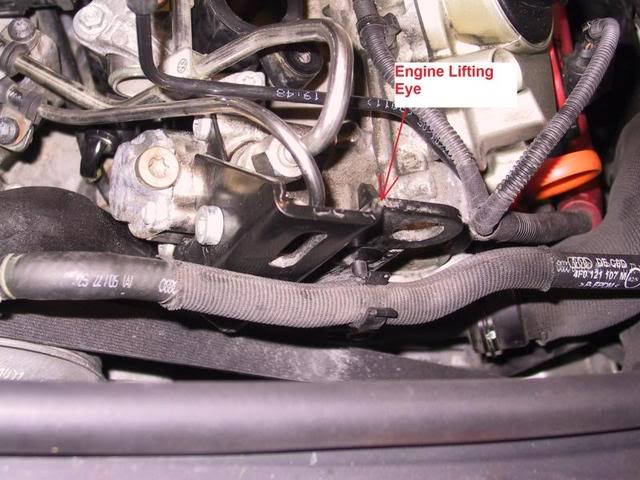
Step 2 – Access the intake manifold
It may be necessary to remove the intake manifold if your valves are still dirty after Step 1.
Remove the engine lifting eye and left cylinder head, using an Allen bit 6mm for the bolt on the side and 8mm for the two front bolts.
Step 3 – Remove high pressure line screws and nuts
Remove the screws holding the high and low pressure fuel lines. Remove the flare nuts for the high pressure fuel line. Set the fuel line aside once it's removed.
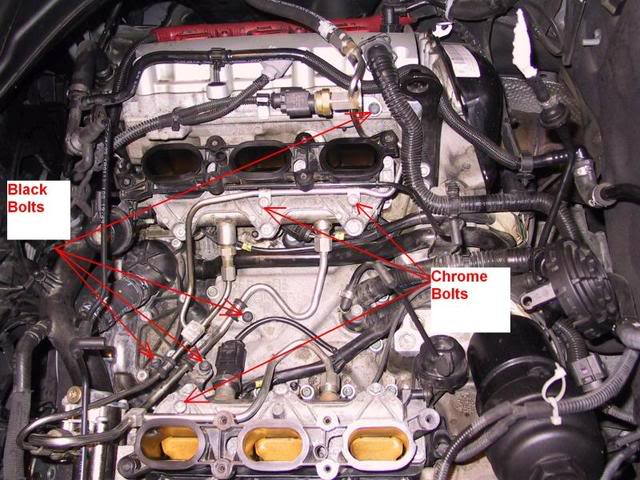
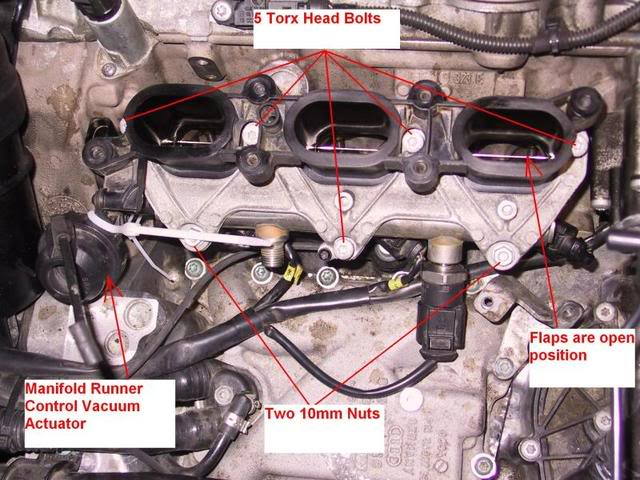
Step 4 – Remove lower intake assembly
Remove the five Torx head bolts and two 10mm nuts on the lower intake holder. Then, pull out the intake assembly. Place rags or shop towels underneath the lower intake to catch any leftover fuel in the fuel rail.
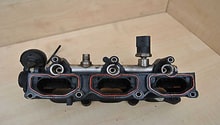
Step 5 – Clean the intake valves
Remove the intake splitters to expose the valves. You should be able to clearly see any built-up carbon deposits.
Use aluminum foil or a clean shop towel to cover any intake holes you aren't cleaning. Spray your intake manifold cleaner into the valve and allow it to soak for at least 30 minutes to loosen up the deposits. Once the deposits have been loosened, use a small brush or pick to get them out. Then, use a rag or paper towel to soak up any cleaner residue. Repeat with other valves.

Step 6 – Reassemble parts
Reassemble any parts you've removed in the reverse order, starting by replacing the lower intake assembly. Replace the fuel line along with the screws and nuts to hold it in place. Replace the left cylinder head and engine lifting eye.