Audi A6 C6: Diagnostic Guide for Adaptive Headlight Problems
Adaptive headlights are one of the most complex mechanical features in the Audi A6 C6. This article will explain some of the ways you can solve problems with adaptive headlights.
This article applies to the Audi A6 C6 (2005-2011).
The Audi A6 C6 has one of the most advanced adaptive headlight systems available to luxury cars. The adaptive headlight system not only swivels the headlights to follow curves, but it also has sensors to help detect pedestrians and animals in the road. Unfortunately, when you include such a complicated feature, there are bound to be some problems. It's understandable to hesitate spending the money to replace the headlight since it costs five times that of a regular headlight, so here are a few things you can check to narrow down what's wrong with the headlights before taking out your wallet.

Materials Needed
- Flathead screwdriver
- Torx screwdriver
- Extra wires
- Soldering iron w/ solder
- Electrical tape or heat shrink wrapping
- VCDS
Scenario 1 – Is it the wiring?
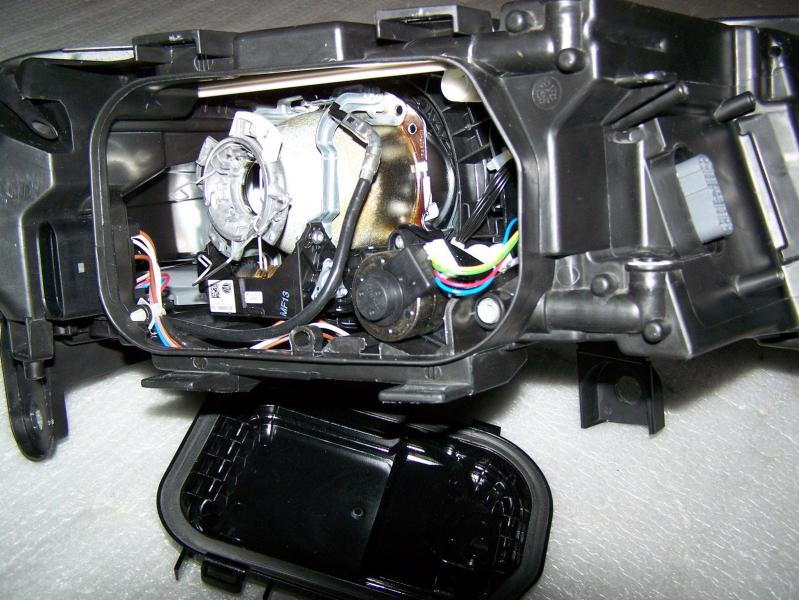
The most common cause of error occurs with the wiring connected to the motors. Remove the headlight and open up the cover. Inside you'll see a bundle of wires. Examine each wire carefully. Over time these wires will get worn down to the point where the insulation wears off or the wire gets completely severed. There is a simple fix for it. Take the broken wire and solder on a new piece of wire to reestablish the connection. Make sure that you cover the soldered wire in electrical tape or heat shrink to protect it from moisture and corrosion. Once the wire is connected, the headlight should start working again with no further adjustment needed.
Scenario 2 – Could it be a software error?
If you receive an "adaptive headlight defective" warning, but haven't noticed a problem with your headlights moving, then it's possible that there is a software error. There's not much that can be done for this type of error other than taking the car to the dealership to the have the software updated.
Scenario 3 – Is it the adjustment motor?
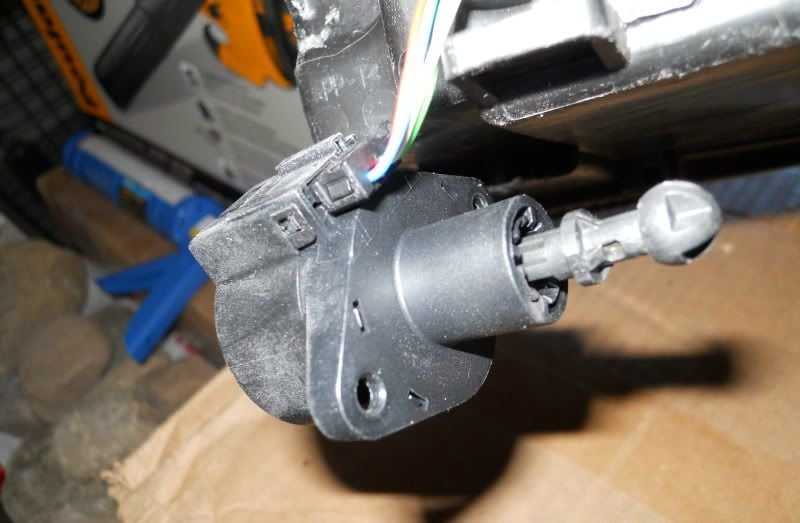
If the cause of the problem is indeed mechanical, then the first place to check is the adjustment motor. If you remove the headlight, you will find it mounted near the top of the headlight with a wire going to it. The motor is responsible for adjusting the headlights. If one of the gears inside the motor were to break, then it will fail. To fix it you'll either need to remove the motor and replace the broken gear or replace the motor entirely.
Scenario 4 – Are the headlights not adjusting or are you getting a headlight range control defective error?
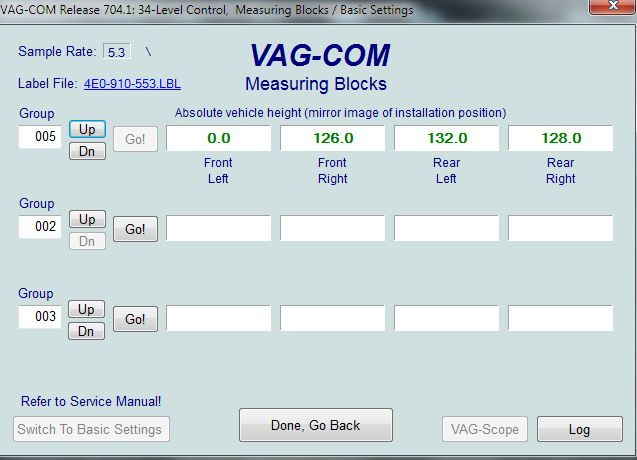
Sometimes, you may get a headlight range control defective error. Or, you will notice that your headlights aren't adjusting despite not receiving an error. In this case it's a software problem that can be fixed if you manually adjust the headlights using VCDS. Navigate to "headlight range option" in the VCDS software suite and then select basic settings; then, select the appropriate settings to adjust your lights. The software will correct the positions, and the headlights will then adjust. If that doesn't work, you can also try resetting the headlights to their default position using VCDS.
Scenario 5 – Is it the self-leveling sensor?
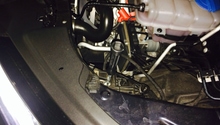
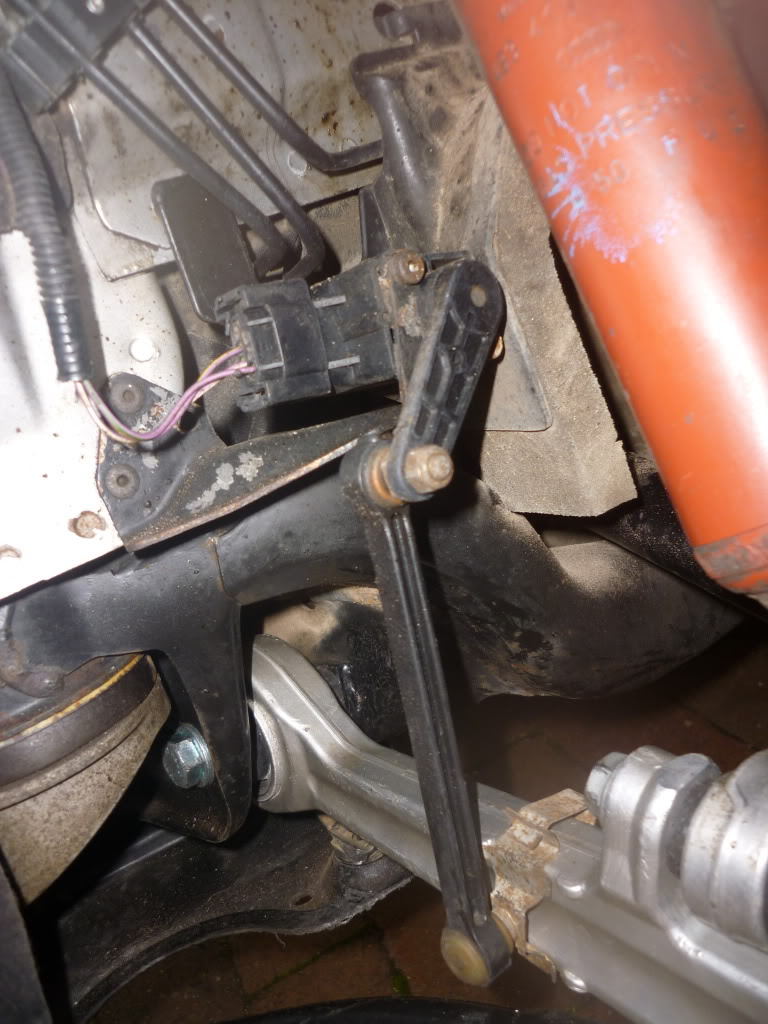
If you've noticed that your headlights are constantly pointed down and not leveling correctly, then you may have a problem with the self-leveling sensor. The sensor for each headlight is located on the lower control arms. You can access the sensors by removing the front wheel wells. Check the electrical connector going to the sensor for any potential issues there, then check the sensor for damage. If the issue is being caused by the sensor, then you'll have to replace it.
Related Discussions
- Adaptive Lights Question on 2005 Audi A6 - AudiWorld.com
- Adaptive Headlight Defective - AudiWorld.com