Audi A6 C6: How to Replace Serpentine Belt
Don't neglect the general inspection of your car during routine maintenance. If your serpentine belt is getting worn, better replace it sooner rather than later.
This article applies to the Audi A6 C6 (2004-2010).
If only our cars would tell us when something is about to go wrong before it actually does. What a wonderful world that would be. One such item that often alerts us after the fact when we are stranded on the side of the road is the serpentine belt. If you are getting up there in mileage, around 60,000 or more, and you've never changed the serpentine belt, chances are it's really time. Don't fret because changing the serpentine belt is really easy on these cars. You only need a few standard tools (and about 30 minutes) and you can be done with this job in the comfort of your own garage. You don't need to spend a ton of money taking your A6 to a pro to do this job for you. Save your cash by reading this guide and get on with it.

Materials Needed
- Ratchet and socket set (17mm specifically)
- Breaker bar
- T50 bit and driver or ratchet
- Replacement belt
- Belt tensioner pulley (optional)
Step 1 – Remove engine cover and locate belt
Park your car on a flat, level surface and pop the hood.
- The engine cover simply pops right off. Grab the upper left and lower right corners then lift. Set it aside.
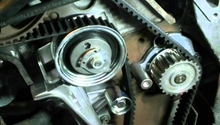
- From the front right, or passenger side, locate the alternator and the belt you are going to replace is wrapped around this pulley and throughout the front of your engine.
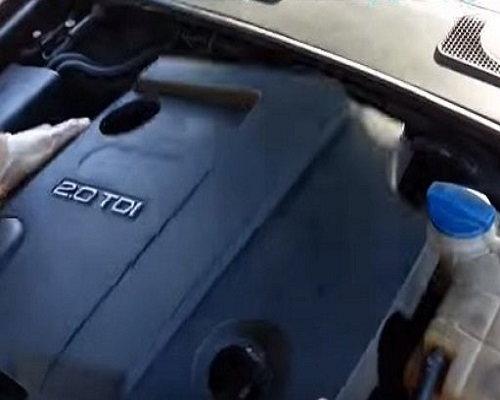
Figure 1. Remove the engine cover. 
Figure 2. This is the belt you are looking for.
Step 2 – Remove air cleaner cover and belt shroud
The space is tight in here, so you'll need to make some room as well as get an additional cover out of the way.
- There are simple clips holding the air cleaner cover in place that get disengaged with an easy pop with a flat head screwdriver. Set the cover aside.
- The belt guard or shroud is a plastic cover that wraps over the top of the belt and the clip is the same here, just pop it open with a screwdriver. Set it aside.
- You should now be able to see most of the belt. The area is still tight, but you have access for all that needs done at this point.
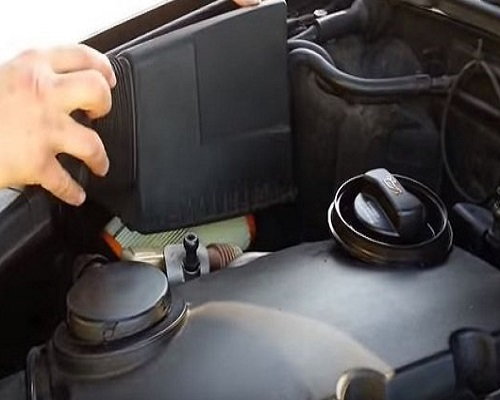
Figure 3. Remove the air cleaner cover. 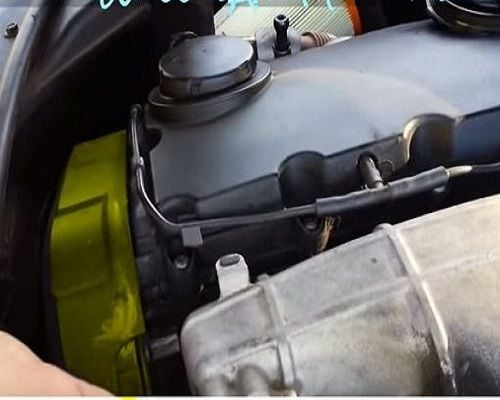
Figure 4. Remove this belt shroud or protective cover by flipping the locking clip open.
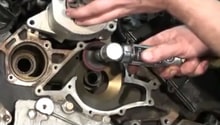
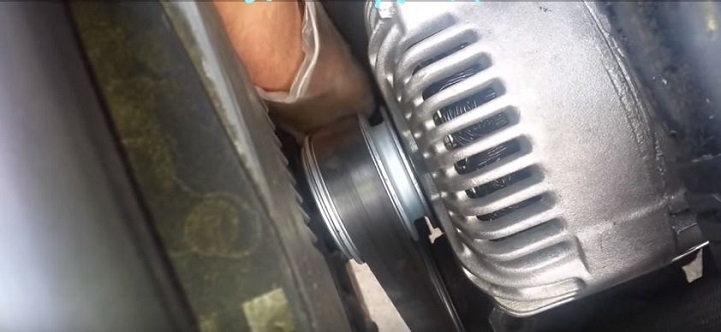
Step 3 – Loosen the belt tensioner
Locate the belt tensioner, which is almost directly below the alternator pulley.
- The tensioner is a very small pulley with a 17mm nut in the dead center of it.
- Use a ratchet and breaker bar with a 17mm socket and put it on this nut.
- Turn the nut clockwise and the entire tensioner pulley will move, not just the nut.
- This movement creates slack in the serpentine belt.
Step 4 – Remove and replace serpentine belt
When you turn the pulley clockwise, you release the tension in the belt, creating slack for easy removal.
- When there is ample slack in the belt, hold the wrench in place on the tensioner with one hand.
- With the other hand, remove the belt from around the alternator pulley.
- You can slowly release your hold on the pulley, letting it go back into position.
- The rest of the belt can be pulled out, but don't force it if you feel any tension. It probably just needs routed around another pulley.
- Follow the guideline (usually a graphical set of instructions) that shows you how to install the new belt.
- Make sure you install the belt in the correct direction and in the following order: idler roller, coolant pump, power steering pump, A/C compressor, crankshaft, tensioner and the alternator last. You can really do it in any order you wish, so long as you are following the correct routing as indicated on your belt packaging. Normally, doing the alternator last is the easiest when you have to hold the tensioner in position to create slack to install the belt on the last pulley.
- Once the belt is installed, reinstall the shroud or cover and lock the clip back into position.
- Reinstall the air cleaner cover and make sure it locks into position.
- Reinstall the engine cover.
- Drop the hood.
- Take her for a spin.
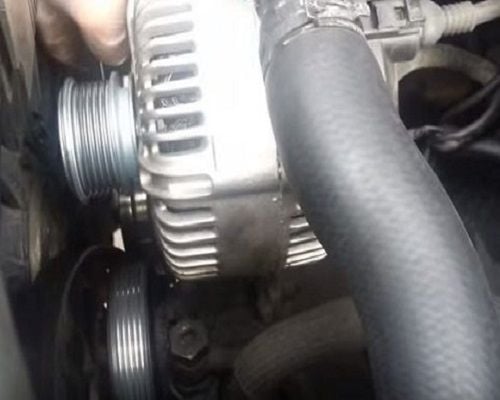
Figure 6. While holding the tensioner bolt with one hand, slide the slackened belt off of the alternator pulley. 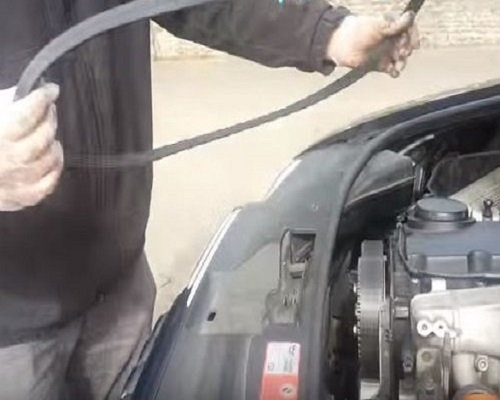
Figure 7. The old belt will pull right out. 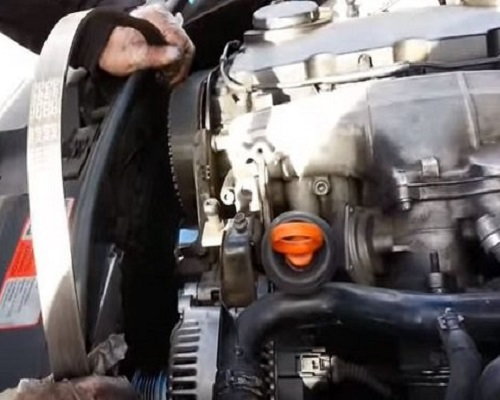
Figure 8. Make sure you have the belt in the correct direction and then route it around the pulleys according to the packaging instructions.
Featured Video: How to Replace Auxiliary Belt on Audi A6
Related Discussions
- 3.2L FSI. What's Wrong with Belt Tensioner and How to Replace - AudiWorld
- Serpentine/Belt Tensioner 3.2 - AudiWorld
- Noise After Replacing Serpentine Belt - AudiWorld
- Did 95k Service and Found This - AudiWorld