LP Fuel Pump DIY Replacement – Audi A4 B7 Quattro
[insert_php] if ( function_exists(‘yoast_breadcrumb’) ) {yoast_breadcrumb(‘ ‘,’ ‘); } [/insert_php]
By: betyouaint
Following some recent fueling issues and a suspicious diagnosis from Audi that suggested that the in-tank fuel pump was faulty, I decided that I’d forgo their $950 quote and do the job myself. I ordered the part from Europa along with a new seal and the blanking cap (for the extra pipe stub that is apparently on all replacement pumps now) for around $208. I tried to find a B7 DIY but could only find a couple of B6 DIYs, which promised that the job was practically the same. Although it is somewhat similar, there are definite differences between the two jobs.
Before starting, make sure you have minimal fuel in your tank. I was at less than 1/8 of a tank with around 30miles indicated range remaining. This was well under the rim of the pump but less would have been better still. Anymore that ¼ of tank and you risk the fuel level being higher than the pump seal and having it gush into the car.
I started by removing the rear seat, which involves yanking up on the front edge of the seat around the 1/4 and 3/4 points across the width of the seat. I’d don’t have heated seats so there was nothing else that required disconnecting.
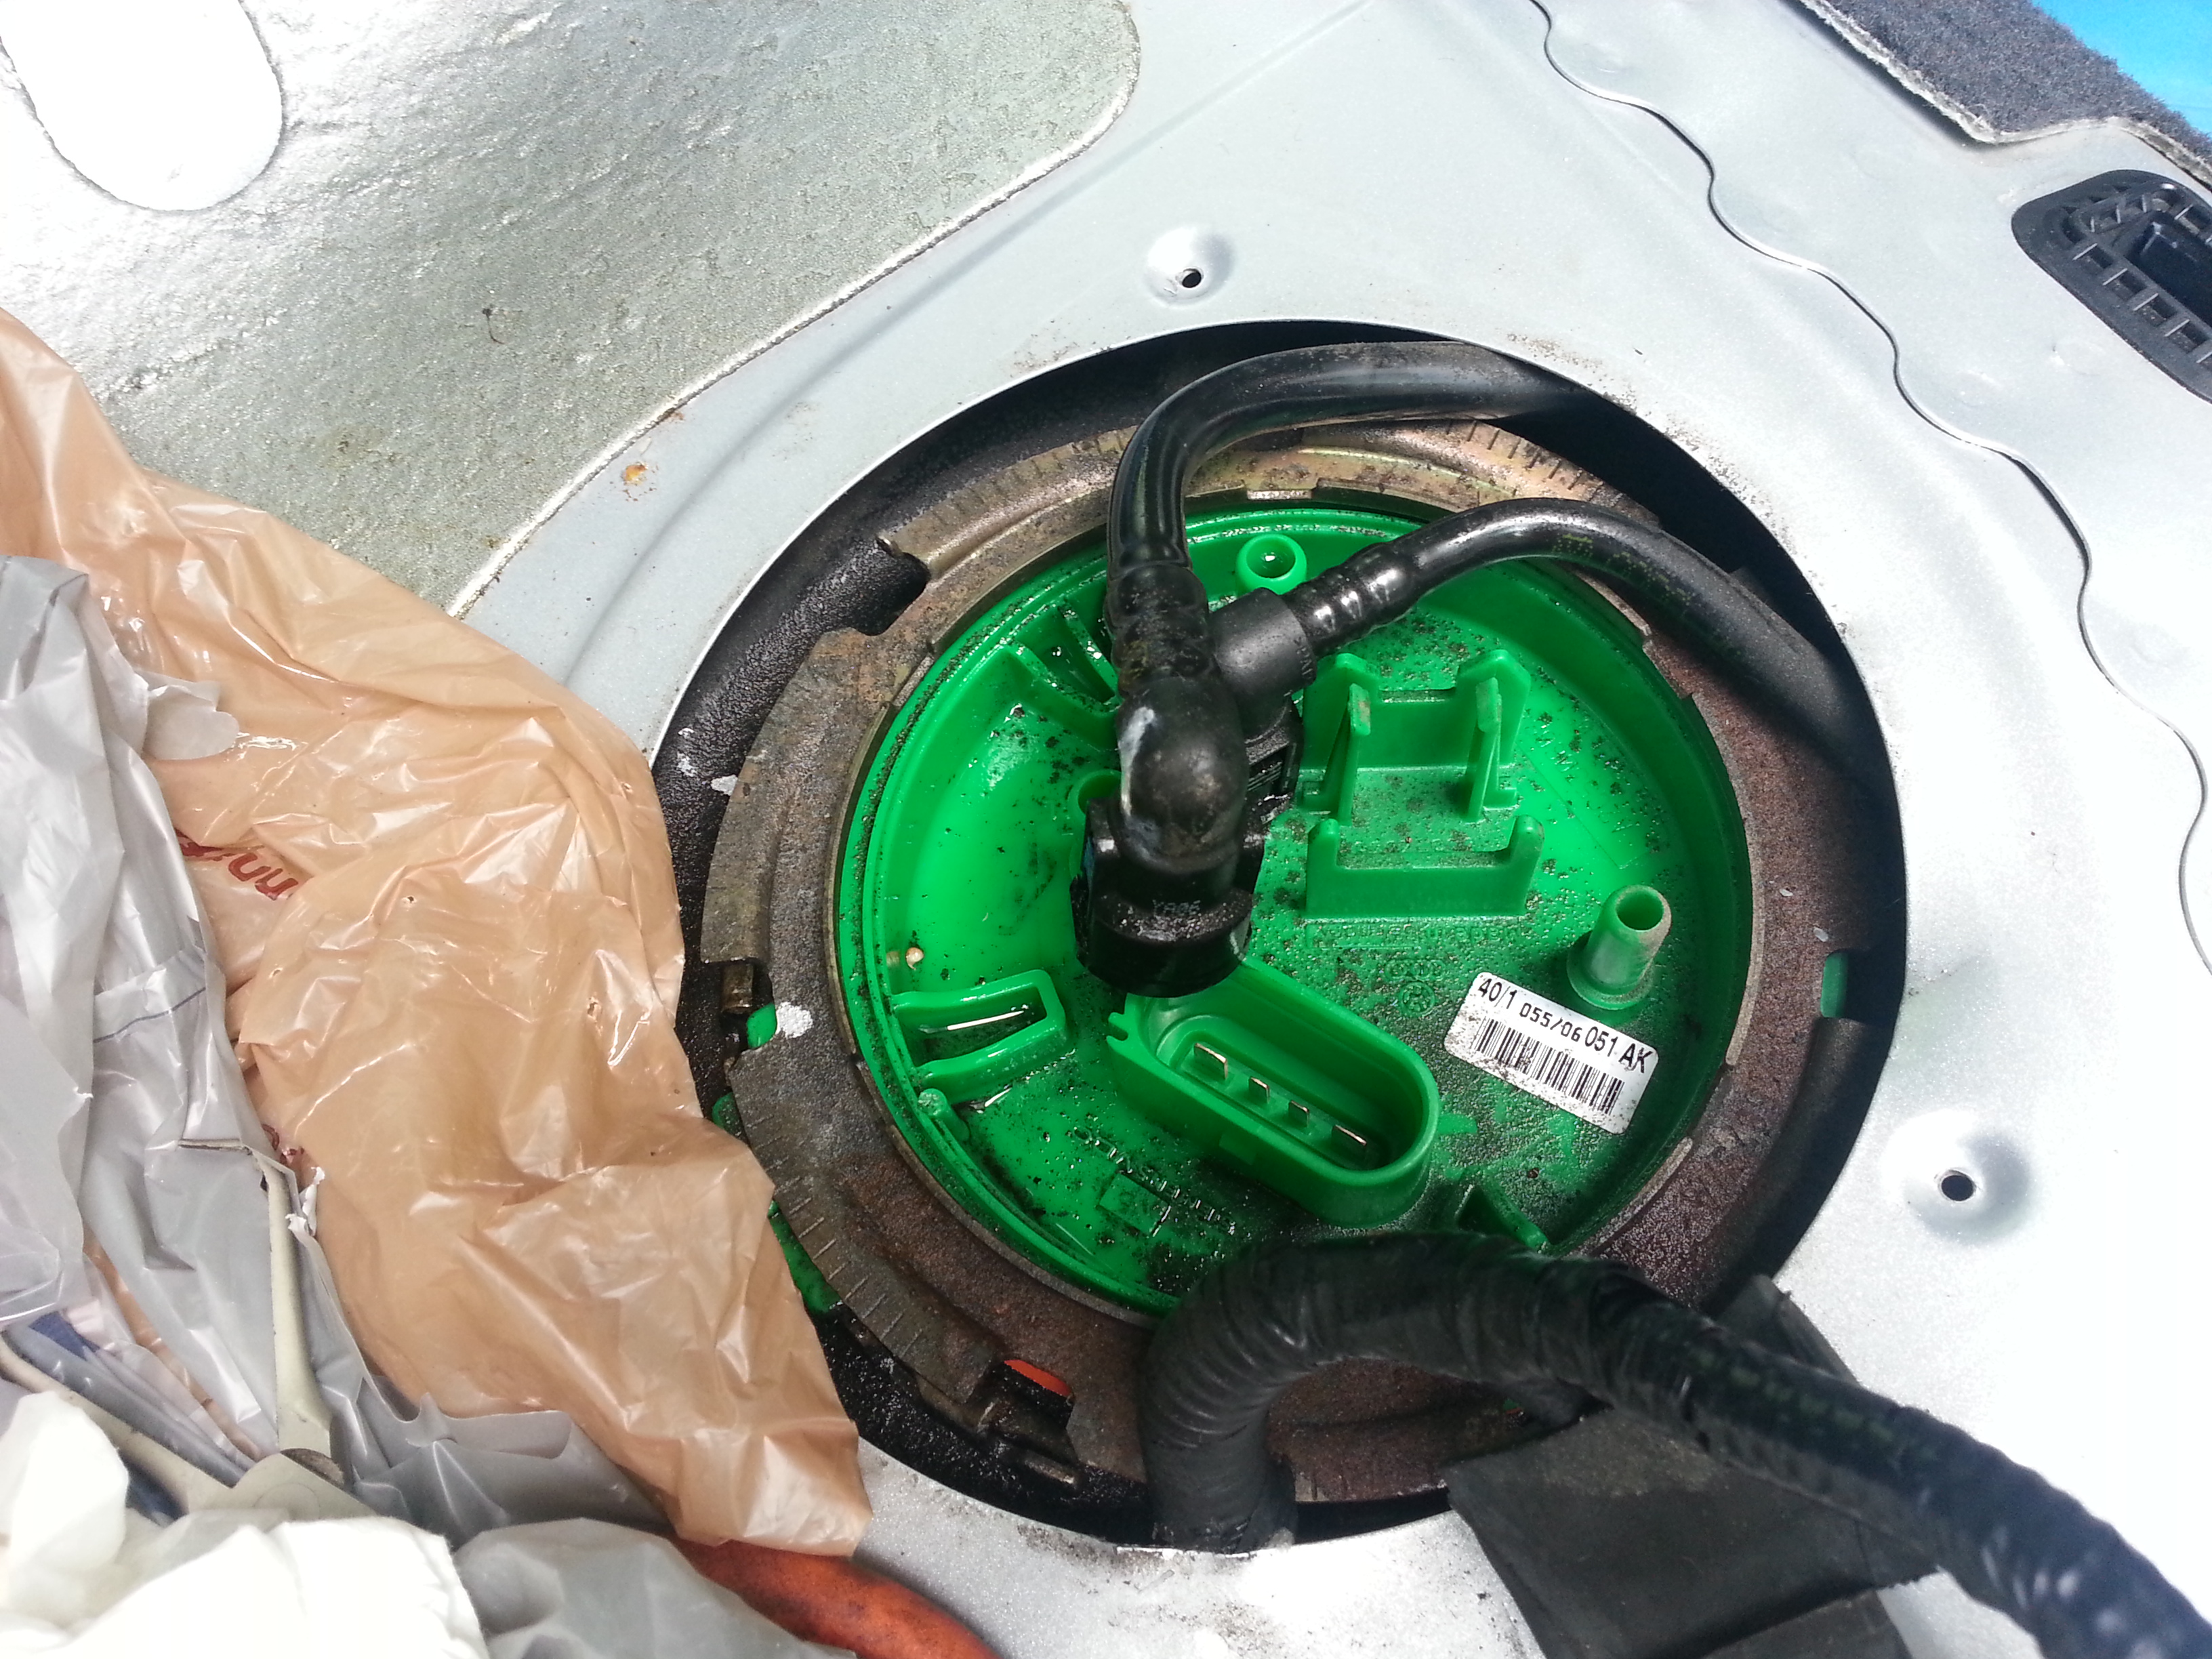
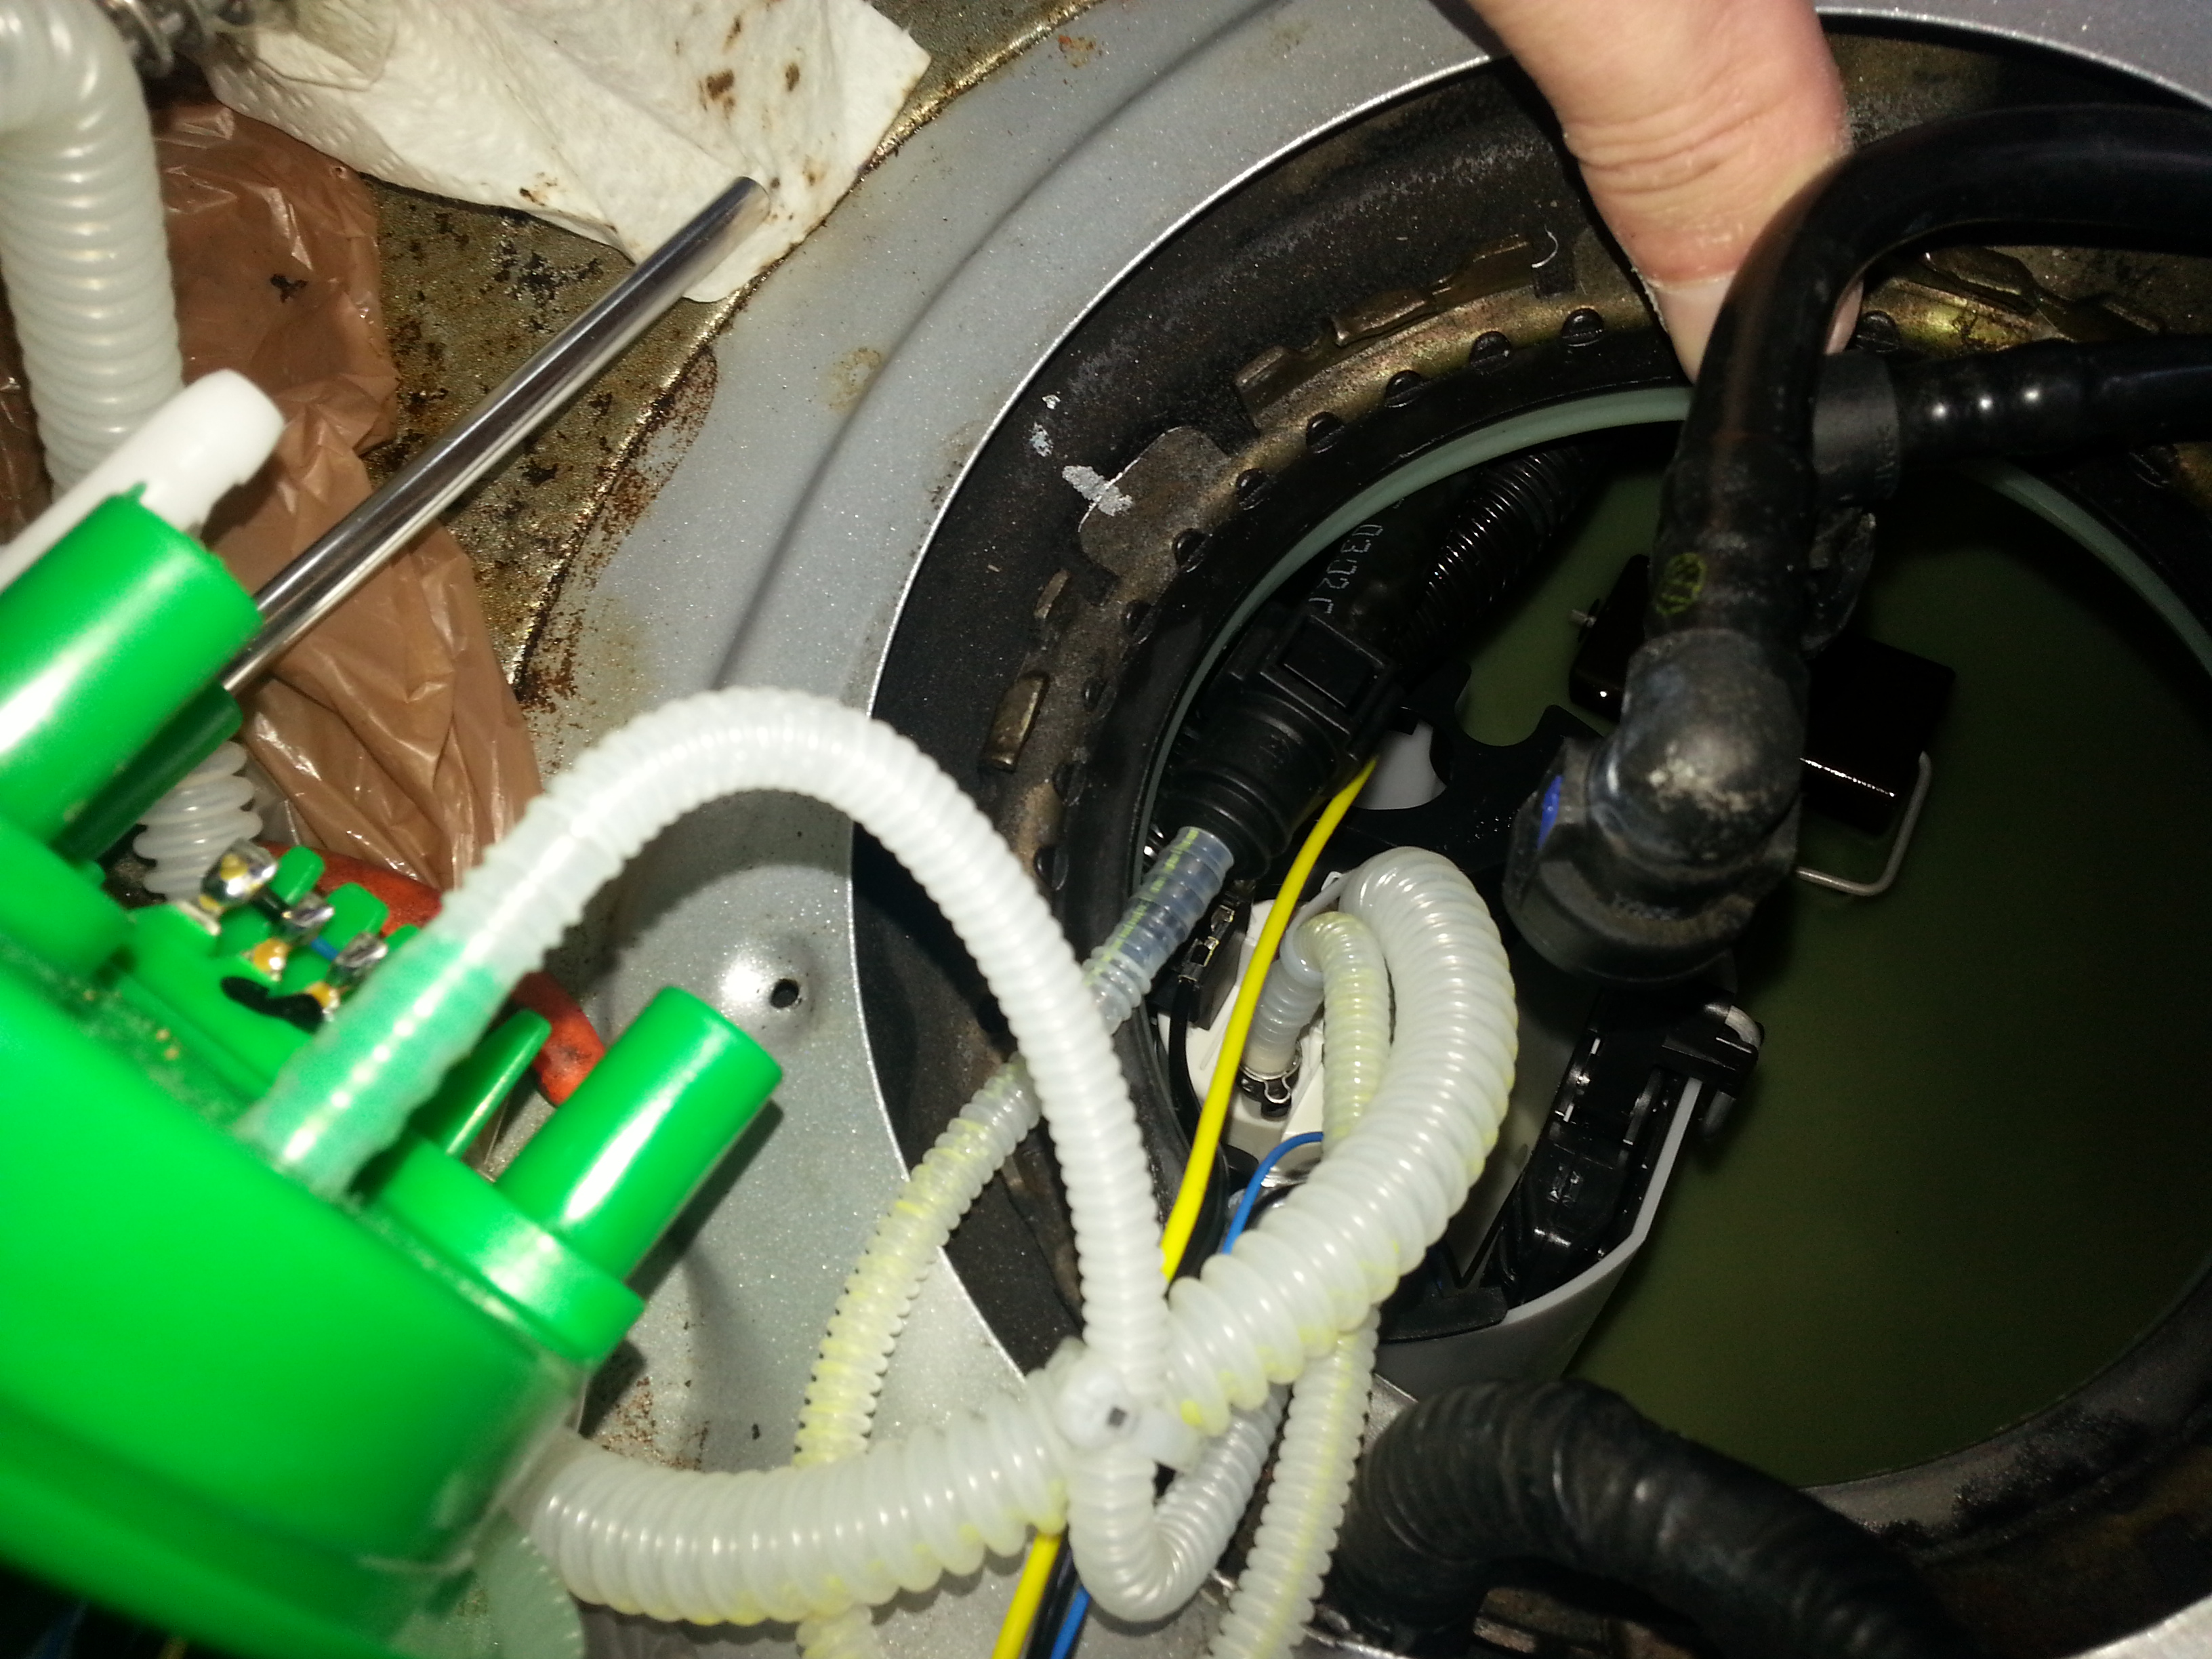
Beneath the seat, on the passenger side, there’s a plate secured by 3 Phillips head screws that needs to be removed. Once removed, you should see something like this…

I used my compressor to clean all the crap off the top and prevent it ending up in the tank later on. I also sprayed a little WD40 on the locking ring around the pump as it looked like it was a little corroded.
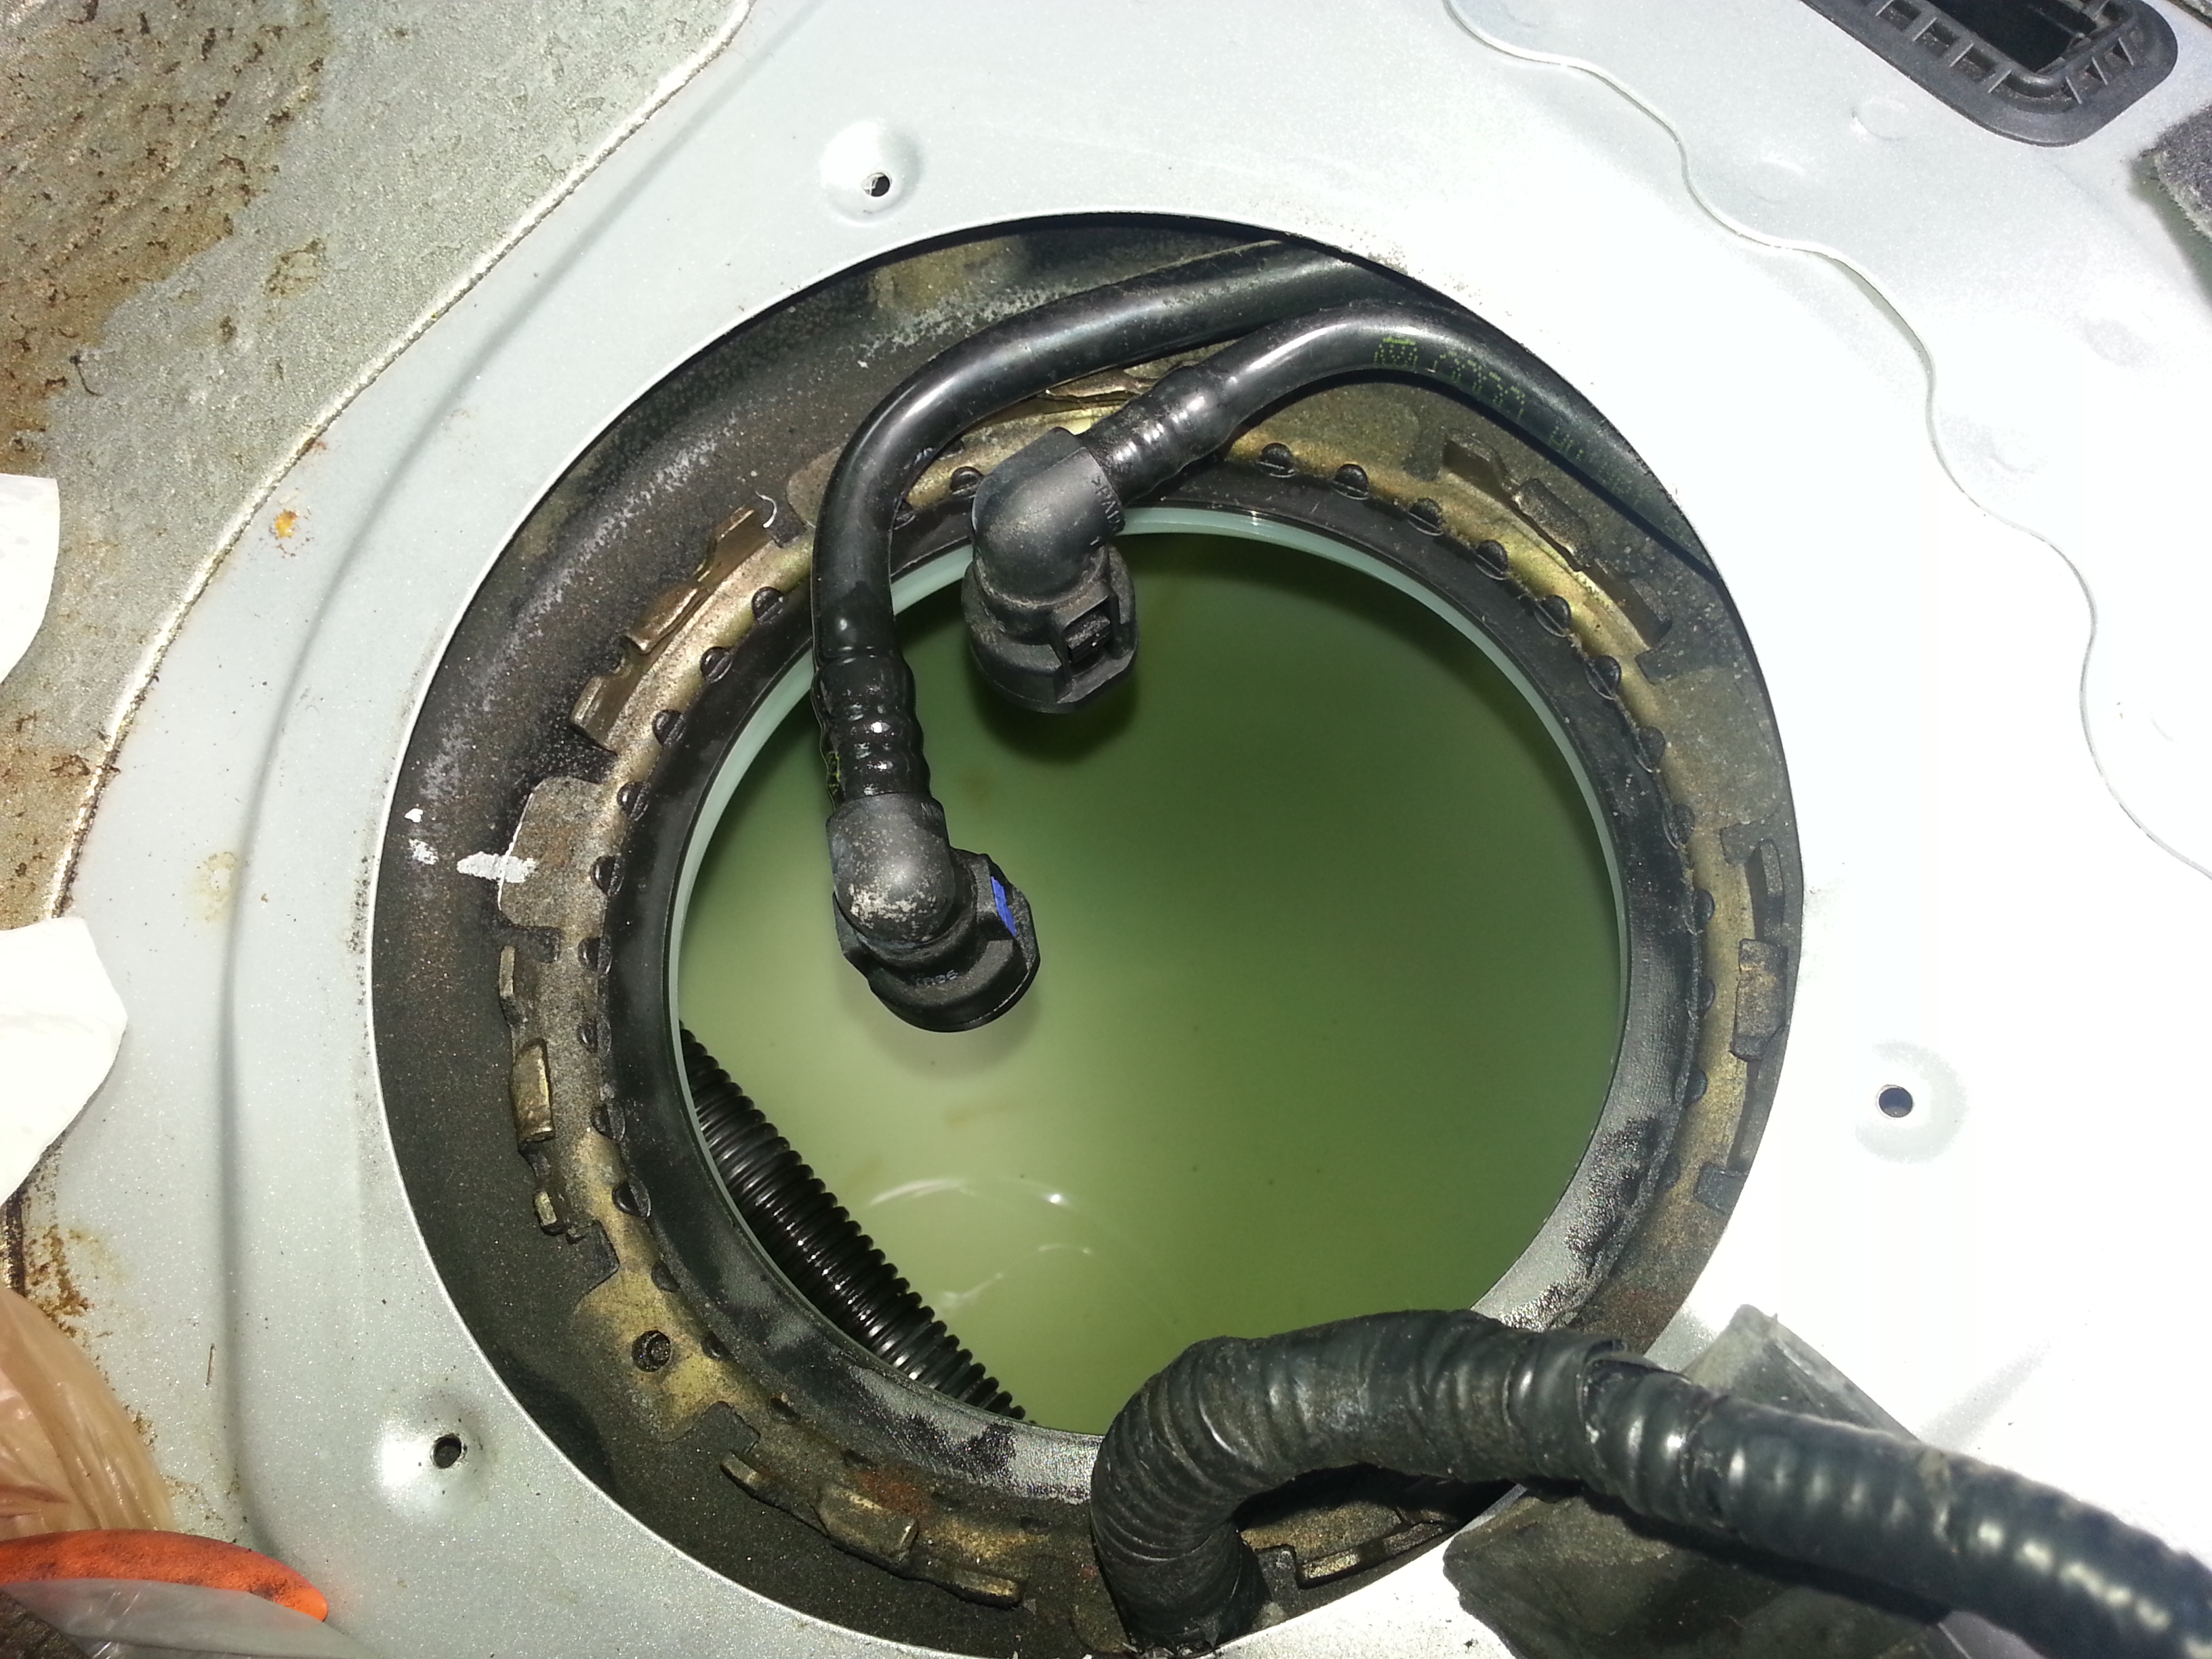
The large connector between 6 and 9 o’clock is the electrical plug. This plug is a standard Audi push-squeeze-pull but this one was especially sticky and needed a bit of careful prying at the base to release. I then put one of my disposable gloves over it and a rubber band to hold it in place to prevent fuel contamination. I also used some plastic shopping bags and paper towel around the area to minimize fuel contamination of the under-seat area.
The pipe connector at 11 o’clock is the return line and the pipe connector at 1 o’clock is the pressurized line, as I discovered when I removed it… still pressurized. These also require a push, squeeze pull but in this case, there are two release tabs recessed in the connector. Luckily I had a flimsy pair of needle nosed pliers which I modified, bending in the tips so that I could depress both tabs at the same time. Again, a little fiddly but not too difficult and something you might be able to do with 2 small screwdrivers and some careful coordination, if you don’t have a suitable tool. There is nowhere to tuck these pipes once they are disconnected and they will get in the way and prove a frustration for the rest of the job; just be careful not to damage them.
Next step is to remove the pump retaining ring which holds the pump in against the rubber seal. There’s a special tool you can buy for this job or you can fabricate one if necessary. Alternatively, the popular option is to hammer the ring in an anti-clockwise direction using a drift or large screwdriver. Before removal, you might want to make some alignment marks for reference when reinstalling.
Despite some corrosion, mine came off relatively easily. The one problem I did have is that there was a small lug pointing upwards right next to the electrical cabling which was digging into the cabling. There’s not a lot of room for maneuver but I manipulated the cable over the lug after the first few small turns of the ring. Damaging this wire could have turned this into a much longer job.
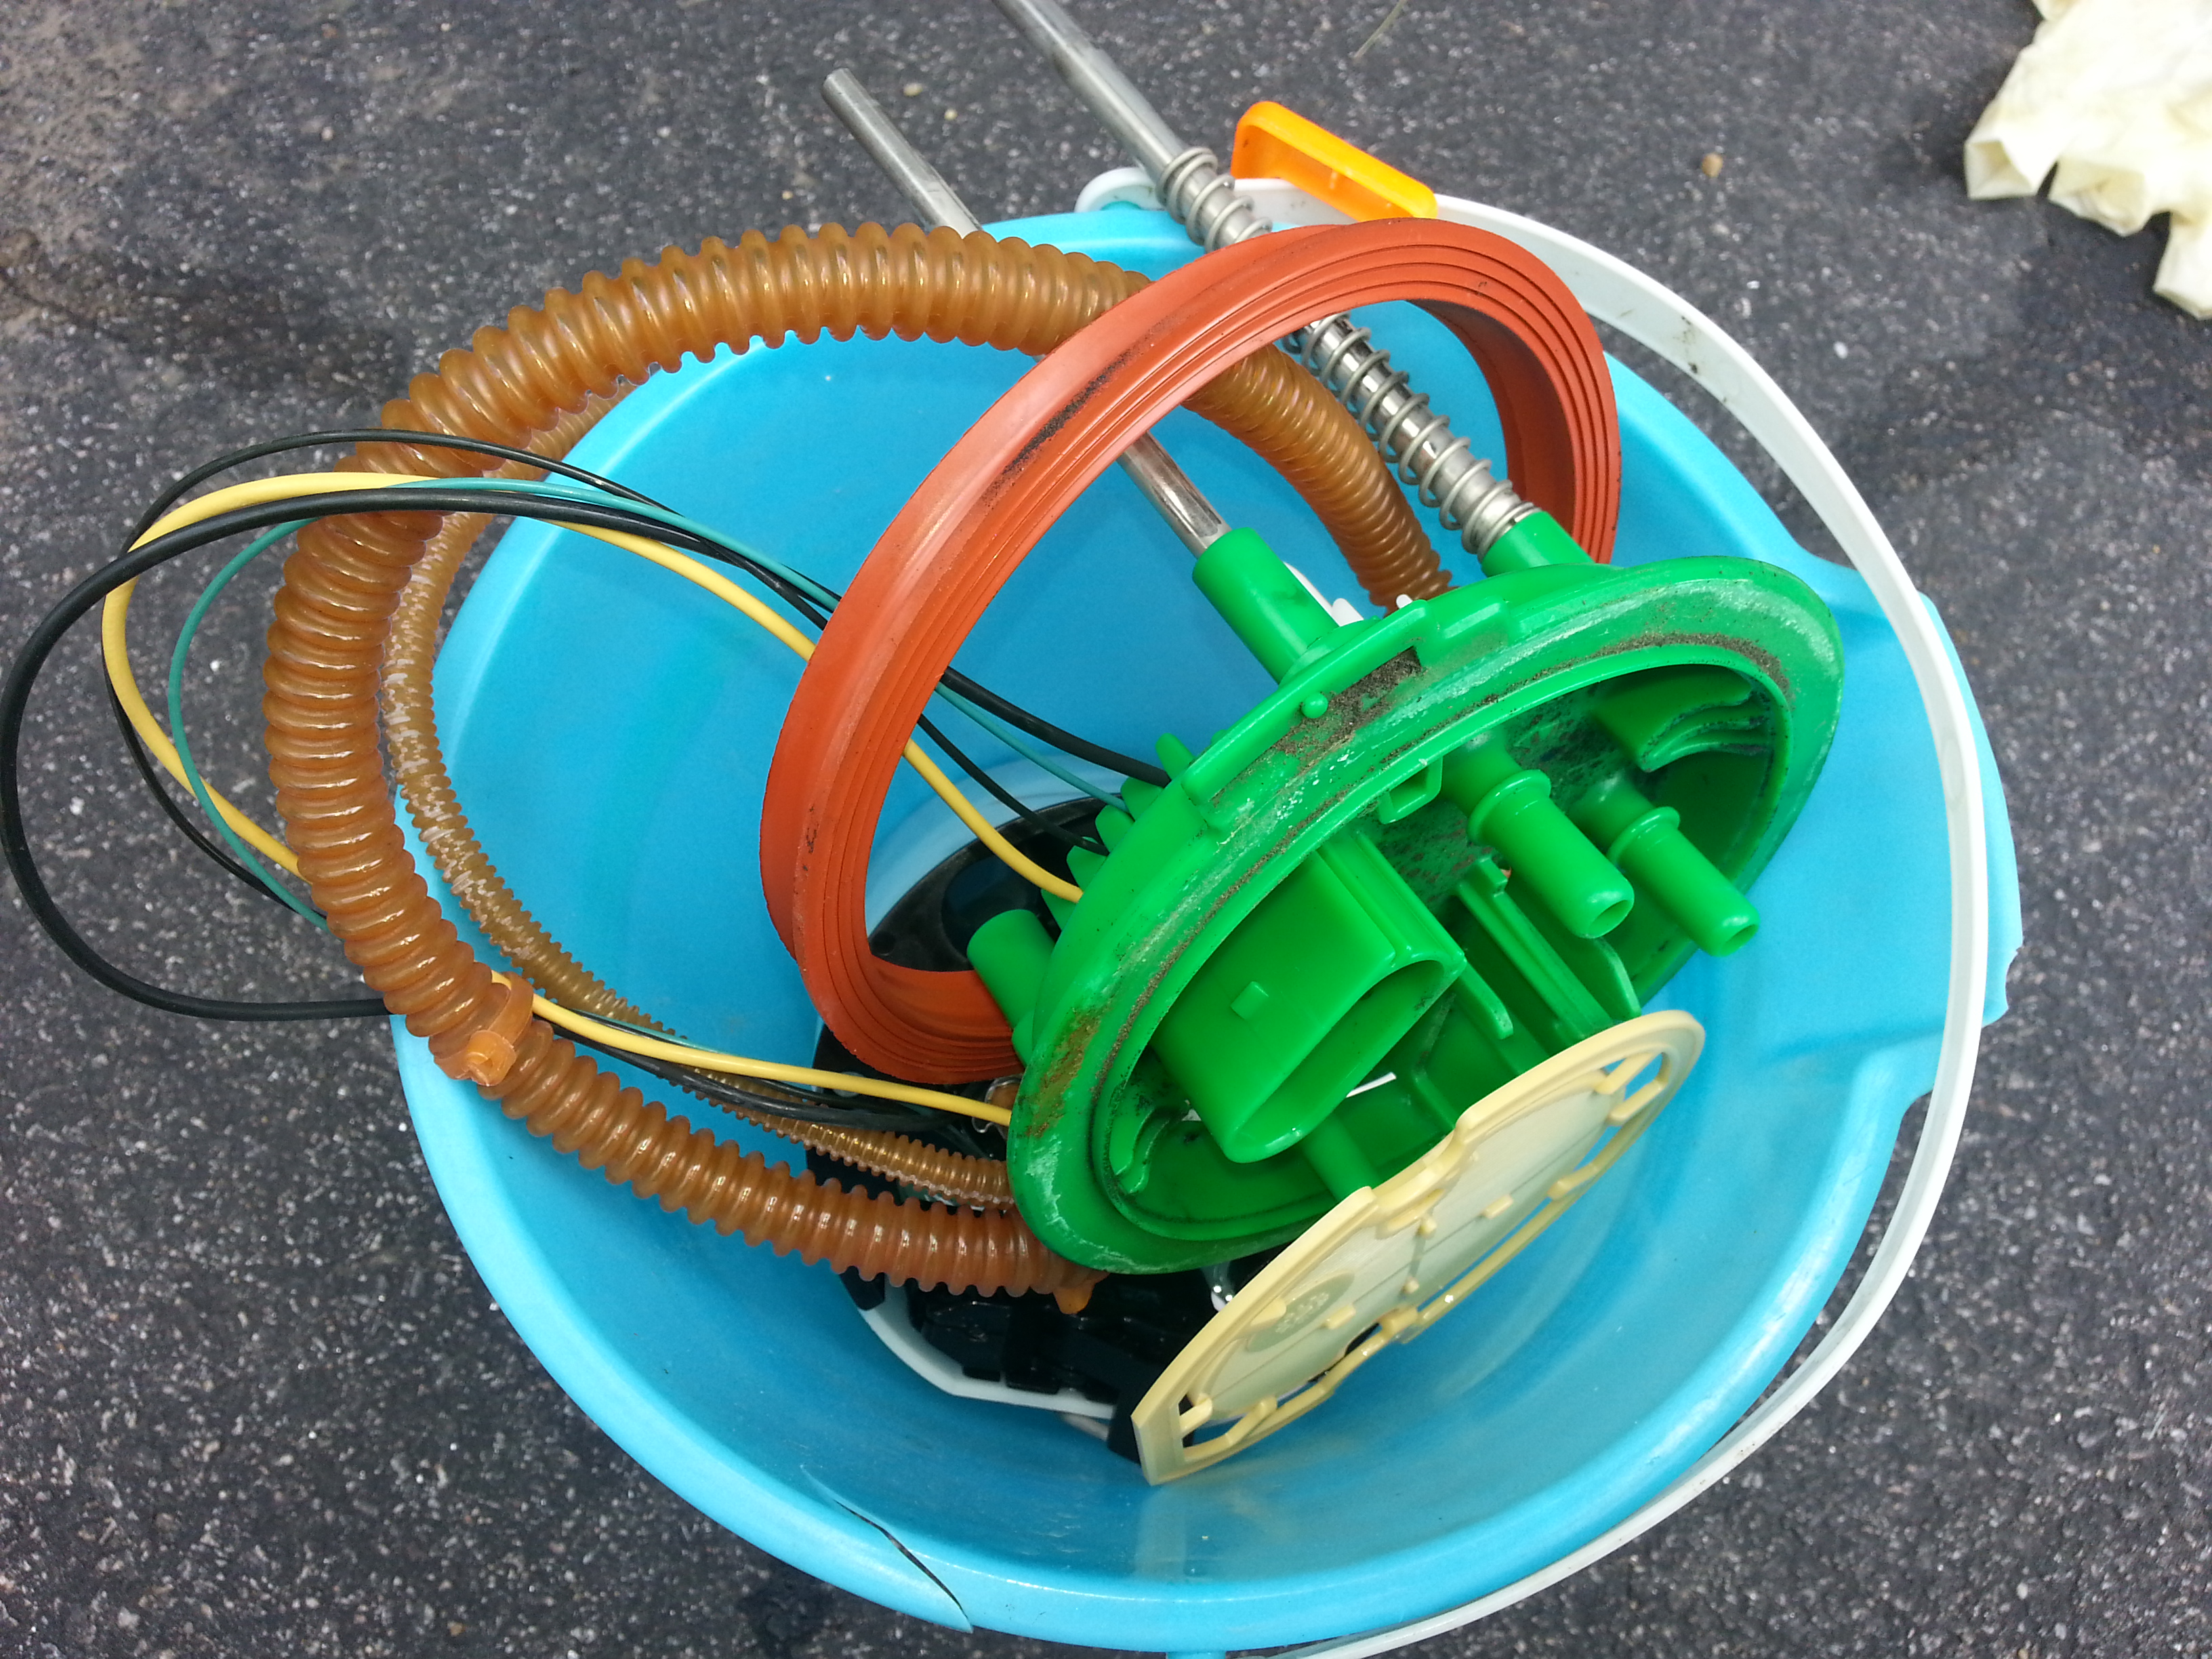
Once the ring is off, you should be able to partially remove the pump assembly head…
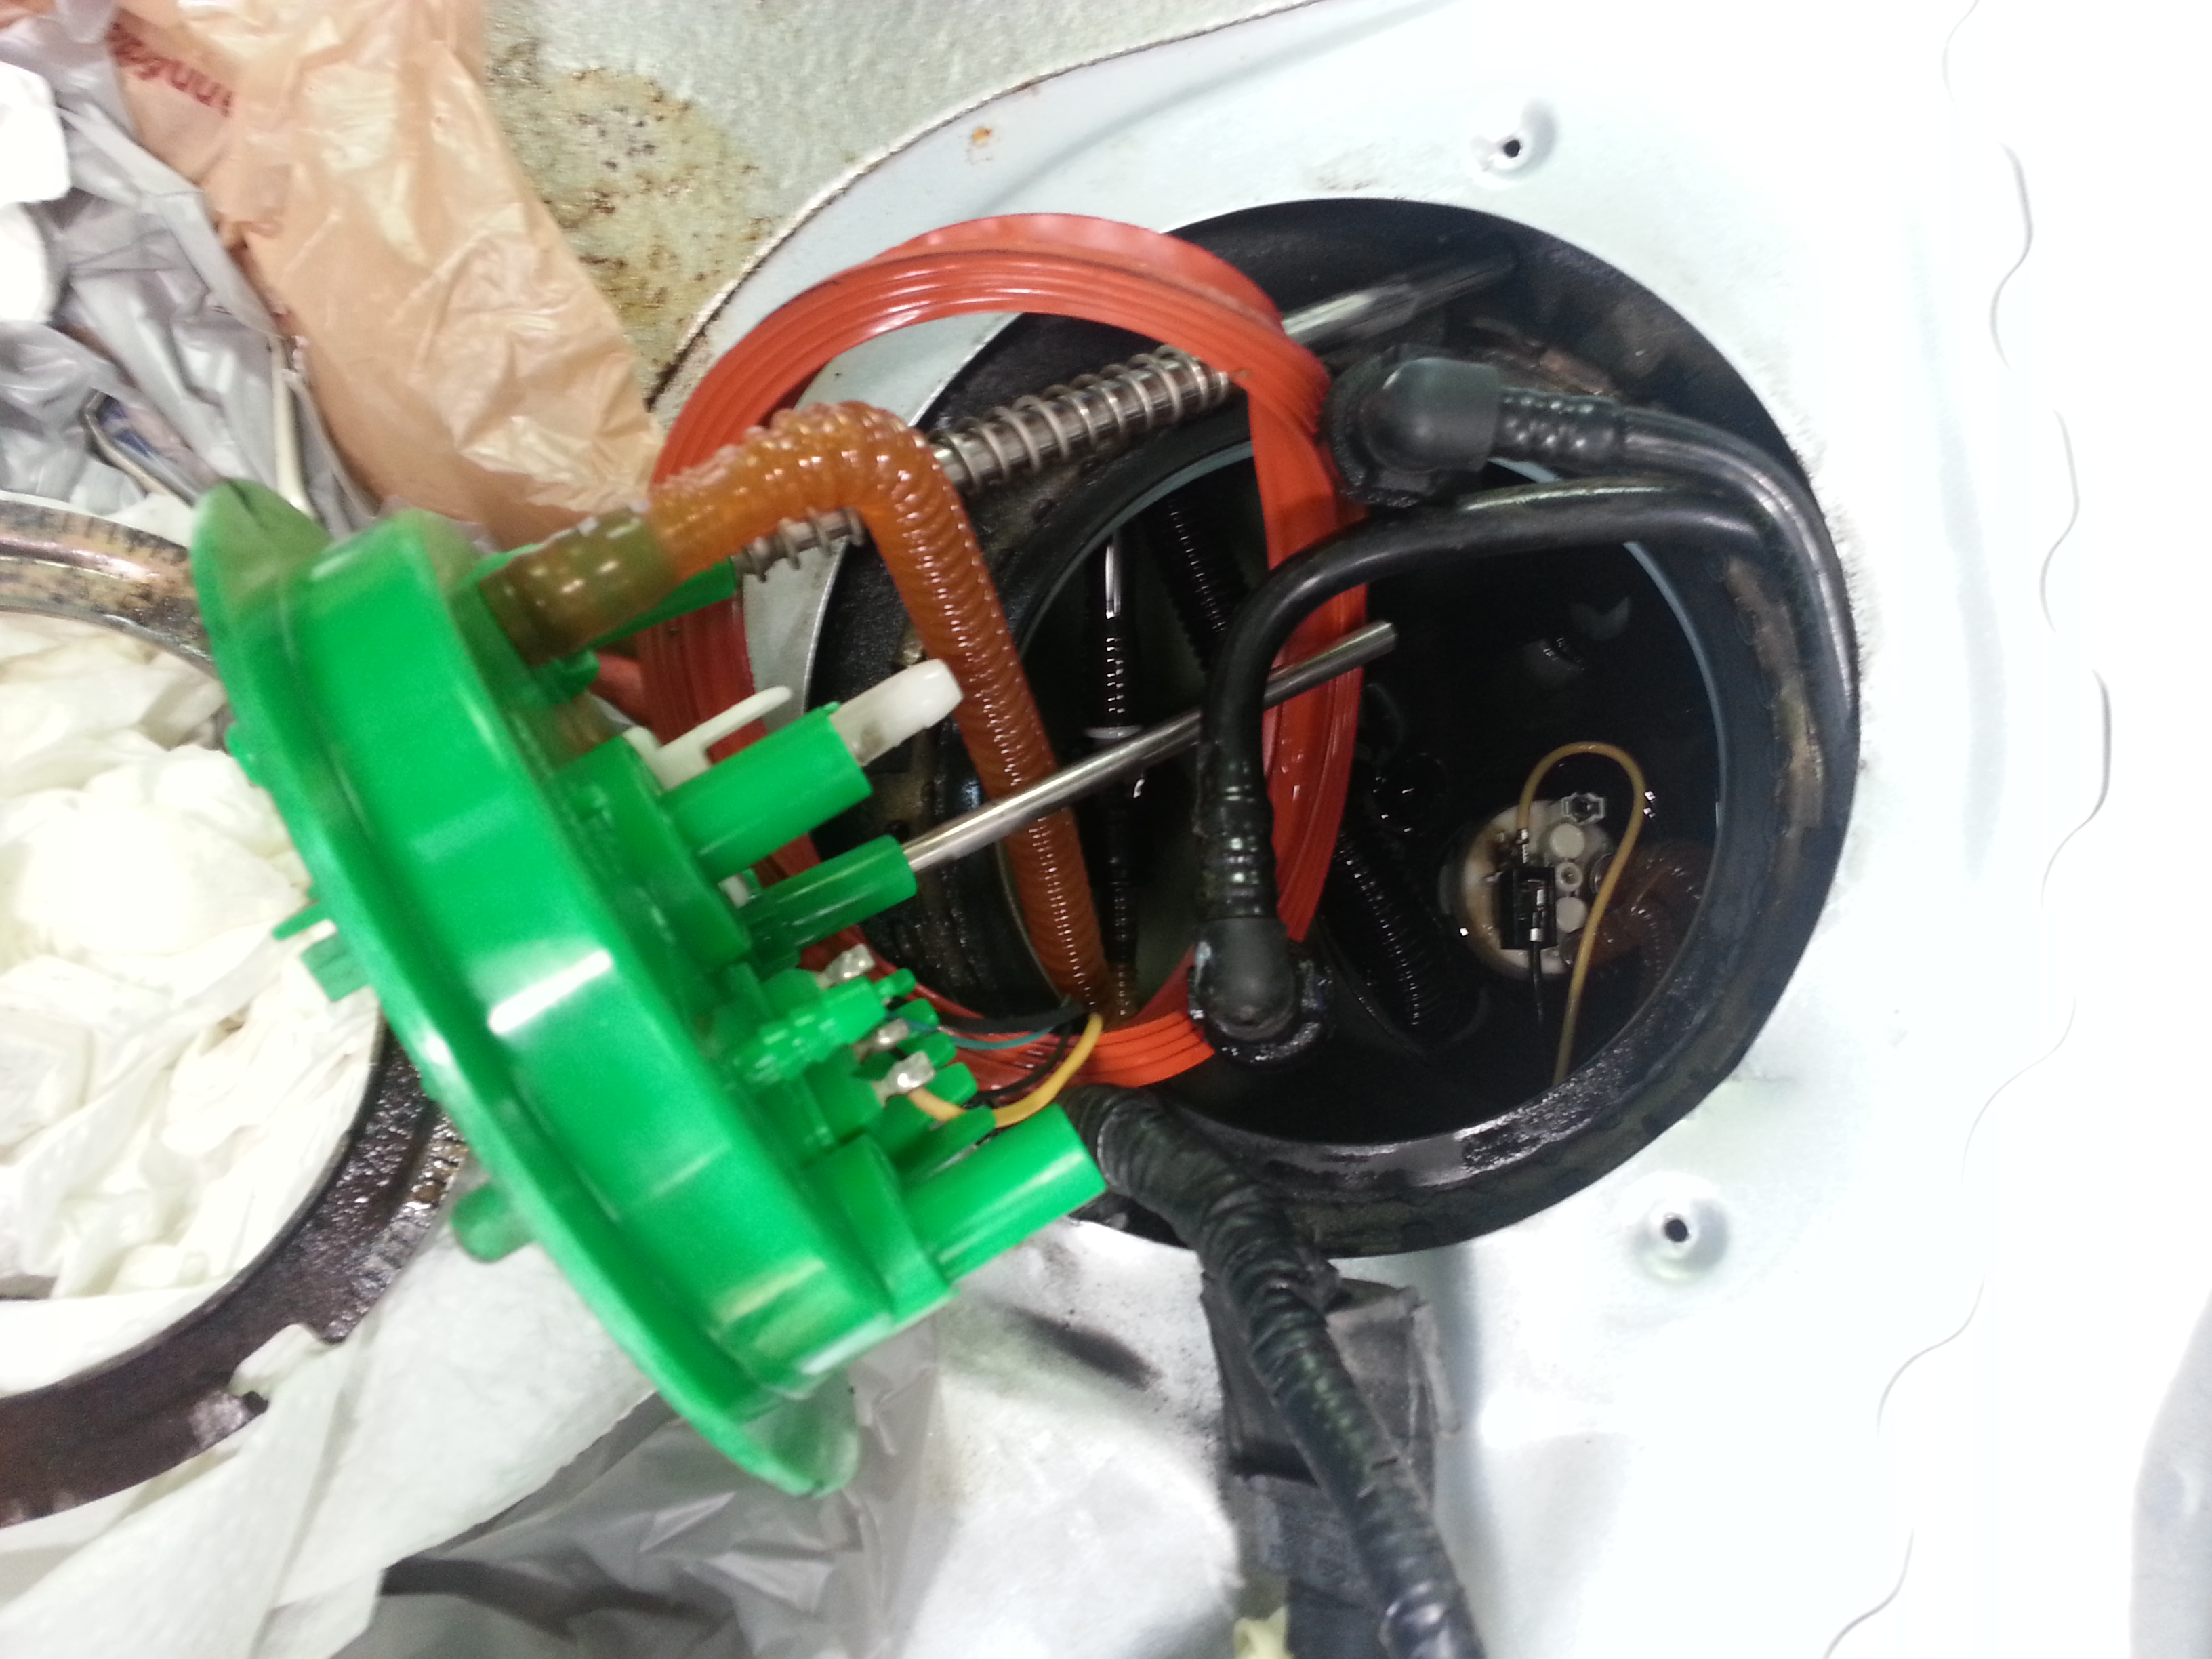
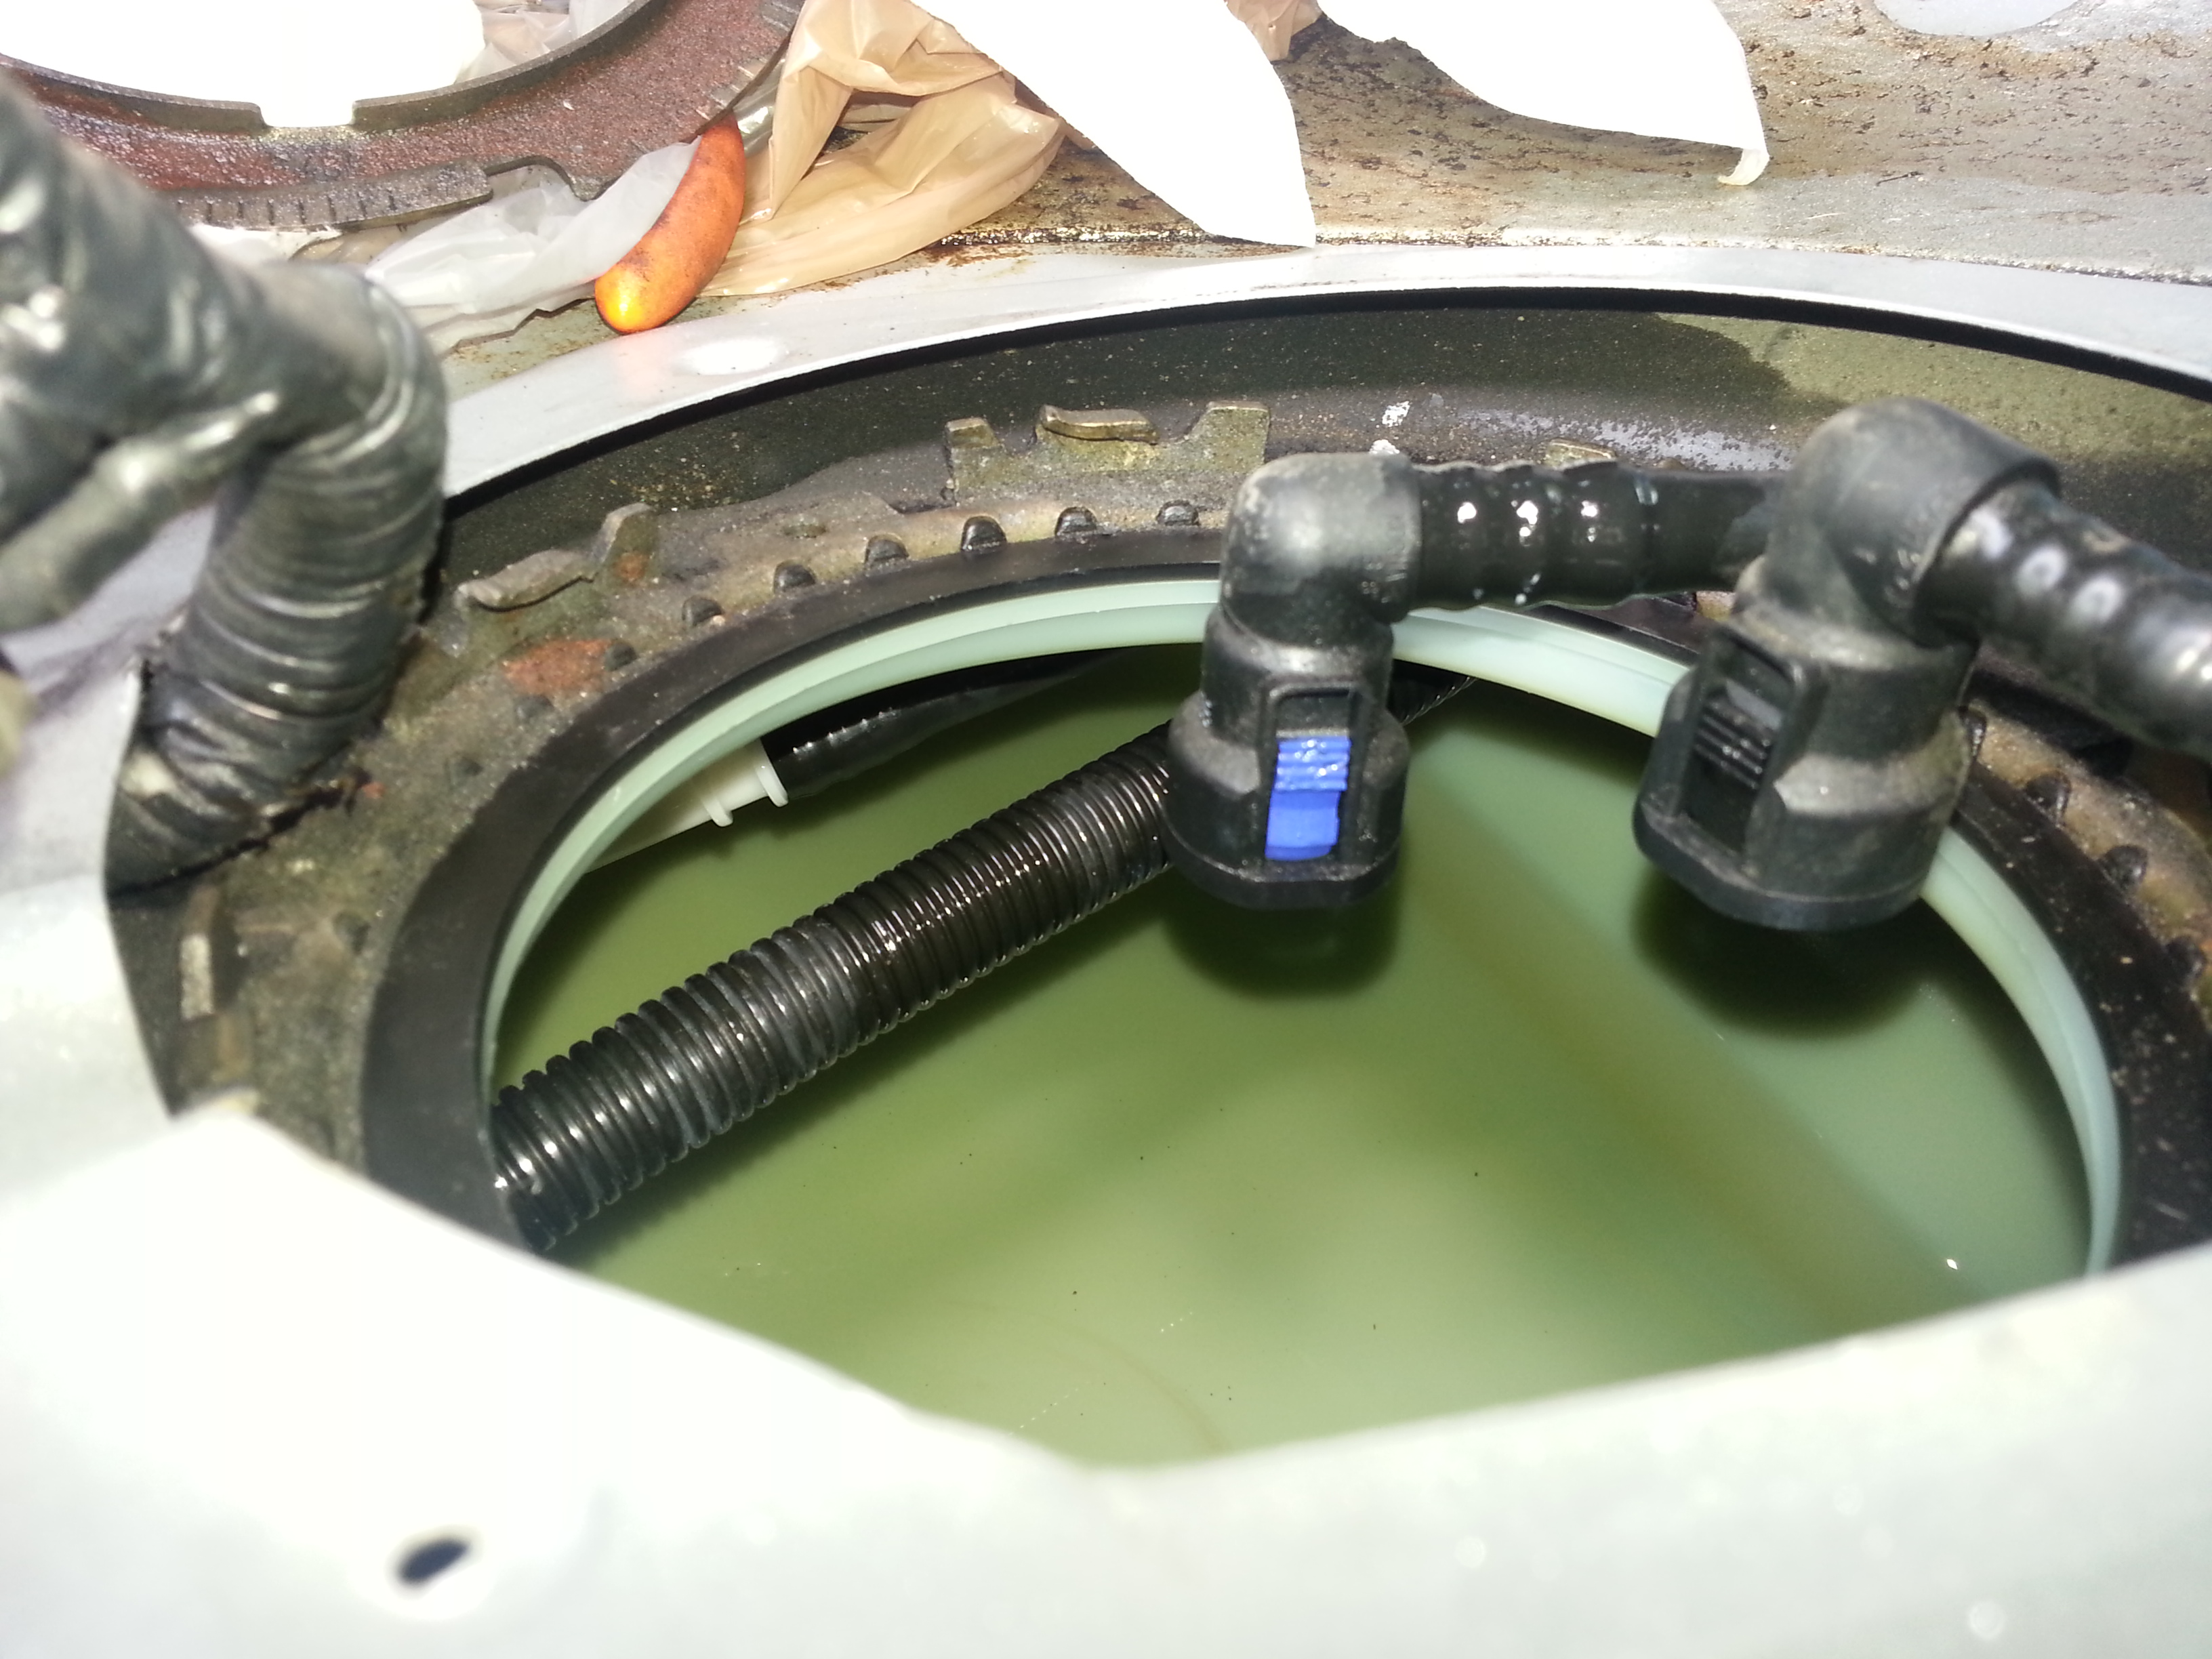
The business part of the pump remains in the tank and is attached to the head by a number of wires and tubes. Before you can remove the lower pump assembly you will need to disconnect 2 more tubes, a thinner black line and a thicker ribbed line. You can see both these lines in the picture below starting at the 9 o’clock position through the hole. The thinner one is a push-squeeze-pull connector, the thicker one just pulls out of the lower pump assembly.
Once these are disconnected, you can go about negotiating the lower pump assembly out of the tank through the hole. Have something ready (small bucket) into which to can put the pump assembly as it will still have a lot of fuel waiting to spill all over your carpets.
Now the hard part starts. Installation is the reversal of removal with some added suck factor thrown in.
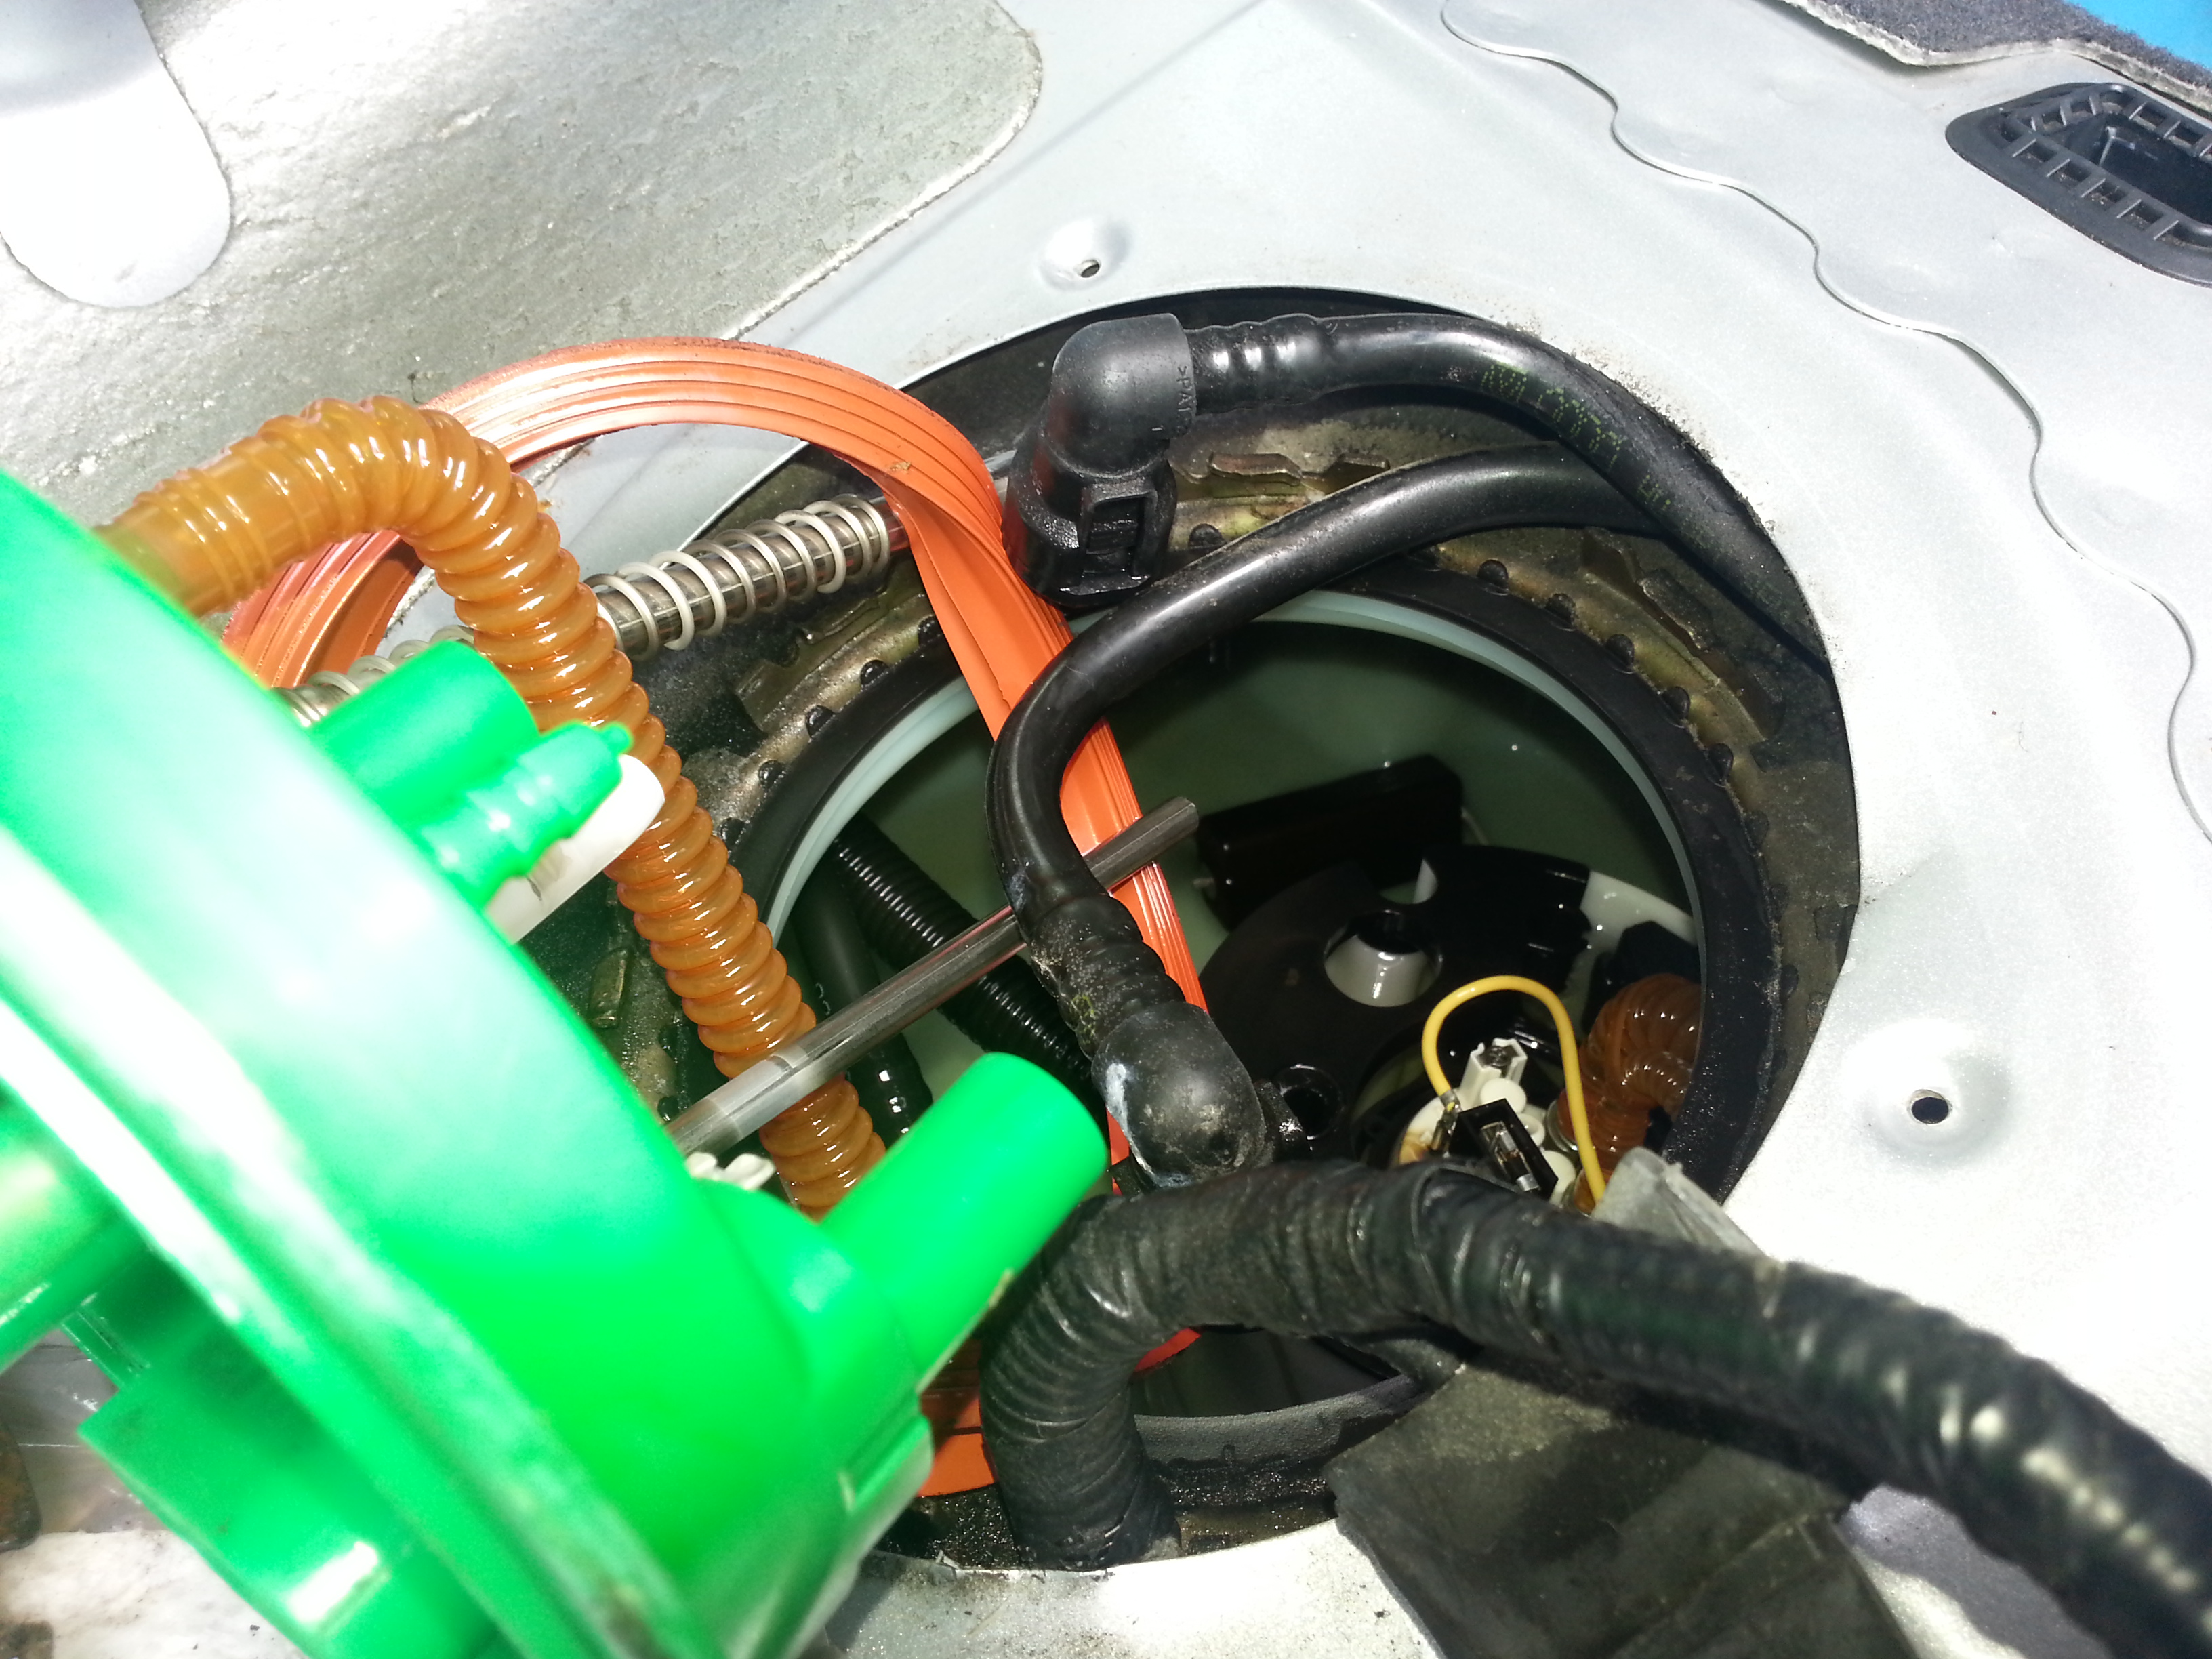
Carefully negotiate the lower pump assembly through the hole into the tank and let the upper assembly sit to the side for now. You need to reconnect the large ribbed line and thinner line to their respective connections on the new pump. Not too difficult just yet
Now you have to decide at which point you are going to refit the seal. If you do it now, you will likely push it into the tank when you try to install the upper pump assembly along with all of the attached pipes and wiring. What I did was to coerce the mass of pipes, connections and wiring through the hole into the tank first. Next, I attempted to locate the upper assembly into the lower assembly, which seemed trickier than it should have been. You need to correctly align the two metal rods of the upper assembly with their corresponding holes in the lower assembly, navigating through all the pipes that seem specifically designed to impede your actions. Once I’d managed to get the two halves somewhat mated, I decided now would be a good time to fit the seal.
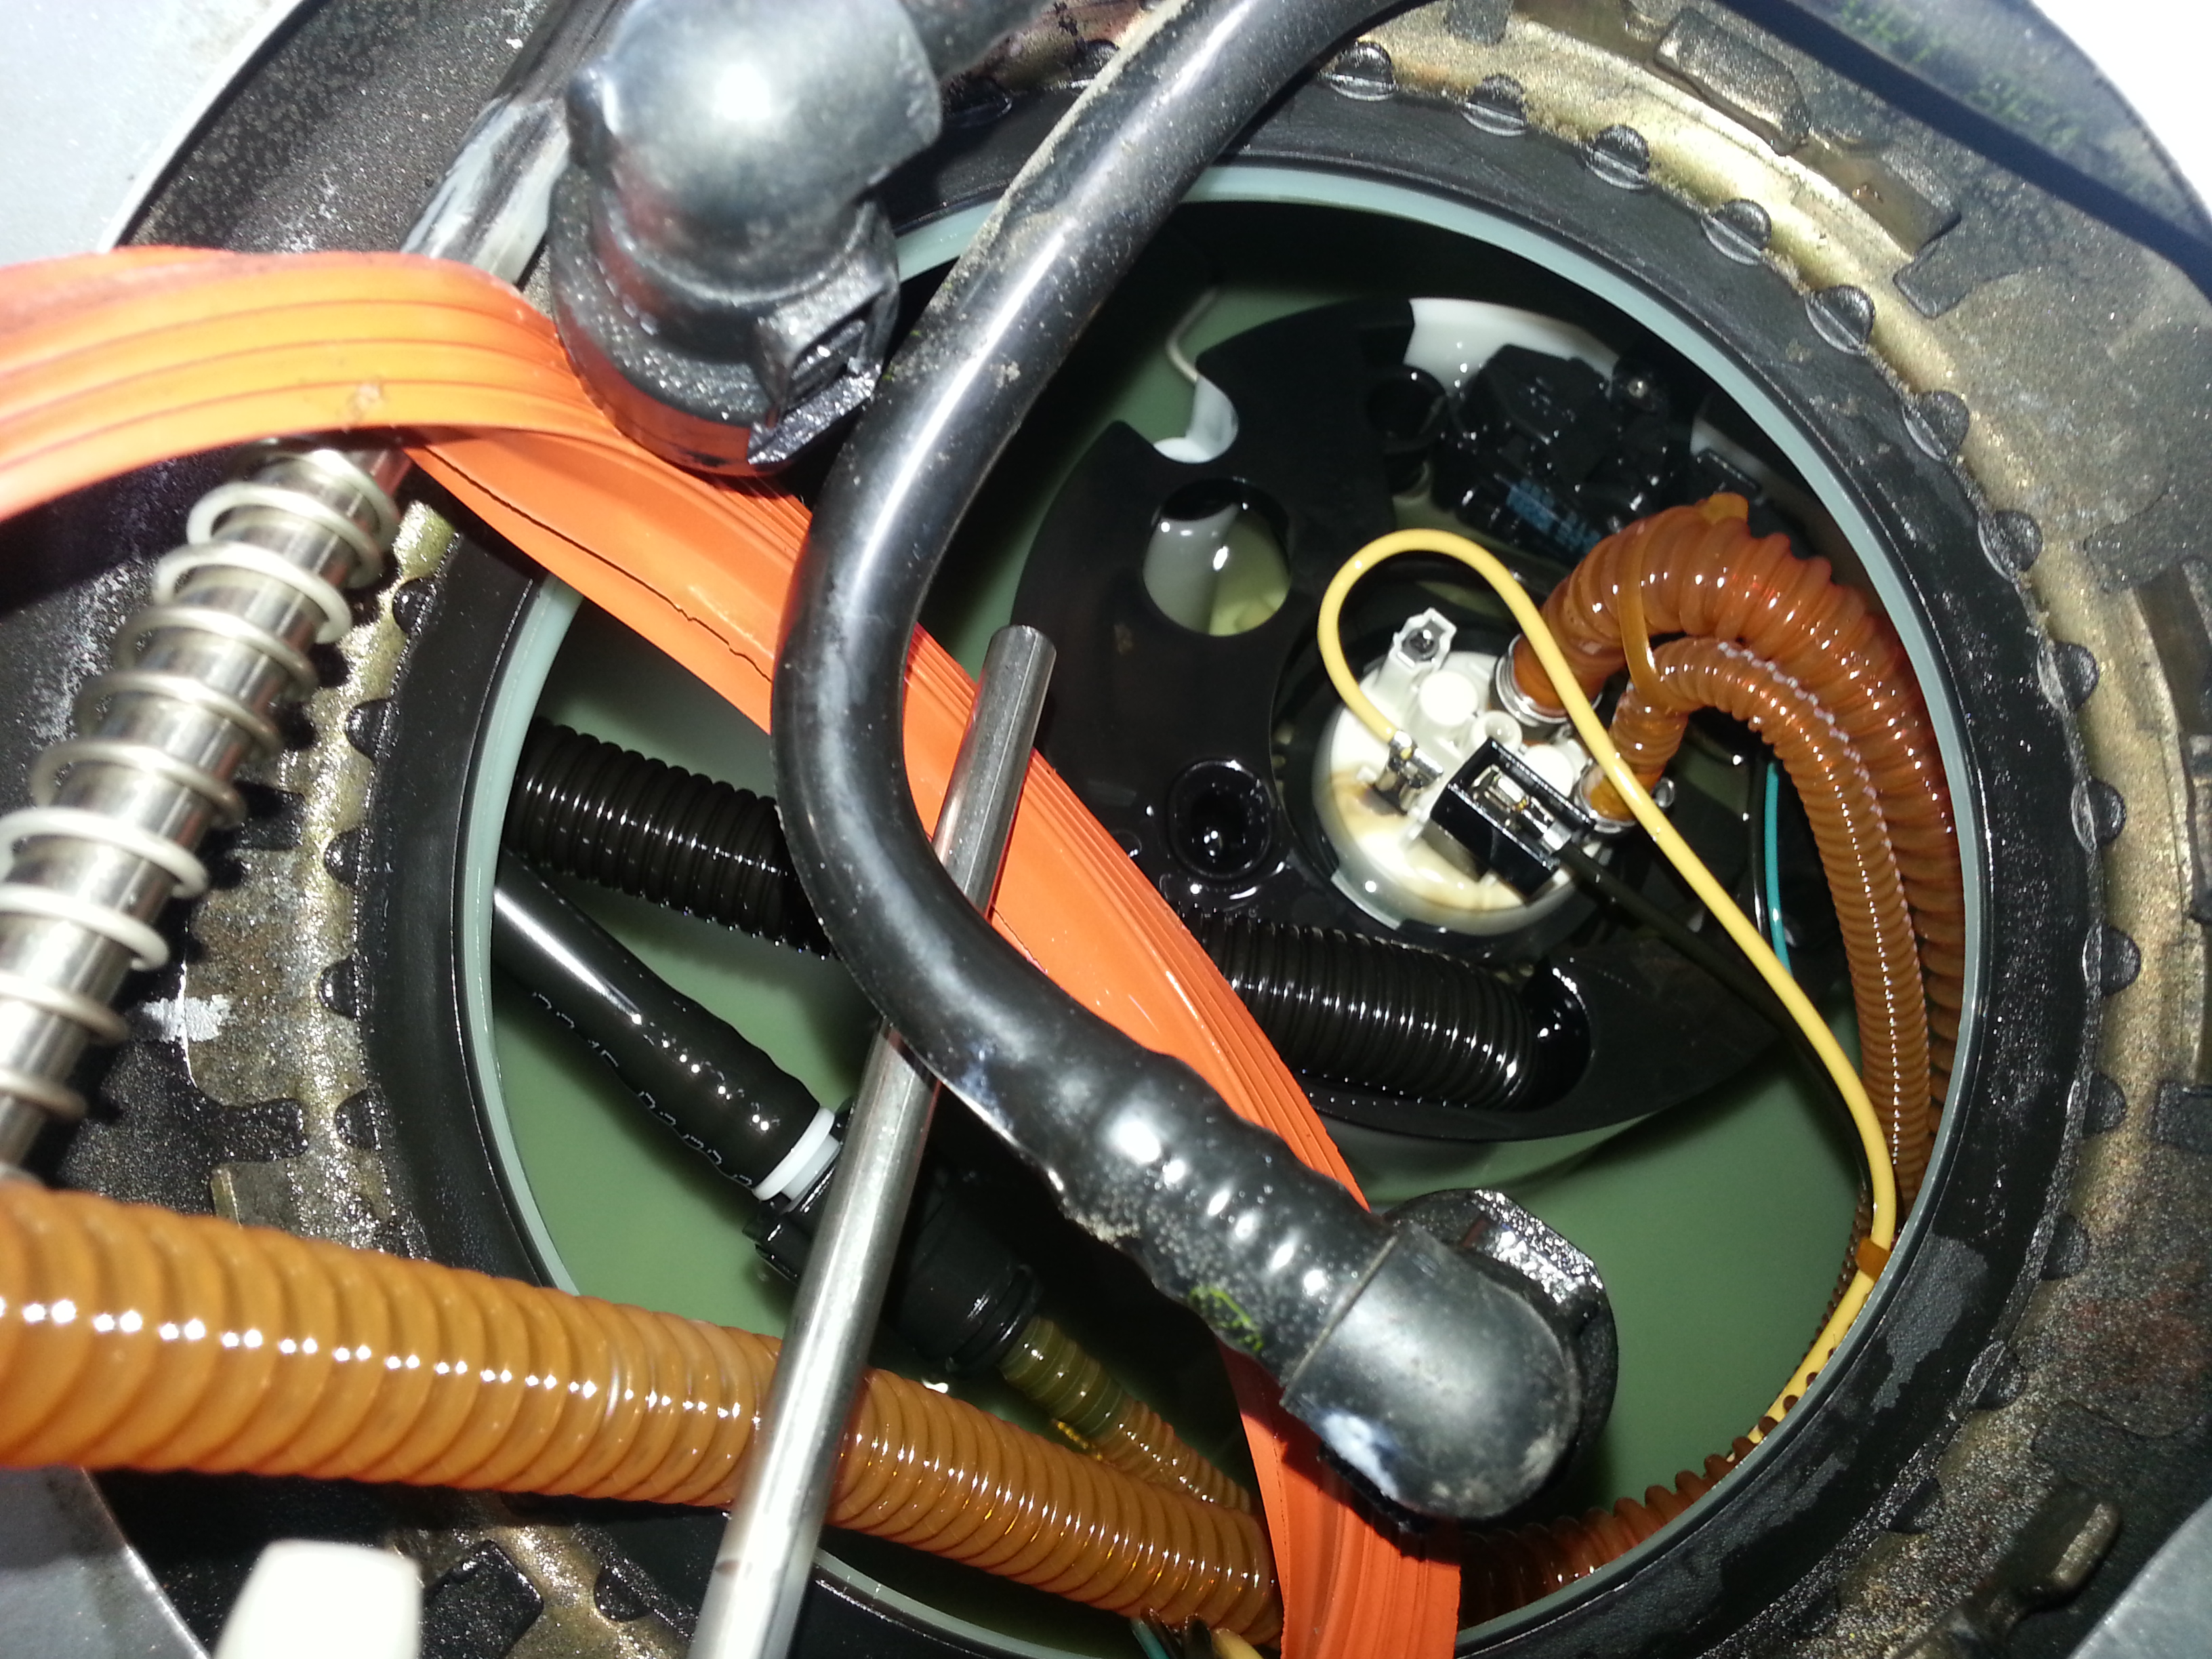
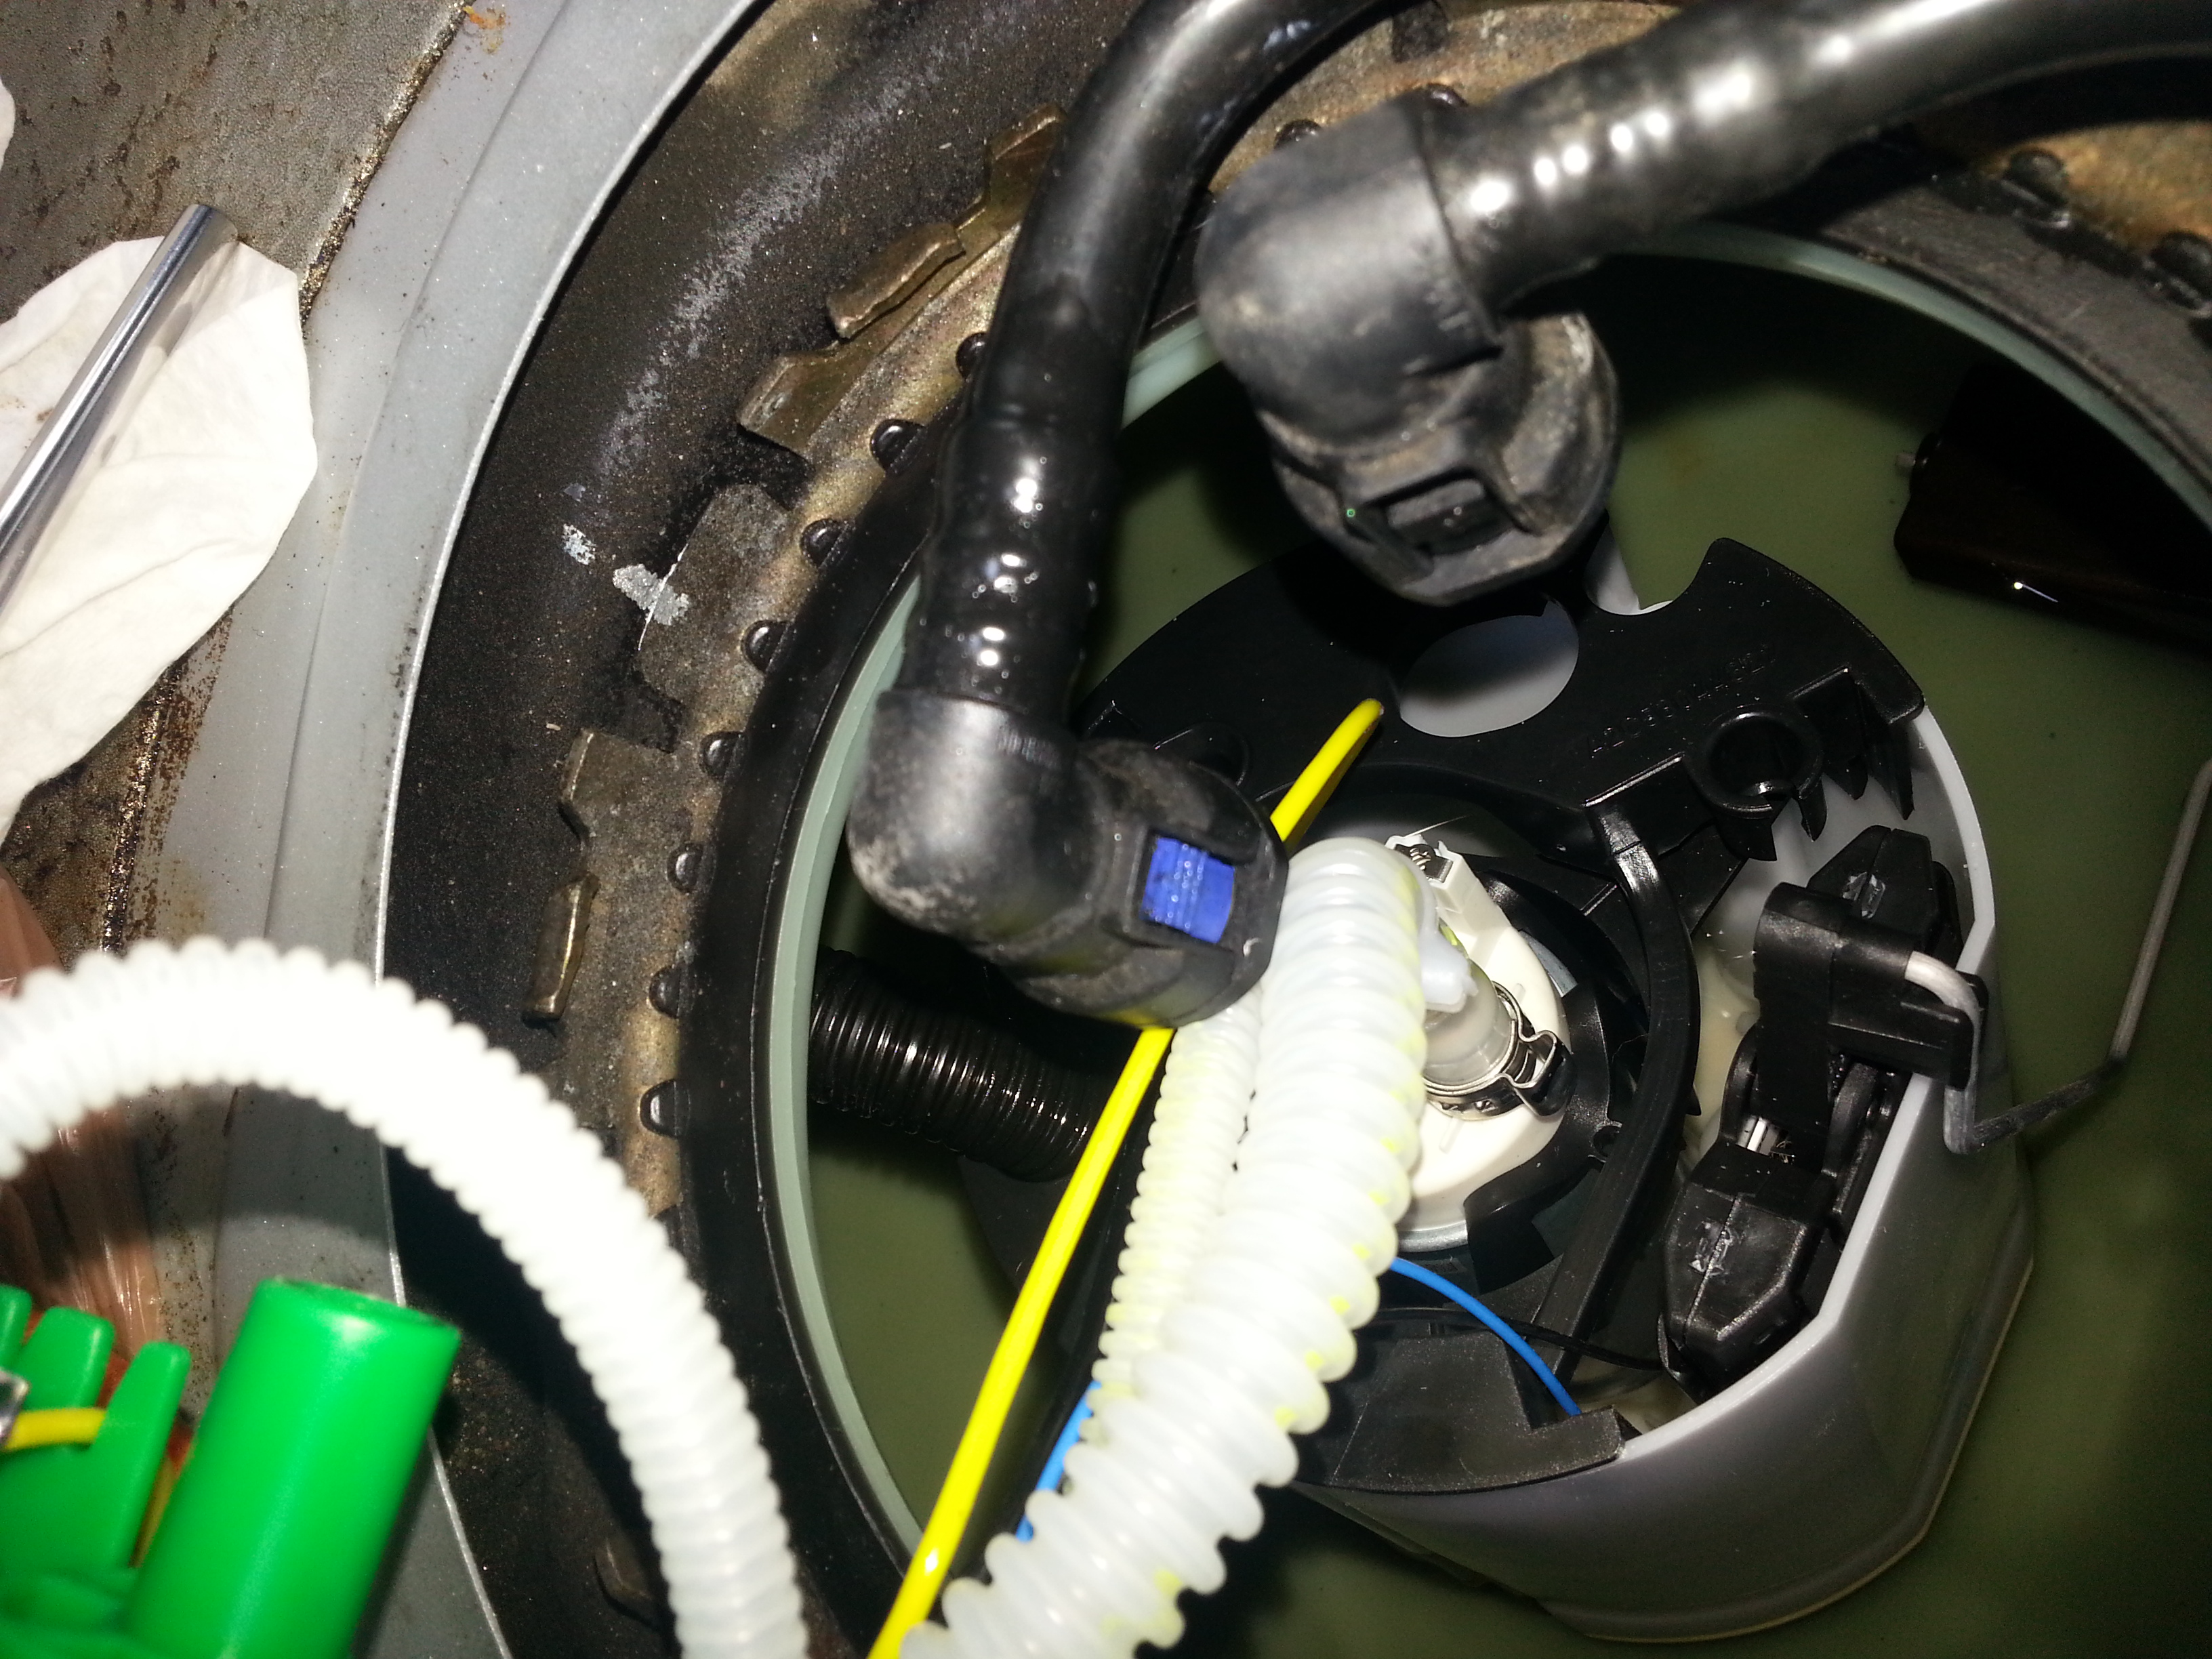
As I pointed out earlier, there isn’t much room for manoeuvre and trying to carefully get the seal into place through the full 360 degrees of the hole and remain there, while you seat the upper assembly, is a regular PITA. Maybe I was just doing it wrong or had already pushed the upper assembly in too far. Those two remaining fuel connections flapping around didn’t help and I actually pried the bodywork of the car up a little to give me more room with which to work. With patience, it took me around 15-20 minutes to finally be happy that it was all sandwiched correctly. Remember, if this seal isn’t correctly fitted then the next time you fill up, fuel will likely leak out as the head height of the tank is higher than the pump seal. Also, make sure that the green tab on the upper assembly is correctly aligned (see picture below) before attempting to refit the locking ring.
While maintaining downward pressure on the upper assembly, refit the ring loosely and recheck the seal before tapping the ring clockwise gradually and from several different points until it was back in its starting position. Note the silver paint between 10 and 11 o’clock that I marked on at the start of the job

Reconnecting the electrical plug and fuel lines was simple enough, not forgetting the blanking plug on the extra spout (I say “extra” but there was the same one on my original pump only it was self-sealed).
Before refitting the cover plate and seat, I drove to the gas station to fill up and check that the seal (yes, I’m paranoid) was in good order. Luckily, the gas cap is on the same side so you can open the door and check as you fill up.
And that is that…
Apart from the fact that it didn’t cure my fueling issue…!!! [ ]
]