|
|
FYI: I kept it as one, long, scrolling page so it would be easy to print as a reference; as opposed to paginating and requiring loading and printing of multiple individual pages. Acquire this:
Tools required:
Important notes:
In the panel on the left is everything you need, except for a few tools. But you have to take the spare out first.  Step 2: Remove the Full-size Spare Have to remove it to get to some bolts that hold the rear trunk molding on, where the trunk latch is. 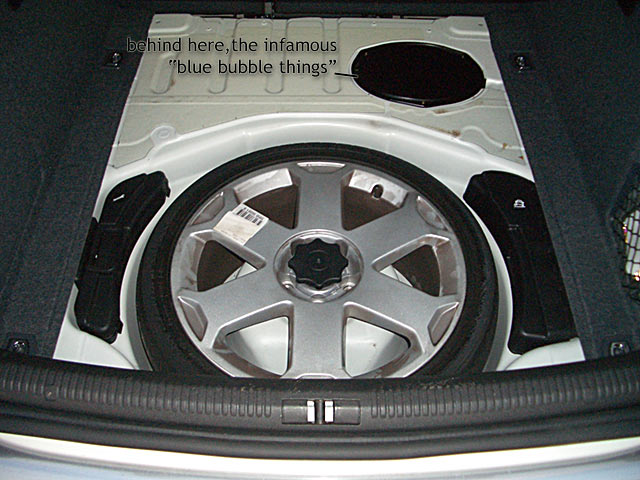 Step 3: Remove Rear Trunk Molding This is looking at the back of the trunk from inside. If you're like me, this is a good time to vacuum the 3-month old pulverized baguette out of the spare well. Photo by: Trunk Monkey.  Step 4: Disconnect Interior Trunk Light Nobody else mentioned this part, but I found it helpful to disconnect and get the molding out of my way while doing the rest of the stuff.  Step 5: Remove Panel from Under Rubber Strip Some people have actually Removed the rubber strip from around the trunk, but you can just peel it back a little at a time and pull the panel out from under - easier to put back together this way. 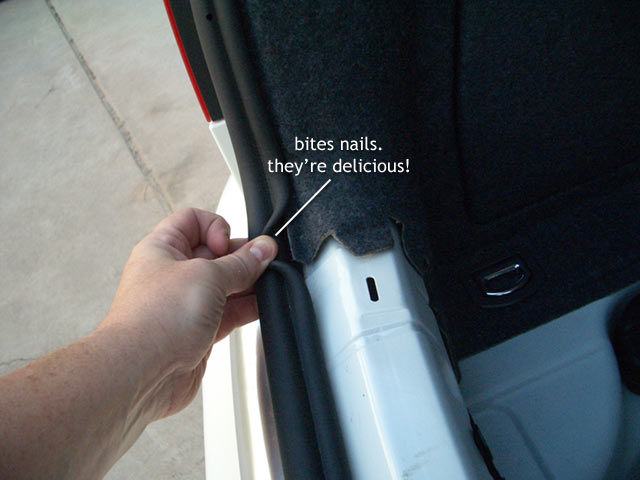 Step 7: Open Hatch Viola. Nothing there if you don't have Nav. That's why you gotta rip stuff apart.  Step 7: Remove Cargo Net Clip Again, no one mentioned this little bugger. The cargo net clip firmly holds the panel in place and you will not be able to get to the Sat module without fully pulling this panel away from the body. You need a pretty big Torx driver to Remove the 2 screws. But a standard driver that fits in the groove solidly can get this out as well.  Step 8: Fully Pull Panel Away From Body This is the most unnerving part. You just start really pulling the panel away. These tough little metal clips don't like to let go and make a loud snap when they release. Don't worry, they don't break. There is also a little metal flange clip, the color of your car, that needs to be bent out of the way to release the panel. You may also decide to work up further toward the front of the car to get more working room, in which case you will encounter one of those little plastic circle clips. Just pull the outer circle away from its base and it releases. 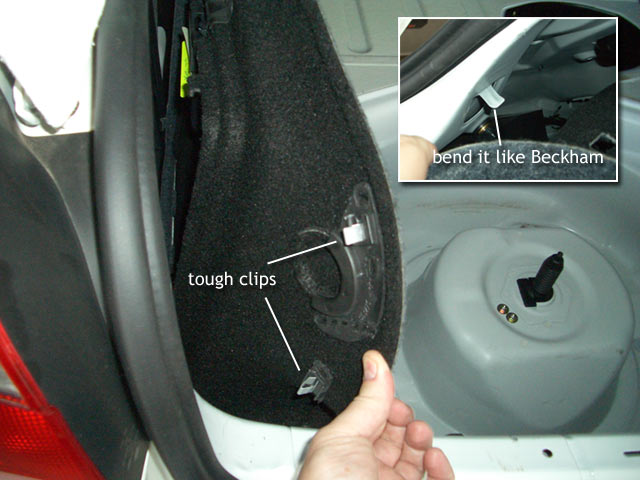 Step 9: Remove Nav Mount So you can see that the panel is still attached to the car, but out of you way. Now Remove the 4 or so 10mm bolts to pull this plastic bin out. The Sat module is mounted on the back.  Step 10: Swap, Or Install New, Module If you're swapping, just press down on the clips and slide the unit out. Then disconnect the 4 cables, then pop in the new one till the clips snap in place and reconnect cables. If you're installing a new one on a pre-wired car, you will have to find the single bundle that holds all 4 connectors. It will be in there somewhere, likely hard to find: see next pic! 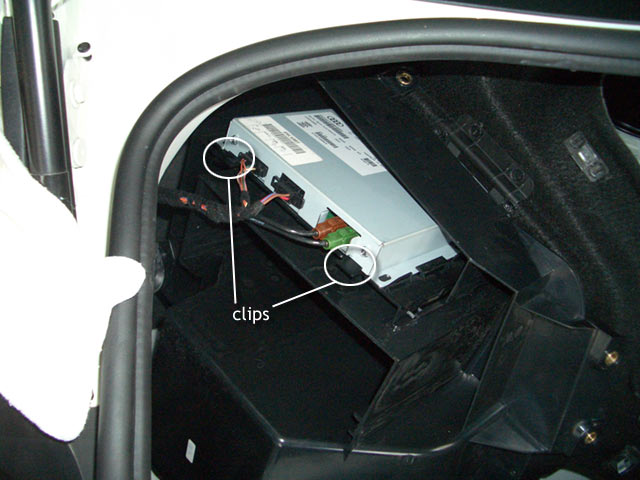 For New Install Apparently cables are ny-tied to the sheet metal up behind the Nav mount. Have to cut the tie to get enough slack to get this to the unit. (Thanks to AWs 'azeitn'!)  Step 11: All Buttoned Up Just put everything back together in reverse order and you're ready to go. However, I recommend testing that the Head Unit up front recognizes the module when you press the Sat button. Do this before buttoning everything back up to save yourself some frustration. You should be able to get the Preview Channel, but make sure you are pulled out of your garage to receive the signal. 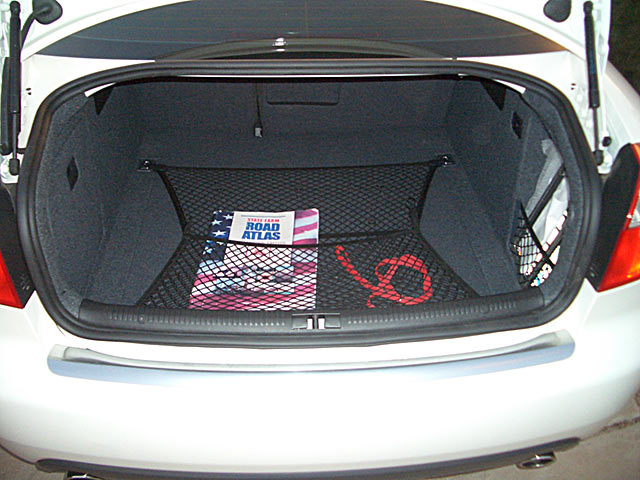 Step 13: Rock On! (or Trance Out or whatever....) I guess that works, but let's check it out. Remeber, you have to activate service by calling them and sitting in your car with the phone. But if you're swapping, it might just work for awhile. Then if it stops working, you gotta call and activate. Sirius » http://www.sirius.com/ » 1-888-539-SIRIUS (7474) XM » http://www.xmradio.com/ » 1-800-967-2346  Remember: if you are doing an install, not a swap, you may need to change a connection to the Can Bus to let your head unit know you now have Sat Radio » read this PDF! (Thanks, Vijay!) That's it unless I missed anything. If anyone else does this and notices any notes or steps I glazed over, let me know and I'll happily add it to this tutorial. Good luck! |
|
Advertising |
Contact Us |
Cookie Policy |
Privacy Statement |
Terms of Service |
Do Not Sell My Personal Information
© 2020 MH Sub I, LLC dba Internet Brands |