|
|
PART 2: Running the wires from the trunk to the dash So here is where there is a bit of extra cost I did not factor in. Needing to get shielded audio/video cables to avoid interference in the picture and sound, I bought the longest high quality cables I could find at Best Buy, which are not cheap. I found a nice 20 foot monster cable for audio, but the longest shielded video wire I could find was 12 feet long, so I bought another 6 foot video cable and a Monster Cable connector to fasten the two cable together. I wanted to run the cord along the door rails where most of the other electronics run. At the same time, I am running the power wires for the OEM rear sunshade that I had yet to hook up, so ignore those other wires (details of that post at a later date). I am running the following wires to the front of the car from the rear for the DVD player: 1) Video RCA cable 2) Audio RCA cable 3) DVD power wire 4) DVD ground wire 5) DVD accessory power wire The wires for power, ground, and accessory that came with the DVD player are way too short, so I spliced in some longer 18-gauge wire to run to the front. Not trusting myself, I got color wires from Radio Shack so I could keep track of which wire was what. I made a pseudo wire harness with the three wires and black electrical tape every 8 inches.  To run the wires to the front of the car, I had to remove: - Lower dash panel - Lower A-pillar trim - Lower B-pillar trim - Driver seatbelt bolt - Rear side bolster - Lower C pillar trim. These are detailed below. Lower dash panel removal Remove the dash panel to expose the battery leads. There are 5 bolts that secure this panel. Two are hidden under the upside-down U-shape trim just above the steering column, one is in the fuse panel on the side, and two are located in the lower corners of the panel. To access the two upper bolts, pull the trim over the steering wheel straight back. Remember, you are removing the BOLTS, not the philips head screws (which are for the instrument cluster). Here is a pic of the panel removal (courtesy of TeddyBGame).  Lower A-pillar removal: Remove the little plastic cap on the lower A-pillar trim to expose one of the screws that has to be removed.  Remove the two Philips-head screws.  Remove the trim by pulling out towards the rear of the car first, then remove the top part of the trim from the rubber door gasket. There are two metal clips that fasten the trim to the door gasket (sorry for the blurry pic).   Lower B-pillar trim removal Open both doors on the driver side of the car, and just grab the inner part of the trim with your fingers and lift up. Simple metal clips are used to fasten the front portion and rear portion.   Once the flat portions are free, then pull the center portion towards the inside of the car to release the tab that is hooked under the plastic center trim.  Remove the seatbelt bolt The lower B-pillar trim hides a 17mm bolt that secures the front seat belt. I decided to run the wires along the rail but just under the carpet which requires that this bolt be removed. There is not a lot of room to work with, and this bolt is tight, so I used my Audi-brand 17MM lug bolt wrench to free the bolt, then a regular socket wrench to do the rest.   Rear bolster removal Using a 17mm deep socket, remove the pin pictured below   Then gently pry back the side bolster to release the lower retainer clip  Removing the lower C-pillar trim Similar to the other trim, this is held in with a few clips and tabs. Just pull the trim toward the front of the car. Once the upper part is free, lift up on the front corner of the rear seat bottom to release a tab that is hidden under the seat. Remove the trim.   Running the wires Now that the path is clear, time to run the wires! Here is the opening that I found to run the wires to the side compartment where the DVD player is located.  Run the wires to the front of the car through the cubby. Pictured below is a view looking from the opening in the trunk. I ran the wires through the wire guides already in the cubby (Note: the CD changer cable is in view here wrapped in the foam).  Then run the wires along the side rail, tucked under the carpet. 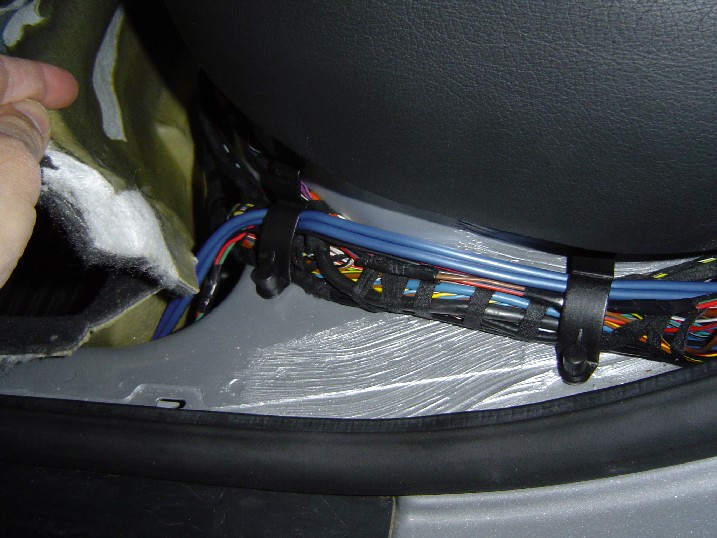 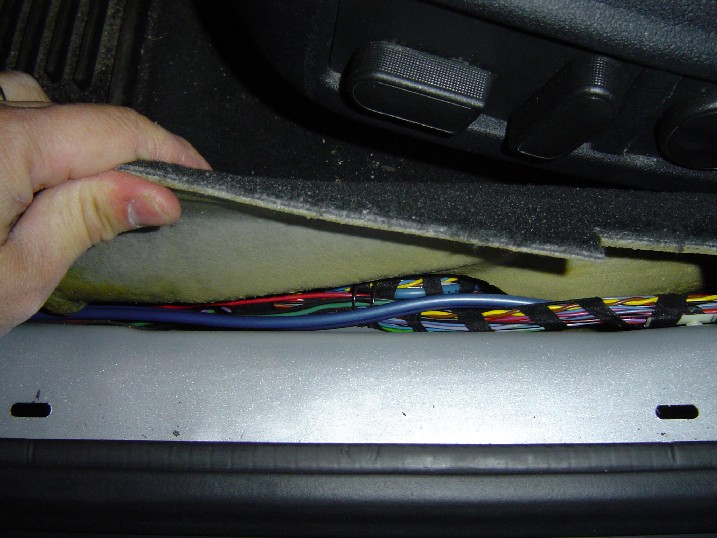 I ran the wires and A/V cables to the front near the deal pedal, and coiled up the extra length and ticked everything under my floor mat until I was ready to finish the wiring. I also ran along the side the wire for the remote eye. The wire was barely long enough for me to reach the front edge of the dash along the windshield. I wish it could have reached dead center of the dash, but there was not enough wire, so I am settling for now...maybe I can get an extension cable and place it exactly where I want, but this will do for now. Note: I have not used the adhesive tape just yet since I am thinking of relocating this if I can get and extension wire. In testing the unit and the remote control, the remote needs line-of-sight to work, so I have to raise the remote control dash height for it to work (not the best setup IMHO). I am thinking of hiding it along the top of the windshield now, so I would not have to raise the remote for it to work.  [page1][page2][page3][page4] |
|
Advertising |
Contact Us |
Cookie Policy |
Privacy Statement |
Terms of Service |
Do Not Sell My Personal Information
© 2020 MH Sub I, LLC dba Internet Brands |