| Tech Article Title |
Author |
Date
|
| Sunroof Switch Repair (fixes random opening problem) |
a4tis |
2007 |
We've been getting a lot of rain here in Western NY (the state not the city) and while driving yesterday my sunroof decided to open up on its own while it was raining, which was lots of fun. So I whipped out Forced Induxion's sunroof DIY, but I decided to add pics and a couple of notes. Everything written is originally from Forced Induxion's DIY guide, except anything in [] is my notes and of course pics are mine as well. This is such an easy DIY that if you have 30 minutes to kill one day just do it so you can avoid dealing with the sunroof ghost at a more inconvenient time..
[Time to complete: less than 15 min
Difficulty: 1 out of 10 (1 being if you have 2 hands and 10 fingers you can do this)]
Tools needed:
-Something flat (thin screwdriver, butter knife, etc.)
-Phillips head screw driver
-star tool [this is a Torx bit - the size you need is T-9! In most multi-bit sets that you buy the smallest they have is T-10. This will NOT fit at all. I bought a separate T-9 bit at Pep Boys for $2.25]
1st: Remove the middle clear plastic cover that's covering the "dome light" area. You can use anything flat like a thin screwdriver or butter knife. [I used a flat blade in my leatherman] Wrap some tape around your screw driver so it doesn't scratch anything. Pry the plastic piece off starting at the left or right side near the top (the top would mean the side closest to you while sitting in the driver's seat.


2nd: Remove the interior colored plastic that covers around the map lights. Start near the top (side closest to you). I was able to just pull this down with my fingers. No tools needed.


3rd: You should have all your bulbs exposed. On the left and right of the sunroof knob you'll see two phillips head screws. Unscrew them and you should be able to pull the whole unit out of the roof easily. Don't worry about letting it hang by the wires...just don't yank on it or anything.

4th: You don't have to do this part but it makes it a million times easier to work on. Unplug all the wiring harnesses from the unit so it's completely free. For some of them, you need to press down on a tab to release them. The smallest one is held on by an interior colored tab. The one held onto the sunroof knob doesn't have a tab and just slips off.

[*****NOTE: While I was able to remove all the of plugs, my harness was connected to the overhead wiring with a retention screw as shown in the pic below. I didn't want to break it so I left everything plugged in and it was still easy to complete this.]

5th: Once the whole thing is free, you can work on it at a table or in your lap now. Now look at the back of the sunroof knob. There are 3 black star screws [T-10 sized torx bit] holding the actual know to the whole unit. You don't need to unscrew them. Just unscrew the 3 silver ones [T-9 torx bit] on the actual knob with the small star tool [torx]. (there might be one hidden under a sticker)

6th: Once you take the 3 silver screws off, remove the cover and you'll see the small green circuit board. Just pull that off and let it hang to the side.
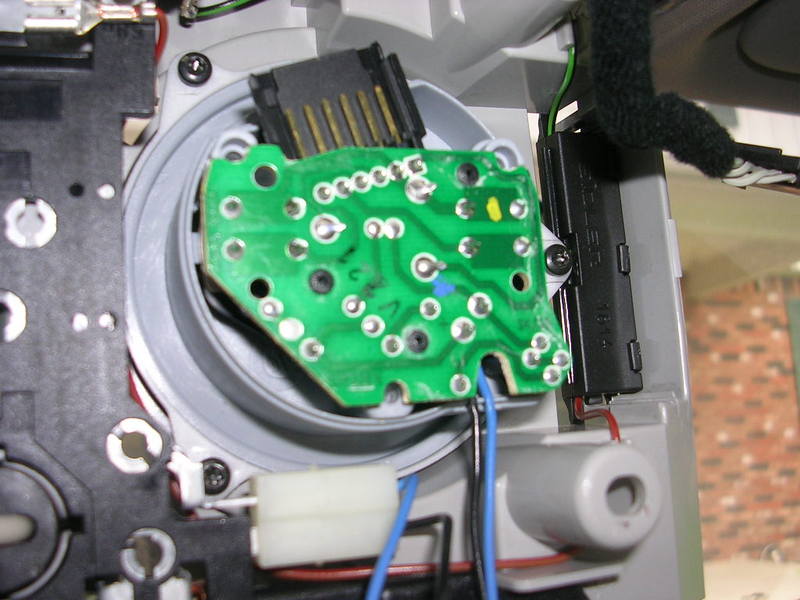
Under it are the metal contacts that you need to bend. There should be 2 parts of it sticking up...bend them up a little more. Then put everything back in reverse and you're done.

IMPORTANT NOTE: While you're putting the cover back on the knob with the star screws [torx screws], TEST THE TILT UP/DOWN AND MAKE SURE YOU CAN FEEL THE CLICK OF THE CONTACTS HITTING THE SWITCH [this is important as the first time I did it the sunroof could tilt up but I could not tilt it back down so check before you screw everything back in]. If it stops clicking and doesn't work again then bend the contacts until they work correctly. You may need to play with it a little bit. Keep testing it the whole time for tilt UP and DOWN while screwing in the star screws [torx] until you're done. Start with the top and bottom screws and tighten the screw that was under the sticker [the bottom one] last.
Hope this helps and good luck.
[Again this is Forced Induxion's DIY guide. I simply added pictures and a few notes - hope this makes it easier for all of you with the ghost:) ]
|