| Tech Article Title |
Author |
Date
|
| B6 – B7 A4 XM install |
Reggie |
2007 |
Audi was one of the few auto companies that gave their customers a choice of which Satellite Radio they
wanted. Sirius has been spending like crazy and was able to buy a exclusive contract with Audi. However,
there are still ways to make the previous versions fit the B6& B7 cars. One noticeable difference is the
Sirius module has the Terrestrial and the Satellite signals combined into one input – XM has a separate
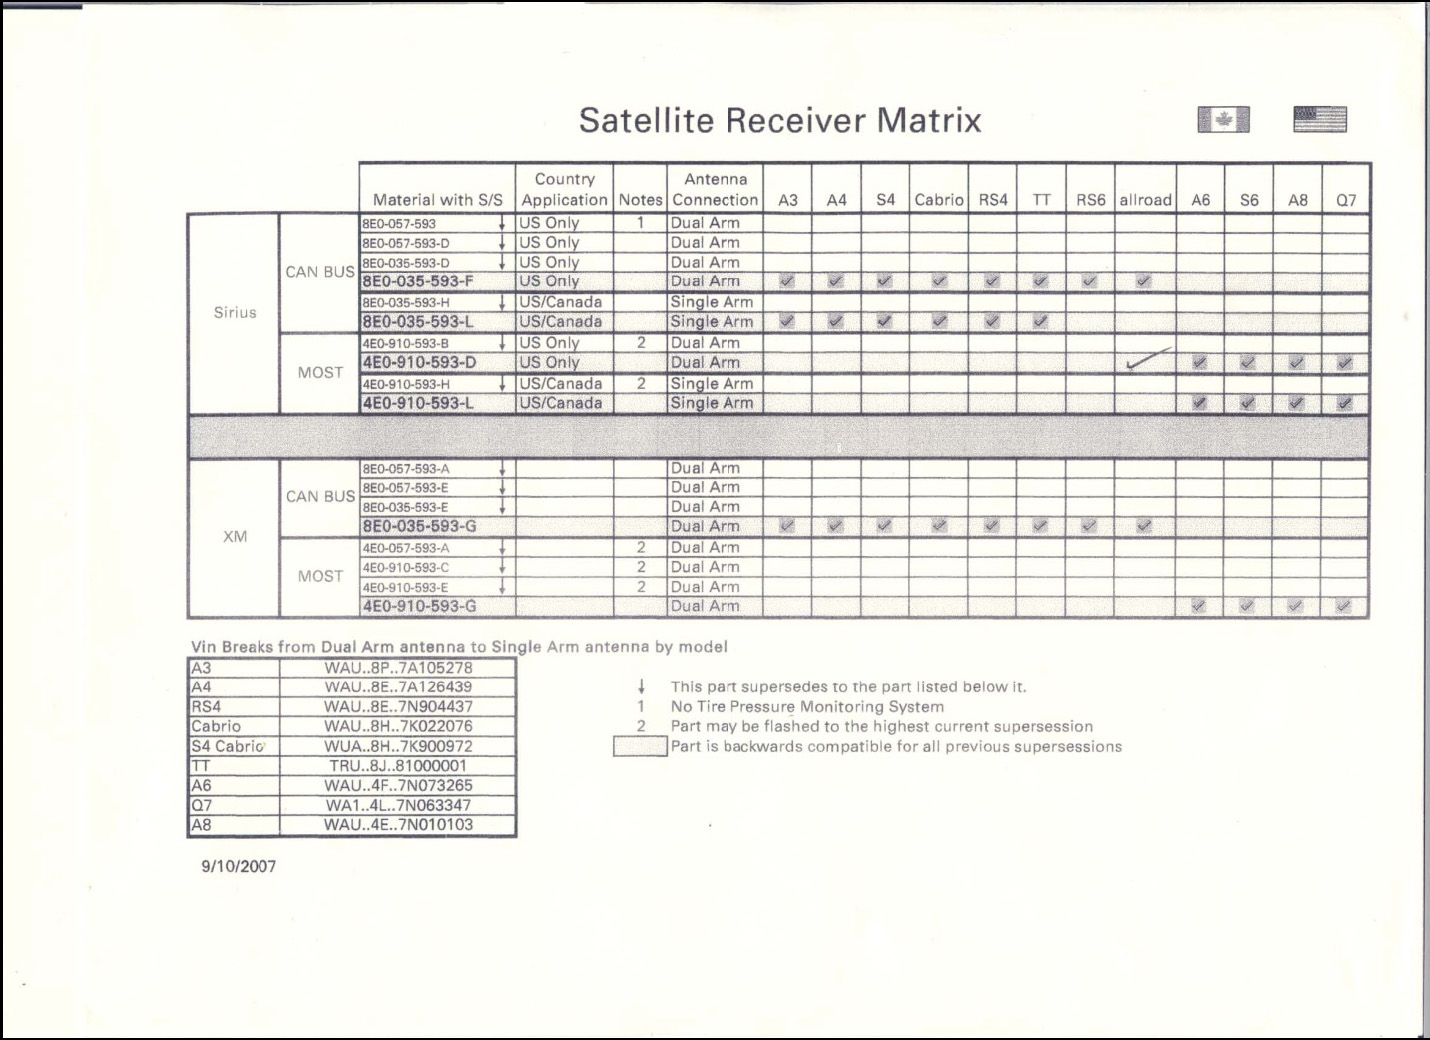
input for each. To see what modules work with what car – look at this matrix from Audi:

Now let’s get started:
Tools Needed:
1 Thin flat blade screw driver
2. Torx 20 driver
3. File
Parts to order:
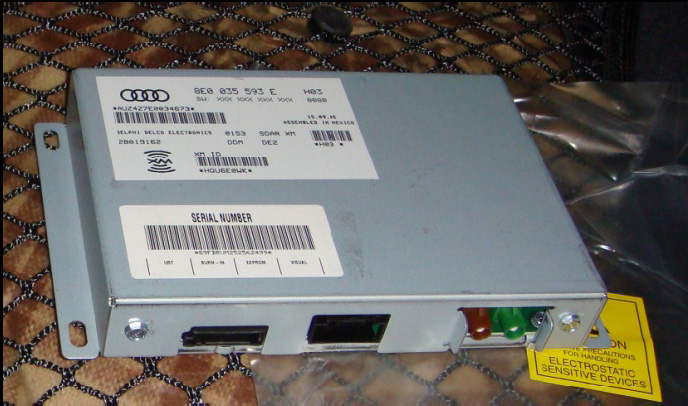
XM Module 8E0-035-593-E or higher. New prices can range from US$400 - $500
Can be sourced from several places – I ordered mine from Carson @ Riverside.

Terk XM-SP – Cost is around US$15 on the web (Do a Google Search)
The XM-SP splitter features a single antenna input (FAKRA) and dual 3-3/4" output cables with
color-coded female FAKRA-type SMB connectors (Green--Terrestrial, Curry--Satellite) for dualinput
XM Satellite Radio receivers.

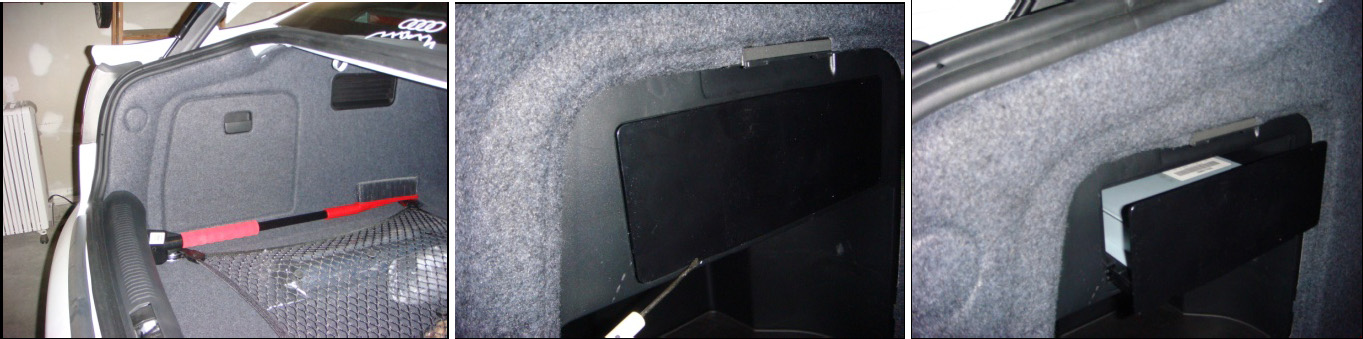
First use the thin blade screwdriver to pry back the Sirius Module bracket. The Sirius module is
mounted to this bracket and will slide out into the trunk area.
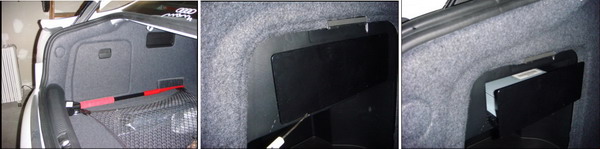
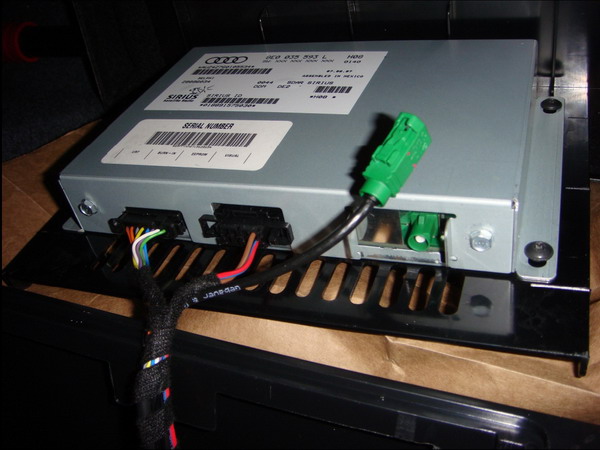
Next disconnect the antenna, and two connectors that are attached to the module. Slide the bracket
with the module completely out. The picture here shows the module mounted to the bracket with the
antenna disconnected.
Next using the Torx drive unscrew the four screws that hold the Sirius module to the bracket.

Put the XM module on the bracket and secure with the four screws you removed from the Sirius
module.
Next we need to modify the Terk adapter:
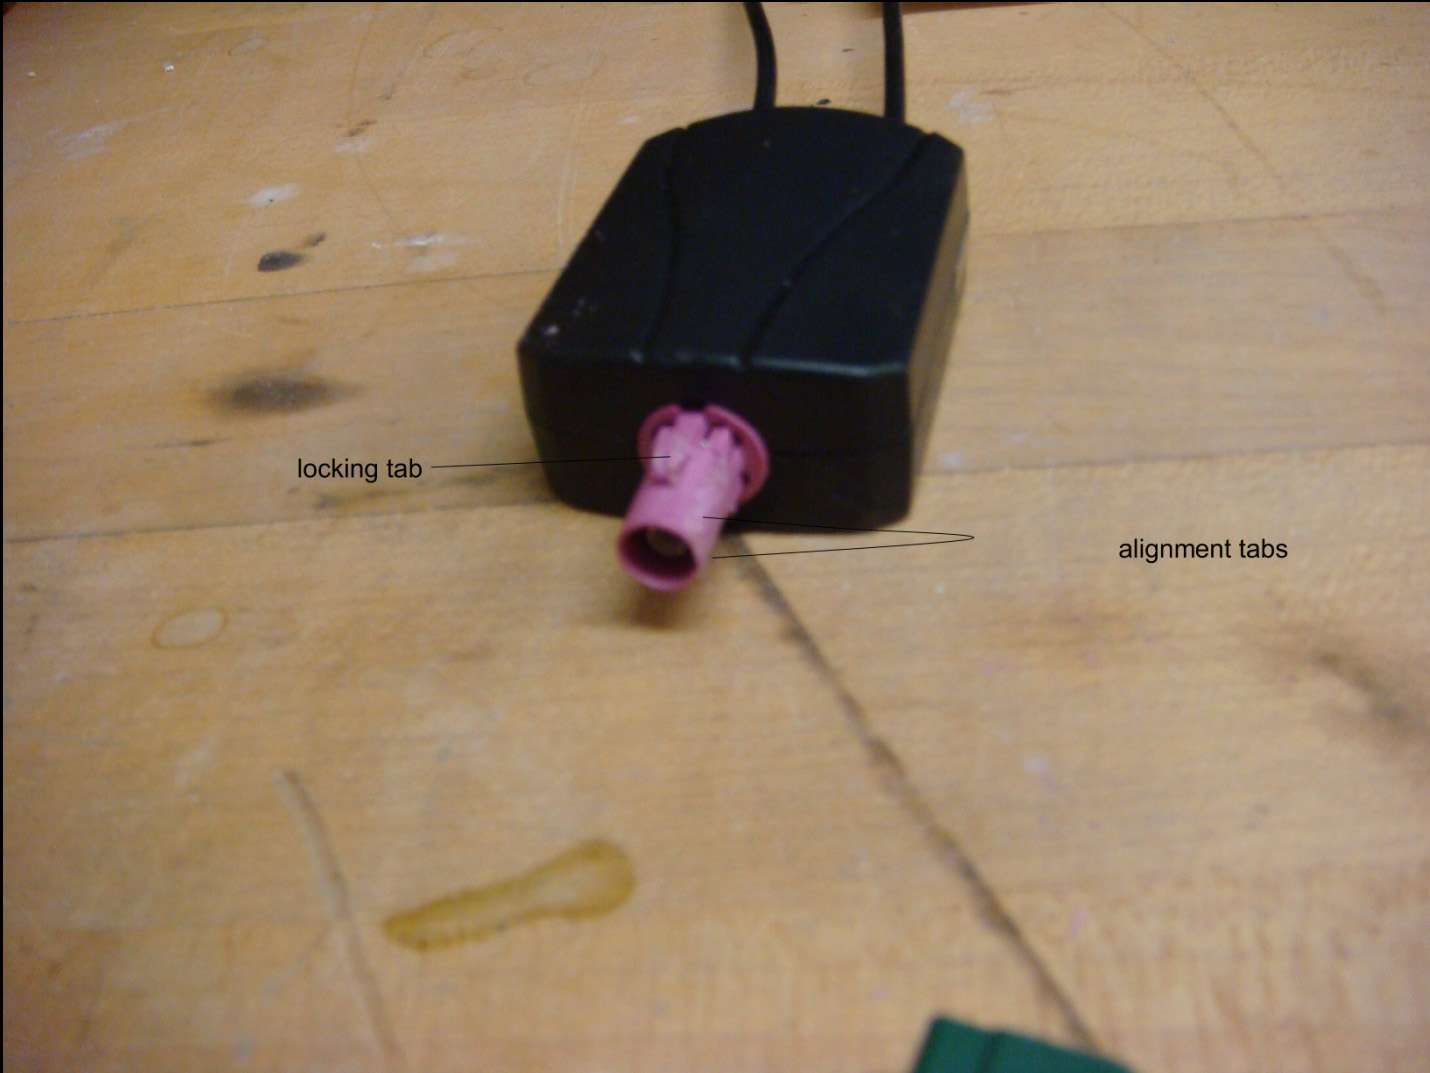
File the alignment tabs flat on the Terk adapter that goes onto the car antenna connector. Note – do
not file off the locking tab. These tabs are designed for a socket that does not exist on the satellite
connector from the car.

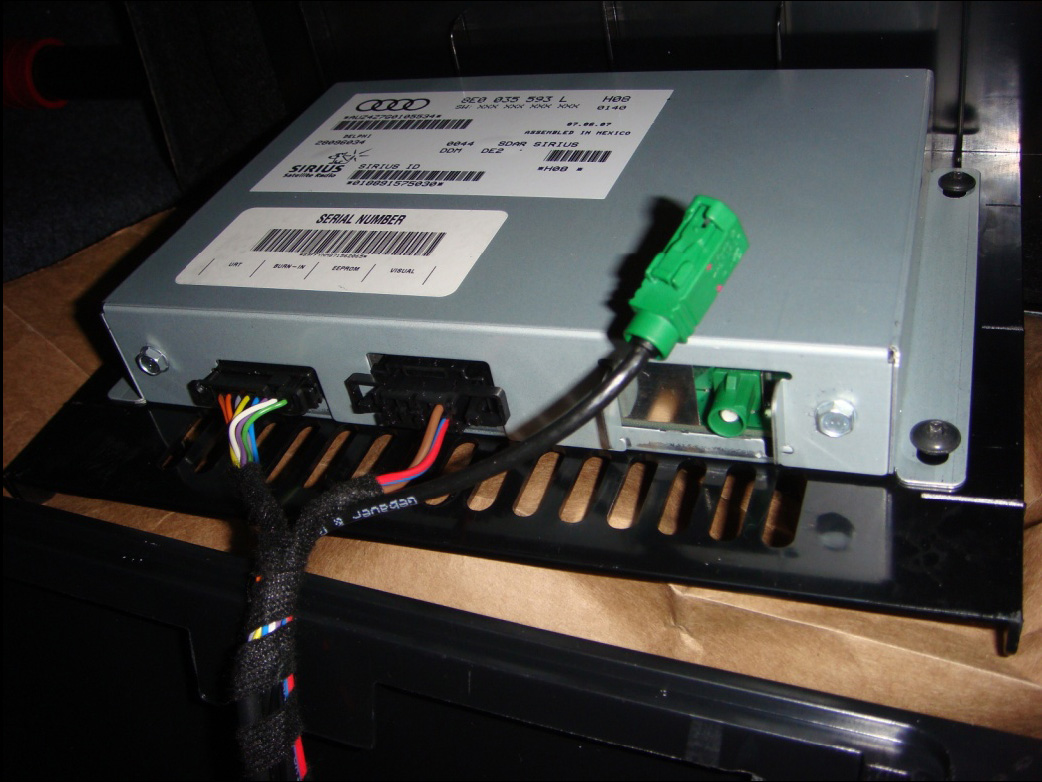
Next one wants to put the adapters on the Terk wires that connect to the XM module. These are color
coded and come with directions from Terk. Dark Green goes to the TER lead (the wire is labeled) and the
Curry color (more like light green) goes to the SAT lead. You will probably have to force these on with
pliers, or you can leave the adapters off all together – I think they will lock enough to the XM module.
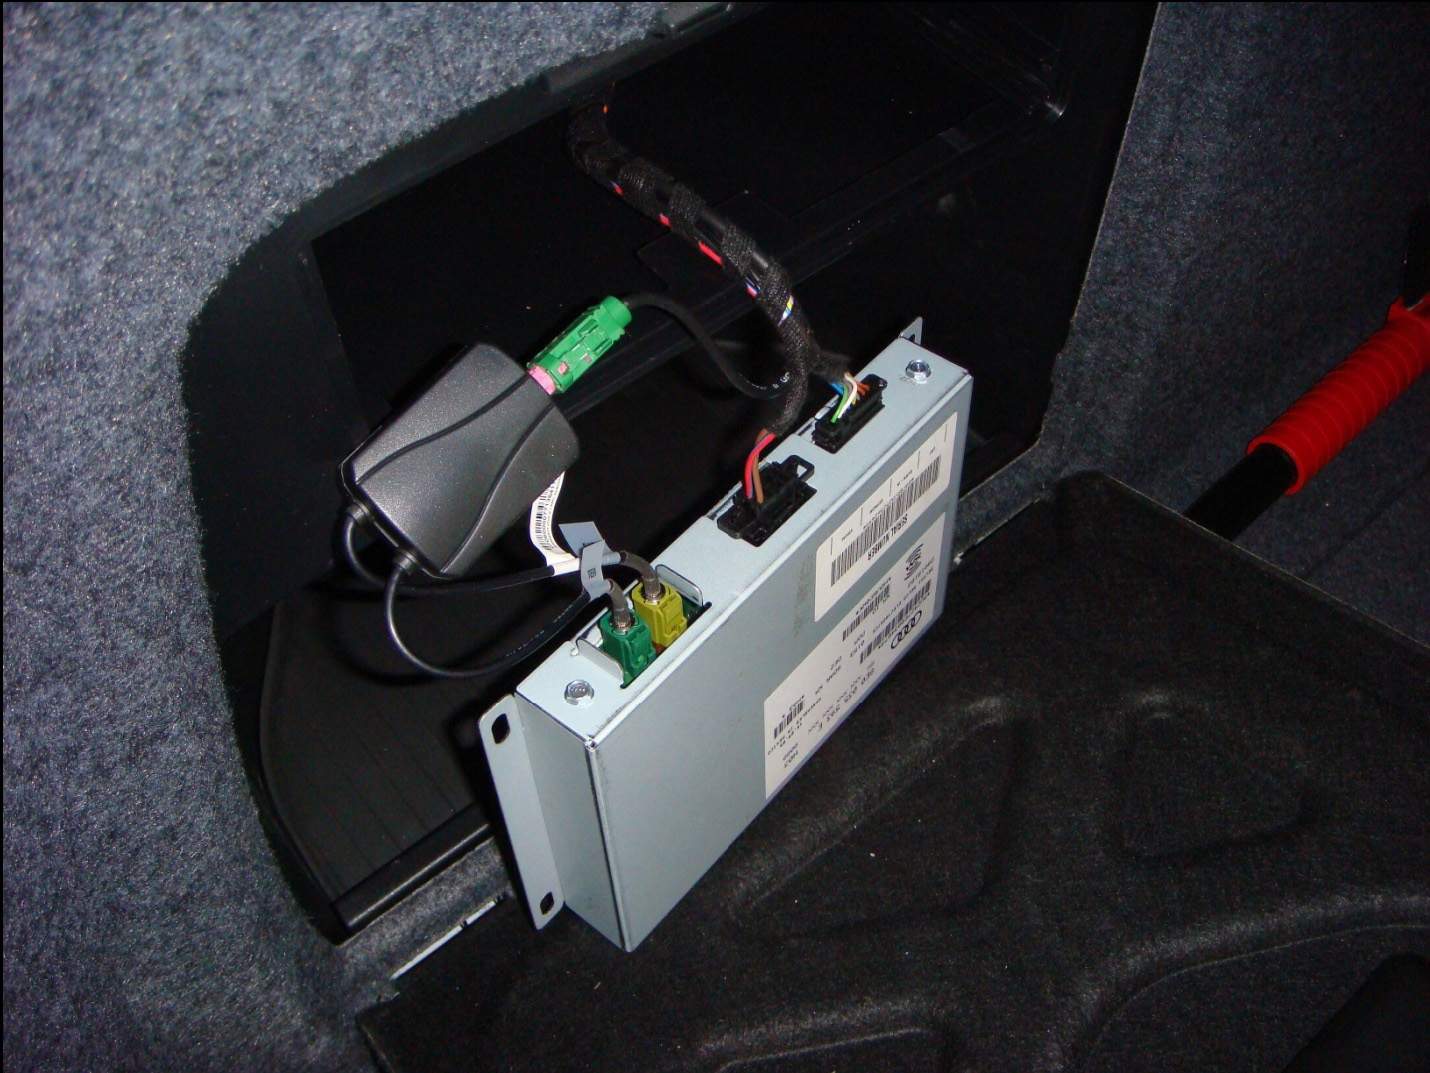
Now just connect the leads to the XM Module. Note that the picture below does not show the XM
module mounted to the bracket.

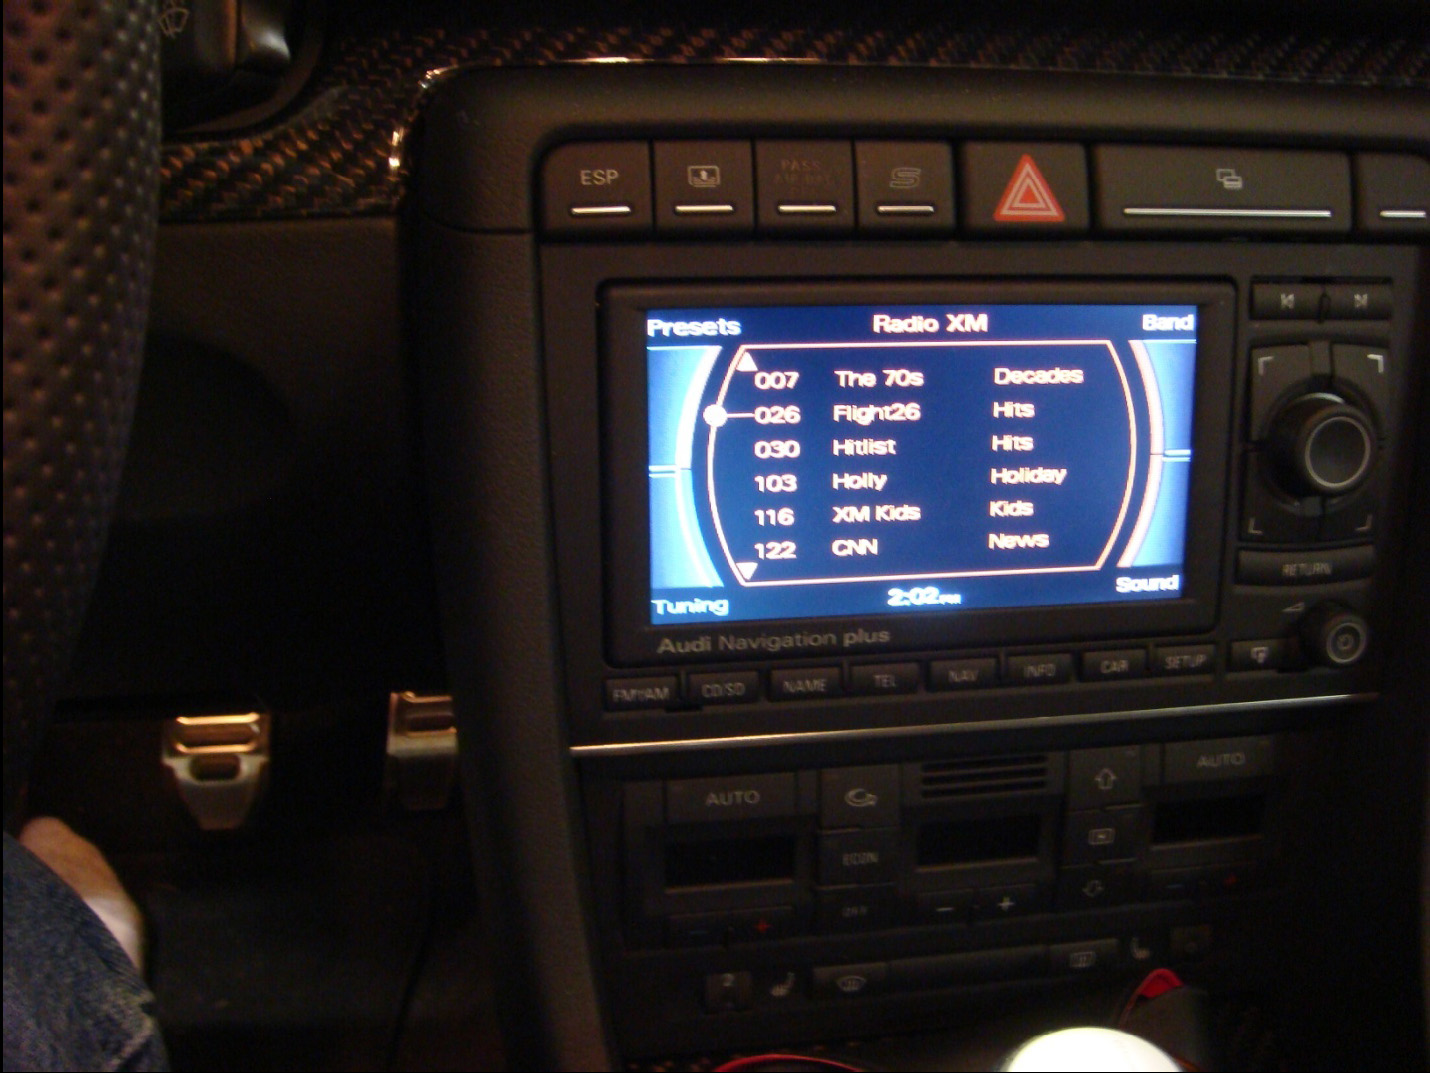
Next it is time to activate XM. Make sure the car is positioned in a area where you can receive the
satellite signal. Turn on the car radio. Press the AM/FM button till XM is selected. Tune to channel 000.
Note if things are good one should be able to see Channels 000,001 and an additional 13 channels. This
was different than my Delphi XM that would only display Channel 000 and 001. On Channel 000 write
down the code that is displayed for your XM module. Now call XM and activate your
account.

|