| Tech Article Title
|
Author
|
Date
|
| Hardwiring
an Escort Radar Locator (2002+ A4) |
CVT_A4
|
2003 |
DISCLAIMER: This article is for informational purposes only. Please use at
your own risk!
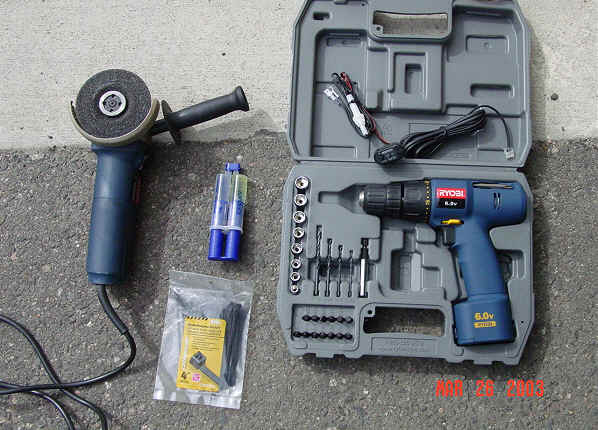
Tools needed:
-
Escort SmartCord-Direct Wire (part number 79-000041-01) from http://www.EscortStore.com/ (about $35)
- Drill with bit set
- Grinding machine
- Glue (or Silicone)
- 9/32" socket (8mm)
- Multi-Purpose Tie/UV
1- Open the fuse cover.
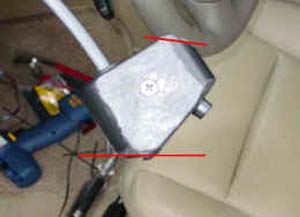
2- Remove the lower panel by removing the three bolts shown in the picture using the 9/32"
head (See first picture, the red arrows). Then pull it towards the driver side (second picture). Note: There are two wires connected to this panel (see next step).


3- Disconnect the two harnesses.

4- Remove the plastic cover (to the right of the headlight switch) by pushing it with your fingers from the back. It will pop out easily.
5- Now, you have to modify the Escort mute remote to make it fit into the plastic cover you just removed from your car. To start modifying, you must open the remote.
6- Unscrew the remote and make sure that you don't make any damage to the black label on the mute remote that says (Passport). This label is stick on the mute remote. Once you get that label, save it in a good place to use it later (I used the white paper under the mailing stamps). Remove the wires inside by simply pulling them.
7- As you can see, the remote is not square. You need to modify it to make it fit into the plastic cover that you removed from your car.
8- Shave the lines (both side) using the grinding machine (or a file) to make it like this. Also, shave the face (red lines shown in the second picture).


9- Now, you have to play with the shape of the housing of the remote. See the picture to know what sides need to be shaved (make sure that you removed the wires before doing this).
10- Make sure that the mute remote housing will easily slide into the plastic cover. Try to insert it with an angle and goes all the way down.
11- After shaving, you will get something like that.

12- I bought a new cover from my dealer. My car comes with beige one, I bought the black one (Part number: 8E1-919-508-5PR) for about $5 (see the picture in step 14 to know what cover I mean). You can use the one you have, but I want a black one. It's really hard to tell how you do choose the place to drill for the mute button. But here what I did. I used a very small bit to drill and see how far the mute button from my hole was. You need to make the hole bigger for the mute button. My hole was little bit to the left. So, wile I was making the hole bigger, I was trying to make my hole to the right (to the correct position). Make sure to have the mute button free to move in the hole before going to the next step (make sure to hear the "click" each time you press the mute button).
13- You have to drill two more holes. One for the power light and the other for the alert light. You should start with the alert light. See how far it is and drill. Note that this hole should not be the exact size for the light. The only purpose of this hole is make the light pass through. Repeat this step for the power light.
14- After drilling, you will get something like that. Notice that the mute hole is bigger than the others.


15- Make sure the all holes are in the right position. You need to test your work before gluing. Reinstall the wires that you remove from the mute remote housing and then connect the wire to a power source and make sure that you can see the lights and the mute button is free to move at the same time.
16- After testing your work, you need to secure the two pieces together (mute housing and the drilled cover). Use a plastic glue for that. DON'T put a lot of glue. I put a lot and the glue went out from the holes. It glued the mute button and I immediately remove it and clean it. I recommend putting glue in the back only (Yellow area). Follow the glue manufacture instructions. Mine needs 24hrs for full strength.

[Page 2]