|
For Non USA models with the manual switch on the cabin.
For USA models contact Agravic for the switch installation.
Difficulty
Scale (1 easy- 10 difficult): 4
Tools
1) Screwdriver (-) for the screws of the headlight
2) Forceps or tweezers
3) Swiss army knife
4) Electrical tape
Parts
1) Auto-leveling motors
2) E-code connector and wires

Mechanical Installation
1) Take out the headlamps from the car (unscrew them)
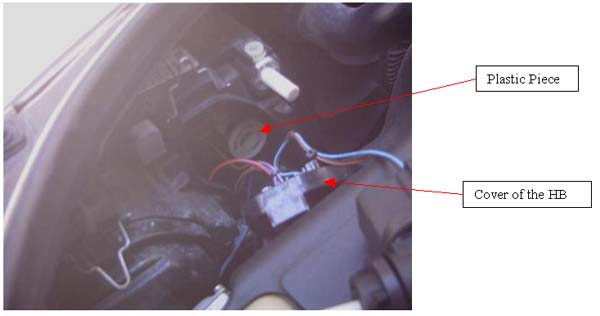
2) Take out the cover of the high-beam
3) Remove the plastic white piece of the e-code (turn the piece clockwise with the forceps and pull the piece to you and the push down the piece)
4) Remove the headlamps from the car to work better
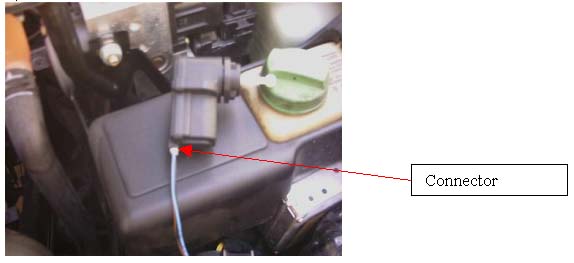
5) Connect the connector of the e-code to the motor
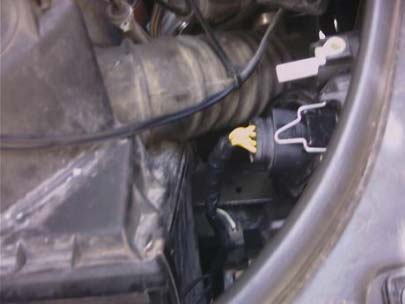
6) Install the motor inside the headlamp (Lot of work to do it. You need to pull the inside of the headlamp to you to help you fix the motor in the position (do it vertically))

7) Turn the motor to fix the position (Like in the picture)
8) Prepare the OEM wiring and the wires that goes into the connector of the
e-codes

9) Cover with electrical tape and test it.

10) Insert the connector on the e-code
11) Put the e-codes on the car and connect everything
12) Align your lights
|