| Tech Article Title |
Author |
Date
|
| 10v (NG - 5 cylinder) Timing belt and water pump installation |
S4gasm ~ (aka LoTR) |
2007 |
This is for a NG 10v 5 cylinder motor, it is pretty similar to the 20v format but there is a few differences, and AW never had an actual TB/WP write up for our cars, so what the heck. Hopefully this will be useful to some people.
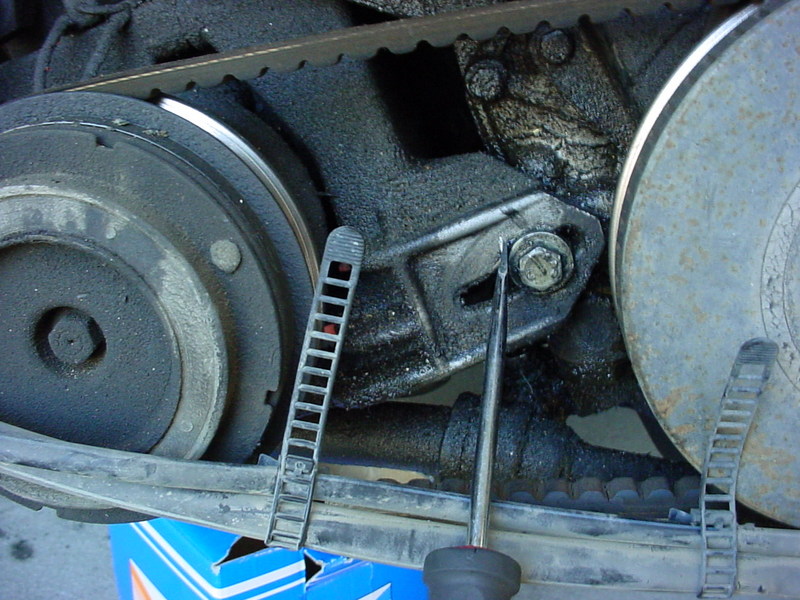
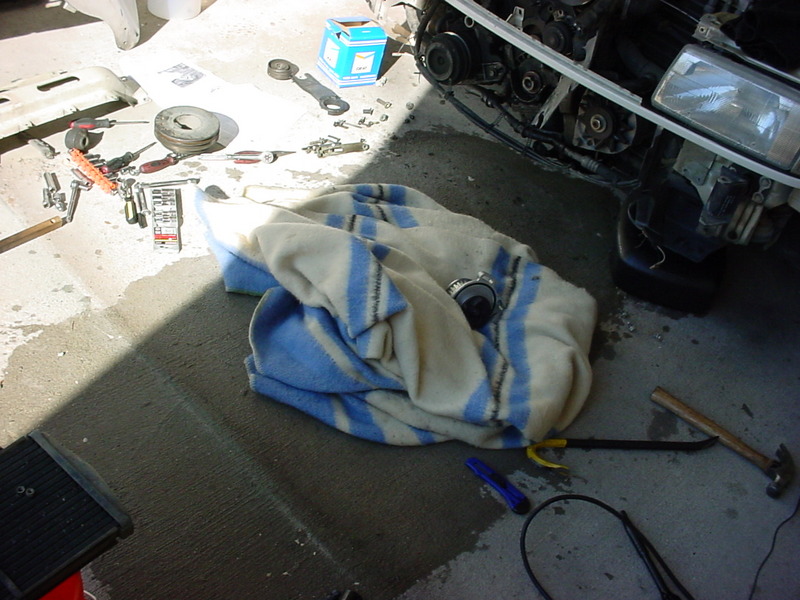
First of all you will need a good basic set of tools, including allen sockets and of course metric sockets. 27mm for crank bolt, and a big breaker bar to bust the 350ft lb bolt lose!! Most importantly you will need the 2084 tool-(crank lock tool) or a home made variation of it. Some people have made them, I was however lucky enough to source one from audifans.com, often people will lend them out for just the cost of shipping. This is a $100 tool so I would suggest looking for a loaner, you will NEED this tool though. You should also have a pry bar of some sort to remove the old idler/roller pulley. You really do NOT need a puller to remove the idler/roller, a pry bar works dandy, just be careful of the bolt on below and to the right of it, it goes threw the oil pump. (see picture below)
Stuff that you should also replace while doing the timing belt:
- Water Pump ~ $43 (and new O-ring)
- Idler pulley ~$35
- Crank Seal and cam seal- (not necessary but check yours) also removing cam sprocket can be a PITA, the cam seal can also be replaced later without removing the whole front end. But definitely replace the crank seal!! About $3 each.
- Timing belt - $9
- Thermostat and new O-ring $18
- *Phosphate free* Antifreeze coolant
I bought all my parts from autohausaz.com..Very good deals and quality parts.
Believe it or not, this was one of the most trouble free jobs I've done on my car, my suggestion would be to take your time! Do not rush this job, I took my sweet time, meticulously taking note of how everything was placed and in what order, plan on spending a whole day with this task ~ 8+ hours. DO NOT RUSH IT!
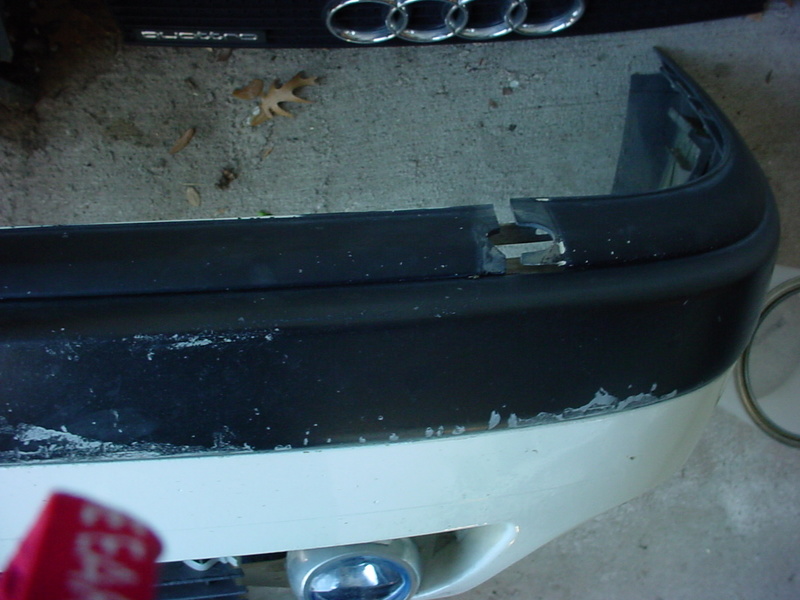
1. Remove the plastic clips on the top of the bumper by using a flathead screwdriver and just sort of pry them up and forward, they pop off pretty easily. There is 2 allen bolts that hold the bumper on, underneath the clips we just popped off. I believe they were 6 or 8mm allen bolts, remove them. Then the bumper will slide forward a bit, then fiddle the sides of the bumper until the clips pop free, I had to lift up on the bumper a bit to remove it. Also remove the belly pan.
2. Next drain the coolant from the radiator, remove the lower radiator hose, it sits pretty low so I had to jack up my car for this step to fit my big drain bucket under there. Remove the hose clamp and then you might have to pry the hose loose by sticking a screwdriver in there and breaking it free around the edges, but with caution!! Remember these fittings are plastic, they can break.. After you drain the radiator, there will still be coolant in the system, you can drain it by removing the heater hose that goes threw the firewall, or you can just drain the rest when we remove the water pump later.
3.Now remove the front grill, 4 screws hold it in. Then remove the center support between and above the headlights, there will be 2 bolts on each side and then a couple screws in the middle that are bolted to the plastic shroud, remove all of them. The hood release cable also runs beneath this piece, it is held in by 3 plastic hook/clips, just twist the clips and the cable will pop out, it is NOT necessary to remove the cable, just unhook it from the clips.
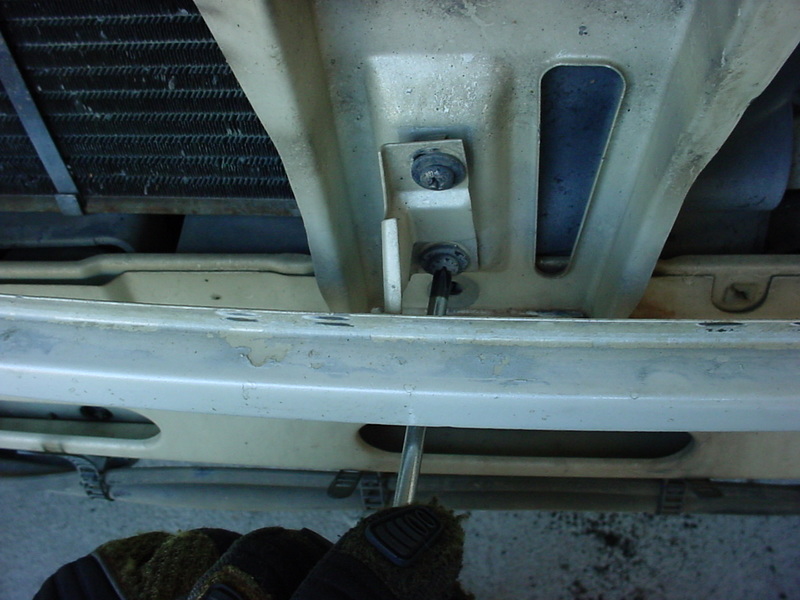
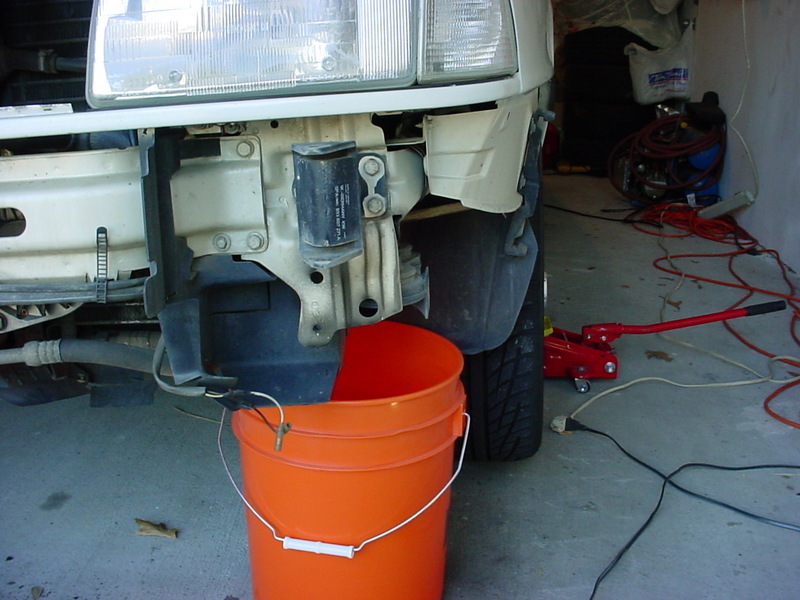
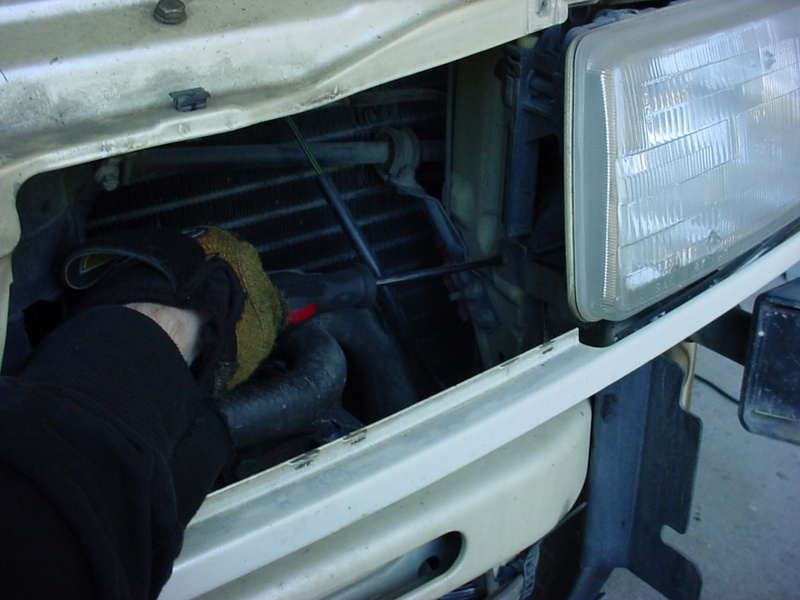
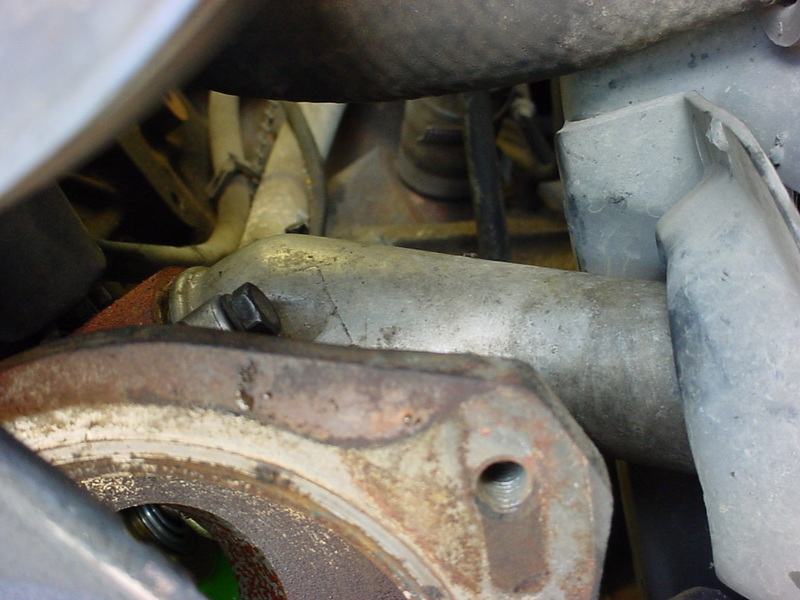
4. Once you remove the above support, you will need to remove the aux radiator next, it is only held on by 2 small nuts from beneath. Here you will need some long extensions and a 10mm socket to remove them, they have to be removed from beneath, lay down and you will be able to see them. Remove the 2 bolts and then disconnect the 2 radiator hoses going into it. There also will be a plastic shroud you need to remove a bolt enough to be able to bend the plastic away from the radiator, it is not necessary to remove the plastic shroud, just bend it out of the way, the bolt is located on the inside near the drivers side headlight - see pic.
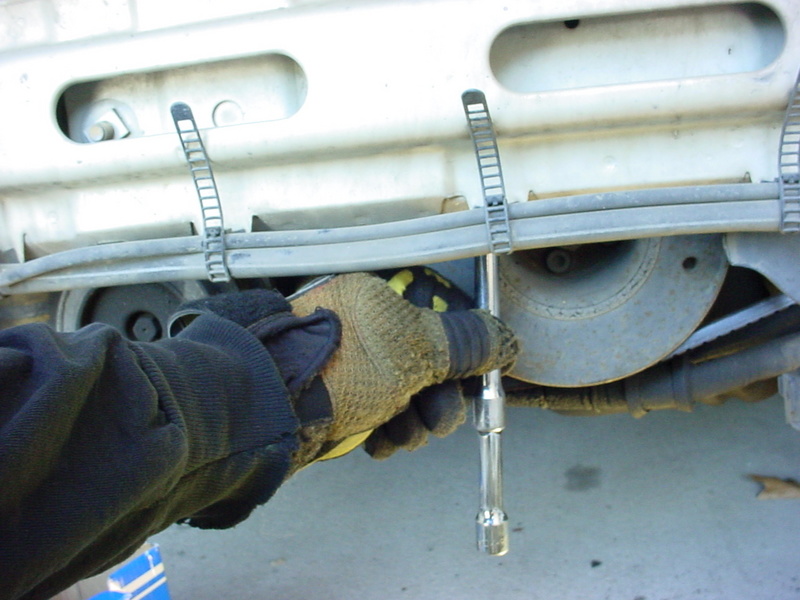

5.Now remove the lower cross member by removing the 3 bolts on each side, there is a set of wires that runs across this piece, you will need to undo the clips from the back before removing it. I used a small screwdriver to squeeze one side of the clip at a time, you may be able to use needle nose pliers, but I had better success with the small screwdriver.
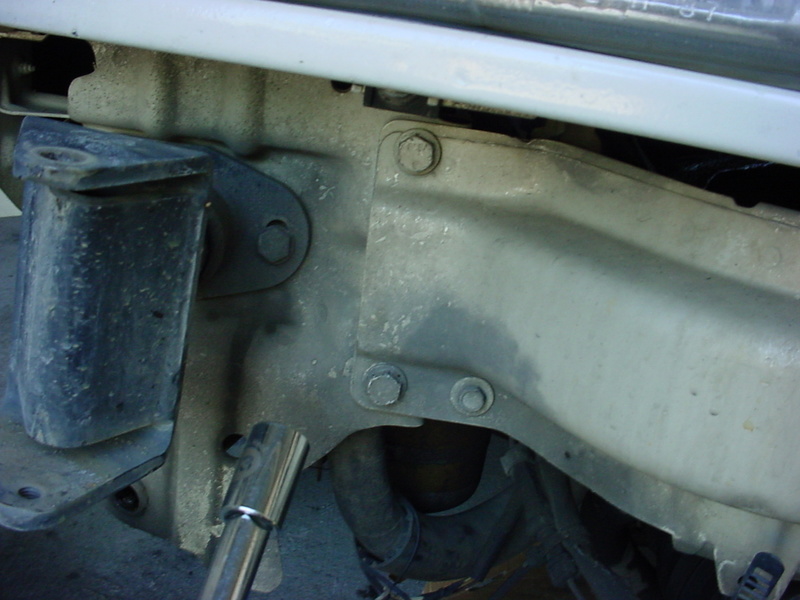
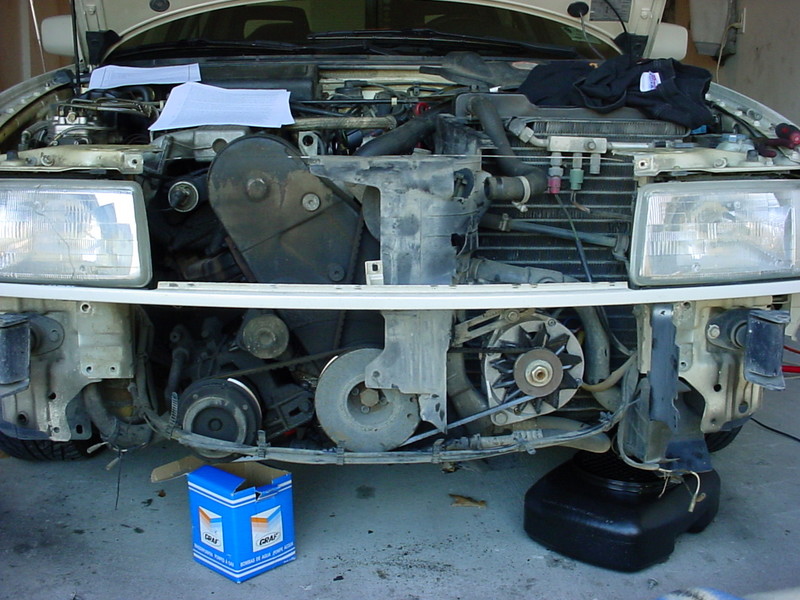
Once you get both those removed, should look something like this.
6.Next you need to remove all the accessory belts, I etched in marks on the mounting plates to give me an idea where they go upon reinstalling. First remove the alternator belt by loosening the 17 mm mounting bolt, then loosening the star bolt, and then turning the big nut that the star bolt threads into, too move the alt inwards to loosen the belt, then remove it.
7. Next remove the AC belt, there is a long horizontal mounting bolt that is below the AC housing, it's a long bolt that pushes against a metal plate to create tension for the belt. You need to first loosen the mounting bolt on the front of the AC housing (pictured below)
Notice all the oil, that's from my leaking valve cover gaskets-did them the next day. :)
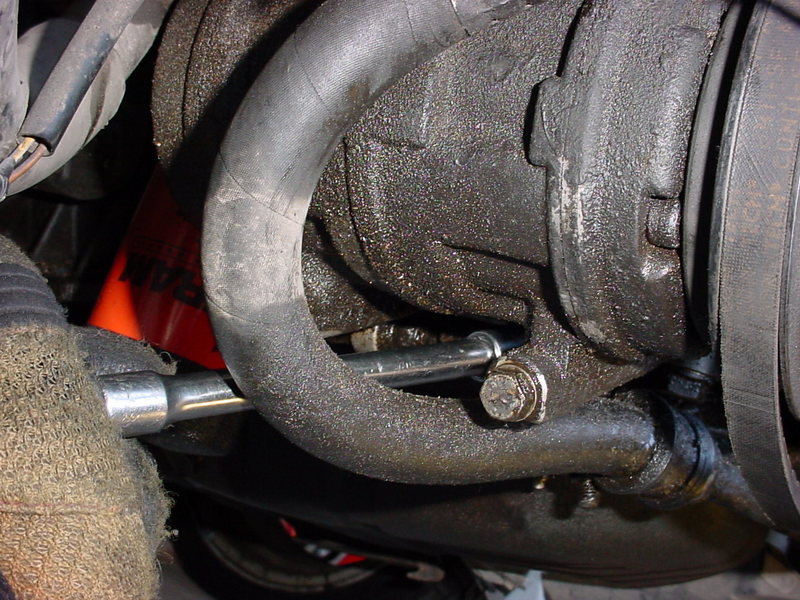
Then once you have that one loosened, there is another mounting bolt in the back of the AC, it is a 13mm bolt with a backup nut on it, also 13mm, you will need a wrench and socket to loosen it. Then you can loosen the long tensioner bolt underneath the AC housing. (pic below)
Next remove the power steering belt, to do this, you may need to basically remove all mounting bolts and pivot bolt to get enough slack to remove the belt. But first loosen the pivot bolt, then remove the adjuster bolt/mechanism completely from the sliding mount...push down on pump to remove belt.
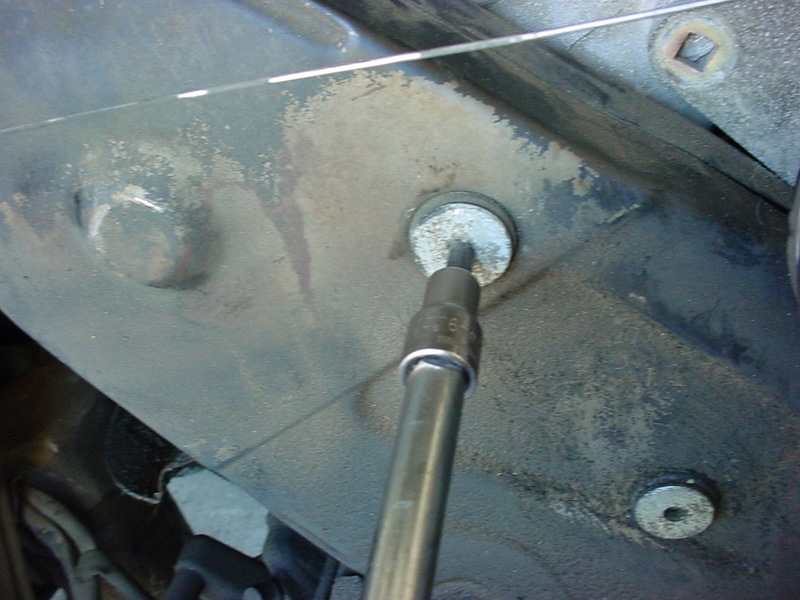
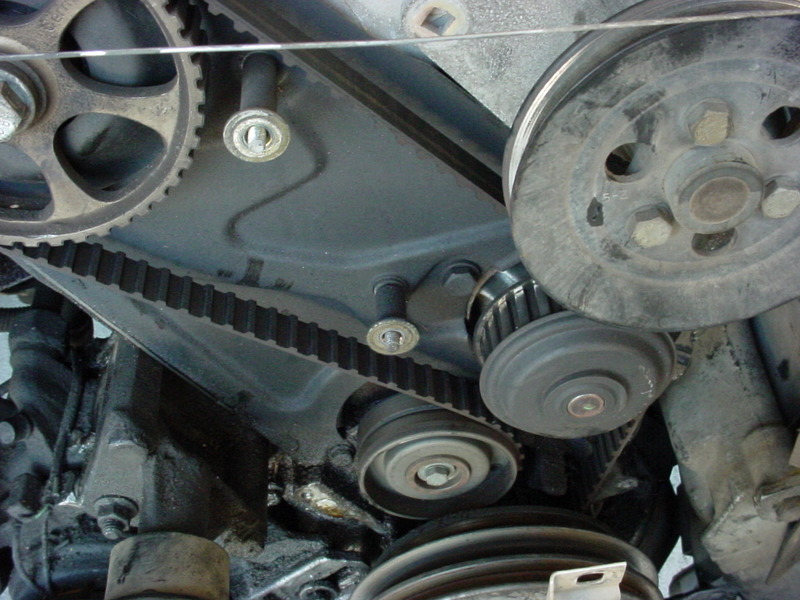
8. Now you can remove the upper timing belt cover, which is just 2 allen bolts, remove the bolts and then remove the upper cover. Then remove the lower cover, which is 2 10mm bolts, remove them and remove lower cover.
Once both removed, should look like this:
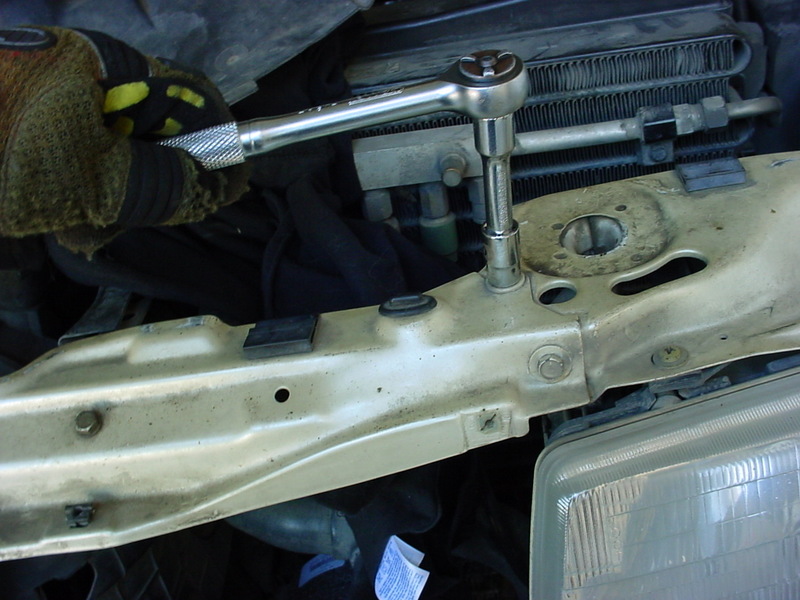
9. Next step is important, its time to get the motor to TDC (top dead center) to do this, you have to hand crank the motor with the 27mm socket by turning the big crank bolt. It will be easier to do this if you remove the spark plugs, less resistance.
There is a few ways to determine if you are on top dead center, here's some good ways to be sure of it. Crank the motor by hand until you achieve all 3.
There is a window in the transmission housing, you will see some numbers on it, like 12,15,18..etc....However, you must be on the number 0!!! 0 is top dead center. Once you see the zero, pop off your distributor cap, and look very closely, towards the font of the dist you will see a very small mark on the dist itself (see pic), that dist rotor needs to be pointed directly at the little mark.
Next you need to look down at the harmonic balancer (crank pulley) and you will see a very small mark etched onto it, it need to be aligned just a smidge to the left of the big metal tab above the harmonic balancer. (see pic)
Dist cap -alignment mark
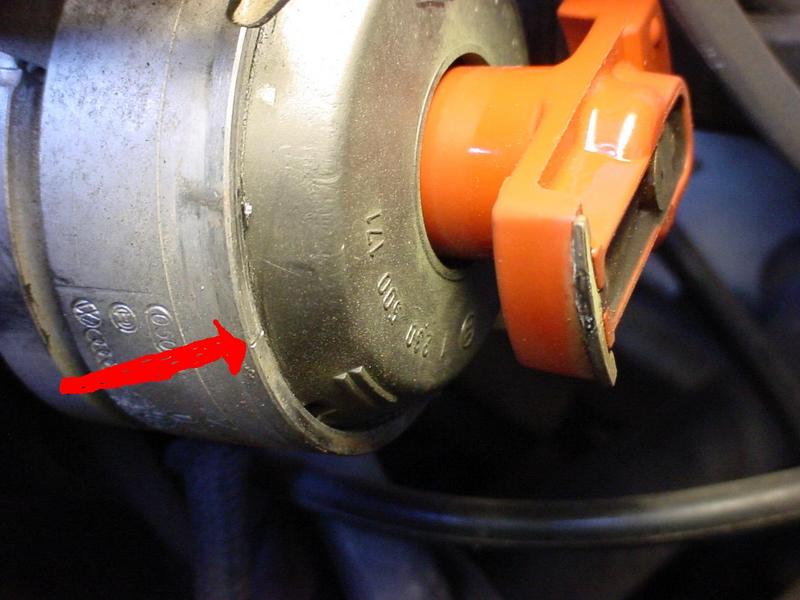
Harmonic balancer mark with tab circled, there is actually a smaller tab to the left, but very hard to see, basically the mark should line up just to the left of the big tab.
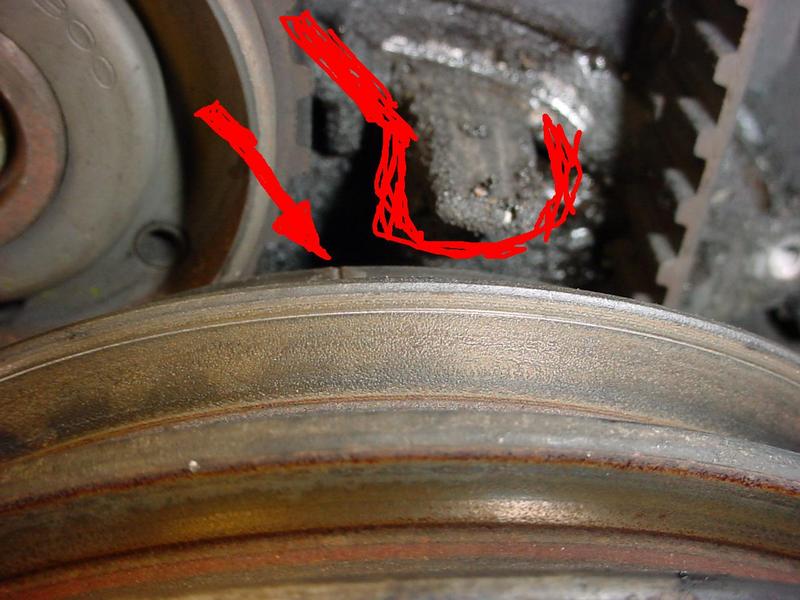
Next, look at your Cam pulley, on the BACKside of the pulley, there will be a very small cut-out notch, that notch MUST be aligned with the edge of the valve cover seal!!!! Some cars will have a mark on the edge of the valve cover, but mine did not, just be sure the Cam pulley notch (on backside of pulley-very important!) is aligned with the drivers-side edge of the valve cover!
Ok so now you have all 3 points of reference for TDC. Be sure all of them are aligned at the same time! It is possible for the Crank pulley to be aligned, and the cam pulley can be 180 degrees off, if that's the case you are NOT at TDC, you need to make another half rotation of the motor-by hand.
NOTE: Before you remove the belt, a very good idea, is to take a screwdriver (or white out) and make a mark on the cam pulley and a tooth that is contacting the cam pulley, and mark the belt (and pulley) Make sure the marks are visible and permanent!!.... and do the same thing on the crank pulley! Once you remove the belt, you need to count the amount of teeth between the 2 marks. (mine was 61)
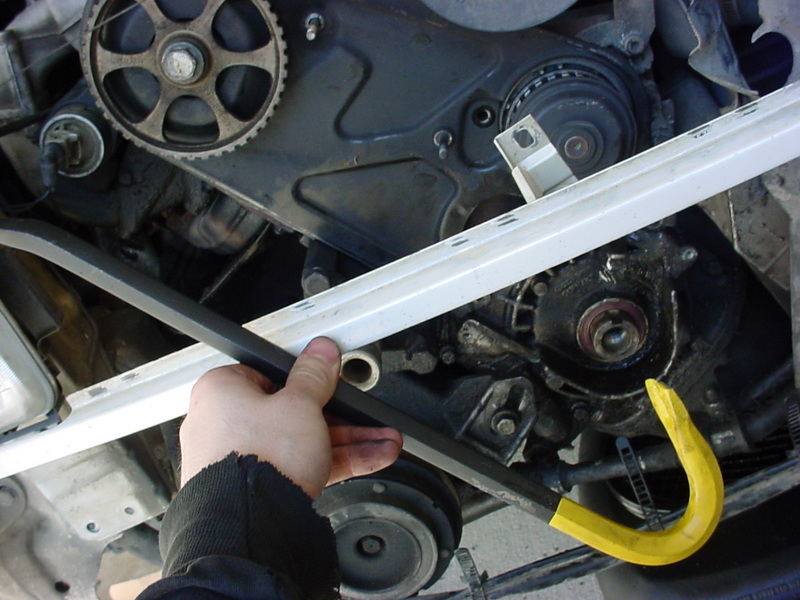
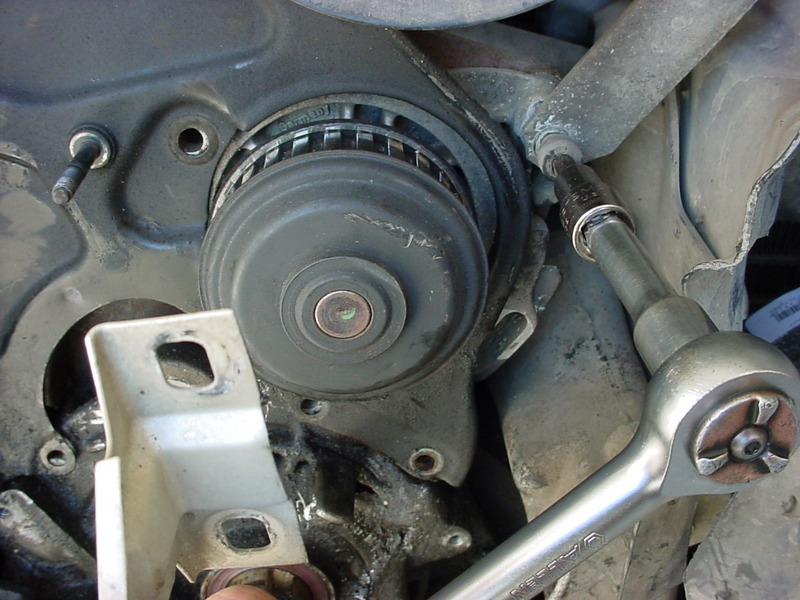
10.Once you are sure you have TDC, its time to remove the timing belt! (that wasn't so bad was it?) Now get out your 2084 tool, and remove the rubber cap on that metal bar thing sticking out - just yank it off. That bar is what the tool mounts itself against. See pic.
You might notice i'm using a torque wrench here, this pic was actually taken after the new belt was in, tightening it. To loosen it, you will need a breaker bar.

The bolt is mega-torqued to some 350ft lbs, you need a big breaker bar to budge this bolt, if that doesn't work, get a big metal pipe and slide it over your breaker bar and use it as leverage.
Note: Per 20v.org directions, they say to remove the 4 allen bolts off the harmonic balancer before removing the big bolt, that is completely unnecessary!! As a matter of fact, keeping the harmonic balancer attached to the pulley makes for much easier re-installment of the belt, as it is keyed!
Also note the tension of the timing belt, it should feel fairly loose, it should be able to turn 90 degrees in the middle, loose is better, too tight and you can wear out expensive pulleys and cause extensive damage.
11. Ok so you have loosened the crank bolt by now, marked the notches on the timing belt and crank and cam pulley, and you are at TDC. Time to remove the bolt completely and remove the entire harmonic balancer with the crank pulley attached to it, don't worry the harmonic balancer is keyed, so it can only go on one way.
12.Now is the time to get your pry bar out, let's get the idler roller off, take out the one bolt that holds it in place, and then with the pry bar gently work around the edges prying it out, CAUTION- on the lower right of it, behind it, hides one bolt that goes into the oil pump, do not use any leverage against that bolt! You can break it!! The pulley should come out pretty easily with a couple good prys with the bar.
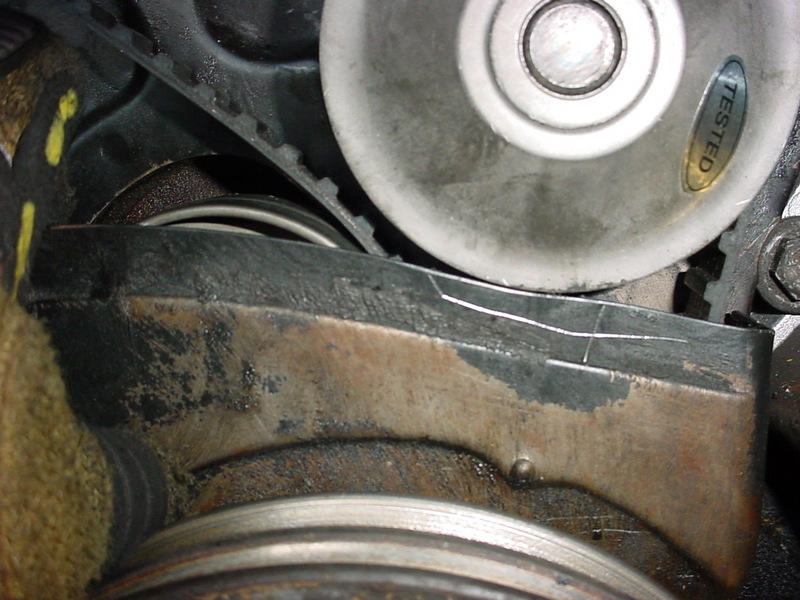
Here is the pry bar I used:
13. Now is also a good time to replace the cam and crankshaft seals if you are doing so, they are tough little cookies to pry out. I essentially had to destroy the old crank seal with a little screwdriver and hammer to get it out! New one just taps in lightly. If you are doing the cam seal, you must find a way to remove the bolt that holds on the pulley without letting the cam move, remember, its already set in TDC! Some people used a long bolt and wedged it between the block and cam sprocket. If you can't get to the cam sprocket now, don't worry too much, it can be replaced later without removing the front end.
14. If you are doing the water pump, you can do it without removing the rear timing belt shield, but you will need to loosen the 3 lower bolts (long ones) that hold the shield on so you can sort of bend the shield out enough so you can remove the water pump from behind it. The water pump has 3 bolts that hold it in, remove all 3, upon reinstalling bolts, put some locktite on the left one, it is a coolant passage, could leak if not tight enough. Also, the 3 bolts that you remove from the rear timing shield must be tightened well, all 3 of them can leak oil from there!! Tighten snugly but don't stripe them!
Water pump location:
Now remember earlier when I said some coolant will come out of the water pump? Yeah, well get your drain bucket ready, the flood gates will open!
15. If you are installing a new T-stat, the housing is just behind the water pump in this picture, you can see it in the pic below...just remove the 2 bolts holding the housing on, and remove the hose from the housing, install new t-stat and O-ring the same way.
16.When installing the new water pump, be sure to clean the surface well and lube the new water pump gasket with Vaseline or something similar, to keep the gasket (o-ring) from getting pinched during installation. Install the new water pump but do not tighten the 3 bolts yet.
IMPORTANT - If you bought the new revised Graf water pump, take note of its slightly different shape from the original water pump, (see pic below) if you notice, the edge of the old pump is tapered off to clear the timing belt shield, the new Graf pump was not! There was very marginal clearance issue, so what I did was take a file and just file down the lower timing belt cover to clear the new water pump pulley.
Notice the tight clearance, the lines you see on the cover are what I scribed in to give me a reference of the clearance I would need - file that area down.
Here is the old pump compared to the new pump, notice the difference in shape.
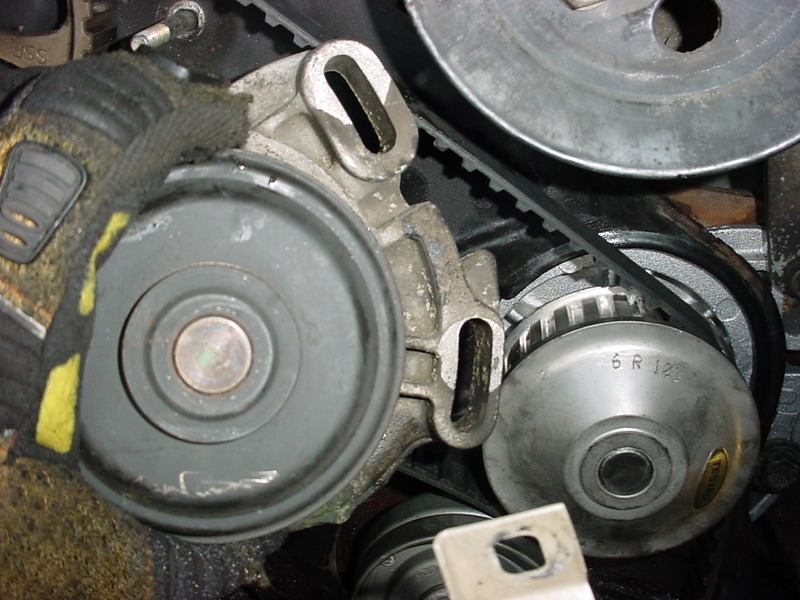
17. Install the new idler roller by lightly oiling the inside of the mounting surface, be sure its clean also. Gently tap the new roller in with a soft hammer by tapping the inside of it, make sure its seated all the way in before installing the bolt, snug the bolt to 7ft-lbs.
18.Now take the new belt, and count out the same amount of teeth between the cam and crank pulley- like the old belt. Mark the new belt with white out. Line up the belt with the marks you made on the cam and crank pulley. What I did-worked very well; with the crank pulley and harmonic balancer still off-as one, install the new belt over the cam pulley with the mark on the belt and pulley lined up, put it over the water pump and around the new roller like so- then take the harmonic balancer/pulley unit and look at the key slot, it will only go on one way!
So with the belt on the proper spot on the cam pulley, just slip the belt over the crank pulley and then slide it onto its keyed home! This way there is really no chance of installing it un-properly, since we never took the harmonic balancer off the crank pulley. Make sense? It will when you get to this step.
18. Make a visual note of the marks now, make sure the belt marks and pulley marks are lined up! Now is the time to get out the 2084 tool again, install it, and tighten the crank bolt to the suggested 350ft lbs, if your torque wrench doesn't go that high, improvise! Via cheater bar that you may of used earlier.
19. Now that the timing belt is on and crank bolt is tightened, go ahead and tighten the water pump bolts to 15ft -lbs. Check the tension of the belt, should be a lot like before, able to twist it 90 degrees between your fingers.
20. Now its time to check the timing, take the 27mm socket again and place it on the crank bolt, make at least a couple full rotations of the engine, everything should be the same as before, - The "0" on the transmission housing window, the dist rotor aligned with the mark, and the mark on the crank/harmonic balancer aligned with the tab. And very importantly, the Cam pulley mark aligned with the drivers side edge of the valve cover gasket. If all of those align again, congrats you have TDC!!
If for some reason it does not align, then back track and remove the crank pulley and redo it until you have it done properly, very important!!
21. Now install the timing belt covers, and double check all the bolts you removed from the rear timing cover and water pump, remember some of these bolts can leak, so snug them accordingly.
22. Re install all the accessory belts, power steering belt, ac belt, then alternator belt. Mine were all in good shape as they were replaced not long ago, if yours are old, now is a good time for new ones. Remember not too tight on the accessory belts, if you over tighten you can wear out the pulleys...not cheap!! A half inch of play is good.
23. At this point you can run the car, reconnect all radiator hoses and aux radiator, put some water in there and run it until the system burps and refill with coolant/water. There is a bleeder screw back by the firewall on the hose that runs threw the firewall, loosen that bleeder screw and once the car reaches temp, it will burp some coolant out of there, watch out that stuff is hot!!
24. Installation for the rest of the stuff is just reverse, should be pretty straight forward from here, remember to take your time here! Good luck!
|