|
|
Remove the rear firewall rubber gasket, cover, and plastic tray/pollen filter and passenger side windshield cover. Get the wiper arms vertical. The engine bay should now look like this: 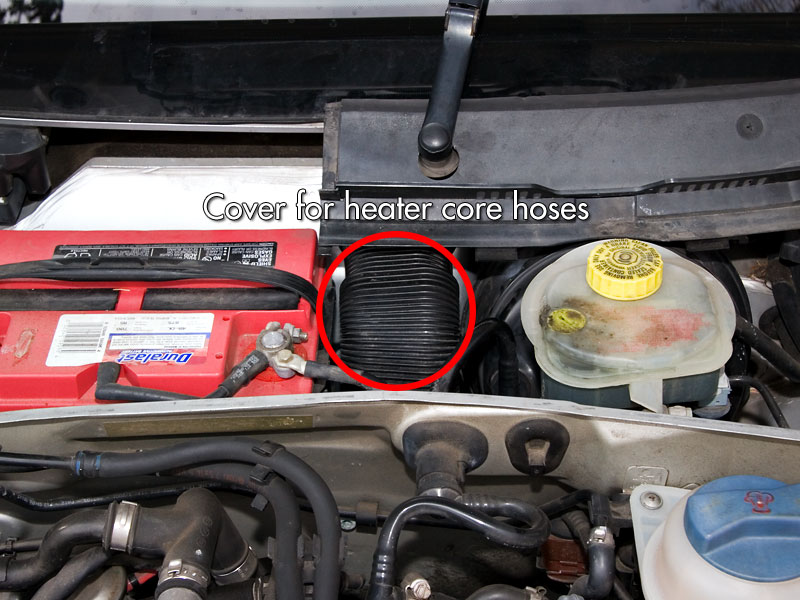 Wedge the driver side wiper cover up on top of the wipers to get it out of the way. Remove the corrugated hose cover (it's split on the back) to expose the lines running into and out from the heater core. You should now be looking at this:  Slide your tubing over the inlet side and run the other end down to a bucket of some sort. You'll need 4-5'.  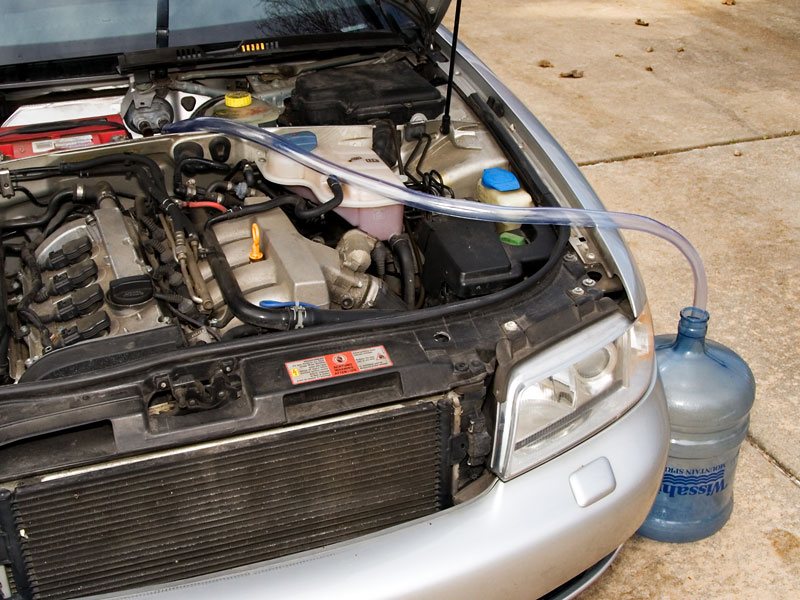 Slide a shorter length of tubing over the outlet side (1-2'). I used a brass hose nozzle that increases flow as you twist it because it sealed fairly well against the end of the hose. Turn on the water flow (not too hard as the heater core is a bitch to replace) and watch the gunk come out. Keep flushing until the water coming out is clear. Reverse the hose and forward flush, again making sure the water coming out is clear. Now is probably a good time to drain, flush, and bleed your whole cooling system. Reverse the removal steps to get things back together. Here's what I was left with: 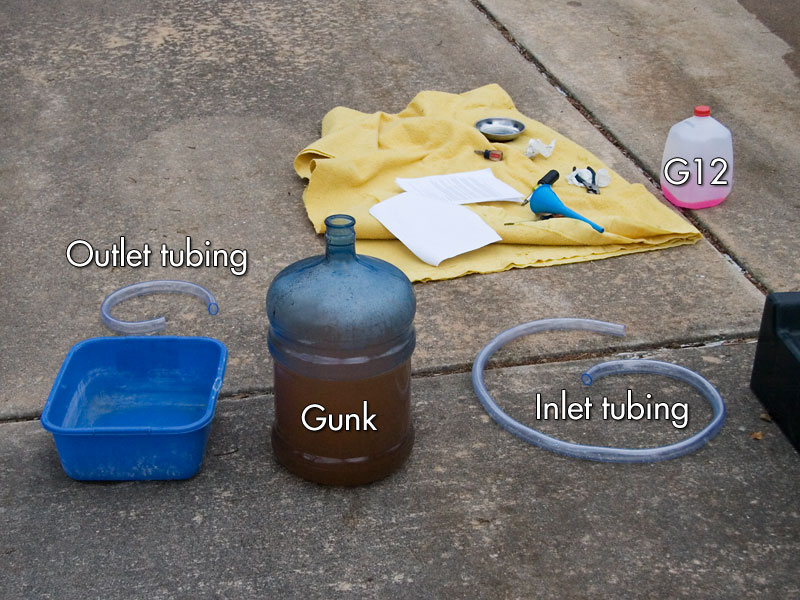 ...oh yeah, and HEAT. |
|
Advertising |
Contact Us |
Cookie Policy |
Privacy Statement |
Terms of Service |
Do Not Sell My Personal Information
© 2020 MH Sub I, LLC dba Internet Brands |