| Tech Article Title
|
Author
|
Date
|
| Stratmosphere
Short Shifter Install |
MächtigAvant
|
2004 |

I received
my short shifter from Strat yesterday, and I decided to install it last
night before The Apprentice started. Turns out, it took me a bit longer
then I thought, but all is well and I finally finished the job. Install
time was about 2.5 hrs. It might take less time if you are a "little
person", or take longer if you don't have the proper tools.
My
first piece of advice is to make sure that you have all of the tools that
are recommended in the instructions.
Key tools are the 6mm allen key socket, the universal joint, a 6"
extension, and the magic wand (magnetic) is absolutely key. You might want
to invest in a retriever tool instead, since the aluminum spacers will not
work with the magnetic tool. For everything else, the magnetic wand works
great.
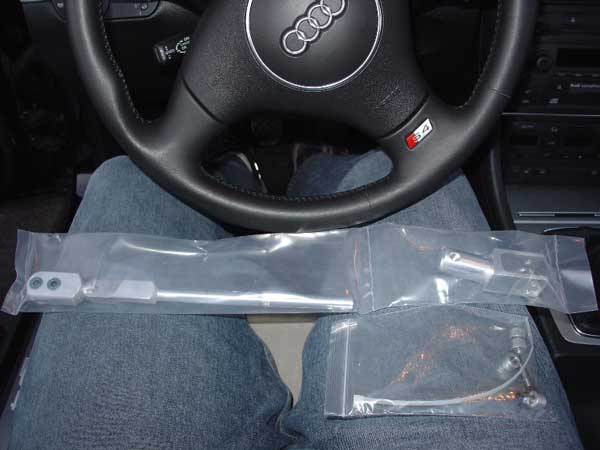
Here's what you
receive in the box. Two bags, one containing the shifter shaft and joint,
and the other includes shims, bolts, a c-clip, zip tie, and some other
items.
First you start by removing the console assembly around the
shifter. It's very simply, just pull the whole unit out. There is a band
clamp that sits under the shift knob that can be a pain to get, but some
needle-nose pliers will work just great to pry that clamp off. Once off,
the entire shift knob and boot comes off.
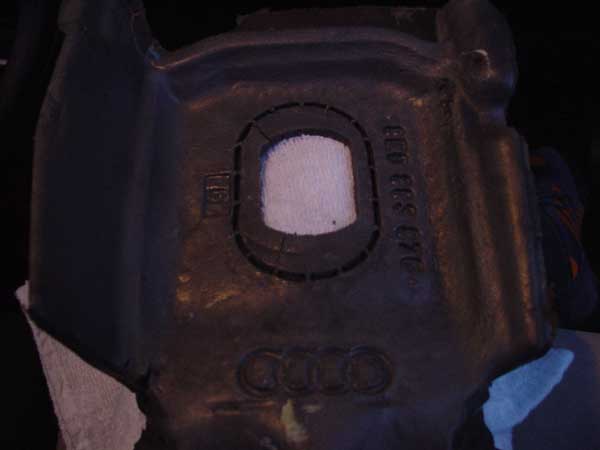
Next you need to remove
the insulation. There is quite a bit of sound absorption material, much
more then the B5. Be careful since it's very delicate. I noticed that even
the insulation has the Audi markings on it. ;-)
Once you remove all of the
insulation, you can then see the shifter and the linkage assembly. A good
thing about the B6, is that there really is no place for you lose your
bolts. If they fall down to the bottom, they are pretty easy to grab. In
the B5 they could slip down the sides or in the rear. Still, you need to
be very careful not to lose any parts.
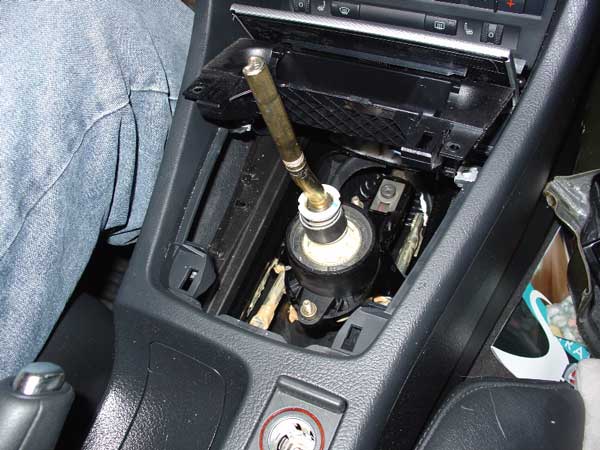
Before you go any further
into the install, I'd recommend that you pry the ashtray loose. This
allows you to get under the bottom of the tray and allows for much easier
access to the 6mm bolts that are necessary for the install. Check the
picture below to see how I oriented the ashtray. You can also see the
shifter and linkage assembly.
Next step is to break the 6mm bolts.
You'll need to use the ratchet, the extension, the joint, and the 6mm allen
key socket. Make sure that you seat the allen key properly, otherwise you
will run the risk of stripping the hex. If you do, you'll be SOL since
you'll be very hard pressed to find another bolt, and you'll definitely
lose the ability to drive you car to go get it.
Once you break both
bolts, you should be able to move the shifter assembly around a bit. Next,
I'd break the torx screws with the T-20 driver. Once they are all loose,
go ahead and remove the two 6mm hex bolts, washers, and the lower plate.
Then remove the torx screws. You should now be able to completely remove
the shifter unit.

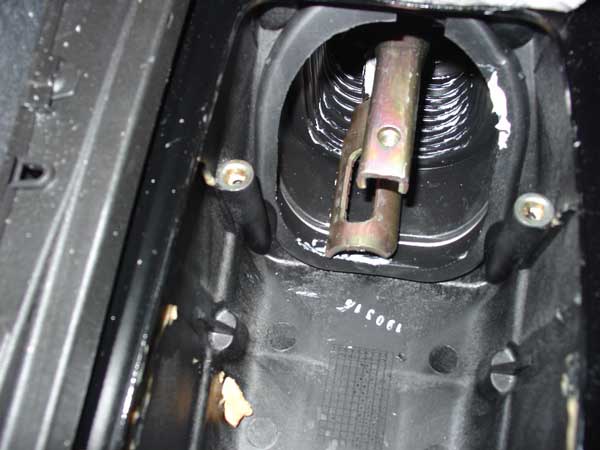
Here's
what the shifter unit looks like. Next step is to remove the stock shaft,
and replace with the new shaft. Follow Strat's instruction to setup for
either the standard throw, or super-short throw. Your going to need a set
of circlip pliers for the next step. Use the reverse c-clip pliers to
remove the c-clip. Be very careful not to stretch it too far, as you can
bend it to the point that it cannot be re-used. If you do bend it, it's
not the end of the world since Strat does include an extra c-clip, but I'd
recommend re-using the stock clip and keeping the extra one for a spare.
(BTW, I broke mine last night and had to use the spare)
Here's a picture of the linkage
assembly. The lower part actually connects to the shifter on the tranny.
The upper is for holding the shifter unit and moving it forward and aft
for alignment issues.
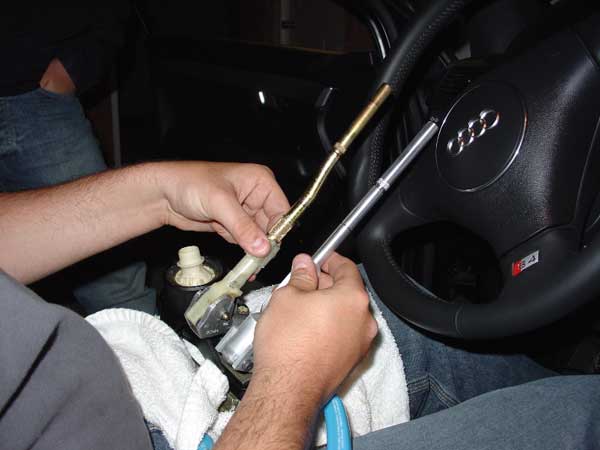
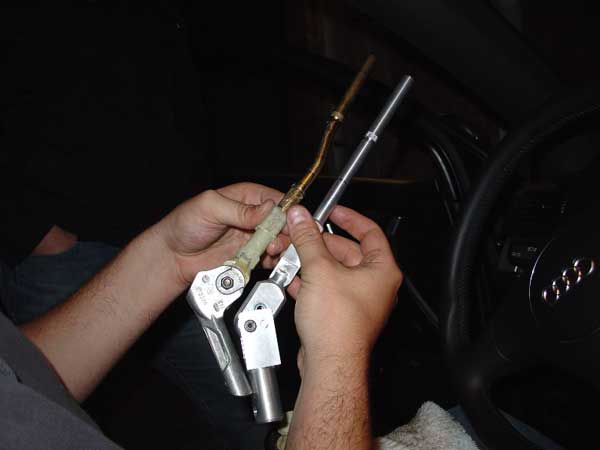
Notice above the difference between the
two shifters. There is clearly a bend in the stock shifter, which the
Strat shifter does not imitate. I cannot seem to figure out why the stock
shifter has this part.
Make sure that when you connect the lower
joint to the shifter, that you have the lower part oriented correctly. Use
the stock shifter for a reference.
When it comes time to install
the spacers, I detracted from the instructions and used an approach from
my past B5 unit. Instead of super gluing the spacers to the shifter,
instead I used some lithium grease (same grease I used to lube the shifter
joint). Basically, use a bit of grease on the bottom of the spacer and it
will actually cause it to stick to where the torx screws are placed. If
you look at the above pic (one showing the linkage), you can see where the
torx screws are placed. Just stick a bit of grease on the bottom of one of
the spacers, and place it over the hole. It should be sticky enough to
stay in place when you re-install the shifter assembly.
The real
tricky part is getting the lower 6mm bolt and plate installed together. I
recommend PRE-threading the shifter with the 6mm bolt just to make sure
that it's easier to thread when everything is down in the bay. Line up the
shifter and install the torx screws. Next line up and thread, but do not
tighten, the top 6mm bolt and washer. This keeps the shifter from moving
too much.
I didn't follow Strat's instructions of removing the
c-clip to lower the shifter. Instead, I used the magnetic wand to maneuver
the 6mm bolt and plate together over the lower linkage. Once placed, I was
able to maneuver a screwdriver to release the magnet and set the bolt in
the hole of the shifter. Once set, I was able to lower the 6mm allen key
ratchet and tighten. Voila! It took me a while to figure this method out,
but it works like a charm.

(Beer always helps with frustration. :-)
)
Now don't tighten the lower bolt, just thread it. Line up the top 6mm
bolt and then tighten. Then straighten the shaft (I added a little bit of
right-lean to the shifter, which allows me to get at the lower bolt
easier, and actually allows for a smoother 1st gear shift) and then
tighten. And I mean tighten. Don't strip the hex, but make sure it's tight
since this is what actually moves the shifter assembly, especially during
hard shifts.
Then re-install the insulation, sound absorption material, and shift knob and your done! Enjoy the shortened feel and
quickness of your new shifter! :-D
|