|
|
Fill the air voids with Urethane on the stock transmission mounts to have a stiffer transmission mount. Difficulty (scale 1-10) = 1 Parts Required Forsch Rubber to Urethane Primer (McMaster Part # 8644k31) - $16 Forsch 94a Urethane (McMaster Part # 8644k18) - $26 Rubber gloves Plastic spoon Small round file Exacto knife HVAC aluminum tape Duct Tape Quarter Tub/container (tofu, cool whip) Clamp (optional) Steps The stock transmission mounts have a flat side and a side with a raised middle part. There is a very thin rubber membrane halfway through the mount. Since we cannot pour the urethane in one side, allow it to dry, and then pour the other side (only have @20 minutes to work with the urethane) – I cut this membrane out. It is so thin; I see no purpose for it. Removing it will allow for a ‘one time' pour. Obviously, we will want to tape the flat side and pour from the side that has a raised middle piece.  Cut out the membrane with an exacto knife. Take a small round file and rough up all rubber surfaces.  Once roughed up, use some acetone to clean up the rubber mounts  Once dry, I took an extra precaution by applying some Forsch Urethane to Rubber Primer. My hope is that this will allow for better adhesion so that the urethane filled parts do not pop out over time. Apply Forsch Rubber to Urethane primer with a small paintbrush. Let Dry. Next is taping the flat side. We need to ensure that the urethane will not seep out of the bottom. I used HVAC aluminum tape (like heavy tinfoil with a sticky side) and Duct tape on top of that. It worked so well that I don't think that I needed to clamp the mount when I poured in the urethane. 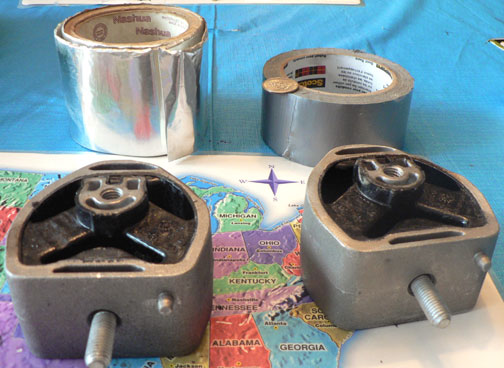 Taping up the flat side, I first covered the middle portion of the mount to ensure no urethane seeped over and filled the hole 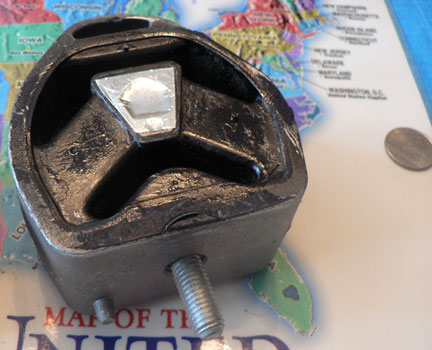 I then applied one piece of HVA aluminum tape to the flat side. I used a quarter to rub in the edges ensuring a good seal.  Last, I put a layer of duct tape over the aluminum tape for good measure. 3 rows covered the side. Again, I used a quarter to rub this in.  I put each mount in a tub just in case the urethane seeped out  Next, it is time to mix the urethane. Shake the small container well.  Then add the small container to the big container and stir for @5 minutes. (I had trouble opening the big container – I could not remove the lid as it was sealed shut. I had to destroy the top and empty it into a plastic cup for mixing). You will only have a total of @20 minutes to work with the urethane.  It will be the consistency of honey.  I tried using a syringe to fill the mount voids, but it was not effective. The urethane may have been too thick. I ended up using a plastic spoon. I spooned in the urethane until each void was full and evened up the level to cover all rubber parts (again, hopefully to have it dry as one piece – assuming some shrinkage) I clamped the mount to ensure no seepage while it dried – but it would have been fine without the clamp. The HVAC aluminum tape was the key. 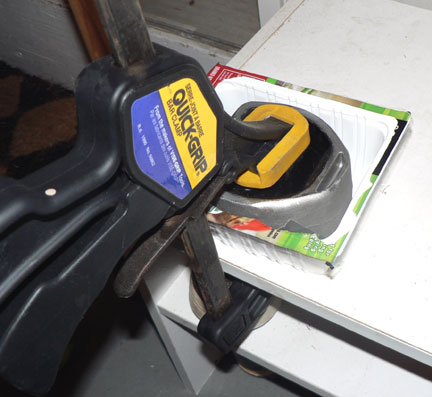 Filled and clamped  Let it dry overnight, then remove the tape.  The bottom (flat side that was taped) will be flush, the top side will be slightly overfilled. Let them fully cure (a few days) before mounting on your car. Thanks to ModifiedA4 for the idea and thoughts on how to prep the mounts. |
|
Advertising |
Contact Us |
Cookie Policy |
Privacy Statement |
Terms of Service |
Do Not Sell My Personal Information
© 2020 MH Sub I, LLC dba Internet Brands |