There have been a number of questions about installing mud guards on the
S4 forum. It's pretty easy, but it took a while to get it straight. I'm
writing this FAQ in hopes of making the process easier for others.
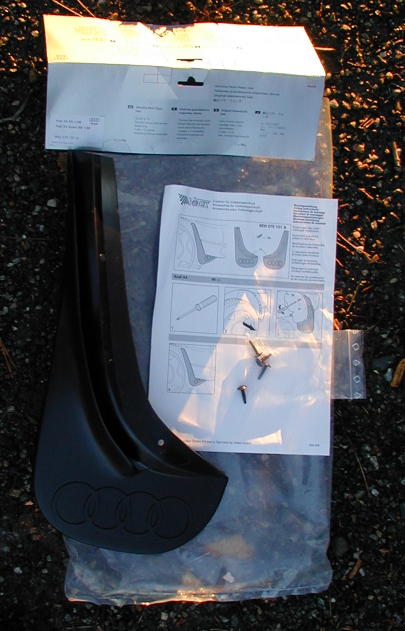
For starters, here are the part numbers. These are Audi part numbers.
I got mine from Clair Parts
Express. The side skirts on the A4 are different than on the S4, so
don't get the wrong ones!
-
S4 front mud guard (pair) 8d0-075-111-ba
-
A4 front mud guard (pair) 8d0-075-111-b
-
S4/A4 rear mud guard (pair) 8d0-075-101-a
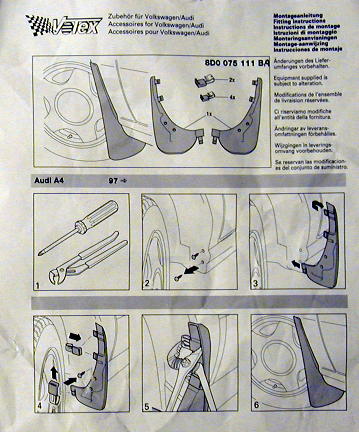
Next are shots of the directions that come with the mud guards. This HOW-TO
is really just an extension to the directions. But for the lack of any
written instructions, they'd be perfect. As it is the drawings give you
a pretty good idea. Please go over them before continuing. Don't worry
about the writing - all it says is "equipment is subject to change" in
seven languages.
Setup
Order the appropriate kits using the part numbers above. They should cost
$35 to $40 each, not including tax or shipping, etc. It's a good idea to
wash the car first so you don't trap grime, especially salt, under the
flap. Also, you'll have to take the rear wheels off to install the guards,
so you might want to take advantage of the chance to clean them on the
inside - I did.
You'll need a crescent wrench like the one shown in the diagram
- it will need to open at least 2 inches. You'll need a hammer for the
bottom clips. You'll also probably need a Torx (star) screw driver, take
a look. If you're lucky, yours will be philips like the instructions suggest.
The Torx I bought says "T25" on it, but the rack on the store where I bought
it said "#10" (I think) - make sure you try it in one of the screws before
you buy it!
Also, it's a good idea to do this in uber-freezing weather. Personally
I did it in unter-freezing weather, and I cracked one of the clamp anchors
- luckily not such that it was unusable.
Rear Installation
Ok, the rears are easier - all though not necessarily faster. First you
have to take one of the rear wheels off. I'll let you figure this out on
your own, but for the uninitiated, I'll make two comments: Audi's have
lug bolts, not lug nuts, and you screw that funny looking pin from
the jack kit into the top lug hole to guide the wheel when you're putting
it back on.
 Ignore the rumors that you need a drill for this. The screws are
self tapping. You probably want to clean an inch or so back from the wheel
well so you're not trapping dirt (or worse yet salt) under the flaps. The
hold them in place with one hand, and align them by eye. Make sure the
bottom looks parallel to the ground, and that the lip that goes around
the side is actually in contact from top to bottom - if it is slid down
too far, there will be a gap between the bottom end of the lip & the
car.
Ignore the rumors that you need a drill for this. The screws are
self tapping. You probably want to clean an inch or so back from the wheel
well so you're not trapping dirt (or worse yet salt) under the flaps. The
hold them in place with one hand, and align them by eye. Make sure the
bottom looks parallel to the ground, and that the lip that goes around
the side is actually in contact from top to bottom - if it is slid down
too far, there will be a gap between the bottom end of the lip & the
car.
Then push the flap in place pretty hard with one hand to make
sure it's a good seal - not that it's that important... Then with
the other hand, put a screw on the end of a philips screw driver (ok, you
probably should have done that first). Guide it through the hole, press
& start turning. It will dig it's way in, just keep turning. Go until
it's reasonably tight - not metal in metal tight, more like lid on jar
tight. Finish the rest of the screws, and put the wheel back on - that's
it! Shouldn't take more than 20 minutes per side, not including washing
the inside of the rim.
Front Installation
 Turn the wheels all the way to the left. Ok, there are only two screw holes
in the front guards, and they don't come with any screws. There are two
screws inside the wheel well - remove these now. Incidentally, one of mine
wouldn't come out, so I just did it with one screw - that and the three
clamps appears to be more than enough.
Turn the wheels all the way to the left. Ok, there are only two screw holes
in the front guards, and they don't come with any screws. There are two
screws inside the wheel well - remove these now. Incidentally, one of mine
wouldn't come out, so I just did it with one screw - that and the three
clamps appears to be more than enough.
The Screws
Line up the cuts in the molding with the side skirt approximately - you'll
get a chance to fine tune it in a minute. Hold it in place, and take the
torx screwdriver with the screw already on it ('cuz you already did that,
right?) and get ready to put it in the hole that's closer to you. Now push
the mud guard in and up really hard. If you have the luxury of a
second pair of hands, have them do the pushing, and use the flashlight
to determine if you've pushed far enough for the mud guard hole to line
up w/ the hole in the car that the screw came out of. Once it is, push
the screw back in & start turning. Tighten it about 1/2 way (3-4 turns),
enough so it stays in place, but not so much that the guard can't move.
 Now put the second screw in. You'll have to do some more pushing to get
that hole lined up. You may even have to push in such a way that the molding
gets misaligned. Have no fear. Once you get that screw in, tighten it also
only half way.
Now put the second screw in. You'll have to do some more pushing to get
that hole lined up. You may even have to push in such a way that the molding
gets misaligned. Have no fear. Once you get that screw in, tighten it also
only half way.
Now
adjust the guard so the molding matches your side skirt. I had to pull
up on the guard really hard to get it in the right place. Once it's there,
keep holding it in place, and tighten the closer screw all the way. Then
tighten the other screw.
The
Clamps
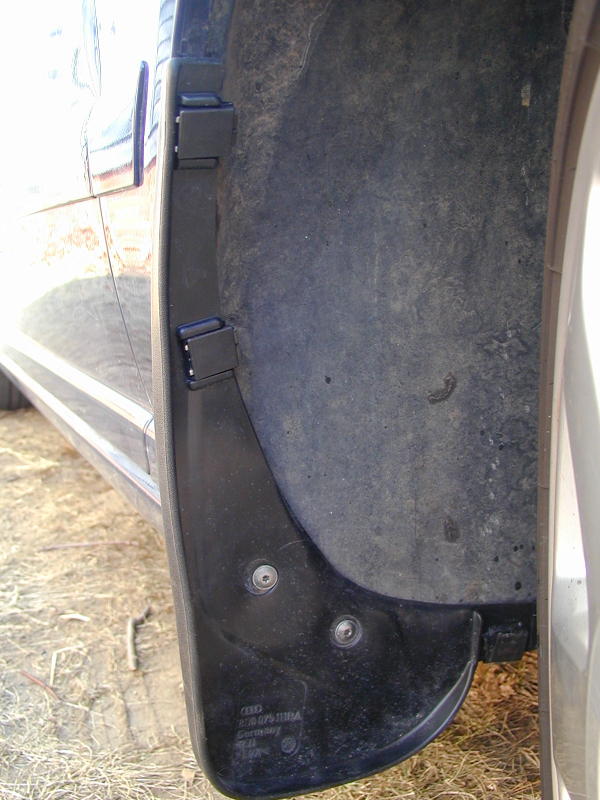
Ok,
these are funky little things. Take a close look at the instructions to
see how they'll be aligned, The two larger clamps are for the bottom. The
6 black plastic anchors are identical. The top two rubber flaps fold behind
the guard. They get pinched between the 1/2 inch of body metal that is
folded into the wheel well, and the plastic wheel well lining. Do the top
one first - with one hand, push the plastic lining away from the metal
so there is a gap. With the other hand, fold the flap behind so it goes
between the metal and the lining. Just shove it in there - there's nowhere
else for it to go. You can't really tell if it's in there or not without
a mirror - I just felt it and took a leap of faith.
Now
put the plastic anchor in place. Then position the clamp so it's ready
to go around the folded flap, and push the fork of the clamp into the anchor.
You should be able to get the first "click" by hand. Then do what the directions
show with the crescent wrench.
The
middle clamp goes on the same as the first, but it's easier to get the
flap behind the metal once the first clamp is in place
The
middle clamp goes on the same as the first. It's easier to get the flap
for this one behind the metal once the top clamp is in place because the
top one is already creating a gap between the metal and the lining.
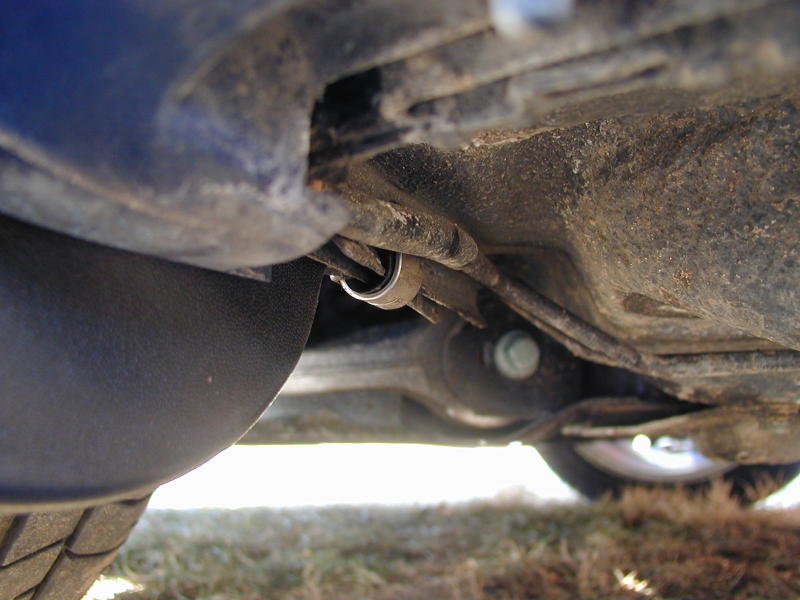
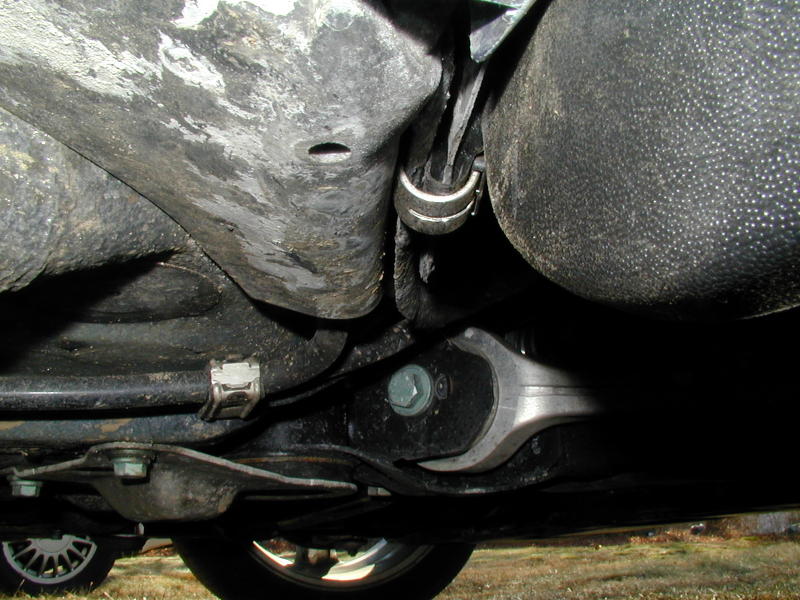
 The bottom clamp is a little more difficult. It is the larger of the clamps
because it has to go around more and thicker material. It goes around both
the bottom of the fender liner, and a little lip that sticks off of the
frame. There is a small gap between these to pieces (Ethernet experts might
call this an "inter-frame gap" 8-). It doesn't look like the clamp is big
enough, but the fender liner is flexible, and the clamp will squeeze it
to the frame. Fold the bottom flap around both pieces, and start to push
the clamp over them as far as you can. Hold the clamp in place, and fit
the anchor over it's fork as in the diagram. Finish it with the crescent
wrench. You'll probably have to tap the clamp with a hammer afterwards
to get it all the way in place.
The bottom clamp is a little more difficult. It is the larger of the clamps
because it has to go around more and thicker material. It goes around both
the bottom of the fender liner, and a little lip that sticks off of the
frame. There is a small gap between these to pieces (Ethernet experts might
call this an "inter-frame gap" 8-). It doesn't look like the clamp is big
enough, but the fender liner is flexible, and the clamp will squeeze it
to the frame. Fold the bottom flap around both pieces, and start to push
the clamp over them as far as you can. Hold the clamp in place, and fit
the anchor over it's fork as in the diagram. Finish it with the crescent
wrench. You'll probably have to tap the clamp with a hammer afterwards
to get it all the way in place.
Right Side
 The bottom clamp on the right side is the hardest because there is a plastic
cover of some sort behind the frame lip, and it gets in the way of the
clamp. Technically the right way to do this is to remove the cover first,
wrap the flap around both pieces, and then put the clamp around the whole
mess just like you did on the other side.
The bottom clamp on the right side is the hardest because there is a plastic
cover of some sort behind the frame lip, and it gets in the way of the
clamp. Technically the right way to do this is to remove the cover first,
wrap the flap around both pieces, and then put the clamp around the whole
mess just like you did on the other side.
However I got lazy. You can't fit the rubber flap between the
frame piece and the cover, but you can fit it between the frame piece and
the liner. Then you can put the edge of the hook part of the clamp up against
the gap between the cover and the frame. You won't be able to push it in
there by hand, but if you hold it at the right angle, you can tap it in
with the hammer. Do it just enough so it doesn't fall out. The clip will
be at an angle which will still enable you to fit the anchor onto it -
do so. Then finish with the crescent wrench like on the other two. I had
to do it part way with the crescent wrench, then go under and hammer the
clip the rest of the way on, and then finish with the crescent wrench.
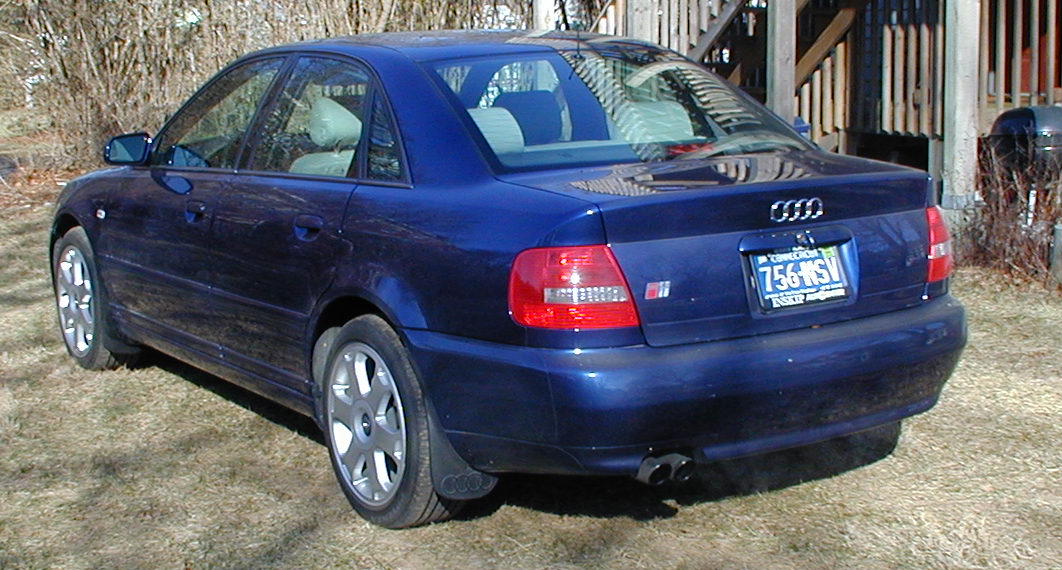
Summary
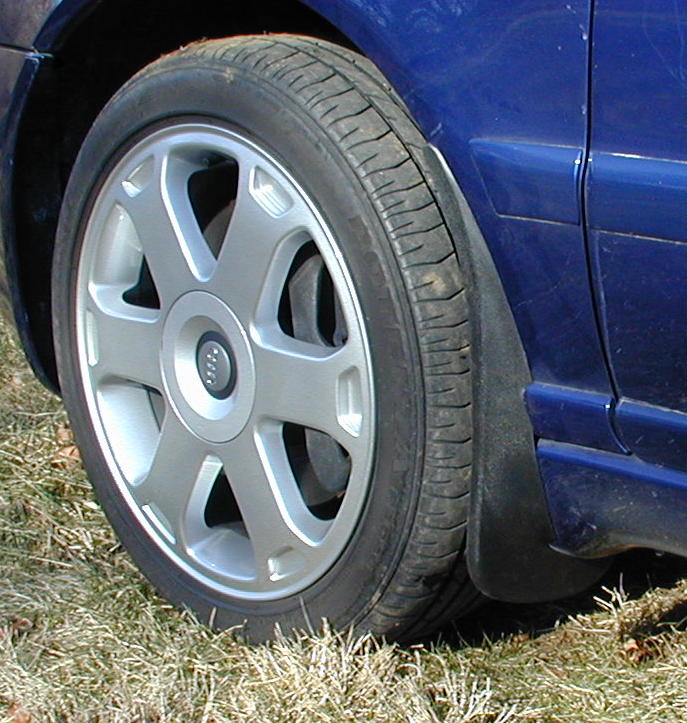
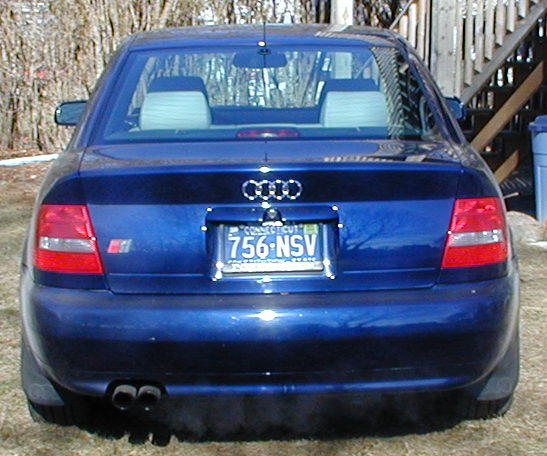
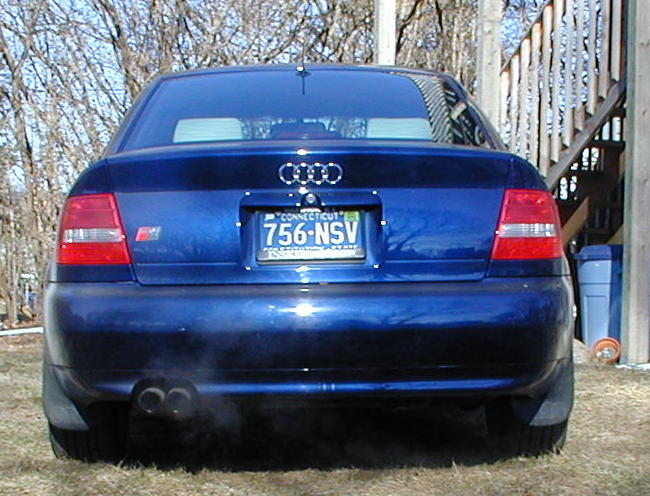
Yikes! You're done! Here's a little photo gallery of how my car looks with
the flaps on. Please feel free to email
me questions!
-Avram