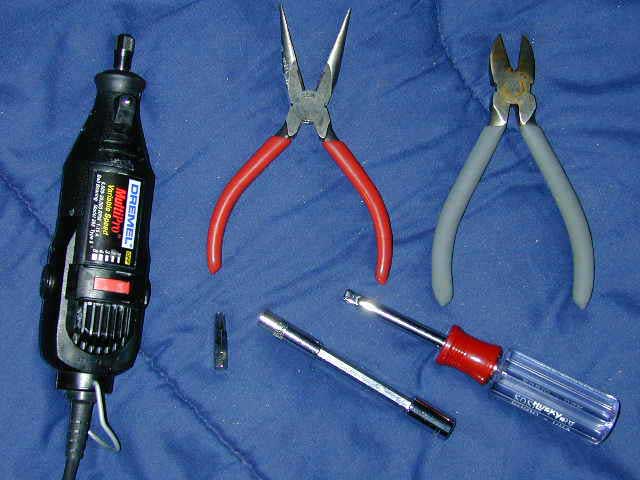
Surgery
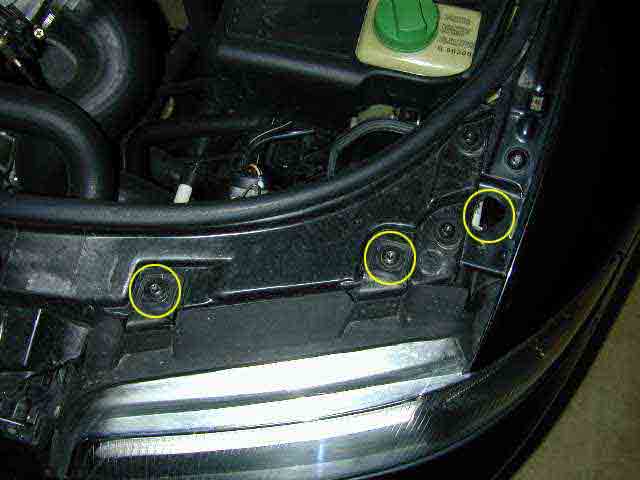
1. Headlamp Removal
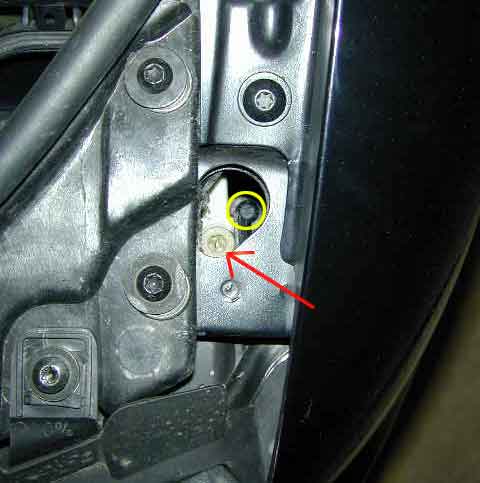
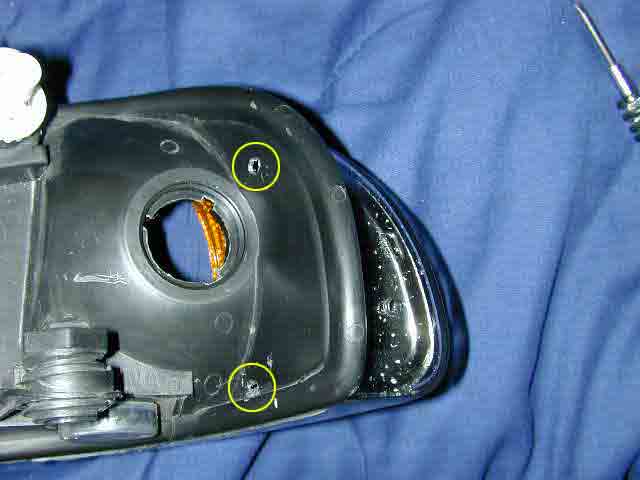
The first thing you have to do is remove the headlamp unit. There are 3 torx screws holding the lamp unit to the car.(circled in yellow) The top 2 are fairly obvious. The 3rd one on the other hand is down 4 or 5 inches beneath the white lamp adjustment screw(indicated by the red arrow). Once unscrewed, slide the unit out, don your operating gloves and slap it on the table.
BE CAREFUL NOT TO LOSE THE SCREW OR BIT/DRIVER DOWN THE HOLE.
Remove ALL the bulbs and wiring harnesses. You may need to shake the unit around so better to be safe than sorry.
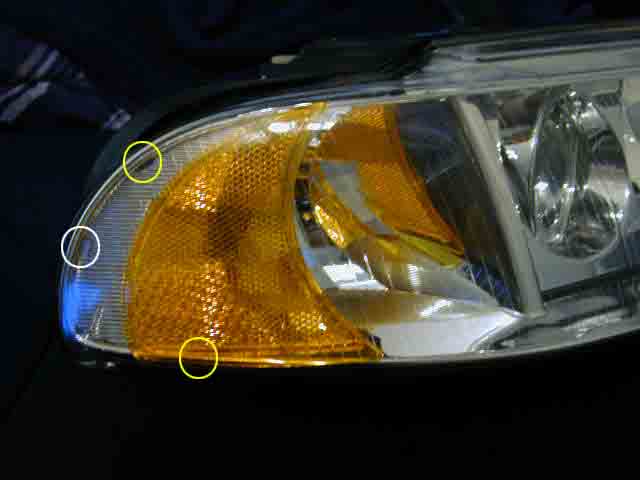
2. Freeing the Orange Insert
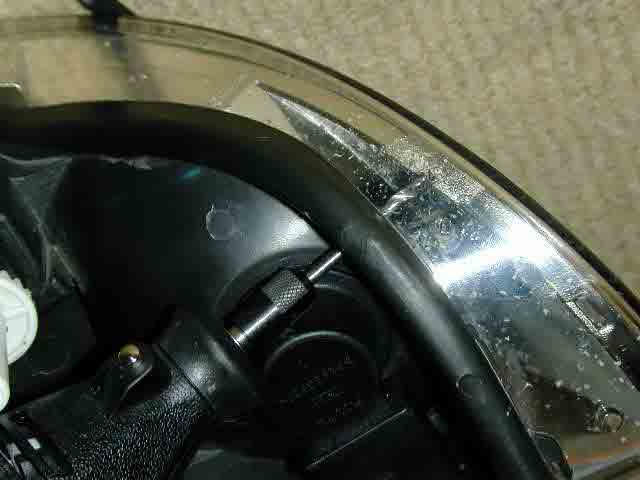
The orange insert is held in place by 3 tabs which are circled in the picture on the right.
Only the upper and lower tabs hold the unit in place.
Drill 2 holes through the black backing of the unit and slowly eat away at the upper and lower tabs until the insert is free from captivity.
BE CAREFUL NOT TO DRILL INTO THE LENS.
3a. Cutting up the Orange Insert
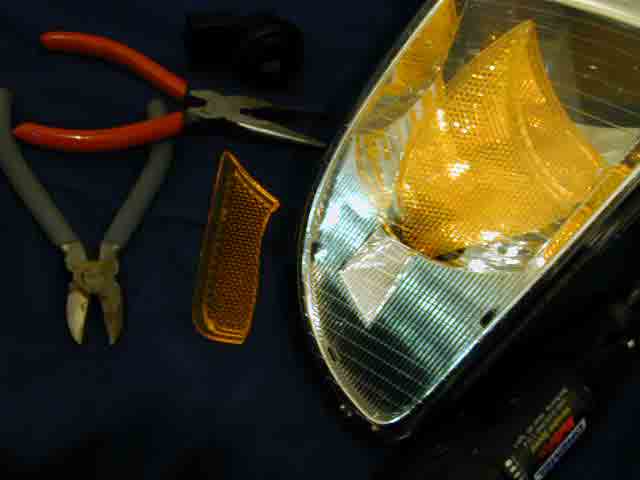
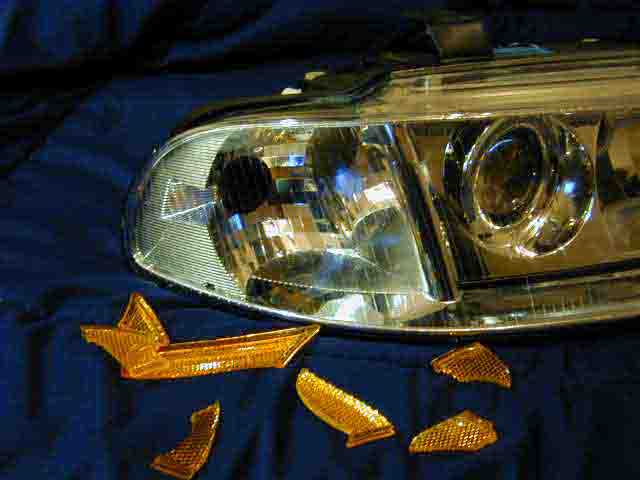
Now reach in through the hole(where the signal bulb used to be) with the needle nose pliers and slide the insert away from the edge. I used too much force and got it lodged at the other side for a while. shake it shake it. Maneuver the insert until it sits in the hole and start snipping away at it with the wire cutters. The insert is really fragile. Brake the insert up into small pieces which will fit through the hole. A few choice snips and you're done.
The hardest part is positioning the insert so you can properly attack it with the cutters. You may want to grab the insert with the needle nose pliers while cutting at it with the cutter.
BE CAREFUL NOT TO SCRATCH THE LENS.
3b. Cleaning Up
Use some compressed air to clean out the plastic shavings in the lamp unit. I used some compressed air canisters used for blowing out computer equipment. You should find some at CompUSA or other computer and some office supply stores. What can't be blown out may have to be sucked out.
4. Plugging up the Holes
Apply some silicon(easily found at any home hardware store) to patch up those holes you drilled.
A small dab should be fine. Be thorough though. Plug in all the bulbs and harnesses, remount the lamp unit. Voila.
Remounting the Lamp Unit
For the troublesome 3rd screw you can "place a piece of paper towel on the screw head and than place the torx bit on it to give it a tight grip so it doesn't fall off." -Page916
Thx
.. to Page916(who figured it out before I did) for much needed insight, James Wu (who also figured it out before I did)
for great advice and Sir Gorobei for donating the specimen for experimentation.
