| Tech Article Title
|
Author
|
Date
|
| License
Plate Bulb Conversion |
Christian
Hieras
|
2004 |
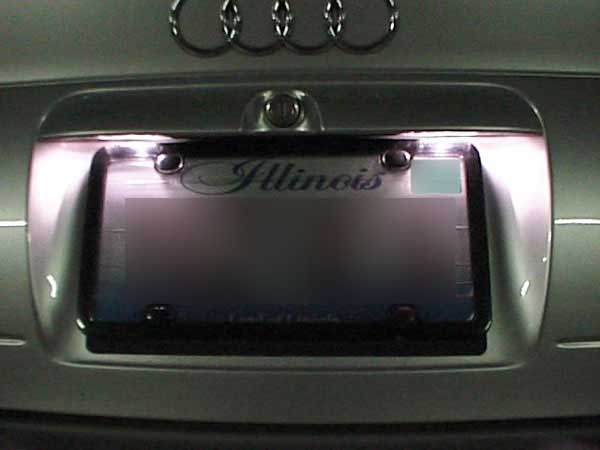
This is a very simple bulb conversion I performed on my 1999.5 Audi A4. I took a liking for nice looking lights and have converted all of my exterior and interior bulb to aftermarket bulbs. The interior and trunk is complimented with hyper white bulbs. The exterior front turn signals / park lights, city lights, and side marker bulbs have been converted to hyper white LED bulbs. The headlights are 8300k Diamond Blue MeccaTune HID kit and the fog lights are purple HID Xenon bulbs. My only dilemma is the License Plate bulbs. I can never seem to get the correct length bulbs. The horrid dome light bulbs are dim, dull and ugly.
I've purchased several hyper white LED dome bulbs that would either burn out after a week or two and/or lose connection and won't light up due to bad connection. In my opinion, the design of the license plate bulb housing is too much tech and not enough reliability. In other words the design sucks. If this is something you've experienced and would like to simplify this setup then read on.
OBJECTIVE:
To get rid of the horrible dome light bulbs and replace them with a simple push in style 194 bulbs. This will save you a lot of headaches in the future due to the simplicity and ease of purchasing. You can even purchase decent 194 hyper white bulbs at Wal*Mart now for
$4.50...not bad. Approximate install time 30 - 60 min
TOOLS NEEDED FOR INSTALLATION:
~ Phillips Screwdriver
~ Torx Screwdriver 15T
~ 10mm socket
~ Rachet w/3" extension
~ Your choice of wire connectors
~ long nose pliers
~ small cutter
~ 1/4 ` drill bit and or Dremel w/drill bit cutter
~ electric tape
I started by purchasing an inexpensive CUZO universal side marker kit. These are 2"x1" rectangle kit with a small dime size cylinder bulb housing. If you've ever installed side markers you will understand that these are the easiest to install because all you need to do is to drill a ˝" or less hole and the side marker slides right in. Anyway, this also means that the bulb housing is very small and compact and can be retrofitted for other applications.
DOWN TO THE MOD:
1) Using your Phillips screw, remove all of the camouflaged screws found all around the trunk liner. Don't forget to remove two screws on the emergency triangle holder and the two screws hidden inside the trunk pull down handle.

2) Once removed, locate the 10mm bolts 2x which holds the exterior trunk handle in place. Remove those bolts first and then remove the 2 - 10mm nuts in located between the bolts which holds the trunk lock housing in place.
3) After the two bolts and two nuts have been removed unplug the license plate bulb housing connections and remove the from the trunk.
4) Looking at the rear of the handle you will see 4 torx screws. Using a 15T Torx screwdriver, remove the screws and pull the housing off of the handle.
5) Now, looking at the license plate bulb housing, remove the lenses. By using the long nose pliers snap off the wide plate connections by twisting it or rocking it back and forth.


6) Once accomplished, use a small cutter to cut and nip the raised plastic that sits behind the wide connections. The main purpose of this is to be able to bend the remaining copper stub upright so as to enable you to pull the wire right out of the housing.

7) Once the wires have been removed from the housing, turn the housing upside down and drill a hole right into the original wire location. Be very careful not to drill to far in and damage the inside of the housing. Then take a Dremel attached with a drill bit cutter and cut a hole big enough to accommodate the new bulb plug (I used a 194 bulb set up).

"Keep in mind that you can do your own variation of how you want to cut the hole. The important thing is that the plug fits snugly into the hole and that you will have enough clearance for the bulb once installed. The bulb must not be touching the plastic housing as it might melt the plastic unless you use LED bulbs."
8) Once you have mounted the new bulb holder take some kind of filler/glue such as caulk or liquid nail and fill in any holes if necessary. Then connect the two wires together plug the housing in and test your new lights.

9) If everything checks out, the last thing is to get the lens ready. The original lens holds the dome bulbs in place and makes contact with the wide metal plates previously removed. (#5) Use your cutter or long nose pliers to pull the connectors out of the lens. Once completed place the lens back on the housing with the rubbery foam insulation and re-place the screws.

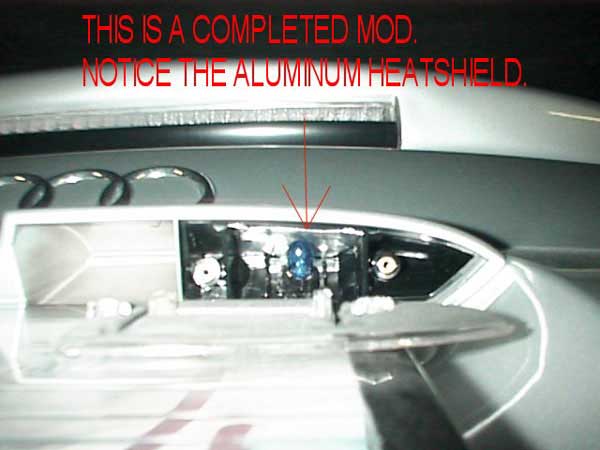
10) NOW PUT EVEYTHING BACK TOGETHER AND CLEAN UP YOUR MESS. CONGRATULATIONS!!! YOU NOW HAVE A COMPLETED THE MOD.

"You could also add some heat absorber/light enhancer by taking a thin piece of aluminum sheet metal and cutting it sized to the inside wall of the bulb housing closest to the bulb head. This is the area that will get the most heat and should be protected from melting.

I didn't really do any measuring. I cut it by eye and once I got to fit just right then used the plate as a pattern to cut the second one. Make the plates a hairline wider so that it will be very tight once you slide it in the housing. To affix it just fold one of the outer corners of the plate down towards the wall and push the plate down.
The folded corner should recess on a corner and will tighten the fit. You could also glue it if you prefer."