| Tech Article Title |
Author |
Date
|
| Removing Stock Mirror Housings and/or Installing RS4/6 housings |
LI-S4 |
2006 |
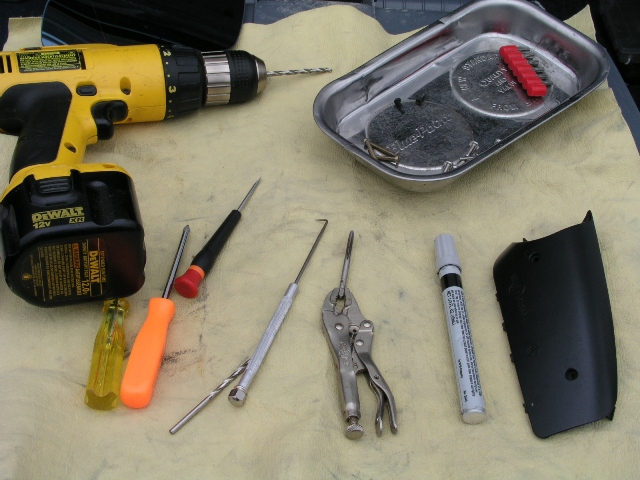
Tools needed
- Phillips Screw driver
- T10 torx bit with ratchet or screw driver attachment
- Small flat head screw driver
- Small hook or prick tool
- Drill + 5/32" & 1/8" drill bits
- Tap for 8-32 NP thread
- six 8-32 x 1/2" stainless steel pan head machine screws
- Paint stick or other touch-up paint
- I also used a thumb screw driver and a small racheting screw driver
I started by folding the side mirror forward for better access..
Step One
Remove the mirror glass by inserting your fingers under the glass on the inboard side, and slowly pulling sraight out.. It will come out with a snap, so hold it in place!!

Step Two
Disconnect the wires at the back of the glass. One set is for the heating, and one set is for the auto dim (varies by vehicle options) I have the non-autodimming euro glass, so only one set of wires for me.

Step three
Remove the two small phillps screws from the bottom of the mirror holding the black plastic trim. There is one clip inside the housing on the outboard side, holding the bottom plastic in place. While you are in there...take a minute to do the mirror mod...see the little hole by the screw???

Use the prick to pull that clip back and press down on the trim from the inside...it can then be pulled down and away from the housing.
Step four
Use the T10 Torx driver to remove the three brass screws that hold the mirror motor in place. Be carful that the motor doesn't drop and mark the paint on the door. A towel drapped over the door will help.
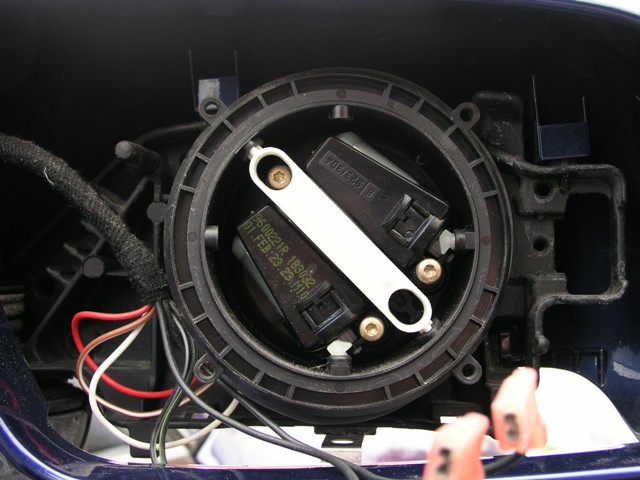
Step Five
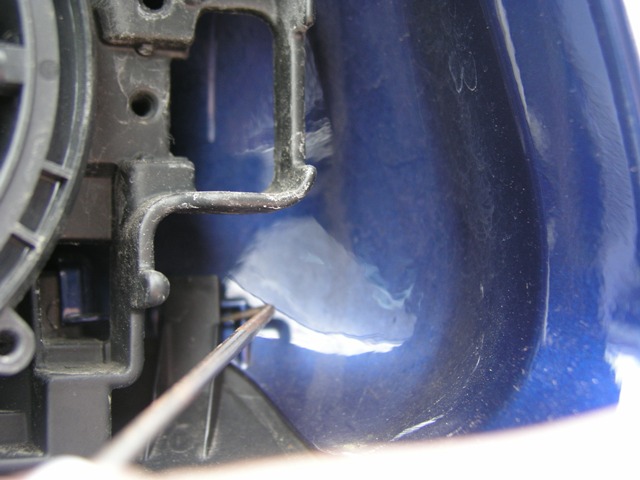
Remove the housing by lifting straight up. At first inspection it appears there are tabs behind the motor that need to be released. In actuallity, they only index the housing. There is a small tab that needs to be released that can only be seen from below...it is behind the mirror pivot on the door mount. I just pulled up, hard until the clip released.

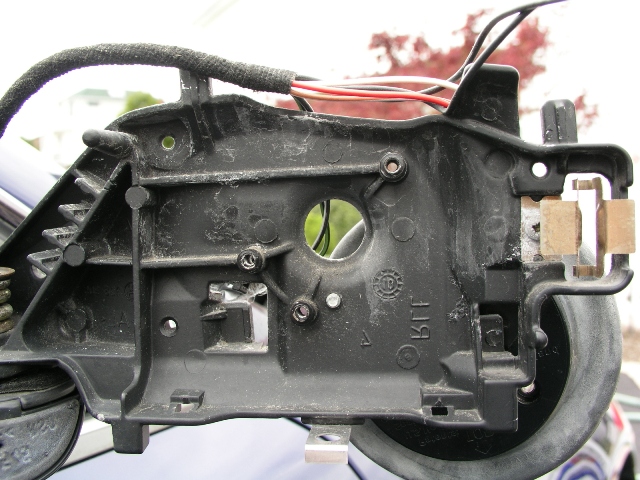
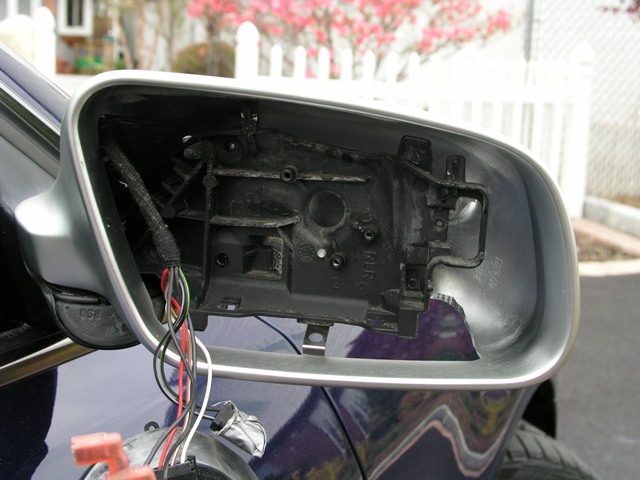
This is what you have left..the mirror, housing and motor are all removed. I have the motor drapped over the back of the support arm so as not to scratch the paint...
Stop, have a beer.
If you are replacing the housing with another plastic housing, just reverse the above and go have another beer.
If you are installing the RS4 mirrors, they need a little modding to get them to work.
The inside of the aluminum mirrors are milled on a CNC machine and there are three posts, drilled in the center, that line up with unused holes on the support arm. You can see these three holes in the picture above..the three outermost holes (the inner ones are fo the motor). That's the good news. The bad news is that although the holes in the housings line up perfectly, they are not tapped...so you can't put a screw in there (unless you are into ghetto installs).

Step Six
You'll need to tap the holes (that's run a bit in the holes that creates threads to accept a screw). I bought six 8-32 X 1/2" stainless screws. I have a tap and die set..if you don't, you can buy the screws and one appropriately sized tap at any good hardware store. The hole in the post inside the housing was a bit too small to tap straight away, so I used a slightly undersized drill bit to enlarge the holes so the tapping would be easier..
Tap all six holes (three in each housing)..don't forget a drop of oil when drilling and tapping.

A blast air from the air compressor and a wipe cleans up the oil and metal bits...watch your eyes..wear good eye protection!
Step Seven
The holes in the support arm need to be enlarged a bit, so the #8 screw can fit through. I used the 5/32" bit for that. The arm is made of aluminum so it's rust resistant..still I used a paint pen to dab the raw metal. You can see the holes and the paint in the pic in step five.
Step Eight
Thread the motor and all the wires through the new housing from the bottom. Again, watch the paint! And, watch the small metal tab on the bottom of the support arm..it's sharp enough to give you a nice cut, and certainly can scratch the housing. The taped wire connector is for the auto dimming mirror.
Step Nine
Use three #8 screws and attach the housing to the support arm.

Step Ten
Reconnect the auto-dim connector and heating wires, if your car has them, snap the glass back in place and Viola' !!
um, have another beer.
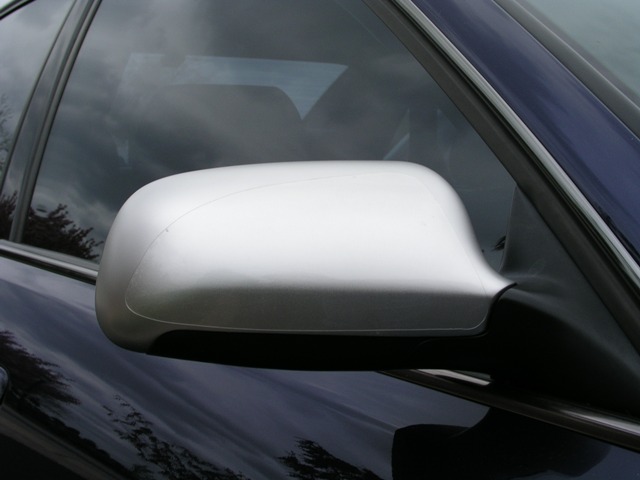
If you have never used the euro mirrors, you must try them!! The blue glass cuts glare dramatically, yet you can still see who/what is behind you! I like them a thousand times more than stock...they also have the wide angle panel at the outer edge.

I had my mirror housings covered with clear-bra film. Now that I look at them, I think not using the clear-bra is worth the chance of having the mirrors get scratched... The mirrors are brushed, and have a matte finish. Unlike the housings, the clear-bra is a high polish which makes it invisible when applied to paint. But it stands out too much on the mirrors for my taste.
So, if I decide to keep the mirrors on, I will remove the clear-bra. Thanks anyway Roger!!

|