Tech Article Title Author Date
B6 Snub Mount Install Eddie Man 2006


Discussion:
The stock engine snub mount is somewhat soft in comparison to the new APR.
Shown here is how pliable and soft the stock snub is...


How does that translate to the ride, feel and drivability of the car?
According to ECS & APR:

"APR's Snub Mount Upgrade replaces the front engine mount on the car. This mount enhances upshifting
and downshifting, reduces driveline shock, and helps power transfer by taking up excess drivetrain slack."


Before the new snub install, I was experiencing much slop in how my shifting was feeling
and really a "not very positive" engangement of power, if I were to say.

This observation was very clear once I was able to drive in Clean's B6...His shifting was
very positive and not sloppy...Very Firm in engagement of power in the driveline.

Results:
After the install, I took it for a spirited test run, and the result was very very noticable...
NO MORE SLOP and very positive. ECS & APR were right in stating the above...BRAVO !!!
More Feedback & Driving Impressions

Headlight Assembly & Bumper Removal Tools:
Flat Head Screwdriver
3/8" Extension
Torx Wrench Drivers, Switchblade
7mm Allen Wrench
3/8" & 1/4" Ratchet Wrenches
30s Torx Sockets
10mm Socket
13mm Socket (not shown)
45s Torx Socket (not shown)
8mm Allen Wrench (not shown)


Install:
0. Install Time = 2.5 hours
1. Block rear tires
2. Place entire front of vehicle on jack stands.
3. Lay out carpet or thick blanket to ease install and make oneself more comfortable.
4. Part 1 to remove underbelly pan.
Remove screws, (5)-Metal and (3)-plastic.


5. Part 2 to remove underbelly pan.
Remove screws in front wheel wells that secure right & left flanks of the
underbelly pan. (4)-Plastic.
Here is 1 of 2 plastic screws in wheel well.


6. Remove Left & Right Light Assemblies.


7. Remove Left & Right Fog Grilles.


8. Part 1 to remove bumper.
Remove (3)-10mm nuts on the inside of each fender, underneath the
headlights that secure the bumper. Shown here on the right fender


(6)-10mm Nuts, total


9. Part 2 to remove bumper.
Remove torx screw behind each wheel well liner adjacent to fender lip and front lowers.


10. Part 3 to remove bumper.
Carefully and gently pry lower away from fender.
Both left and right lower requires seperation.
Carefully work it till it begins to seperate.


11. Part 4 to remove bumper.
Using a 7mm Allen Wrench, loosen (but do not completely remove) each
bolt on the right and left side. Bolts are located inside Fog Grille Opening here:


12. Part 5 to remove bumper.
Carefully guide entire bumper assembly away from the raw front end of the car.
13. Set bumper on blanket immediately in front of car.
14. Remove quick connect light harnesses. (2)-Total.
15. Clamp shut/off the bumper squirter hose to prevent draining while working.
Place bucket benneth hose to catch residual drips.
16. Remove bumper squirter hose at the quick connect.
17. Place belly pan, bumper assembly, light assembly, fog grilles and all the nuts,
bolts and tools for bumper removal aside in a safe place, out of the way.


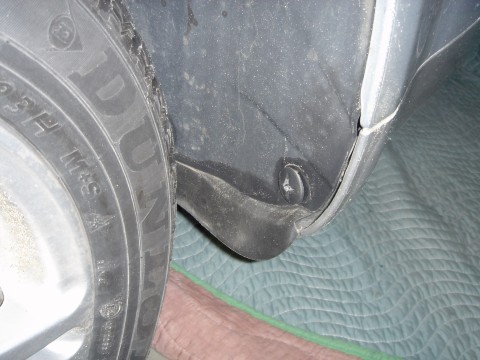
Bumper Removed and Ready for Snub Removal/Install
(Side Note: Wifey comes out to garage and says "WTF...Are you sure you know what yer doing?" HA !!! I said.)


18. Loosen till almost removed (DO NOT REMOVE) top torx 45s bolts on both right and left bumper support brackets.


19. Remove bottom (2)-torx 45 bolts on both right and left bumper support brackets.


20. Remove fender/front torx 30s screw from left and right sides.


21. Firmly seperate lower front end from framwork.
Top of front is still attached...And that's okay for this snub install.
Lower front should move 2"-5" away from frame to facilitate snub removal/install.
22. Get underneath front of car and locate snub mount, snub "Cup" and snub mount bracket.
Notice that I've marked the lower right hand corner of the snub cup.
I did this to help me not forget the exact orientation of the snub cup.


23. While on back, use knees to aid in moving front outward to create space for rachet/socket.
24. Remove front snub cup bolts. (4)-13mm
25. Remove engine snub mount bracket bolts. (3)-8mm Allen Bolts.
26. Pull entire snub assembly out.


27. Before pulling off Stock Snub, study orientation of snub.
Installation of new snub MUST be oriented identical to stock snub.
Also note the there is a back and front side to the snubs...
Follow that orientation also.
28. Remove stock snub w/screwdriver.
29. Press new snub on.


30. Re-Assemble of entire project in Reverse Order.
31. Use Thread Lock on all critical bolts.
(Snub Mount Bracket Bolts & Bumper Bracket Bolts)


None needed for Bumper...
Bumper has locking top plate.
ALMOST HOME :)

32. Do NOT final tighten front snub mount bracket till engine is warm. Reassemble all except under belly pan.
33. When engine is warm, adjust snub "cup" so that equal space all around between snub and snub cup.
Tighten all bolts.
34. Reinstall under belly pan.
35. FINISHED !!!

BEFORE & AFTER


Advertising | Contact Us | Cookie Policy | Privacy Statement | Terms of Service | Do Not Sell My Personal Information
© 2020 MH Sub I, LLC dba Internet Brands