|
|
Skills needed: Wet Sanding and Buffing Equipment needed: DeWalt DW849 Variable speed buffer (or a good corded drill) Products Needed: 3M 600 grit Wet/Dry Sand Paper 3M 1500 grit Wet/Dry Sand Paper 3M 2000 grit Wet/Dry Sand Paper 3M 05526 Sponge Pad 5 Gal Bucket Terry Cloth Wax Pad Mequiar’s PlastX Cleaner and Polish 3” Buffing Pad Kit w/ backing plate 2 Miracle Cloths (Microfiber) Extension Cord 2” Masking Tape 6 pack of your favorite sudsy ale Product Availability: Paint Supply or Reconditioning Supply Store You can contact me at 214-763-8481 or by email  The supplies needed to recondition your headlamps The supplies needed to recondition your headlampsLets Get Started: 1. Fill 5 gallon bucket half way with warm water. Put in two sheets each of 600, 1500, and 2000 grit paper in water making sure each is separated from the other and that they are fully submerged in the water. Paper cannot be used until they have soaked for 15 minutes. 2. Open hood and tape off all surrounding areas around headlamp. I like 2” tape because it covers enough paint to protect it and also can be used on curved or tapered panels. 3. Assess the amount of work to be done…if your headlamps look better than mine, go to step 5. If they are the same or worse, go to step 4.  Do your Headlamps look like this? Go to Step 4  Do your Headlamps look better than this? Go to Step 5 Do your Headlamps look better than this? Go to Step 54. Begin by dry sanding the lens with 600 grit sand paper. As a rule of thumb, with wetordry 3M sand paper, 600 grit paper is 300 grit dry and 600grit wet. You will need to fold the paper over and use a new piece after every 8 or 9 passes, or until your paper looks like this:  Time to change paper Continue sanding the lens until you remove the entire UV coating from the lens. Referring to pic b, the UV coating oxidizes with exposure to the elements and will begin to degredade and come off. The purpose of the dry 600 grit is to remove the ‘dead’ coating from the lens and expose fresh, unoxidized plastic under it.  Dry sanding You will want to sand in a horizontal motion from the center of the car to the turn lens and then back. Don’t be surprised if you go through a lot of sheets at this stage…with each lens I used about 10 sheets until I removed the UV coating. Once you break through the coating you will begin to see the edges of it as you sand (see pic e). This will tell you where to focus your sanding. You needed worry about sanding to much in one area, as the lens is about 80-90 mils thick; you will run out of sand paper before you sand through the lens. While I did this I also sanded out some rock chips and scratches in the process, running my hand over the area I was working on from time to time to check the progress.  My work thus far My work thus far
5. Remove the wax pad from the bucket of water and wipe dons the lens. With the wet 600 grit begin sanding the lens using a horizontal motion going from the center of the car to the turn lens. Two sheets will be enough to do the lens. About every thirty seconds, you want to squeez some more water from the wax pad onto the lens to provide some lubrication to the paper as well as clean out the sanding waste. Once you feel the paper begin to slip over the surface (as opposed to grabbing it), you will need to fold over a new piece of paper and continue. 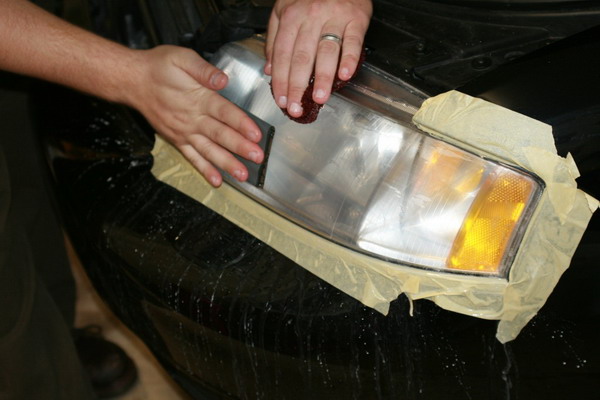 Wet sanding with 600 grit 6. After using the 600 grit, follow up next with the 1500 grit and then the 2000 grit, spending progressively more time with each increase in grit. This will facilitate buffing out the haze in the next step. For example if you spend 3 minutes with 600, spend 5 minutes with 1500 and 7 minutes with 2000. 600 grit makes bigger scratches in the lens and using 1500 and then 200 grit softens the scratches and smoothes out the surface.  Wet sanding with 1500 / 2000 grit Wet sanding with 1500 / 2000 grit 7. Wash down the lens with fresh water and towel dry. Your lens will now look like this:  Freshly sanded and ready for polishing 8. Arrange you polisher and/or drill. Use the yellow wool pad for the polishing. If you are using a drill, there is a special chuck with the kit that will allow you to attach the backing plate to the drill. If you are using a polisher, you need to set the speed at about 1200RPM.  Polisher and polish 9. Begin by applying a quarter sized amount of polish to the CENTER of the buffer pad. Put the pad on the lense and turn on the polisher feathering the trigger so that nothing splatters. Begin working an area 6 inches by 6 inches. Once that area begins to clear up, move over 4 inches and buff another 6 inch by 6 inch area. This overlap will ensure there are not any missed areas. 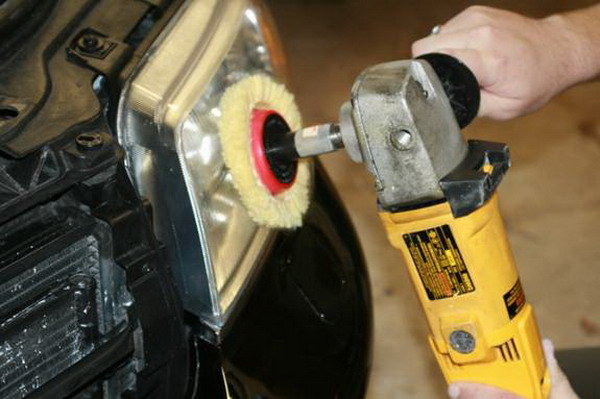 Polishing the lens 10. After polishing the lens, use the miracle cloth to wipe down the lens and surrounding bodywork to remove excess polish, pad hair, and drip lines from the wet sanding. You are now halfway done! Now repeat these steps again on the other side! BEFORE 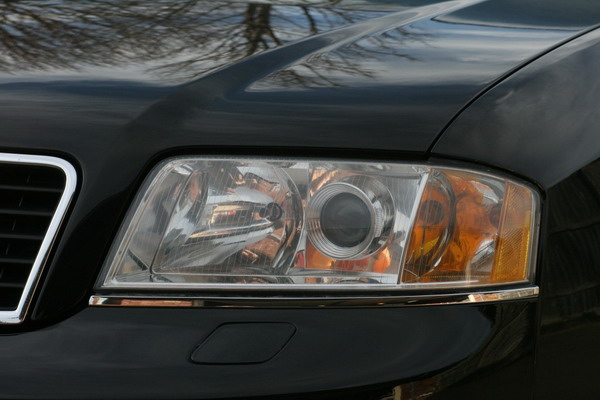 AFTER 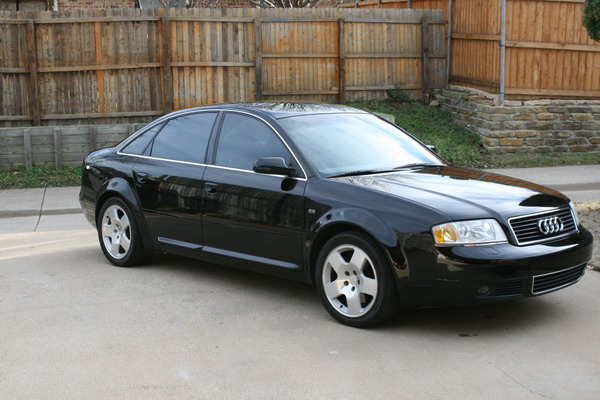 One great looking 4.2!! One great looking 4.2!! |
|
Advertising |
Contact Us |
Cookie Policy |
Privacy Statement |
Terms of Service |
Do Not Sell My Personal Information
© 2020 MH Sub I, LLC dba Internet Brands |