| Tech Article Title |
Author |
Date |
| Custom Dual HID Projector Headlights |
Roger @ CapitalAudi |
2007 |
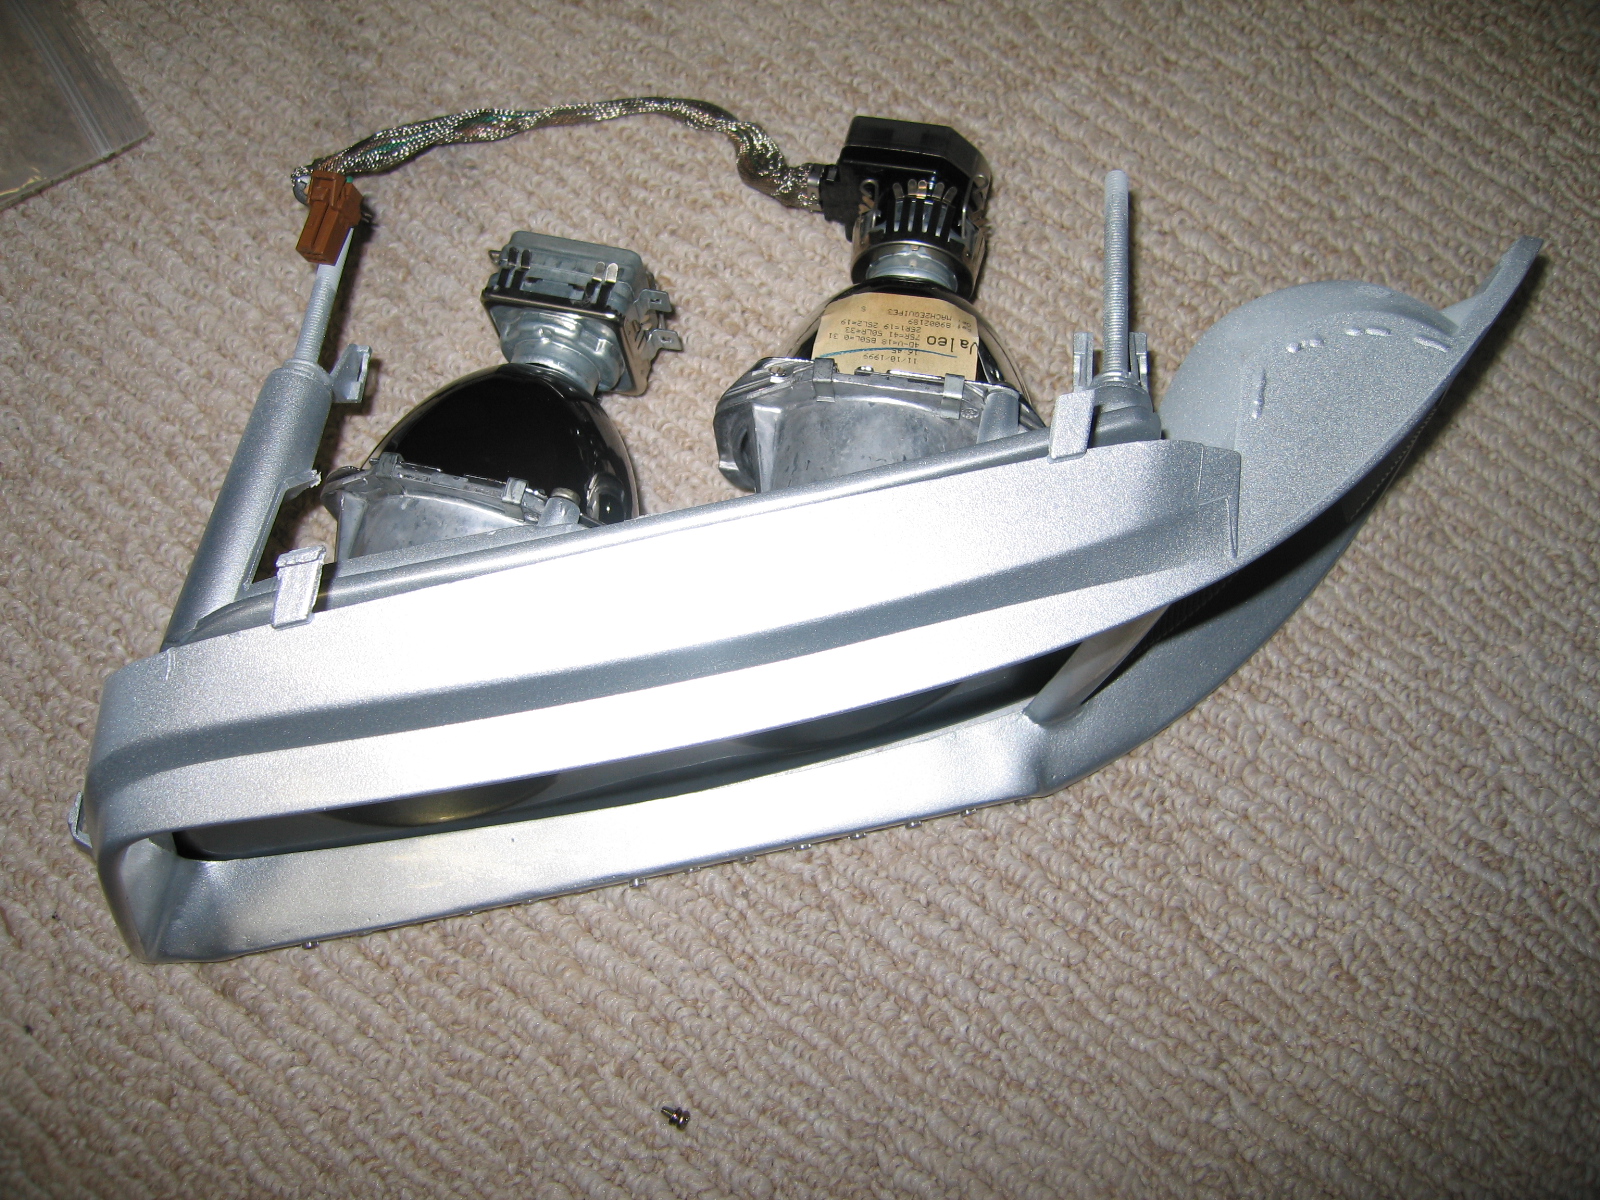
0-First take the headlight apart as much as possible, remove all rubber, wiring, projector housings, etc. out the back of the housings, it's a tight fit but doable.
1-Bake each headlight in an oven on a cookie sheet at 250F for about 30-45 minutes to loosen the glue, any higher will melt and distort the polycarbonate lense.
2-Take the components apart, a screw driver/etc. will help pull the shells apart while it's still hot.
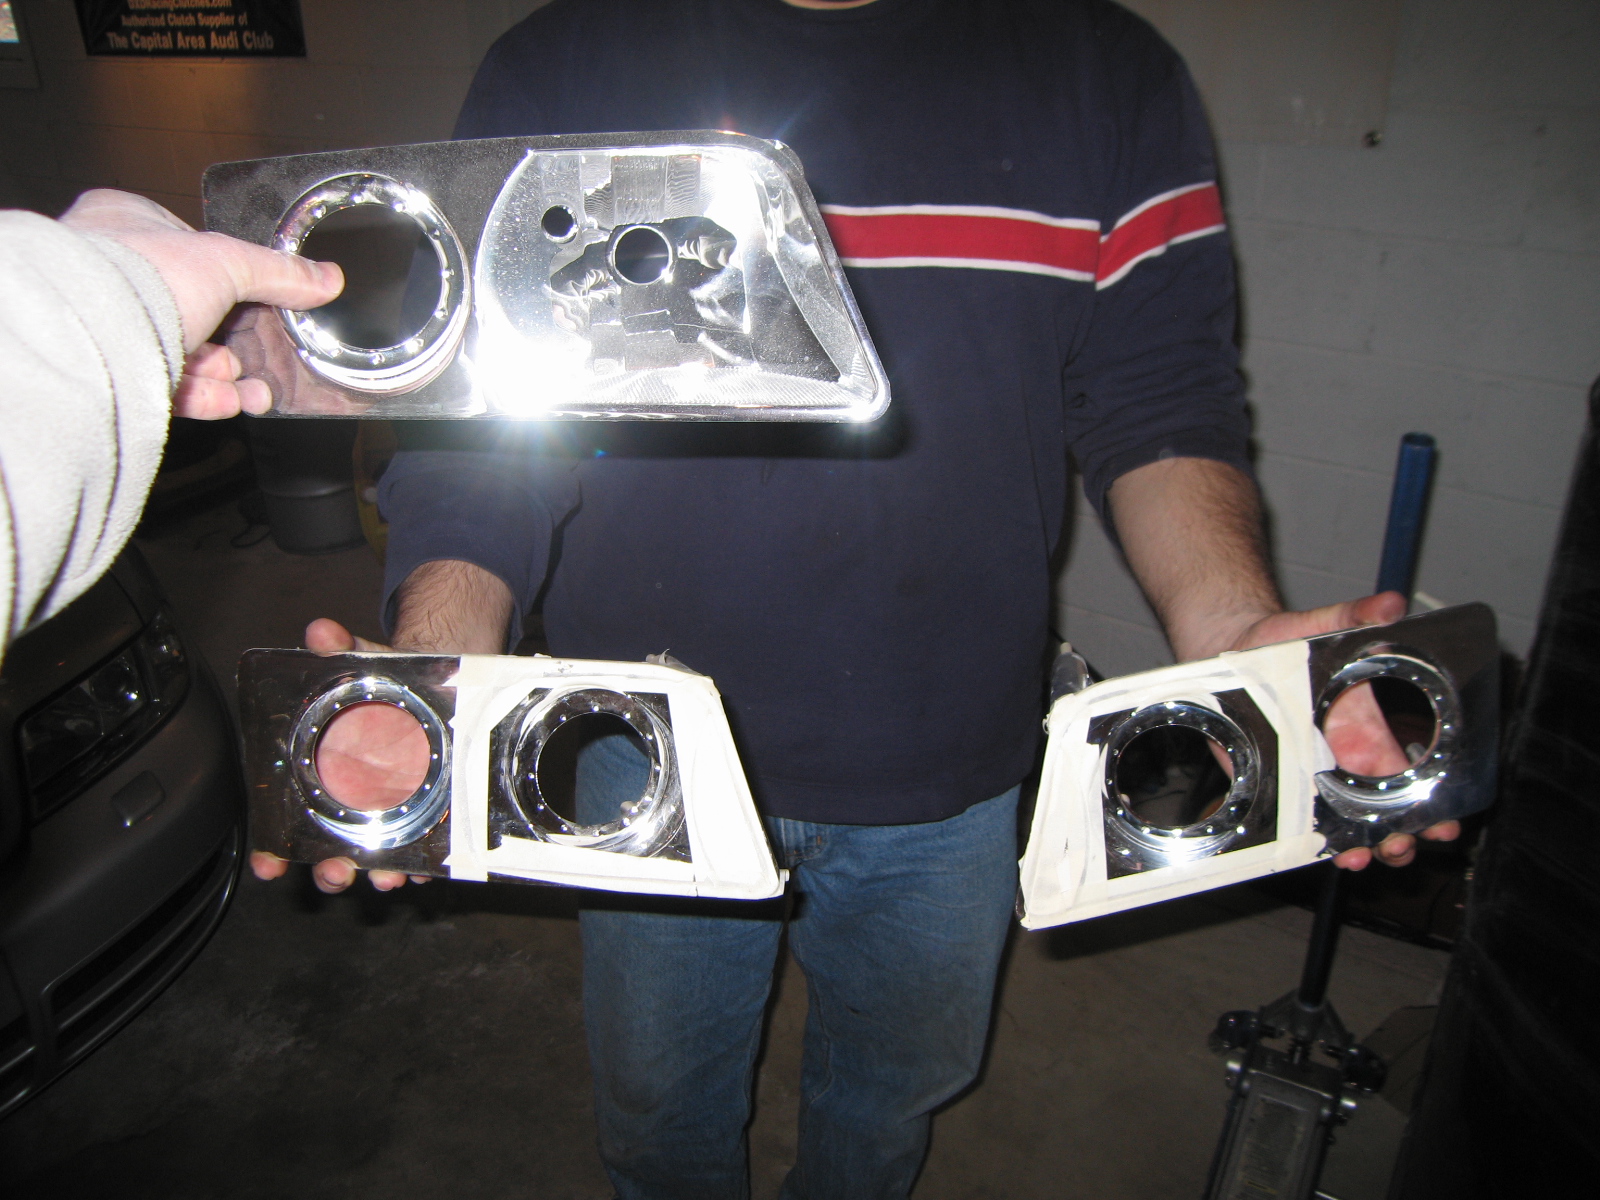
3-Once the parts are apart you need to cut the reflector away from headlamp panel, use it as a guide for how much you need to cut around the extra projectors of the spare set of headlights. Leave as much material around the edge as that plastic is semi-brittle. Then test fit the extra projector into where the reflector was until you have a nice fit. You'll notice how nicely the second reflector fits the curve of the panel, just like factory :-)

4-Use a strong epoxy like JB Weld to secure the new projector in place, use masking tape on the front face to keep everything lined up.
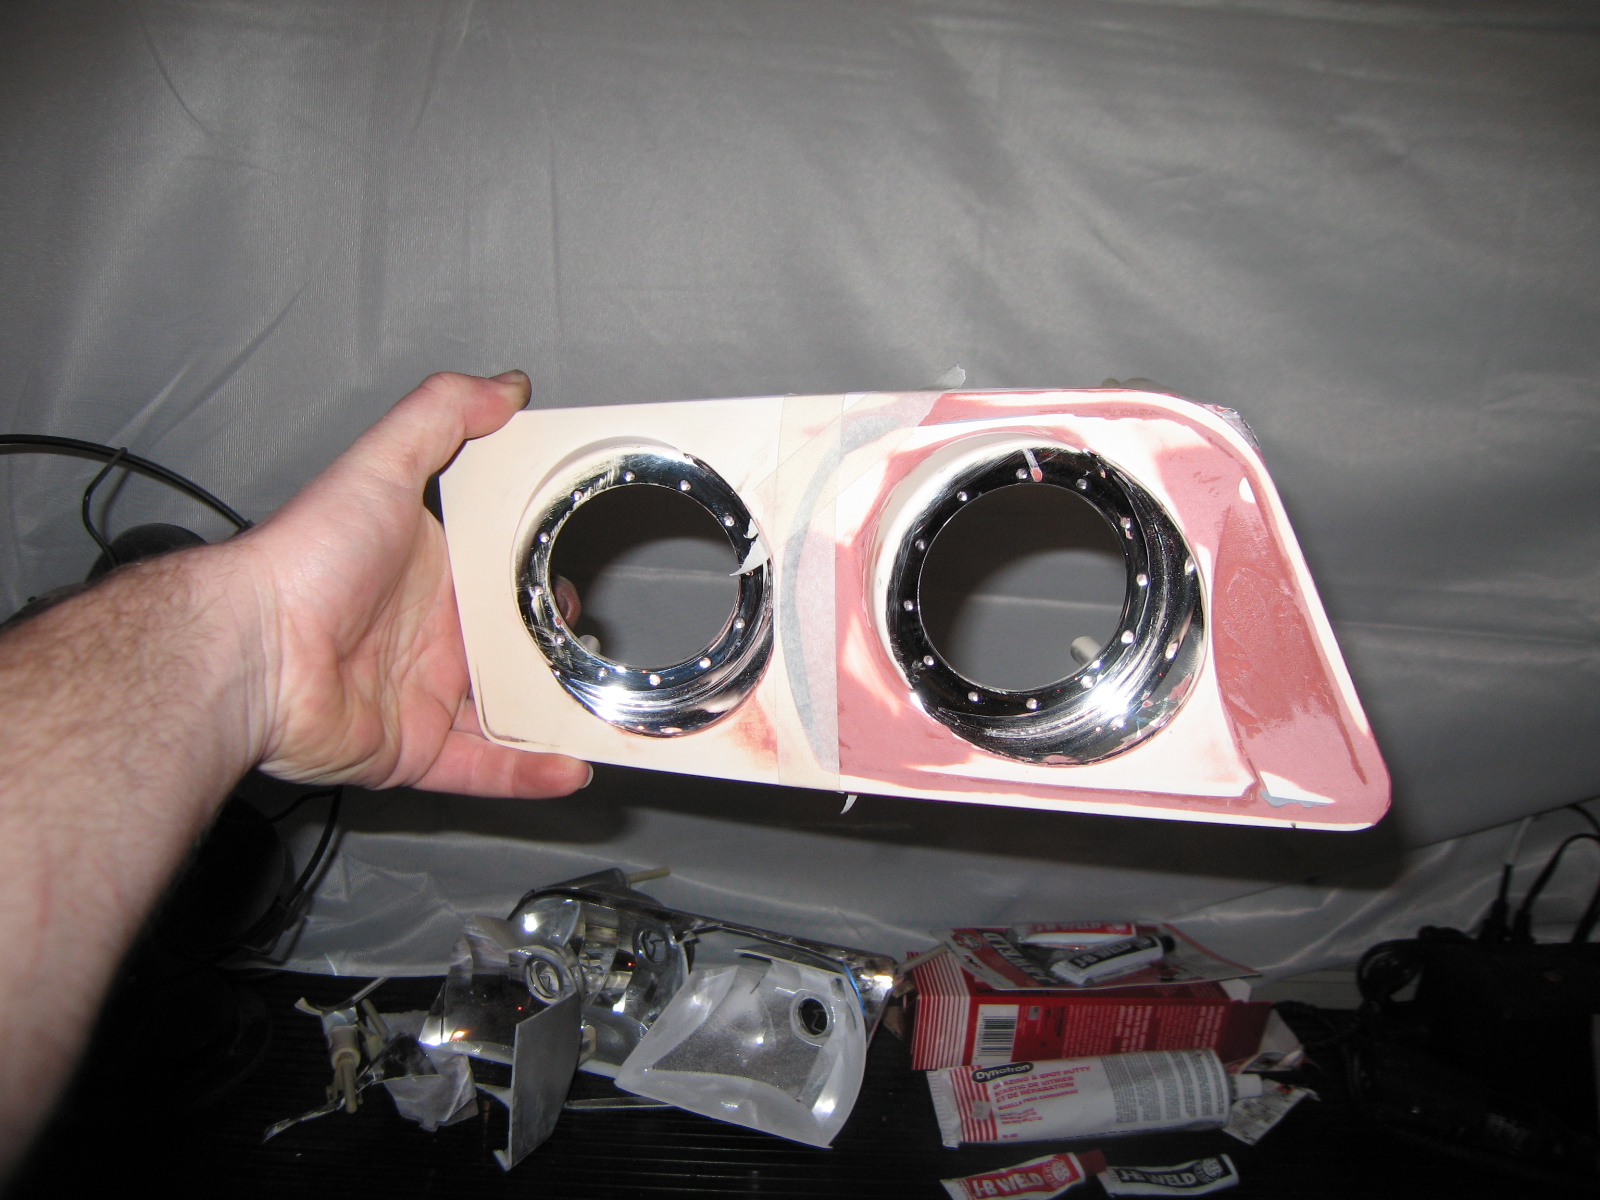
5-Once dry, use a good body filler (Not Bondo! I used EVERCOAT Poly-Flex from a local bodyshop supply store.) to fill in the seams and sand smooth

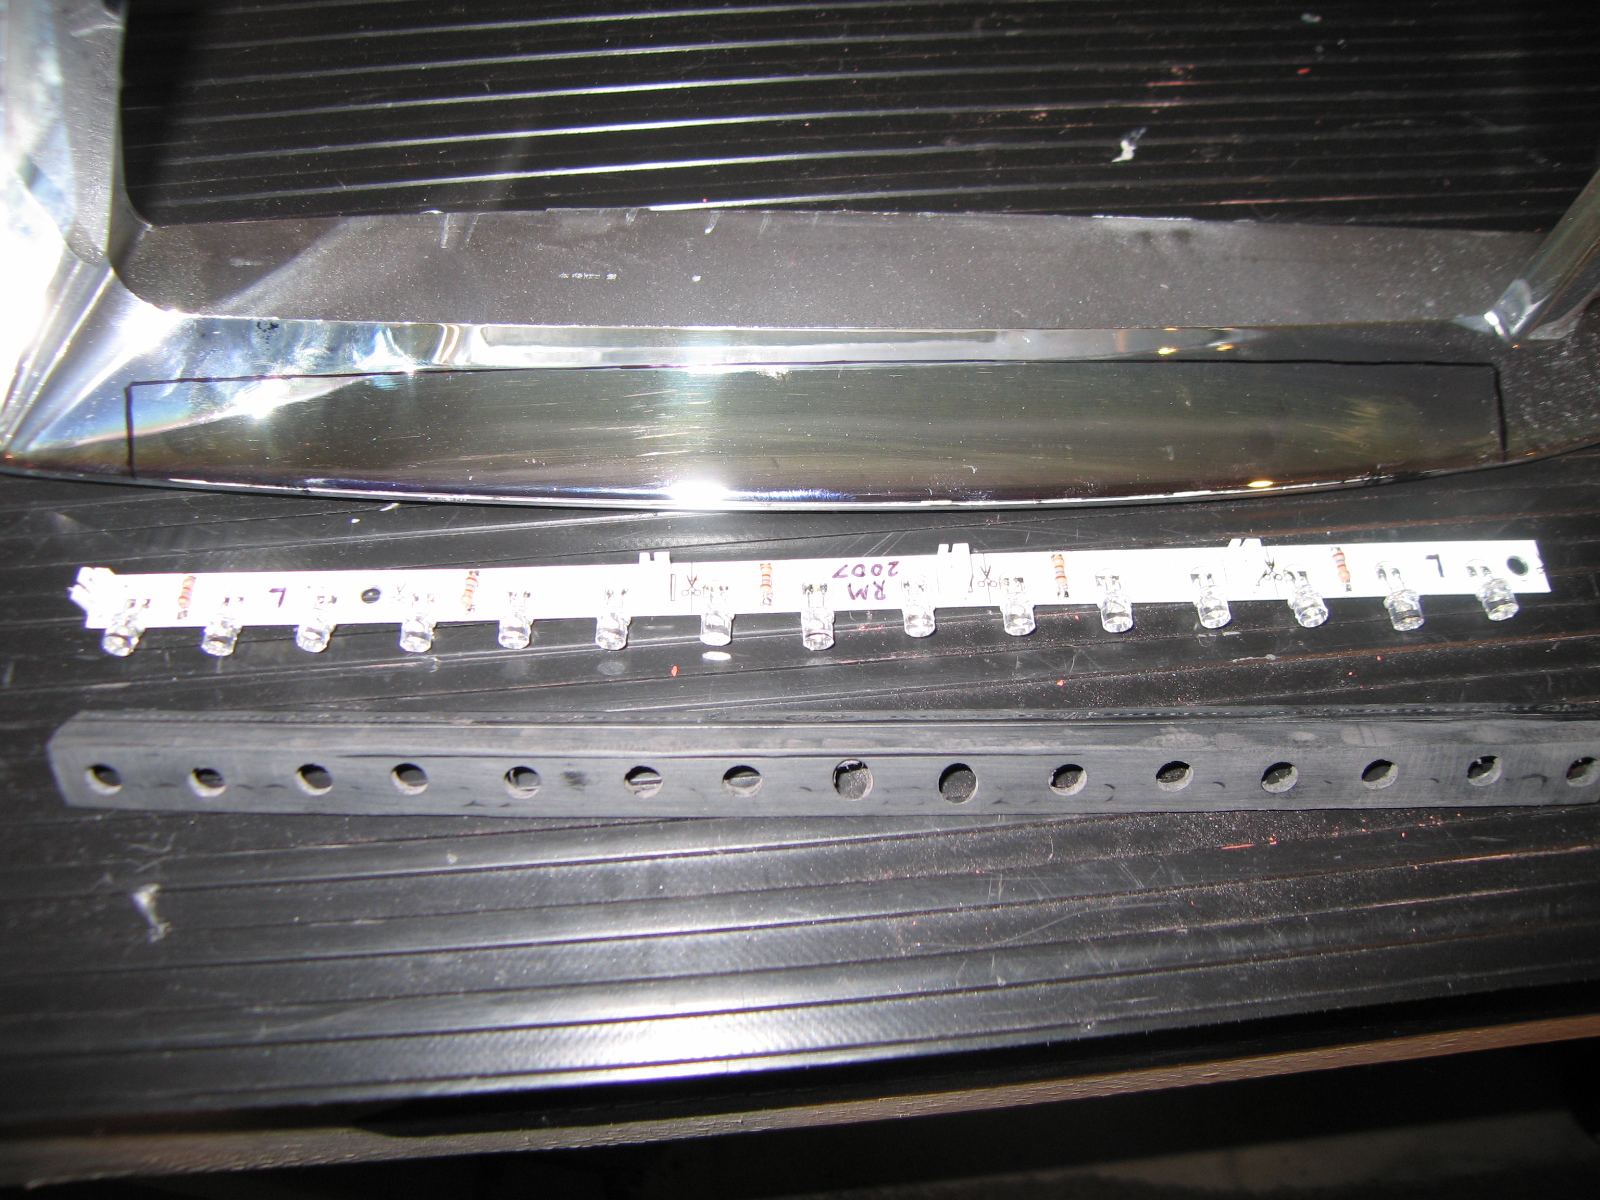
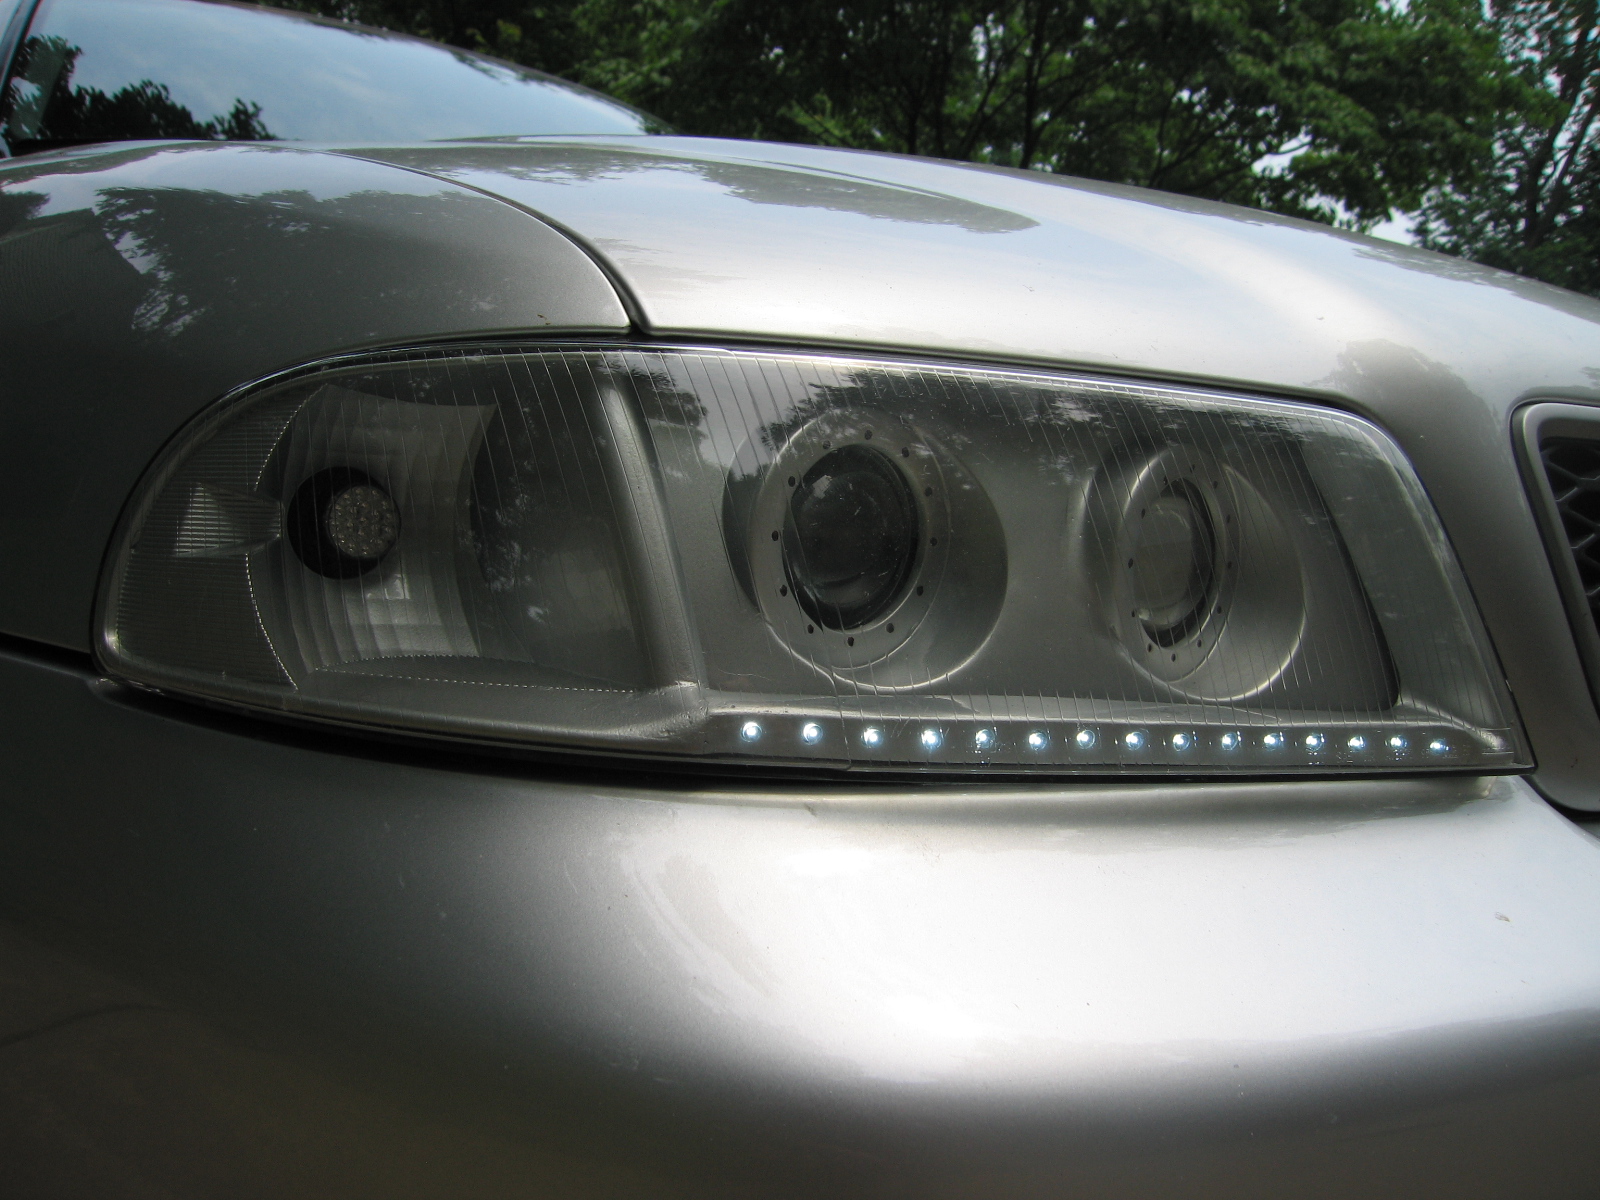
6-You have now completed the main headlamp panel. If you want to do some sort of daytime running LED's like mine you'll need to work on the main shell as well. I used some LED strips from SuperBrightLED.com (18-leds which can be cut to length attached to a thin circuit board.)

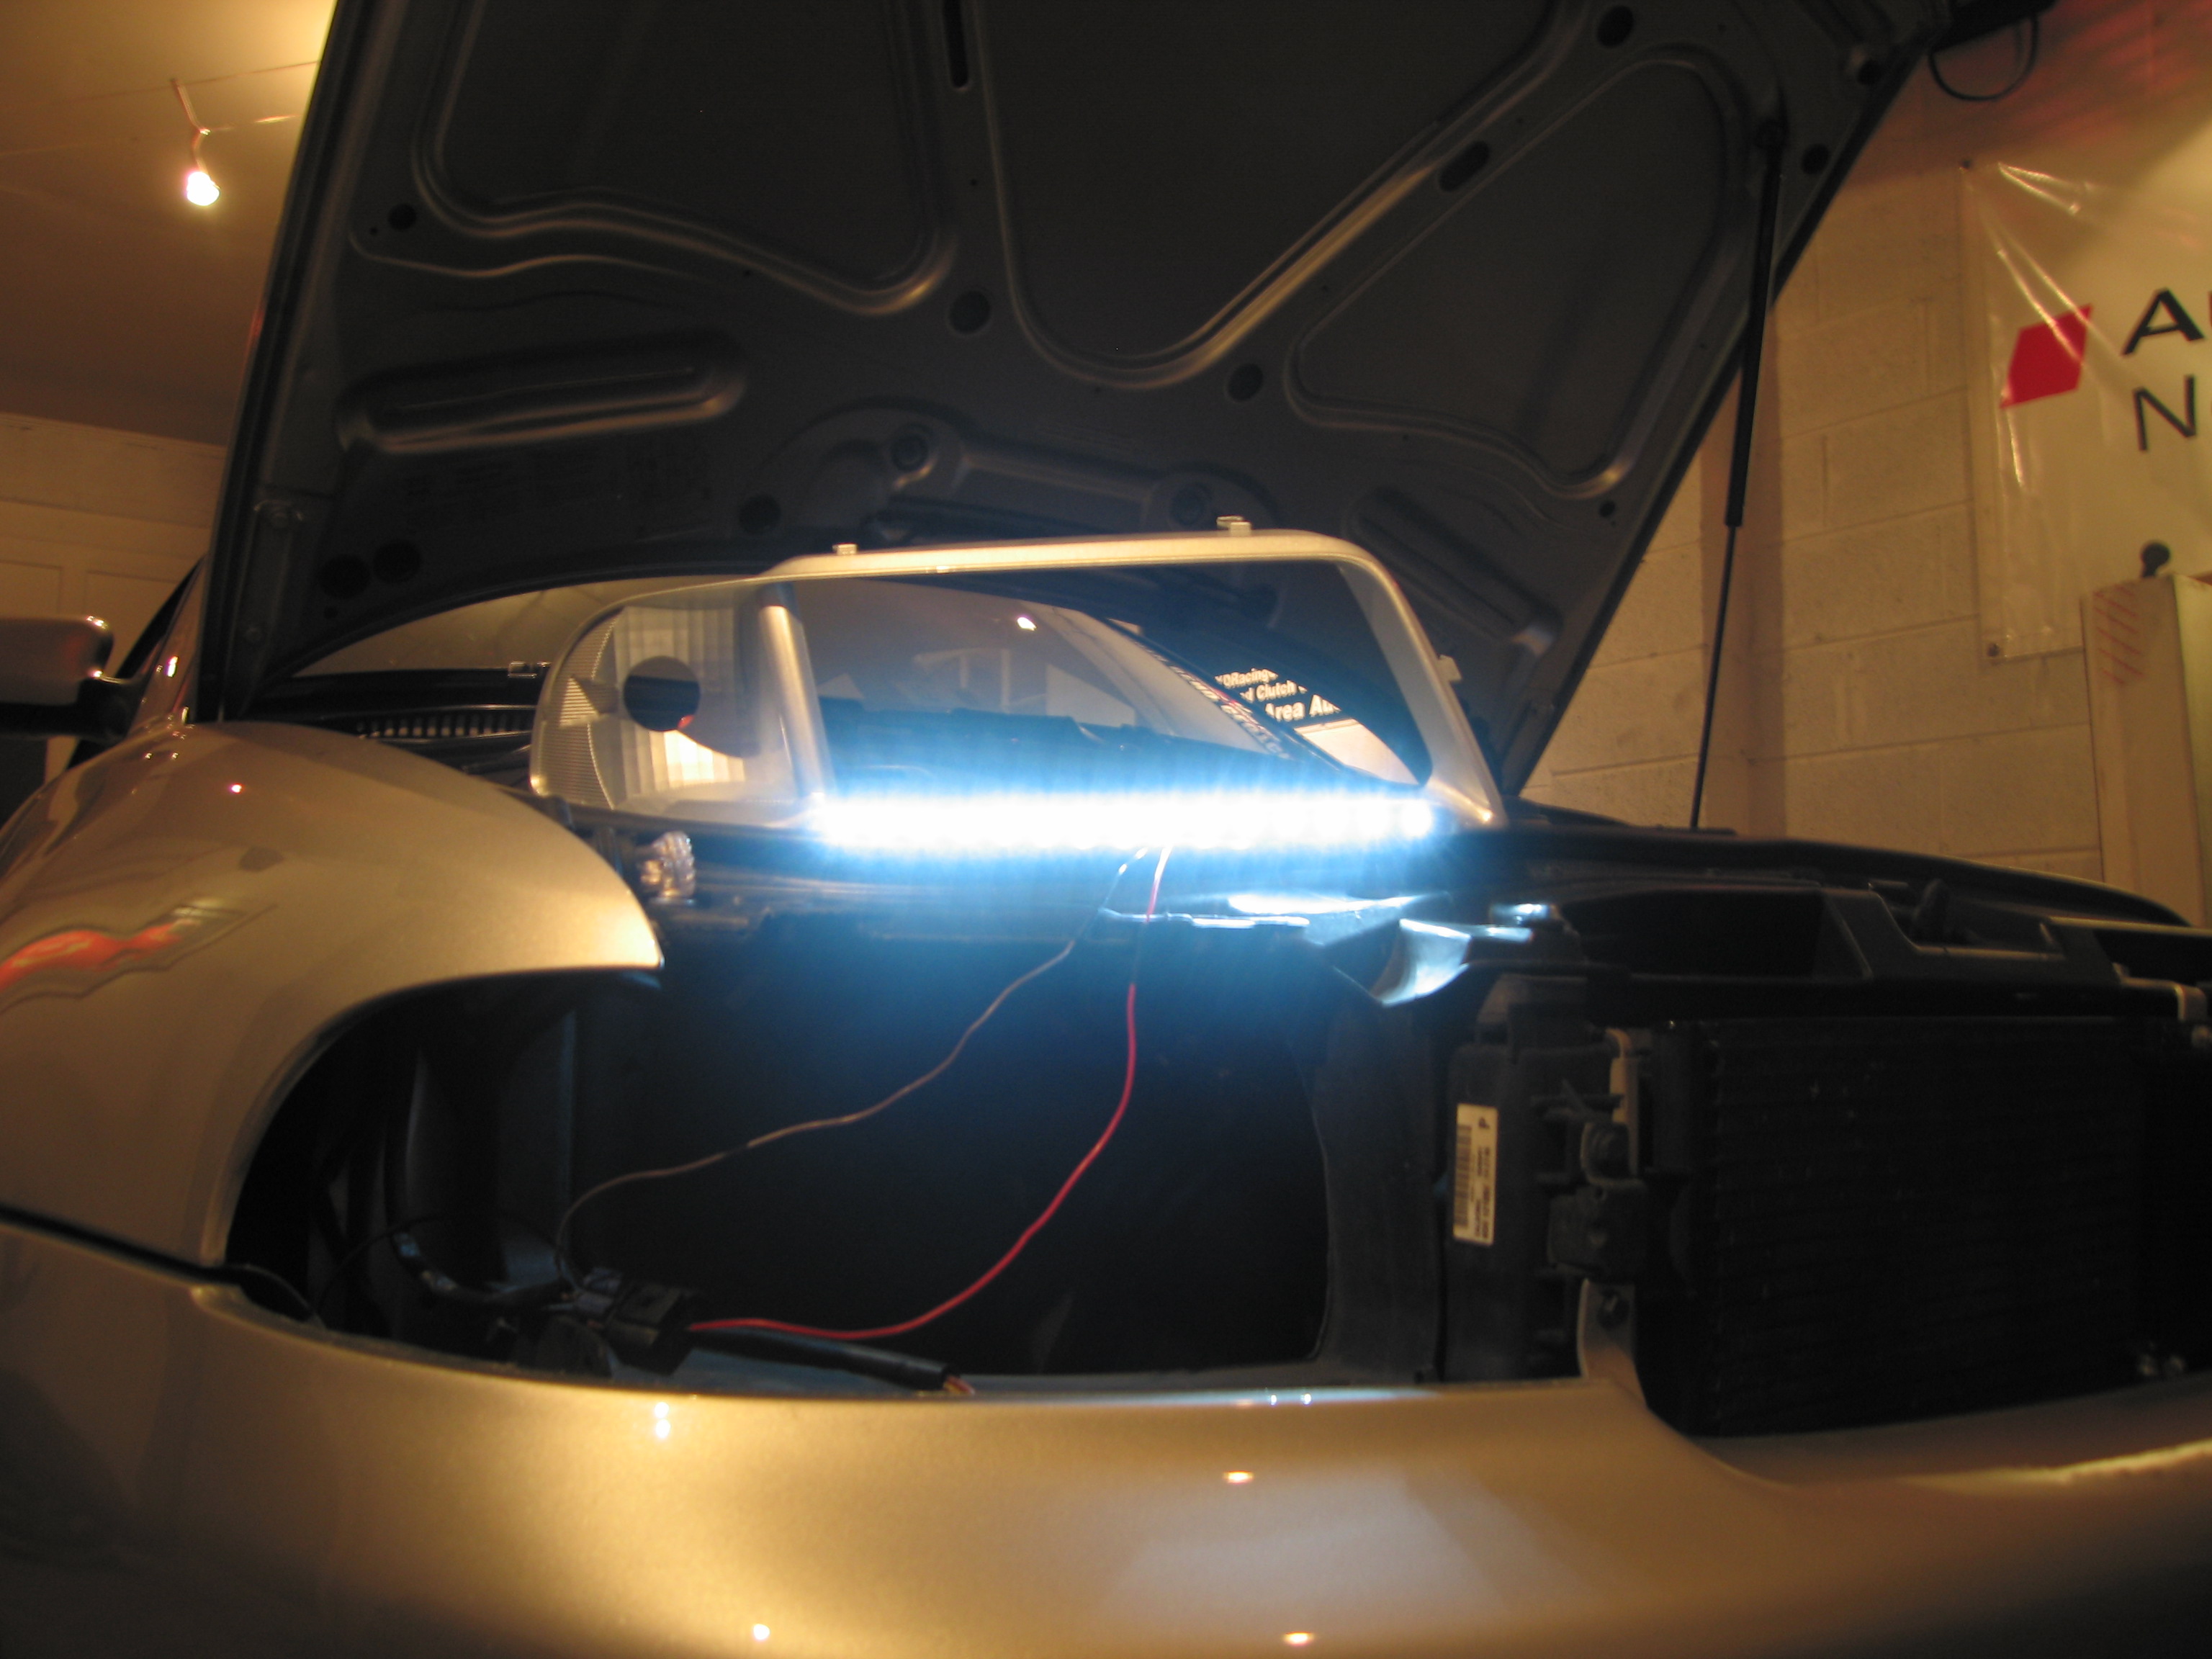
7-For the LED's I cut the front of the curved section straight off to allow space for a flat plastic plate to be epoxied in. I first drilled holes into it to allow just the LED to stick through. I then molded this in as well with the body filler. The LED's are wired to what used to be the running lights.

8-Once you are happy with how smooth the sanding and lines are you can paint the parts. I had mine painted professionally with some other parts, you could spray paint them, but they won't be perfect. I was going for the painted headlamp look of the new Corvette C6's and Ferrari F430's. Make sure to sand away any of the chrome layer over the plastic, paint will not adhere to it as well.

9-Once paint is complete you can start assembling everything. You'll soon see that the stock housing will not have space for the second projector and still retain adjust ability, so you'll need to dremel away extra material here and there to get everything to fit. This part is just trial and error. If using just halogens, not xenons there would be more space since the bulb doesn't stick out as much. For the high-beam xenons I left the beam cut-off plate out so it allows maximum light output.

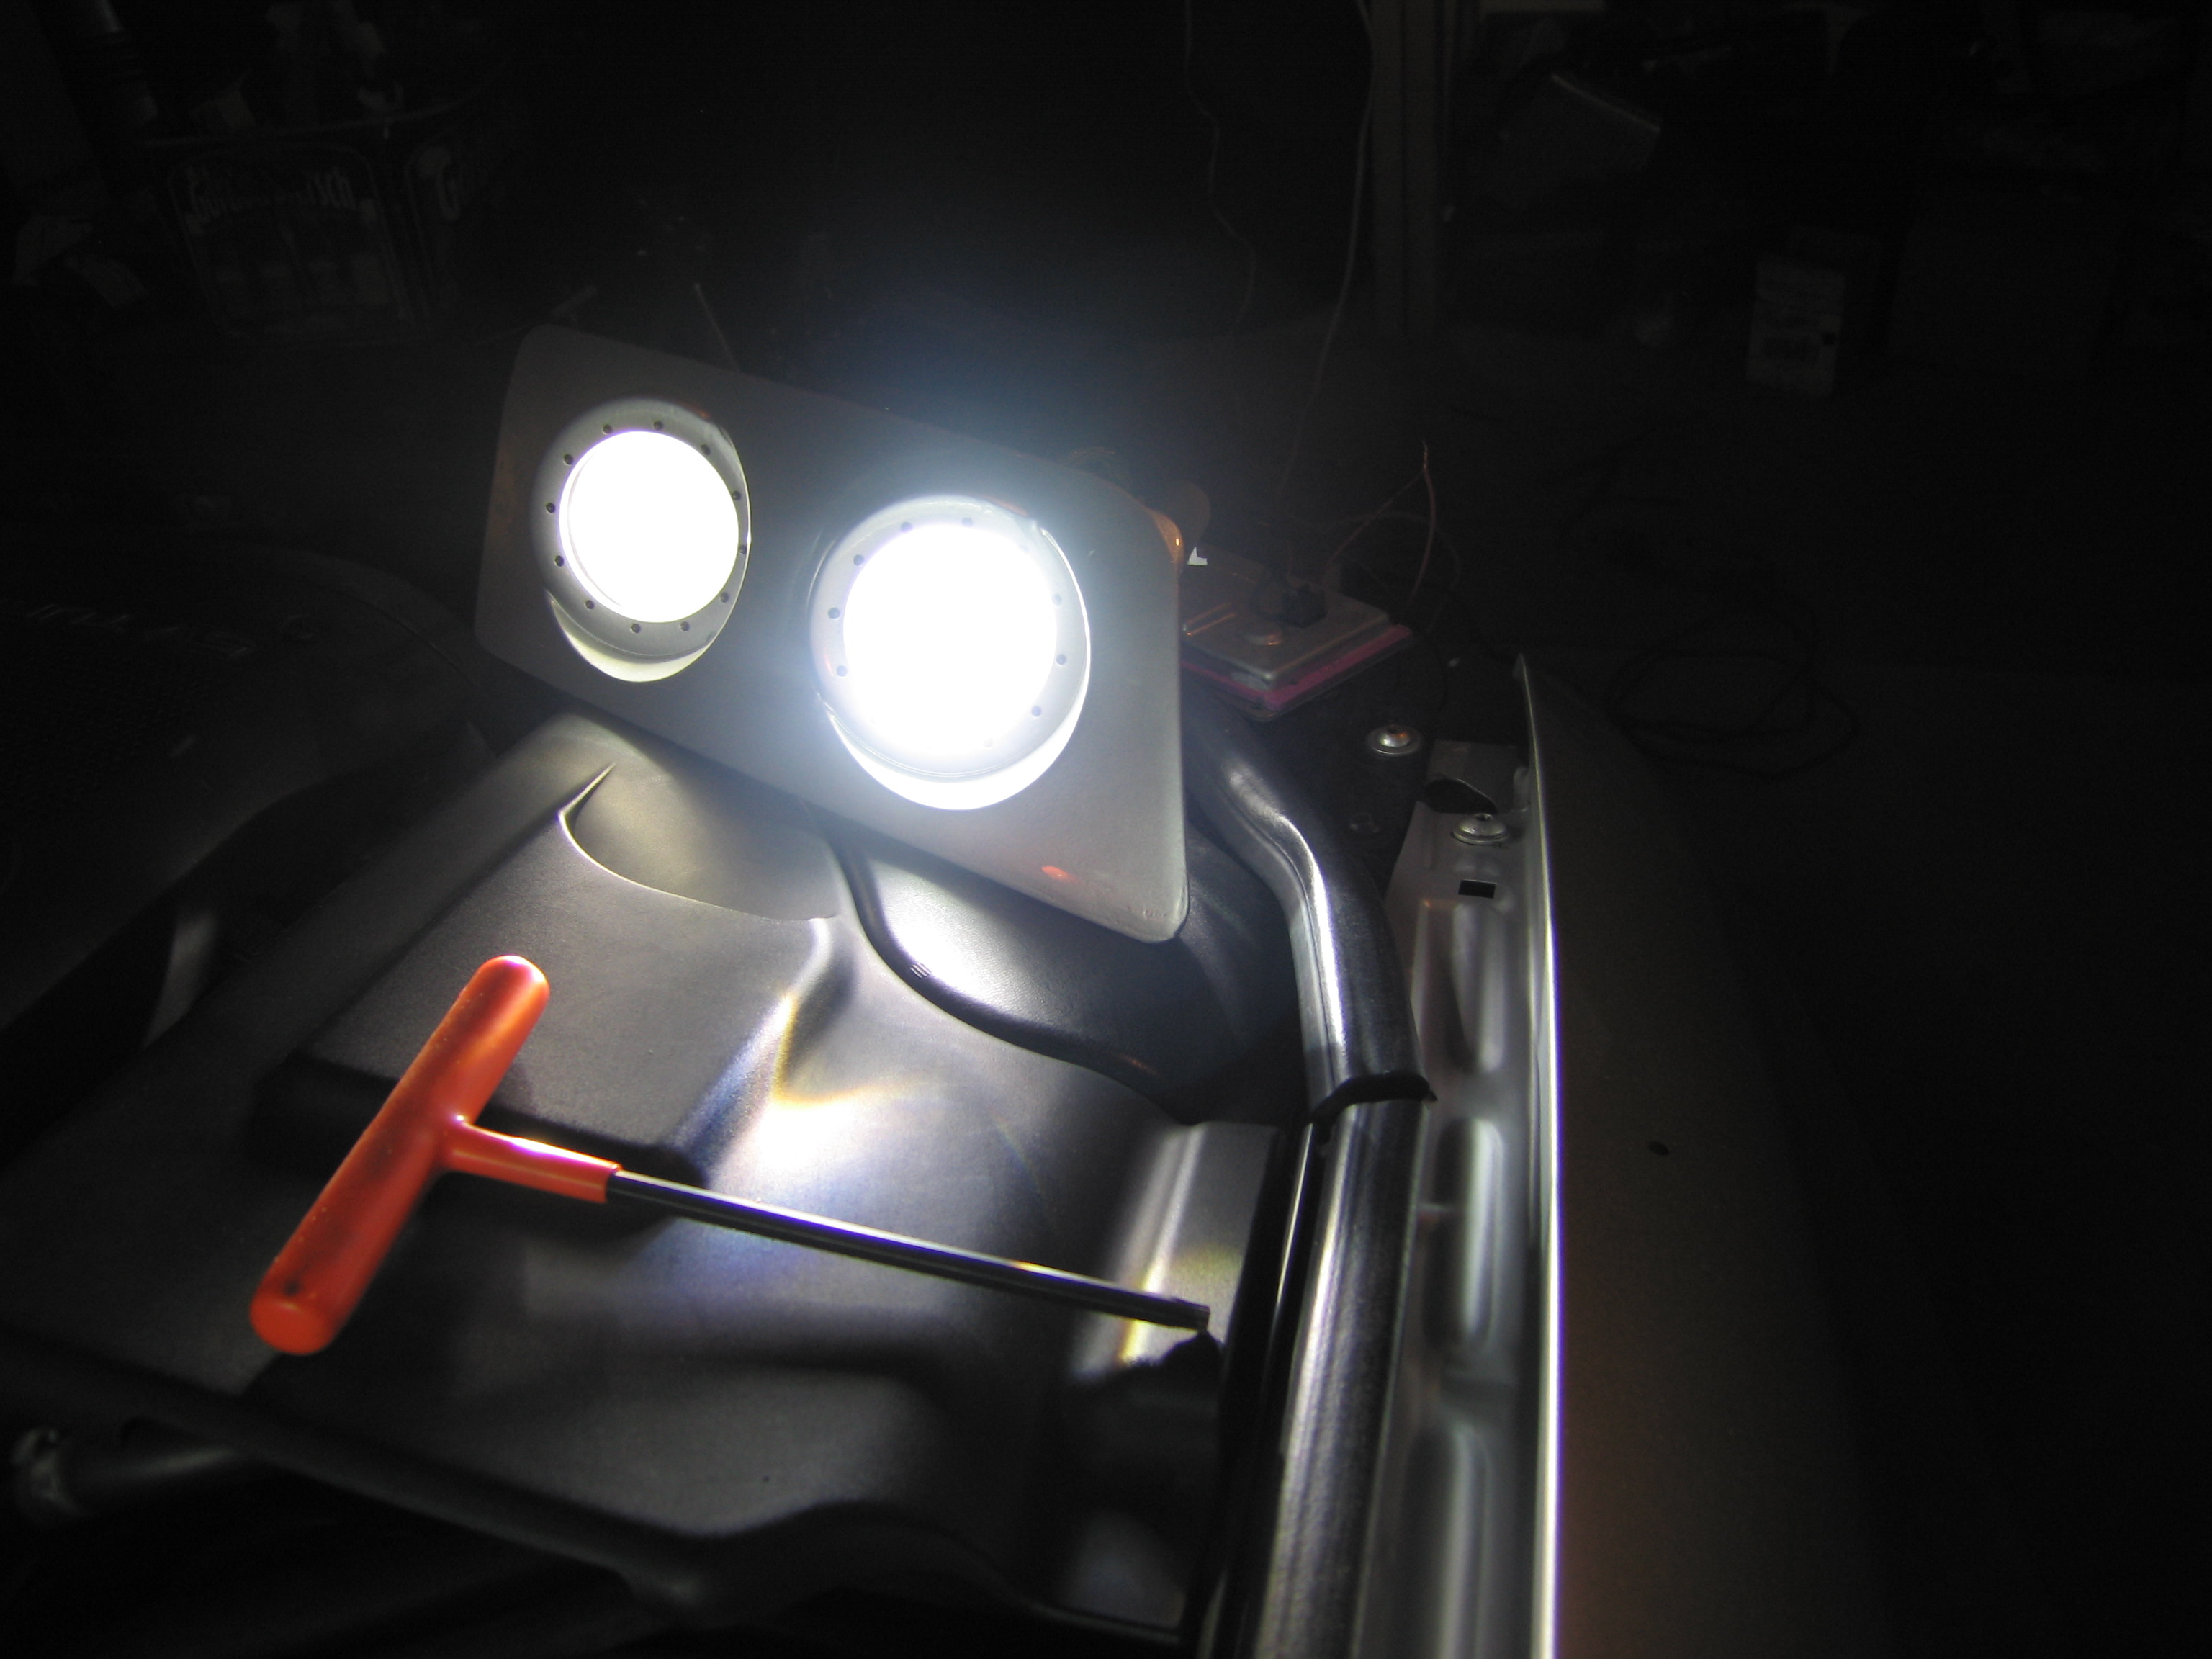
10-Once you have made sure everything will fit together, tape them together with masking tape and mount them on the car. Turn them on and make sure you can adjust them to the correct level, etc. I found out that there was not enough space for adjustment between the headlamp panel and the surrounding part, so I shaved the surround quite a bit to make the extra room.
11-Once everything everything is functioning correctly and you have double-checked all the alignments, you can permanently put the housings back together. I used a clear silicone sealant, for fishtanks. It's resilent/permanent, but wouldn't be a nightmare to take apart if absolutely neccessary. Remember that black glue that was all over the place when you baked the headlights? Yeah, you'll need to get all of it out of the crevices so the seal is nice and tight and it's all lined up.

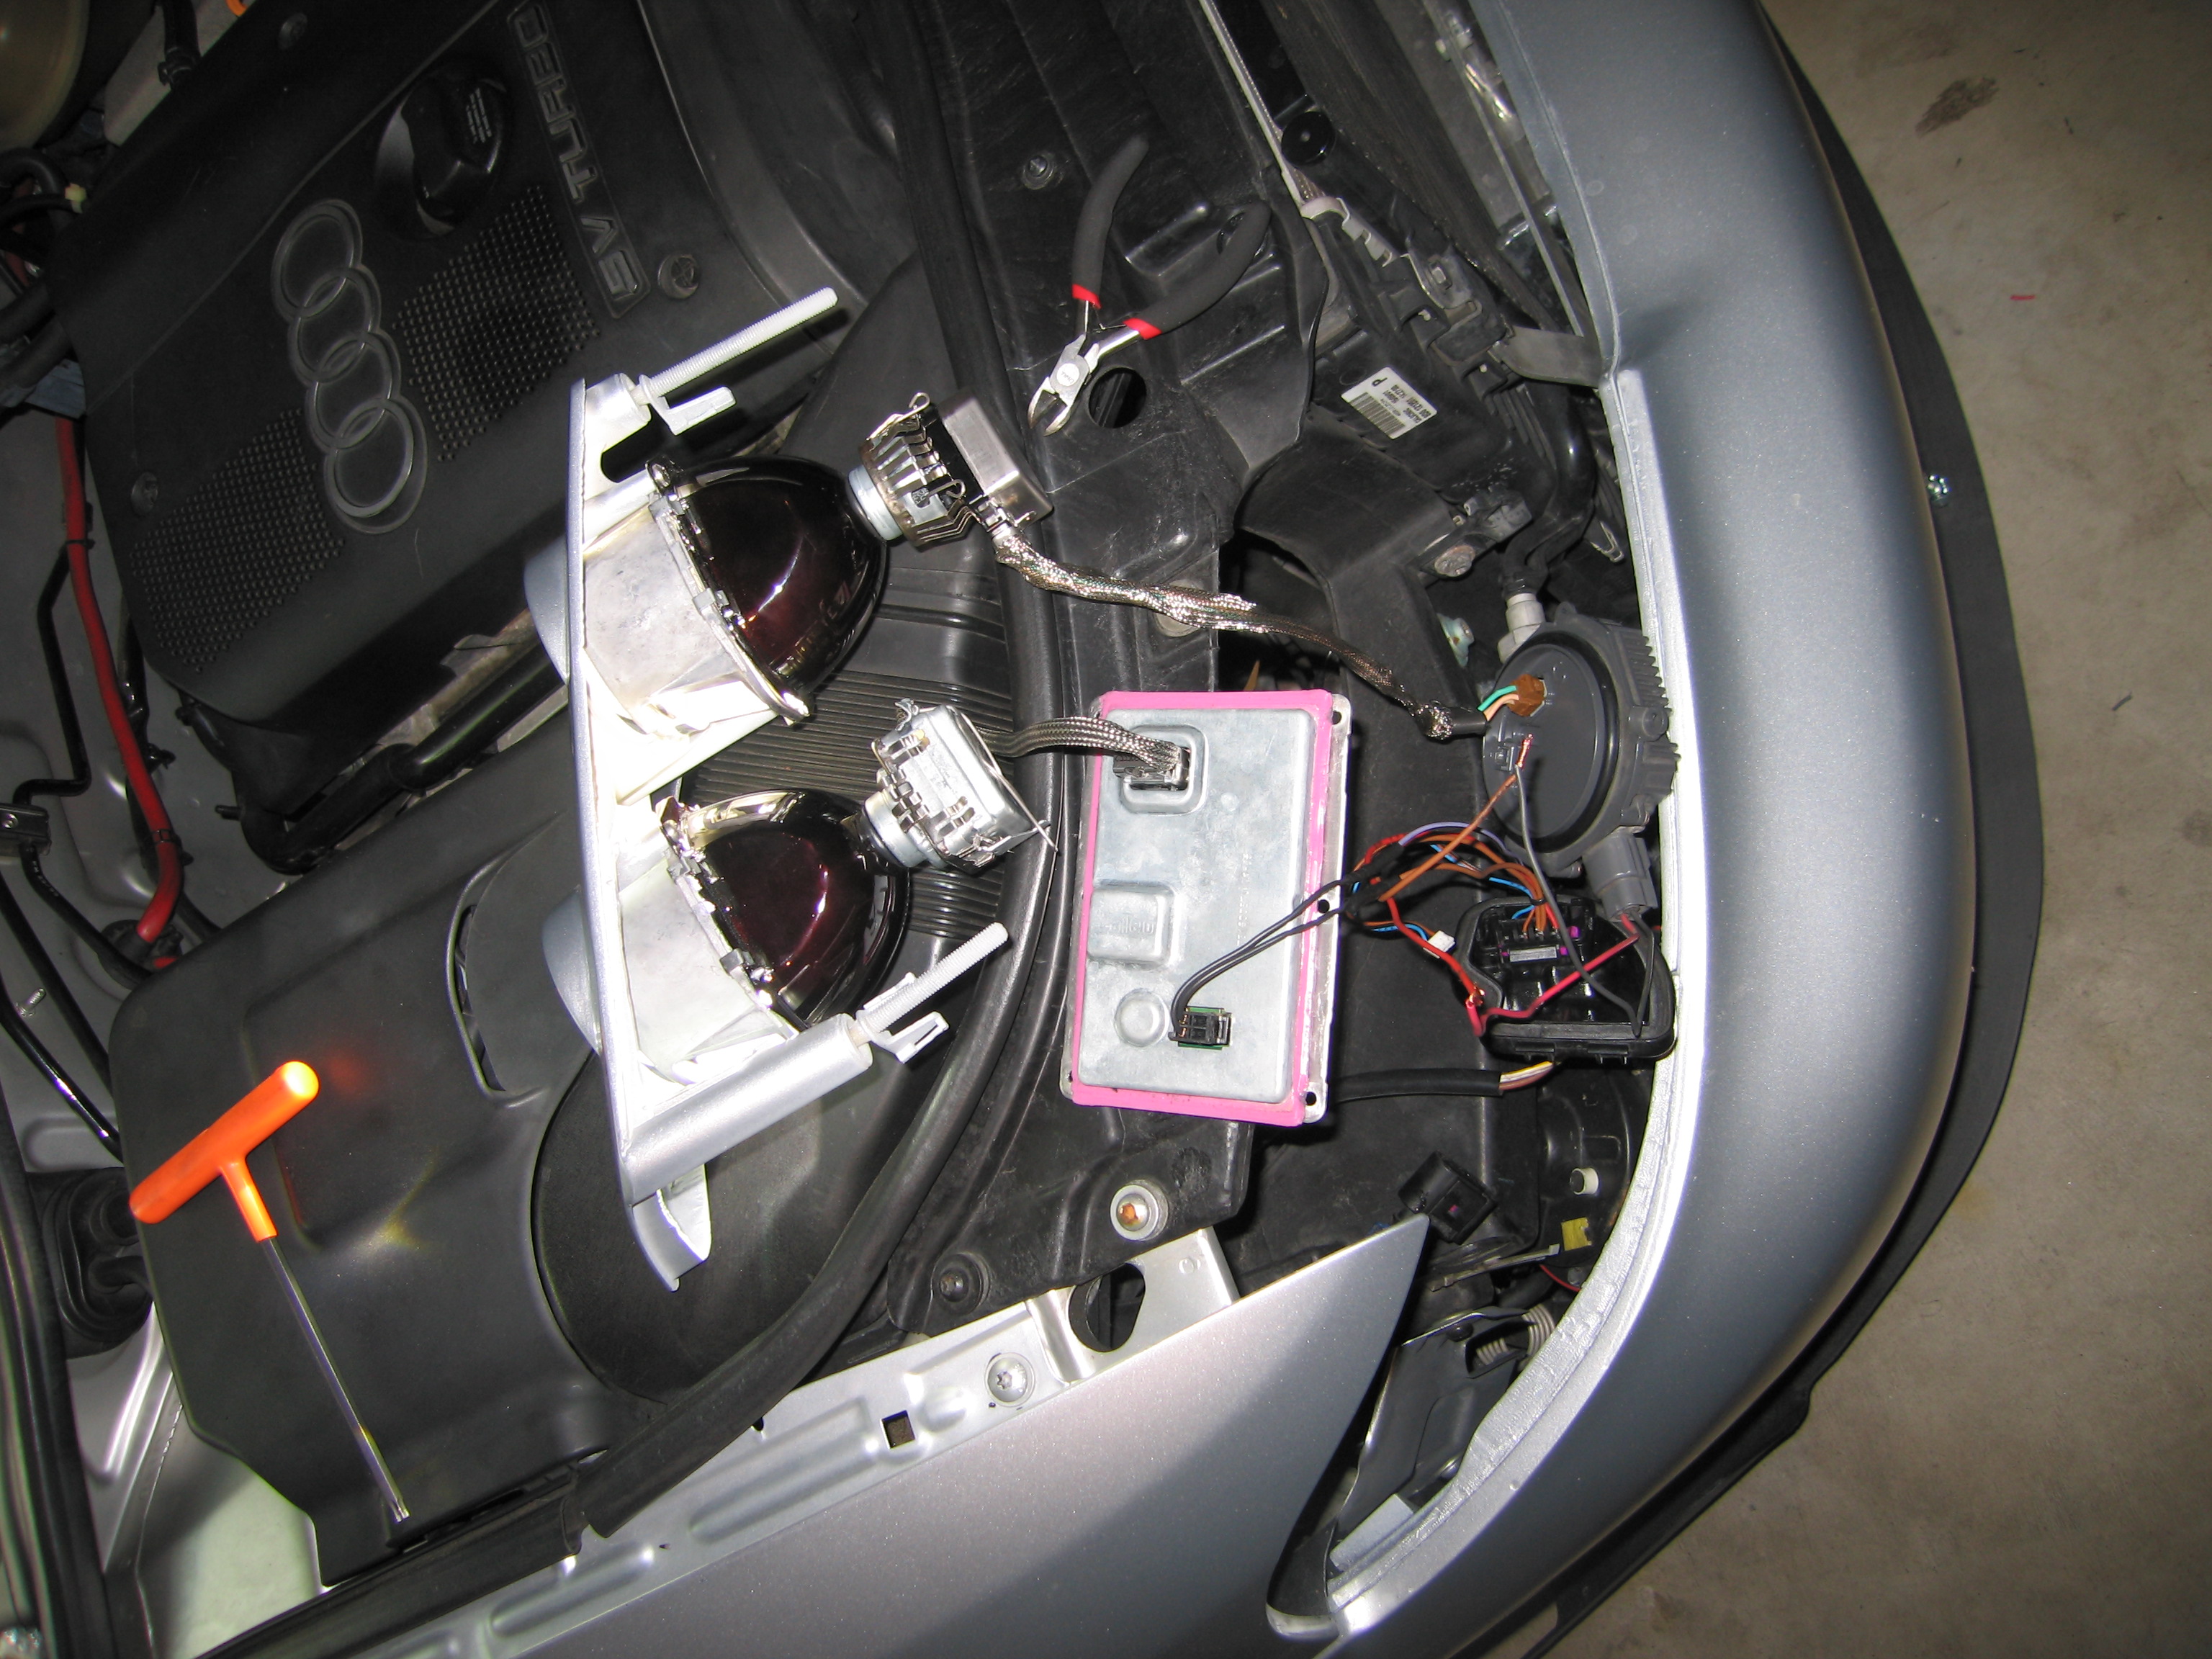
12-This should pretty much take care of the construction. I mounted one ballast in the stock location under the housing, The other one is mounted behind the headlamp (The STI ballast is water resistant and smaller/rounder than the OEM Audi rectangular ballasts.)

Hope these directions help anyone out that wanted to do something similar to this. Overall I spent about 80-100 hours on this project to get everything as clean as I wanted. Your mileage may vary if don't include all the LED work.
|