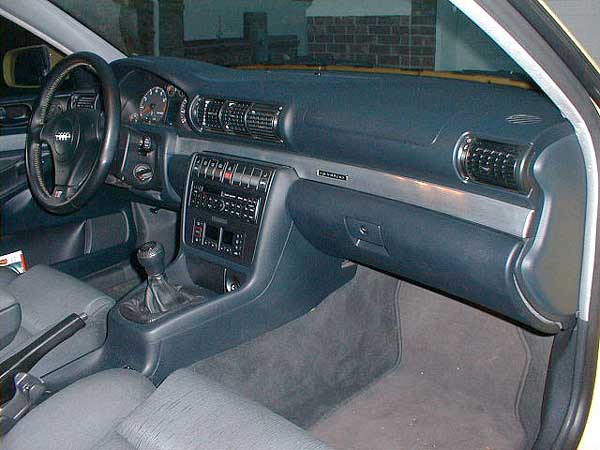
The interior trim on the A4 1.8T is aluminum covered with textured paint. I decided that I wanted to give my A4 a more sporty appearance by having brushed aluminum trim. These are the steps I took to get the aluminum look in my car for a minimal cost, and a better appearance than those 'trim kits' that are available.
This FAQ is based upon my 1998 A4 1.8T but it should be accurate for the '97 and early '99 models. The '99.5 and '00 A4's have a slightly different center console, but this FAQ should still be helpful for those models. This FAQ could also be used on '00 S4's that are equipped with the aluminum trim.
Disclaimer: This modification can be classified as moderately difficult due to the amount of disassembly of the car involved. This FAQ is provided for informational purposes only, and reader accepts all responsiblity and liability involved in performing this modification.
Here's a list of what I used to complete this modification:
Savogran Heavy Duty Super Strip paint remover
Gillespie Old Brass metal polish
A couple of 1" paint brushes
Towels, rags, etc for cleanup
An assortment of screwdrivers
Needle nose pliers
Socket set
Door Trim Removal
I started with the driver's side door. Remove the screws that hold the door panel to the door - there are two screws near the top of the panel on the ends of the door. One other screw is in the door handle section. After removing the screw in the door handle, a trim piece can be moved out of the way, exposing another screw that needs to be removed. At this point you will be able to remove the door panel by lifting the panel up and away from the door. If you want to completely remove the panel you must unplug the speaker connections, etc. I just propped the panel away from the door so I didn't have to disconnect everything. When you have the panel away from the door, you will have to peel back the foam lining from the panel to expose the trim panel attachments. On the front doors there are 4 attachment points and on the back doors there are 3.
The trim and clips look like this:

To remove the trim from the door, locate the attachment points and with your pliers carefully pull off the clips holding the trim to the door. If you're careful enough you'll be able to re-use the clips. Once the clips have been removed, the trim can be easily removed from the door panel.
The procedure for removing the trim on the rear doors is the same, except there are 3 trim attachment points on the back side of the door panel instead of 4.
Dash Trim Removal
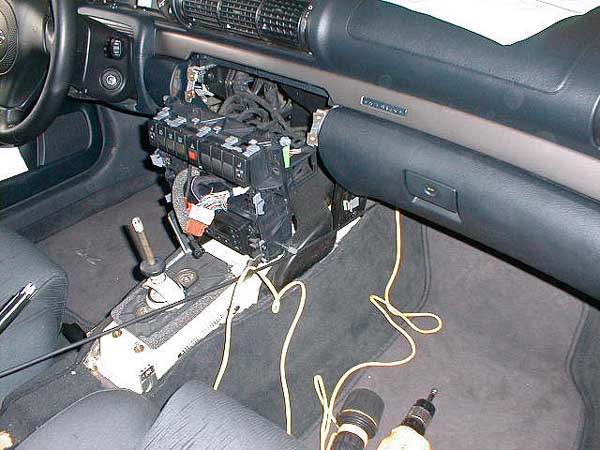
In order to remove the dash trim pieces, the entire center console and all of the lower dash must be removed.
You must first remove the rear center console. The steps to do this are as follows:
First you must remove the Parking Brake lever trim. On the underside of the parking brake lever there is a tab that holds the cover on. Unhook the tab and the cover slides off the handbrake.
There are two small screw covers at the bottom of the plastic piece between the shifter and the handbrake. Remove these covers and remove the two screws.
Remove the rear ashtray.
You will find a nut below the rear ashtray. Remove this nut.
Pull up the parking brake lever, lift the rear center console and detach it from the front center console near the shifter.
Lift console forward and over the hand brake lever to remove.
Disconnect the Data Link Connector from the center console.
Now you must remove the instrument panel center piece trim. The steps:
Remove the radio.
Behind the radio you will find four bolts securing the trim. Remove these four bolts.
Carefully unclip the trim and pull from the center console.
Next you must remove the front center console. The steps:
There are four bolts holding the center console. Remove these four bolts.
Down by the accelerator pedal there is a small cover on the center console. Remove this cover and remove the nut you find there.
Remove the center console by pulling the the console rearward.
Your dash should now look like this:
To remove the passenger side dash/glovebox:
Remove panel from end of the dash (opposite fuse panel).
Remove lower bolts.
Open glove box and reach up behind upper left side of box. Push spring loaded wheel to enable box to drop open fully.
Unscrew bolts holding left side of dash to center console.
To remove the instrument panel center piece:
There are two bolts securing the upper part of the center console to the dash. Remove these screws.
Unhook the upper part of the instrument panel center piece from guides. Pull forward and unhook electrical wiring.
Now you must remove the lower portion of the driver's side dash:
Remove the fuse panel cover from the end of the dash.
Unscrew the lower bolt.
Remove the two long oval covers you find under the dash on either side of the steering wheel.
Remove the bolts found under these covers.
Lower driver's side dash with cover removed:
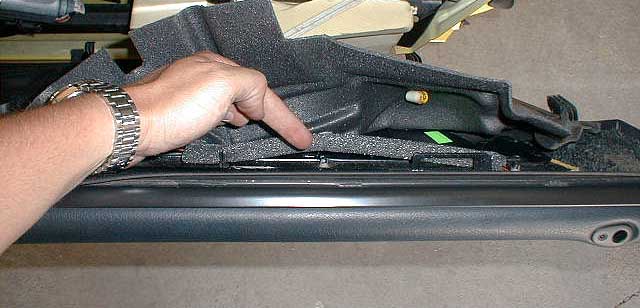
Once all of these have been removed, you can reach up behind the dash and pull the clips from behind the aluminum trim. There are two attachment points for the left side dash trim and six attachment points for the longer right side trim piece. Remove the trim in the same way you removed it from the door panels. The dash pieces are a little more difficult to remove than the door panels, but you'll be able to do it.
The complete removed console and dash:

You should now have all the trim peices removed and you are ready to stip the paint off of them.
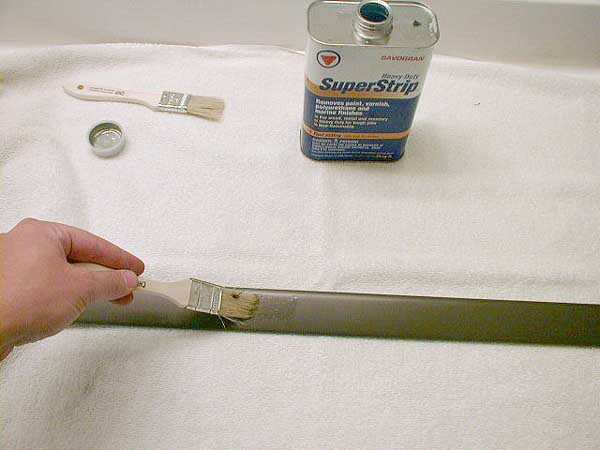
To strip the paint:
Protect your work area by laying down newspaper, towels, etc.
Apply the paint stripper following the manufacturers directions using the small paintbrushes you bought. You will notice that the trim pieces are aluminum over plastic. Be careful not to get the paint stripper on the plastic as it will just melt the plastic away. A minute or two after applying the stripper, the paint will begin to bubble off. The paint stripper should be strong enough to remove the paint without using steel wool or any type of abrasive as this will scratch the soft aluminum below the paint. I just kept applying more stripper using the paintbrush to remove the paint. If you drive a quattro, you will have a quattro badge in the longer dash piece. There is no need to remove this badge. Just carefully apply the stripper around the badge being careful not to get stripper on the black 'quattro' lettering. There is no need to mask the badge - the stripper will not peel the chrome off the badge.
Once you have removed the paint, rinse the aluminum trim under water to remove any remaining stripper. Warm water works best for this. A shower or bathtub works great here.
Apply some metal polish to the aluminum. Only polish enough to give the metal a uniform appearance. Remember, you are going for a brushed aluminum look, not a shiny chrome appearance!
Put the trim in the proper location and replace the mounting clips. Re-assemble your interior in the reverse order of disassembly.
Enjoy your new look!
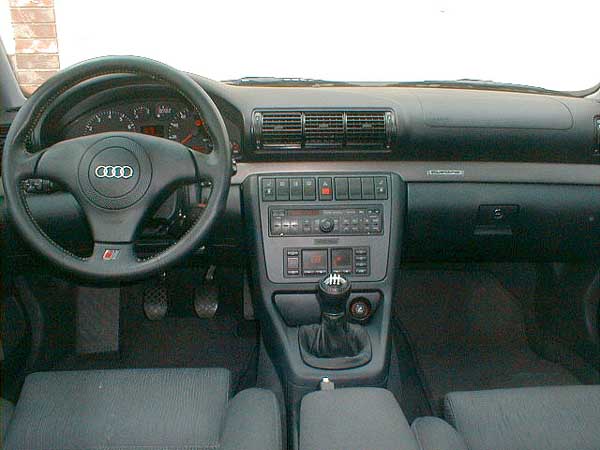
Before
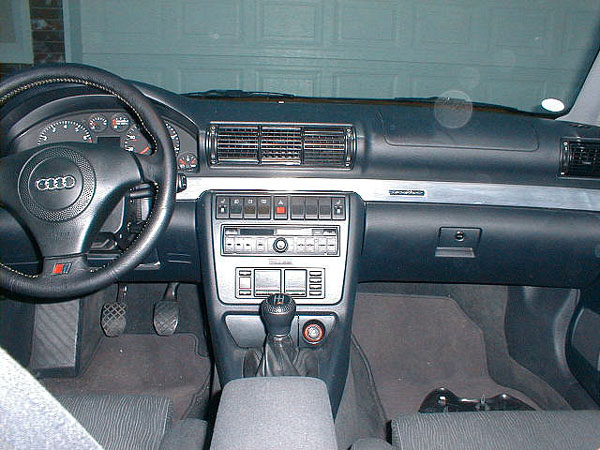
After
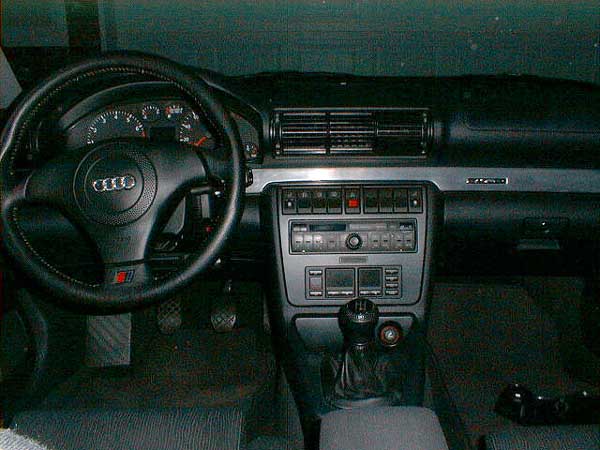
After 2
Twilight Shot
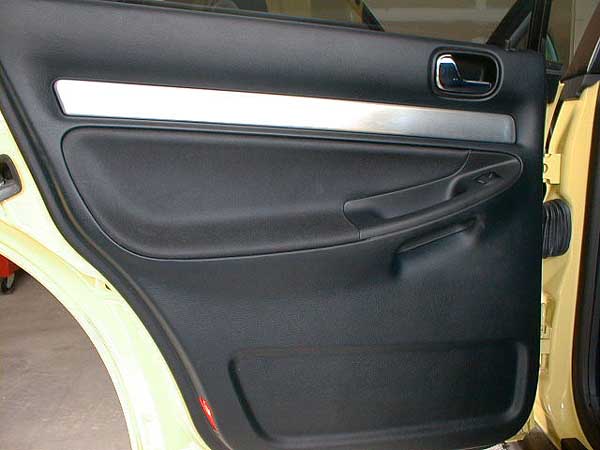
Front Door
Rear Door