| Tech Article Title
|
Author
|
Date
|
|
Tiptronic shift cover: Brushed
Aluminum Project |
owneds4
|
2005 |
Introduction:
Well, basically my shift cover has been
bugging me for the past few months since I got the S4, because it has some
scratches that run down it on all sides. It's not worth buying a whole new
shift cover which the dealer quoted me at 400 something because of the
electronics that are attached to it. So I decided to try to fix it myself.
For the most part I had no guide to follow, so I made some mistakes as I
will explain later.
Materials required: Some masking tape,
Sandpaper. 3 different grits, grit 150 to take off the chrome paint, grit
220 to smooth the lines, grit 320 to fine tune your brushed aluminum look.
1. The first step was to remove the shift plate cover that
surrounds the shifter. This was achieved by just pulling up at the back
side of the cover, give it a hard pull and it should pop off. then pull
back and over the shifter and voila, its off.

2. Next you will see that the
shift plate cover is secured by 4 locks, 2 on each side as you can see in
the picture above, they look like tabs sticking out from the sides, it
will be pretty obvious when you pull off the cover. You will need to
unhook these clips, but be very careful, they are extremely fragile.
*This is where my first mistake was, I managed to break one of my
clips on the first try, it just kinda folded and broke off. So I thought,
Oh well, might as well break off all 4 and find another way to secure the
plate when I reinstall.
Upon breaking all 4 clips I was surprised
to find that the shift plate was snugly secured in its place still. This
is because of the adhesive that was holding the plate down, which was
friggen strong! So I pulled up and slowly pulled it off the adhesive and
it came off, which is where I took the picture above.
3. Upon
loosening the shift cover I noticed that there was a cable attached
underneath. This is for the LEDs, you must disconnect this from the
underside. There is a pressure release on the side of the plug as shown
here

4. The next step
in getting the plate off, is to put in the keys, but don't start the car,
and shift it into 3rd gear like the pic below. This is so the shifter is
in an easier position for you to work with.

5. there will be a metallic
boot (cylinder) that sits below the shifter knob. Pull this down, and it
should pop down.

6.
upon pulling it down, you should see where the shifter clamps down on the
rod with its teeth. Now mine didn't have a ring around it to hold pressure
(wtf?) but if yours does, use a tool to pry it down and off the knobs
clips. Even though mine didn't have the ring in it. I found it to be
extremely secure.
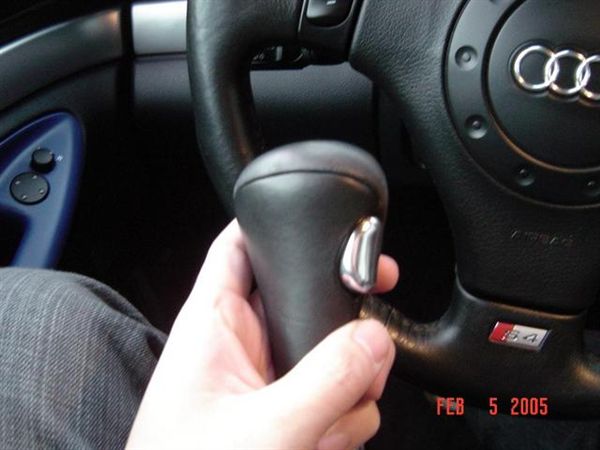
7. Now go up to the Button on the shifter knob,
and slowly pull it out, until you feel a gap underneath it. Then secure it
by putting something in the gap so the button does not release and go back
into the knob. The reason for this is because when the button is fully
pulled out, its not holding onto the lever inside the shifter. Only when
you have done this you can pull off the shifter knob.
8. Pulling
off the shifter knob was a pain in the ASS. I personally used the "Close
your eyes, and PULL!!!" technique. Just make sure your button is pulled
all the way out and secured.

*ok got it off, and nearly punched myself in the face.
9.
Aww man, My tape that was holding the button out fell off, and my button
is now stuck all the way depressed!! and I cant seem to pull it back out.
*no worries, just take
some masking tape and put it lengthwise across the button as much as
possible. Use this to gain grip and just pull the button out slowly. Then
secure the gap underneath with a piece of tape or something.
10.
Now that you have gotten the knob off, you can take off the plate. Gather
your supplies and the plate and head into your home, this is where the
hard part starts...
*you may notice that you cant pull out your
keys in third gear, just pull up on the lever where the shift knob use to
stand, and that simulates the button being pressed, then shift into park
and grab your keys.
11. Now that you've got your supplies, You need
your sandpaper.

*This
is where I made my second mistake, and it was pretty bad, I didn't know
you can take out the Black panel underneath the aluminum shift cover, so I
began sanding with just some tape to cover the little hole buttons with
the letters on them. Well, long story short, I ended up messing them up
pretty bad, and sanding and scratching the letters off on some.
I
HIGHLY URGE YOU TO REMOVE THE BLACK UNDER-PLASTIC w/ Button Letters before
you begin sanding, or else you will end up like me.
12. To remove,
take a paper towel, and something that you can use to poke, I used a
wooden chopstick but you can use anything, put the paper towel over the
plate, and with your chopstick push down over the paper towel where the
first hole is where the "P" (for parking) is, don't be scared, push hard
until you hear the adhesive being removed. The paper towel is so that you
wont scratch up these little black inlays. Repeat this process over the
other holes, until you have loosened the under-black-plastic portion of
the shift cover, then remove it w/ the electronics board.
13.
Begin sanding

*note: as
you can see I didn't do the tip above, and just taped over my inlays, I
scratched them up pretty bad and just ended up scrapping the whole thing
as you will see later.
Start with the 150 grit and remove all the
chrome paint. Its ok to sand it all crazily, the grain doesn't have to be
set yet.
Then use the 220 grit, and make sure you only sand in a
Top to Down stroke motion, this gives it the brushed aluminum fine grain
look.
Then use the 330 and refine the look, and smooth it out,
also only stroke in an up down motion to give it its "lines".
When
you are done, it should look something like this:

Ah it looks pretty good, way better
than the chrome with the scratches in it, in my opinion.
Get it as
flush as you want, then rinse it off, and look at it and marvel at how
much better it looks. Then its time to reassemble.
14. Use some
masking tape and put it all together, and make sure its secure. At first I
used a hot glue gun, but its not recommended. It got all messy and I
cleaned it up and decided to go with tape, No one will see this underside
anyway :p
*Note, I didn't have the under black plastic inlay piece
anymore because I Fux0red mine all up, so I went with the Glowing Red LED
effect and just didn't use it.

^^^ OWNED!!!! I'm just going to throw it away. see how my buttons are
all scratched off? well I sanded it down even more, thinking I could save
it, and work something out with it. Nope, its trash.
I just taped
my circuit board and the black plastic lining to my shift cover and
reinstalled it that way.
15. Reinstall everything, back tracking
the way how you took it off.
Note: When installing the shift knob,
make sure your Shift knob button is completely Pulled out again while you
push it in.
END RESULT. FINISHED PRODUCT ***********
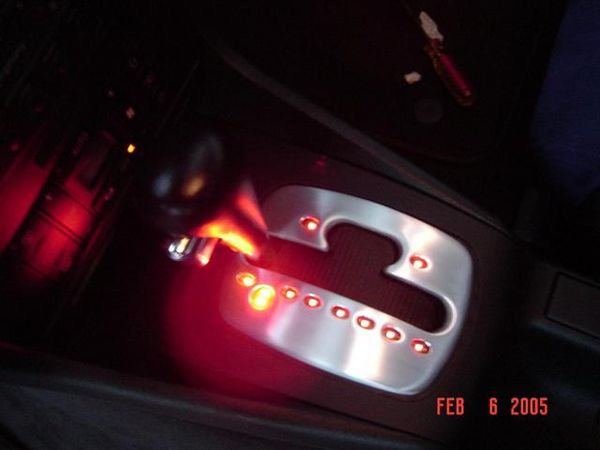


It looks pretty good without the
plastic inlay piece, because the LEDs are in full glow and they really
shine out. looks kinda high tech. Of course, yours will look different if
you didn't FUK UP your inlay piece like I did. But overall I still think it
looks good (if not cooler, for the ricer's taste JK) without the piece,
except that I have to look at my Dash menu to figure out what gear I'm in
:P. No more scratches, A cool brushed aluminum cover that is flush, I'm
HAPPY!