|
|
I was searching for a solution to my sticky cup holder problem and saw many posts about the
dealer replacing them under warranty. This must be the case for others so maybe you'll find this useful. Sticky caused by: Sugar (i.e. Soda): use hot water to get the sugars off Other sticky stuff: try WD-40 No good reason: See below. I had a cup holder that would not come out, so I had to take it all apart. Once I got it out, I found that the cup holder was unable to move freely. To fix this, I used a nail file (emery board) to file down the left and right sides of the cup holder where it touches the cup holder housing. 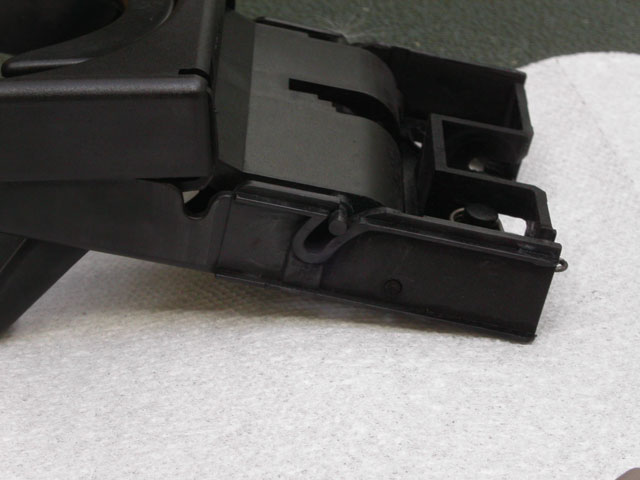 I had to file off quite a bit before it was able to slide free again. Once it was working, I added some graphite lubricant and all was good again. To remove the cup holder from the seats: 1. Pull the rear bench seat up. (Optional, Recommended) Pull up on the outermost corner (either) or the bench seat and as the seat lifts, continue tugging the seat and move your hands in towards the center hump. Pull up until the clips which hold the seat in pop out. Repeat this process for the other side. (I did not remove the seat from the car, just brought it up far enough to work on it.) 2. Remove the cup holder trim frame. Four clips hold the trim frame in place.  Insert a flat-bladed screwdriver behind one side of the trim frame and pry the screwdriver's handle away from the seat. You may want to do this in several locations along one side to keep the trim frame from breaking. The clips may make a popping noise when released. Repeat this process on the opposite side, and then move to the top to release the clips there.  3. Remove the cup holder assembly. Two clips above the cup holder assembly hold it in place. 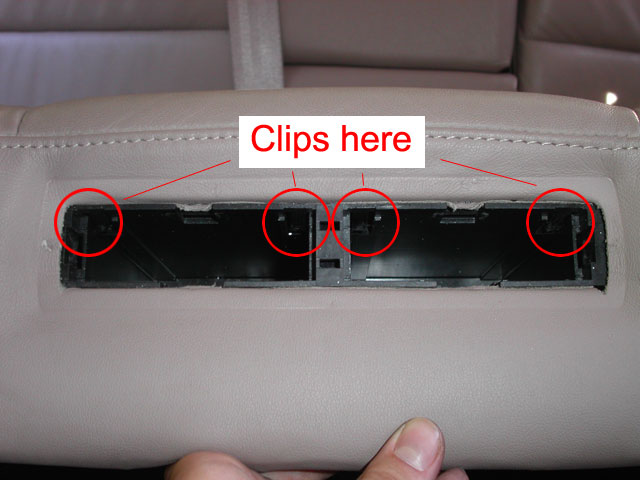  Using two very small flat-bladed screwdrivers, wedge the tips of the screwdrivers between the edge of the cup holder assembly and the clips. With the screwdrivers in place, pull the cup holder assembly out (I used needle-nose pliers). Repeat this process for the other cup holder assembly. This process can be done with the cup holder extended or retracted. To disassemble the cup holder: 1. Remove the tensioning gear. Two clips hold the tensioning gear in place. With the cup holder retracted, the rear tensioning gear can be accessed through a circular opening in the cup holder housing. Using a very small flat-bladed screw driver, release the gear's clip. After one is released, the other will come out without using a tool.  2. Remove the cup holder from the cup holder housing. Extend the cup holder. A square plastic protrusion slides with the cup holder in the rail on the bottom of the cup holder housing. To release this, pull up on the inside of the rail on the cup holder housing so that the square plastic piece can slip out and the cup holder will come away from the cup holder housing. Be careful not to lose the spring when sliding the cup holder out. |
|
Advertising |
Contact Us |
Cookie Policy |
Privacy Statement |
Terms of Service |
Do Not Sell My Personal Information
© 2020 MH Sub I, LLC dba Internet Brands |