| Tech Article Title |
Author |
Date
|
| Headliner Removal and Replacement |
Boston Driver |
2007 |
Headliner Removal
The swap from the stock headliner to the alcantara headliner was "fun"
in many ways, and I love the end result. However, to be honest, this is
not an easy chore (this was done with the help of GBW and 4driver4 last
year shortly after I bought the 4.2). I do know that there is another
AWer out there who has been asking me for a write-up on how to do it
for his recently acquired alcantara headliner set, so here it is for
reference. This is also handy for those wishing to check for clogged
sunroof drains (which are hidden under the headliner) and any other
projects that might require access under the headliner.
Tools required
Torx drivers various sizes, but T-25 is the popular one
Philips-head screwdriver
Flat pry tools (plastic putty knife or metal one taped of to avoid damaging anything)
17mm socket and wrench
Just a few preview pictures of how the headliner is actually secured to
the roof of the car. I will provide detailed steps on how to get at
these anchor points later.
There are several anchor points up front. There are 3 screws hidden
above the dome lamps and sunroof control. The visor clips and hinges
also lock the headliner into place. The moonroof has a metal frame
around the perimeter along the top edge of the opening that locks the
headliner into place. Here is a picture of the headliner removed so you
can see these anchor points:

Same stuff, different angle:

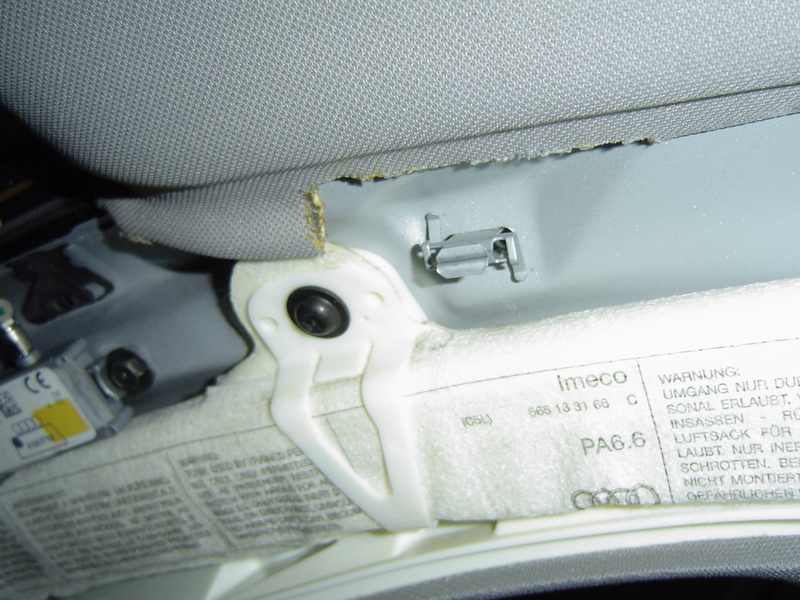
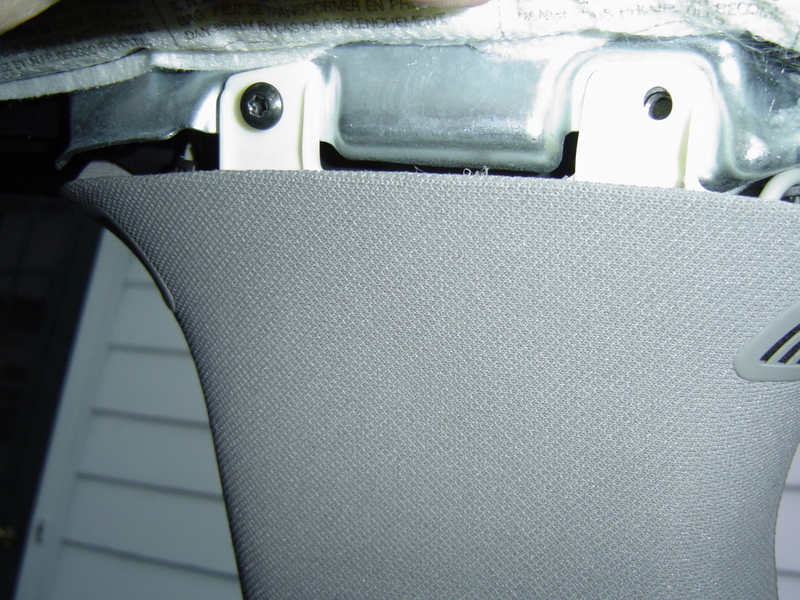
The sides of the headliner are tucked in under the pillar trim, so
obviously the pillar trim will have to come out first. Here is a
picture of how the headliner is held under the pillar trim, looking
along the side curtain airbag:

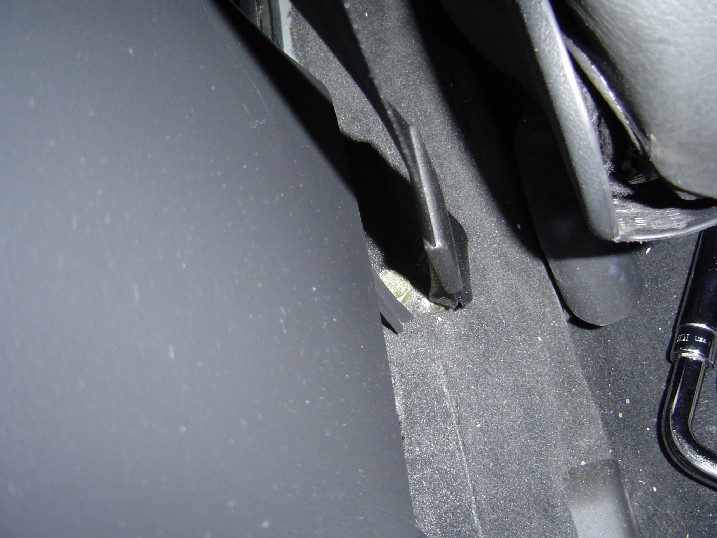
The rear of the headliner has an edge that curves up and tucks into a
slot along the roof above the rear window. Here is a picture of that
curved edge:

So, if I were to do this again (which I hope never to have to do) I
would start with the pillar trim, in this order: A - D - C/D - B.
Before anything is done, remove everything out of the trunk, since the
headliner panel will be removed through the trunk opening
A-pillar removal
This has already been well documented (see link below at the end of the
A-pillar section), but here it is again. First thing to do is to remove
the sun visor. Remove a small plastic cap to get at this Philips-head
screw.

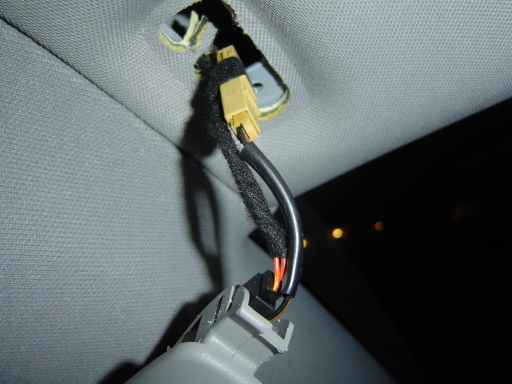
Pull the visor out of the headliner by turning the leading edge down
and back because the plastic wire guide is J-shaped. Once the visor is
loose, disconnect the wires for the visor mirror lights and the
Homelink (if so equipped).
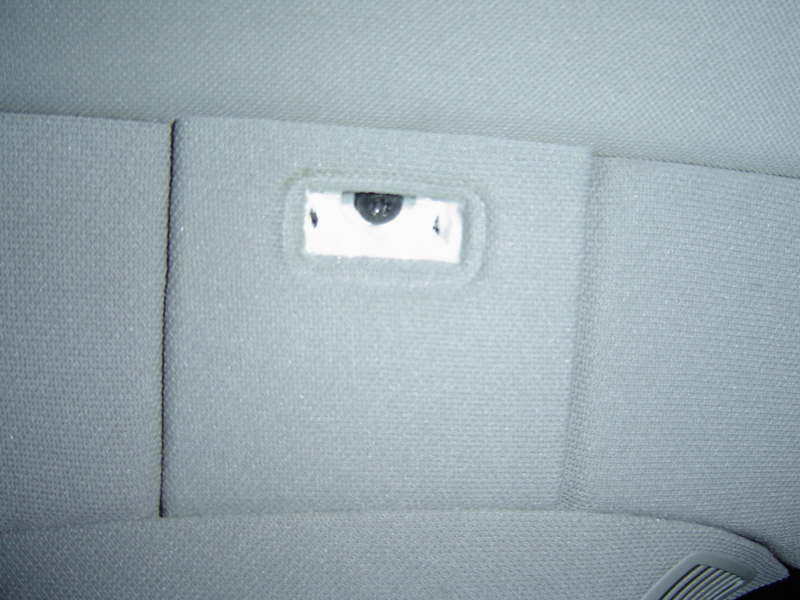
Next, remove the grab handle, which is held in by two torx bolts hidden
under the hinges of the grab handle pictured below. The caps pivot near
the top edge, but you can snap them out by using a thin flat
screwdriver along the side of the cap.

Remove the "AIRBAG" plastic tag above the B-pillar to get at this torx bolt hidden under the tag.
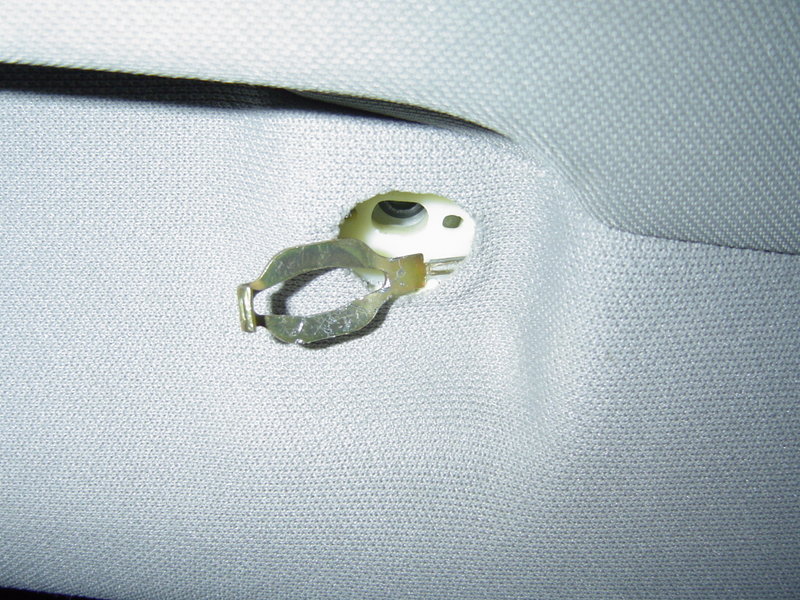
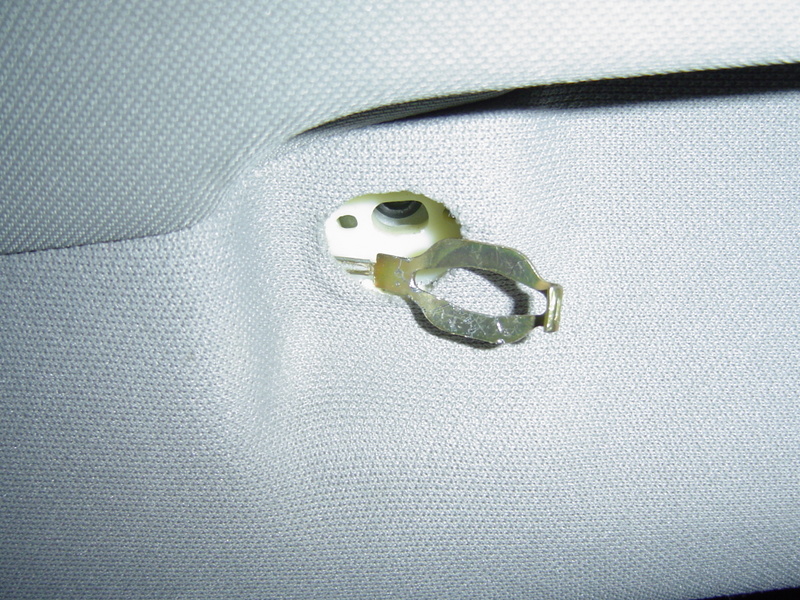
Now, in the leading hole for the grab handles, look for a brass oval
washer. Grab that with some big pliers and pull back towards the rear
of the car until it snaps loose, probably only travels about an inch or
so. You'll see why later.
Now all that is holding the A-pillar to the car frame are a few clips
along the side of the windshield. Gently start pulling from the top
near the corner where the visor was secured and work your way down.
You'll know when the clips release.

The A-pillar should now be free to remove. Don't forget to remove this
clip, which is stuck in the A-pillar slot. This clip is the one
attached to the other end of the wire cable that you pulled a couple of
steps above. You must reattach the cable to the clip and the clip to
the pillar before reinstalling.

More information (and better pics) of the A-pillar removal and the cable clip reassembly are found here.
D-pillar removal
The D-pillar (which is the long sloping trim that runs along the rear
window) is attached the same way as the A-pillar, so again, remove the
grab handle to get at the oval washer and cable.


Once the cable is released, you must also get at a torx bolt hidden
beneath the coat hook. Flip down the coat hook and remove this screw:

Then remove the torx bolt:

Here is that locking clip that has to be removed and replaced on the trim prior to installation.
C/D-pillar removal
Now you can remove the C/D-pillar trim (the trim around the triangular
window). This is held in with a few torx bolts and clips. To get at the
torx bolts for the trim, you need to remove one torx bolt for the side
curtain airbag circled in the top of the picture below.

Once the bolts are out, just pull the trim away from the metal frame to release the clips.
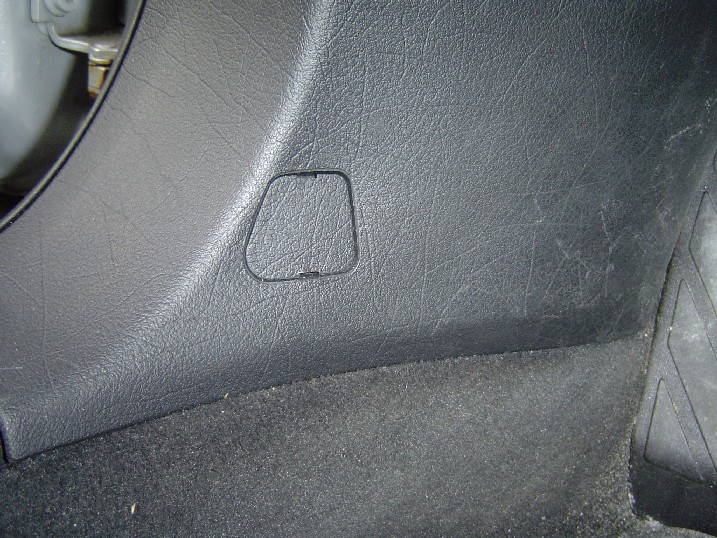
B-pillar Removal
The B-pillar trim is held in with two torx bolts, but full removal from
the car requires you to remove the seatbelt, which passes through the
trim panel. It is secured by an anchor bolt, which is hidden under the
plastic trim along the floor at the base of the lower B-pillar. To
remove the trim, you first need to loosen the lower A-pillar trim first
(two Philips-head screws). One is hidden under a plastic cap here:

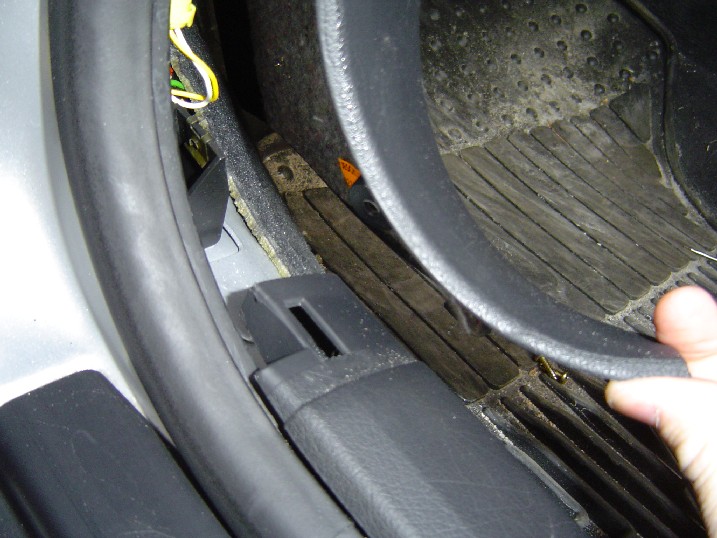
Once loose, you can now flip up the trim to expose the leading edge of the trim that runs along the door threshold:
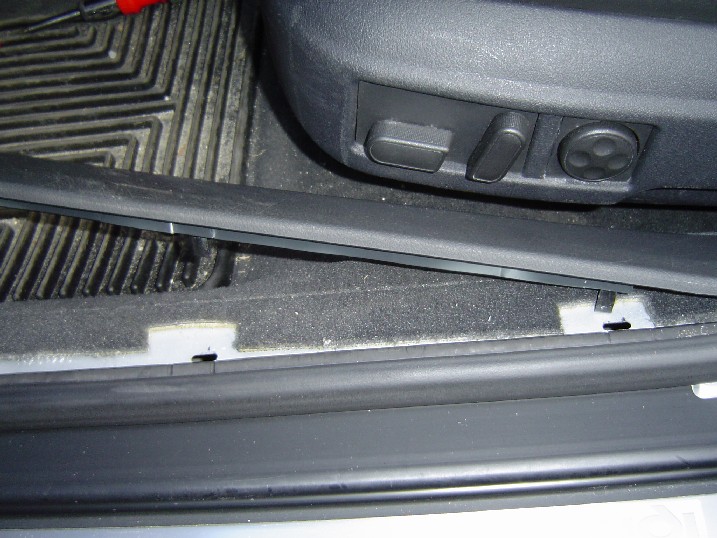
Then remove the threshold trim:


Here is the 17mm bolt that needs to be removed:
Luckily, the same size as a lug bolt, so I used my handy lug wrench for
more leverage, easiest to get at with the front seat moved forward a
bit:

Once the bolt is loose, I was able to use a shorter socket wrench and
remove the bolt. Now remove the torx bolts along the upper edge of the
B-pillar trim, which are hidden under the side curtain airbag:

Then remove the sensors for the interior motion alarm:

The B-pillar is also held in by small white tabs, hard to see in this
picture, but you can see the tabs on the right side of the alcantara
B-pillar on the right side of this pic:

Once removed, you can now thread the seatbelt through the slot and remove the B-pillar trim from the car.
[Page 2]
|