|
|
I had
what I think is a common problem. When a certain amount of weight is applied to the center armrest it
slips down as the part that is supposed to hold it in place is broken/worn. I didn't find a tech article specific
to this, but I started with this one "S4 Armrest Fix" to remove the
armrest from the car.
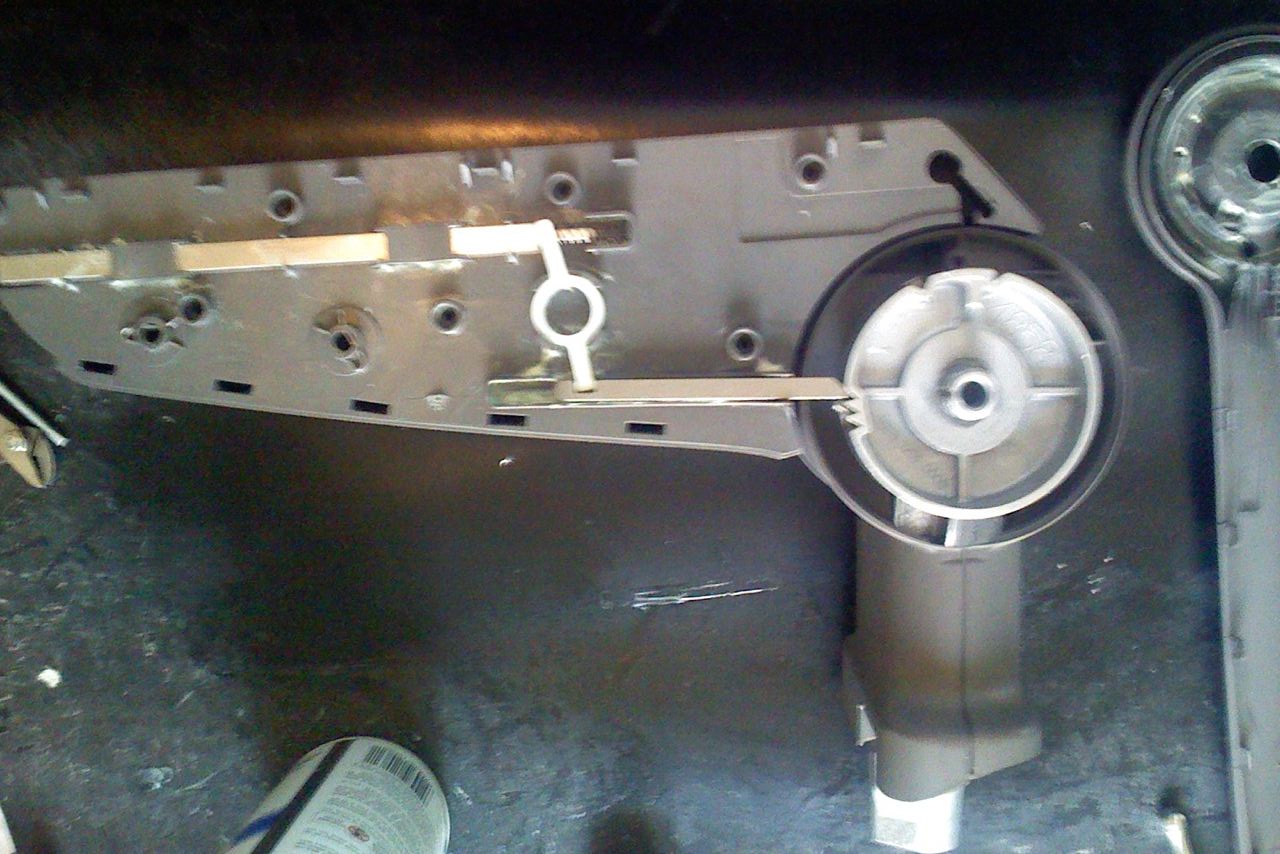
Further Disassembly: There are seven torx (T8) screws under the felt liner that hold each side of the armrest trim on. You can look at my disassembled photos for approximate position. If you take the torx drive and just feel around by hand you'll find them eventually. They're not visible.  : Shown Disassembled to see screw holes Once you have that removed you need to deal with the metal retaining washers under the round caps (they pop of with a small screw driver) where the armrest meets the piece that mounts to the car (the hinge). These are the last piece that's holding the trim & armrest onto the base part. The easiest way to get these off is with a cutting disc and a Dremmel. You will not get them off using a screwdriver and hammer. They need to be cut off. Once the retaining washers are removed and the side pieces are off you can see how the latching mechanism works. It's spring loaded metal piece that pushes into a groove in the main base part ( I call it a gear). 
What happened with mine is that the groove on the gear became worn down so it was only catching by a little bit and would then slip to the next groove. Also, the groove and and spring loaded piece were pretty gummed up with felt particles and grease which didn't help the matter. 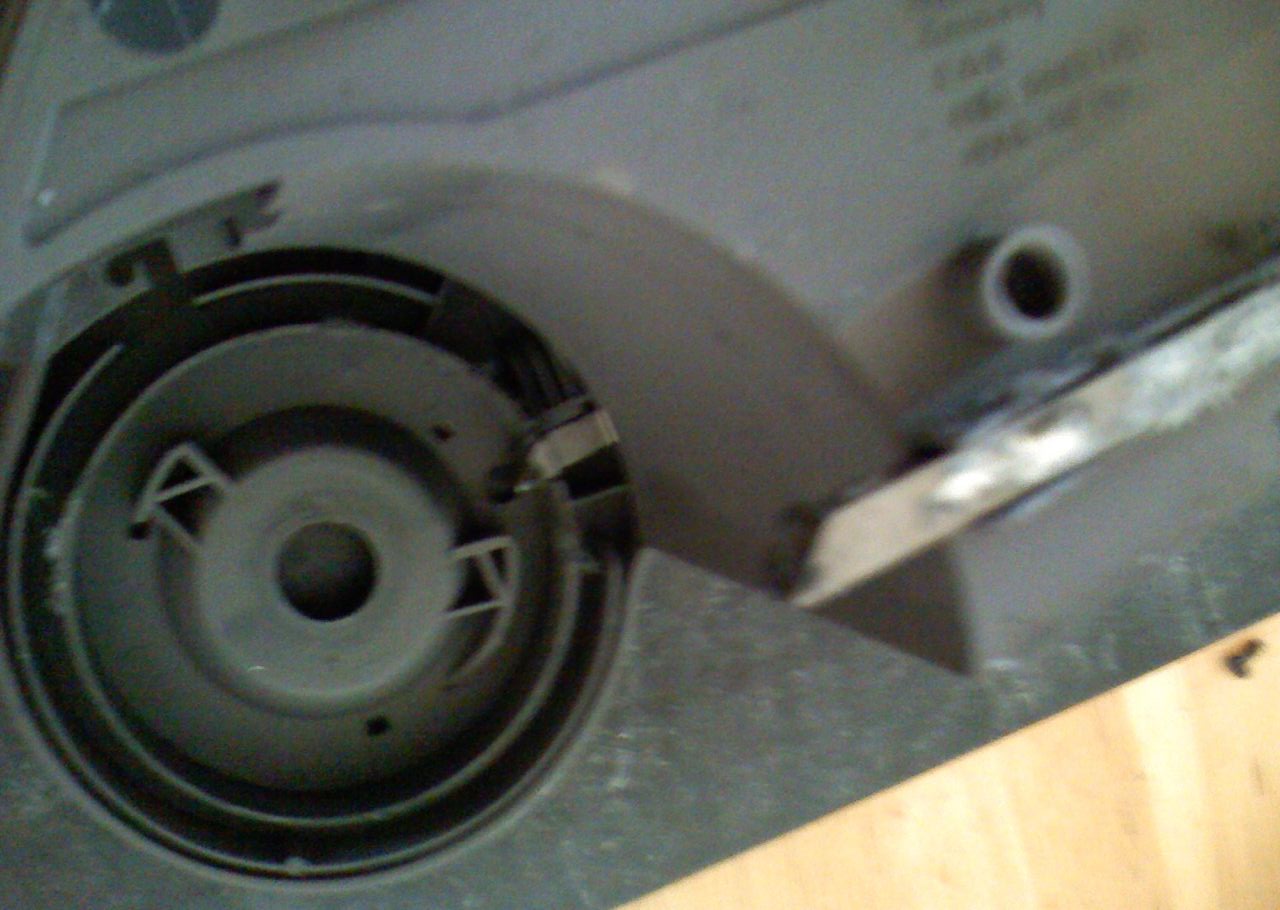

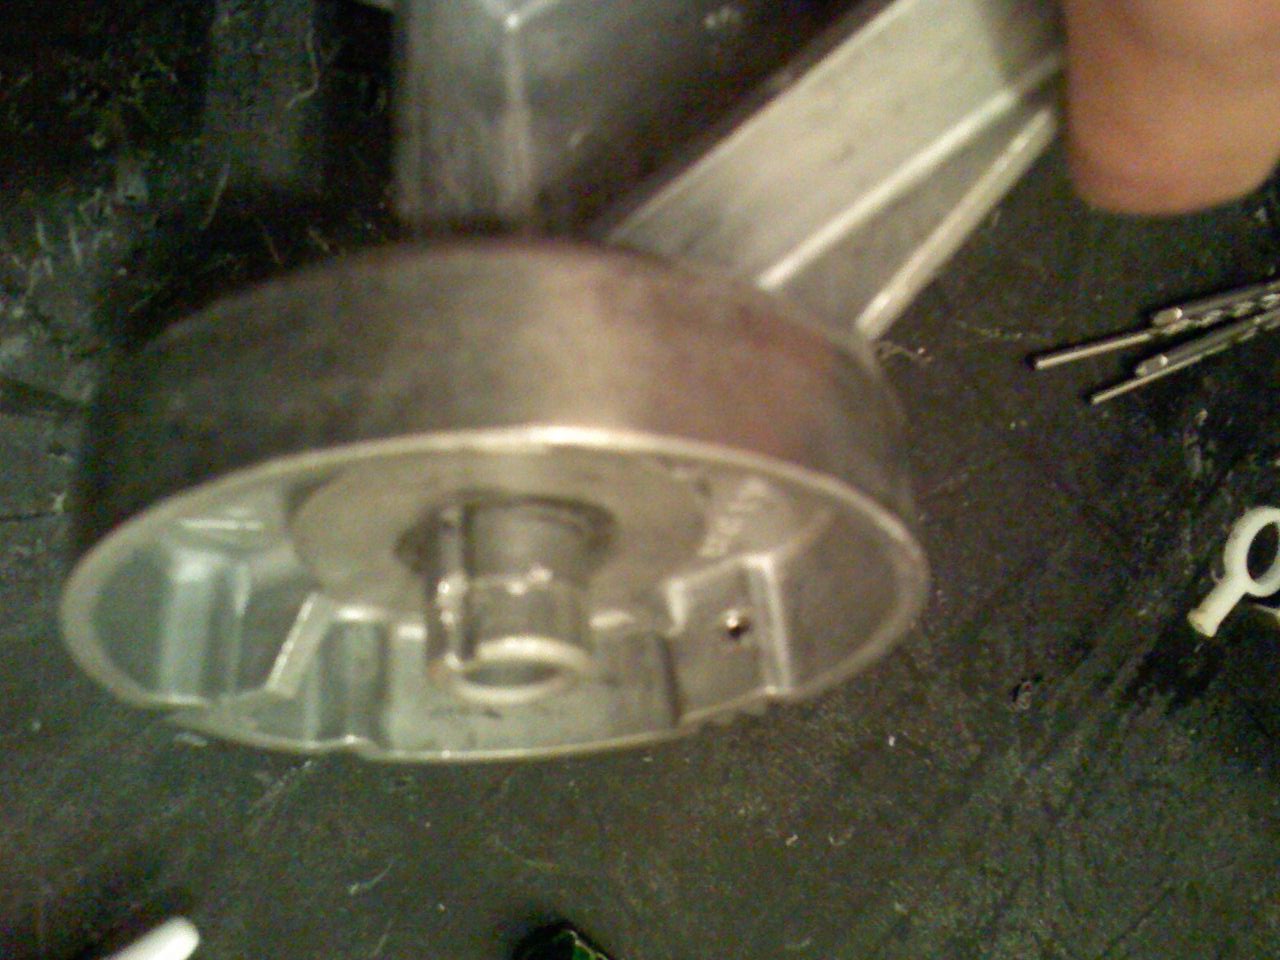
So I took apart the pieces and cleaned them up so there wouldn't be anything to encourage the slipping and then examined the worn gear catch that the metal piece rests in to lock the armrest in place. The casing around the “gear” comes off by removing tow screws and just unsnapping the two sides. (I didn’t take enough pics of the process, but you can look ahead and see it completed so you know what you’re going for) 1. Drill a hole at the same angle as the original catch in the slot right below the catch that is worn using the bit that came with the tap set. This will get your set screw to sit in the same approximate place and angle as the original catch. 2. Using the tap, very carefully and slowly thread the hole you just drilled, by turning the tap straight into the hole. You may want to repeat this once more to clean out the threads, sometimes little bits can get stuck in the threads. 3. Check fitment of your set screw, then remove and squeeze loctite thread locker into the hole. This will keep the set screw from moving in the future once everything is together. 4. After waiting about five minutes for the loctite you can screw in your set screw from the back side until it is at the desired height to provide a good "catch" for the metal piece to rest on. You may want to put the gear piece up to the catch at this point to make sure you get enough height from the set screw to keep everything in place. 5. Once done, repeat on other side. Some pictures of it completed. 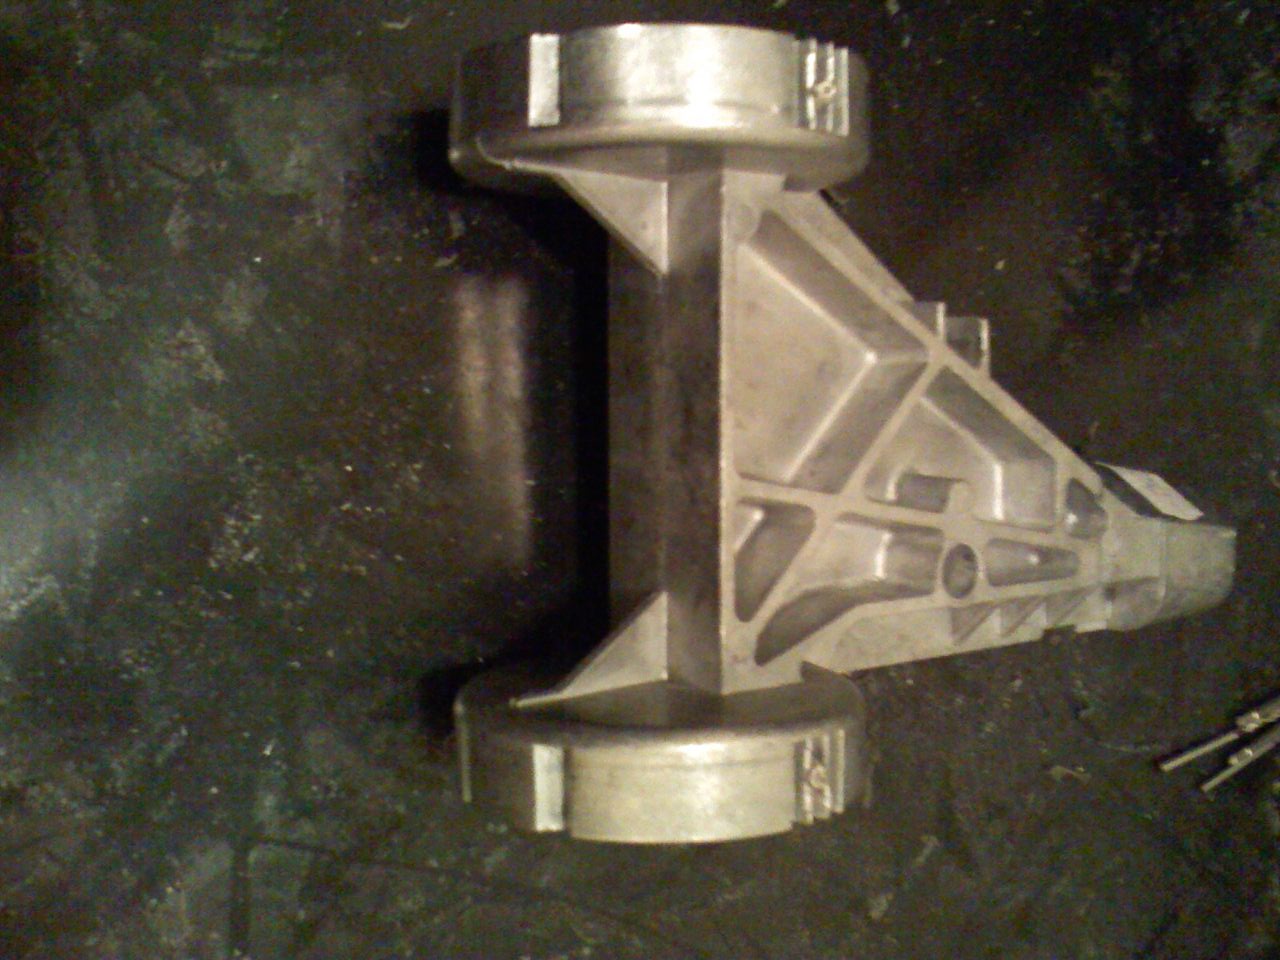
6. Re-assemble Armrest. The hardest part here is going to be fitting the new retaining washers on that hold the sides of the armrest on to the base/gear. These fit very tightly. What worked for me is putting the armrest sideways on a rubber mat, grabbing an old socket about the same size as the retaining washer and using a hammer to drive it down. Be careful not to drive it down so it’s too tight as you’ll restrict the movement of the armrest. NOTE: I made it so my set screw come out a little bit further than the original catch to insure it wouldn’t slip. By doing this I had to cut away a bit of plastic on the sides that attach to the armrest so that the set pin had room when the armrest was adjusted. (see pic) 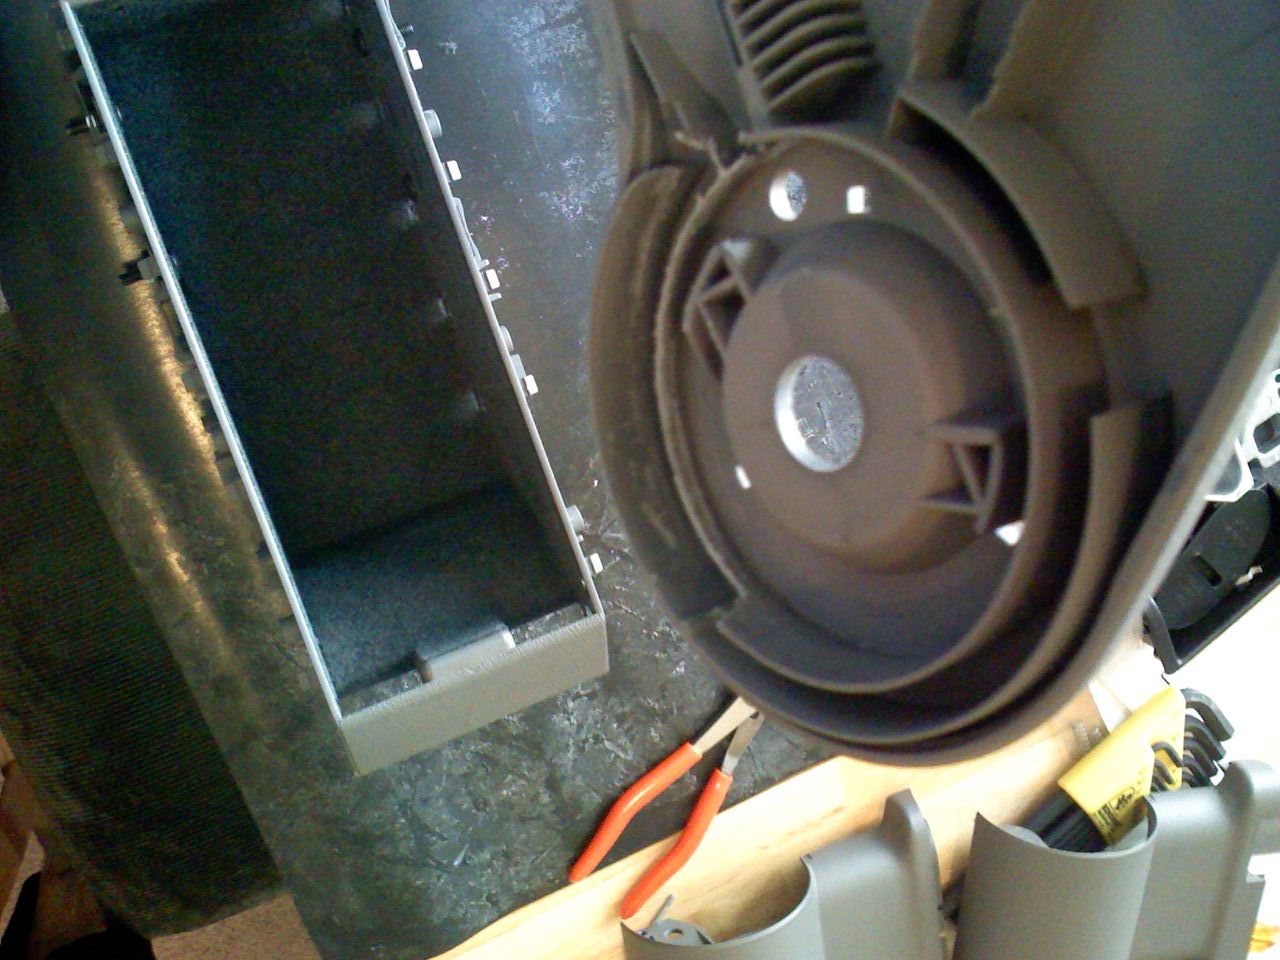
The rest should be pretty self explanatory….just follow the disassembly instructions in reverse. Hope this helps. If you’re doing this fix and want to see bigger pictures just send me a message on the forum. Stealth162 |
|
Advertising |
Contact Us |
Cookie Policy |
Privacy Statement |
Terms of Service |
Do Not Sell My Personal Information
© 2020 MH Sub I, LLC dba Internet Brands |