After many track events and the resulting cording of my tires on the outside, I have opted for more negative front camber. Thanks to Vortrag, I can make this adjustment easily at home. Here's a narrative on the install of the Vortrag adjustable upper links.
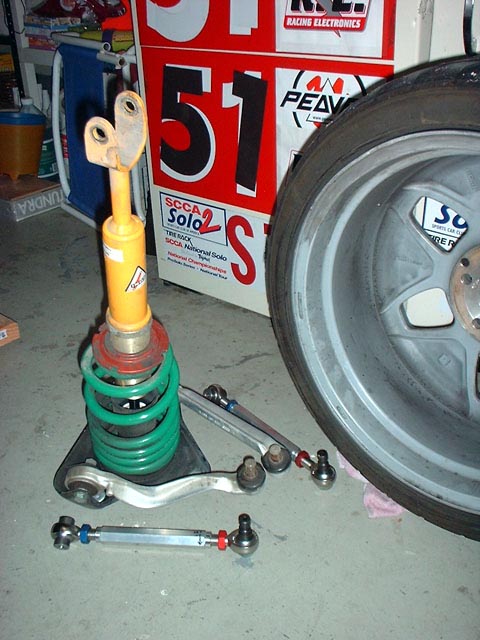
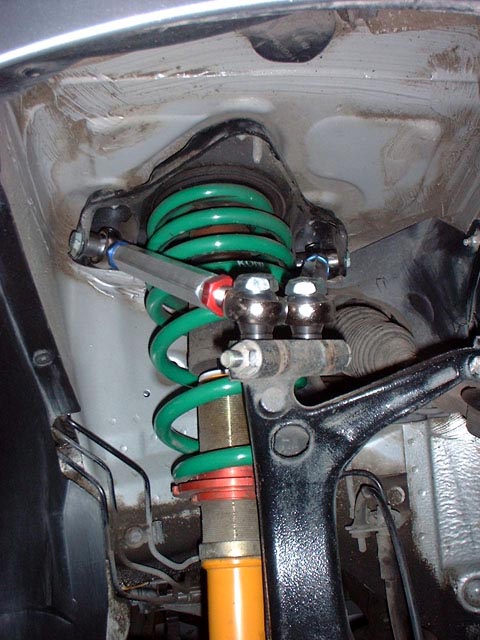
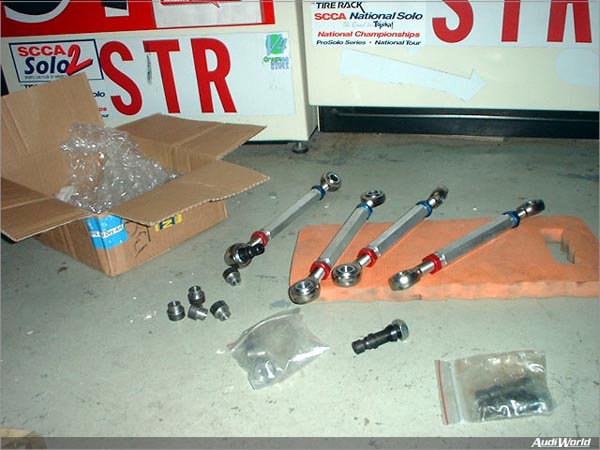
Thanks to Corey for passing these on to me from Vortrag. Sharon already has a set using aluminum ball housings. But when asked if I was interested in the upgraded steel ones, I had to answer, "but of course!" They then ordered two sets, one to replace their aluminum ones and the other for me. These steel ones look pretty strong.
The hardest part was trying to determine how to get started. In the kit there are two sets, one shorter than the other. Each of them has a reverse threaded red bolt along with the reverse threaded ball housing. Some assembly is required. Determining which end connected where required some thought, but a quick chat with Corey confirmed my understanding that it doesn't really matter. However, a good tip is keep them consistent so that the rotation of the center body will be in the same direction for all links. I chose the red side out so that rotating the center body clockwise shortened the links. The task gets trivial as things went together. These new parts have a total weight of about 6 lbs; stock ones are almost 2 lbs lighter.

|
Step one: Removing the old links. Originally, I thought I could do this without taking off the wheel. However it is quite difficult to access and remove one of the top bolts, so the whole suspension had to come out.
|

|
So, remove the wheel, remove the strut housing, then unbolt the upper links with a 16mm wrench and socket.
|

|
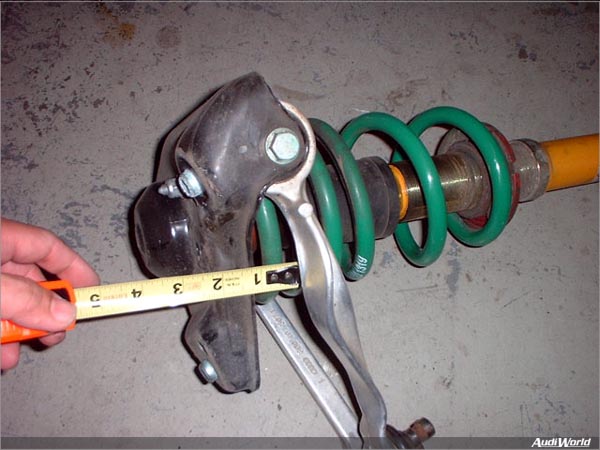
Tip: A good idea to measure the stock link placement first in case things don't work out. These stock settings ensure the rubber bushing is unbound in the normal position to extend life. It may be a good idea to do one side at a time for comparison purposes later.
|
Step two: Measure the original links and match with the adjustable. This is a very crucial, but how do you do it? Some creativity is required at this point. Failure to match lengths will severely affect caster since camber and toe are easily adjustable later. There are other ways which I tried later, but I did not take pictures of those.
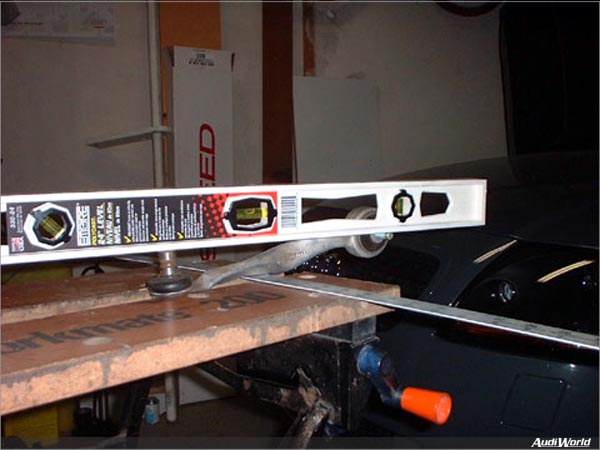
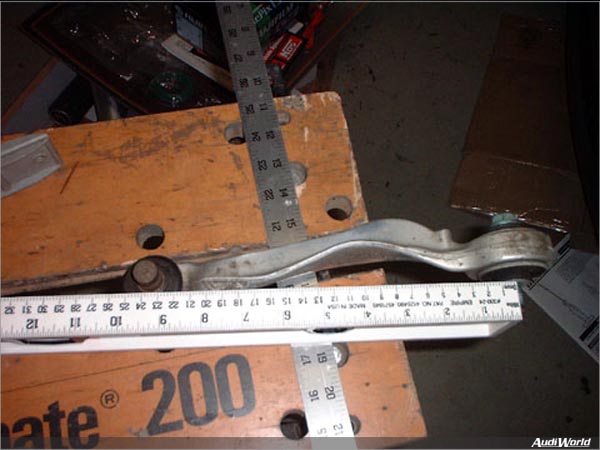
Step three: At this point reassemble with new links in place. Reinstall strut assembly in place. Measure the upper arm mounting point on both ends and compare with the other side. See if matching the lengths was done properly. If OK, then install links on the other side.
Step four: After driving the car around to settle the suspension, measure caster, camber and toe in that order. I haven't made a caster gauge, so I skipped that part. I will come back to it later, but as the lengths appear to be properly matched, caster is most likely close to stock settings.
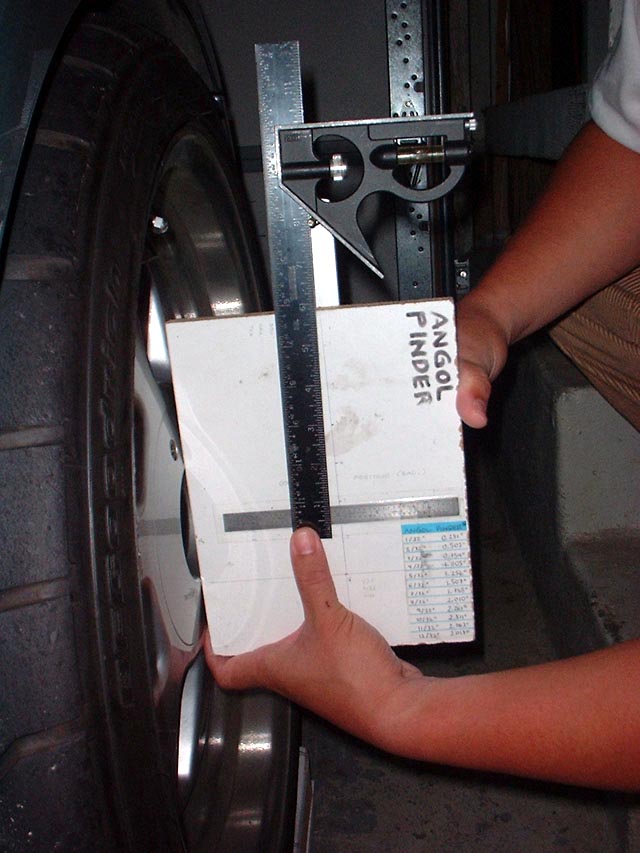
Tips for homebrew alignment tools:
 Camber. With some trigonometry involved, this is the simplest tool to make. You basically use two rulers and a level indicator. Position one ruler parallel to the rim and the other perpendicular with respect to earth and then measure the distance between the two tips. Calculate angle. Remember SOH CAH TOA? To get a perpendicular ruler, I used a 90 degree angular ruler with a level indicator on one side.
Caster can be done with a camber gauge. The idea is to get the wheel 90 degrees turned and measure the angle the wheel is leaning at. Unless you drive a forklift, this is certainly not possible on a car. Instead, rotate the wheel one way 45 degrees and then the other way 45 degrees, each time measuring the camber. Add the absolute value and that is your caster. If the measurement of the camber with turning the wheel in is less than turning the wheel out, you have negative caster. And vice versa. So, the only thing I needed to make was one that showed me 45 degree angles. This is easy to do with my plastic plumbing tool. Note that smaller angles can be used, but the results will require further trigonometric calculations before they can be added together. Corey and Sharon used this method so kudos to them for pointing this out to me.
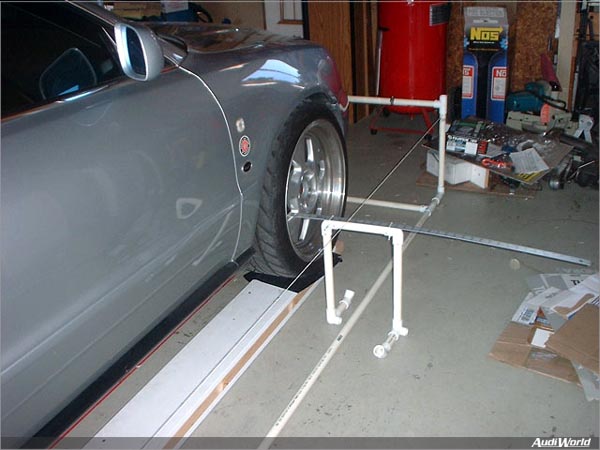
Toe is important. Without it, forget about handling; the car will steer itself into a corner. Toe has to be set with a perfectly square box (or 2 parallel lines) with respect to the car (body) and all four wheels. Doing only one end is acceptable if checking the fronts only. Doing two rear wheels only will most likely result in crabbing or the car moving slightly sideways, even though the left and right rear wheel have a good toe setting between each other.
 String is a nifty tool to get straight lines. When it is under tension, it will be straight. Maybe my next revision will be laser? :-) Two parallel strings can be setup with 2 pairs of jack stands, but setting them up takes too long. Wandering around my backyard (which is in need of a sprinkler system) and the hardware store, I came up with using sprinkler plumbing. Light, cheap and useful later in my backyard. It is also fairly accurate, as the parallel lines are only +/- 1mm off at each end of 17 foot long sections.
Find a center point on the front and rear of the vehicle and match that to the center point of the front and rear of the toe box. Done. If I accidentally hit the box, which I did many times, it was easy to center it again. The box was also verified with the body and wheel center measurements. Close enough, as it appeared to be square with the car.
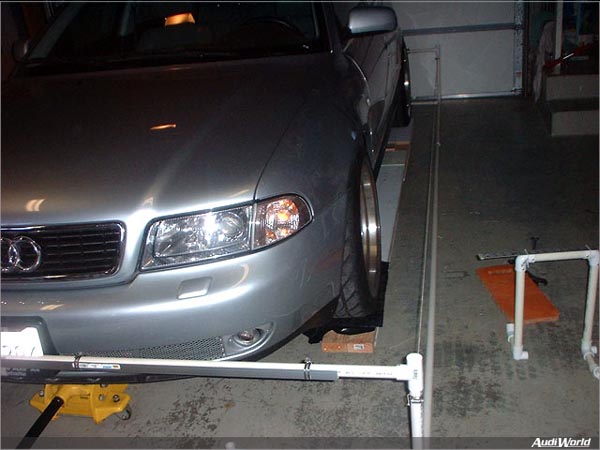
Step five: After I measured camber and toe, it was off to adjust the links. Jack the car up so that both wheels come up at the same time and the front rises up vertically. This is done by placing a floor jack dead center with the lifting arm parallel to the car. Otherwise, the car will rise up in all sorts of angles with respect to the box and the box must be set all the time. Keep car in gear but disengage handbrake to allow some movement of the car and not bind anything. Use slip plates if you have some. If not, use my trademark 30 gallon trash bags, folded in a z pattern. I came across this trick by accident as I slipped on one. Hee hee.
Tip: See my flat rule horsie? That will guarantee me a fast one handed level measurement everytime. Next revision will have a parallel ruler to the string, or maybe laser beams.
Adjust all links with an equal number of turns for now. Count turns, lower car, re-measure camber and toe. This will give you an idea of how much does what. This kit shortens by 1.35mm per turn. 4 turns result in 1.5 degrees camber.
When camber is set, adjust toe. Failure to do so will result in a front handbrake as the wheels toe in by 1.25 inch with -1.5 degrees added camber. Looks pretty funny. Loosen locking nut and turn smaller nut with 18mm wrench. Count turns also. I found that I needed 8 turns on the right front, 7.5 turns on the left front to balance them out. Lower car and check. Repeat as necessary. When done, take down car, drive, and re-measure. If all looks good, pat yourself on the back.
That's -3 degrees in case you didn't notice. Before starting all of this you might want to note before settings last performed by a custom alignment shop.


