| Tech Article Title
|
Author
|
Date
|
| Coilover
Suspension Installation (continued) |
Frank_Sheperson
|
2003 |

21. When
you can set the spring in the seat and the bottom coil fits around the
raised lip of the perch, you're good to go.

22. Put the shock together. Turn the
adjusting ring and the locking ring all the way down (mine were shipped at
the top). The washer goes silver side down against the adjusting ring. Put
on the perch/seat combo, then the dust cover/jounce bumper. Then put on
the spring, widely spaced coils at the bottom.

23. Stand the shock up and put on the
upper seat/perch. Fit the end of the coil into the groove.
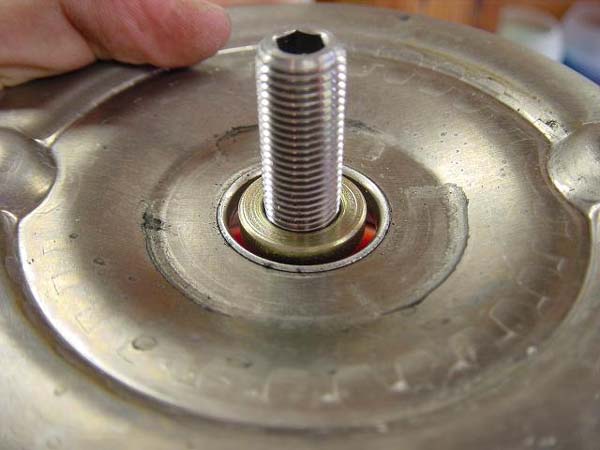
24. Put the new washer on the shaft. I
adjusted the lower perch up a bit so that the washer was about even with
the upper perch, that way I could be certain that the washer wouldn't snag
above or below the perch when I started to tighten things up.


25. Put the rubber cap and new nut on
and tighten the nut. 19mm (the stocker is 18mm, go figure), 6mm for the
hex hole in the shaft. If you have or can find the proper deep offset
wrench, good for you. I had to improvise with some vise grips and a deep
well socket. If you have Proto/Mac/Snap-On/etc, you probably will want to
go get a cheapie socket set like I did. I used a piece of half inch pipe
to hold the allen wrench. If it matters, Bentley says to torque a new
(stock size) nut to 44 ft lb.

30. All put back together, ready to go
back in the car. Unfortunately, I didn't have a clue about where to set
the perches. This is something that's definitely easier to do out of the
car.


31. Put the upper perch back into the
shock mounting plate and loosely install the nuts. Bentley says to use new
ones. This can be a bit tricky if you're by yourself.
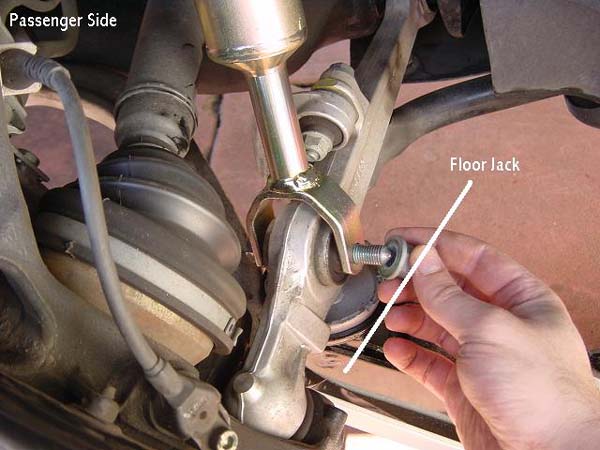

32. Installation is pretty much the
reverse of removal. Some tricky bits may require jacking up the suspension
to get the lower bolt in, or gently prying the gaps on the upright in
order to get the upper links back in. Tightening sequence and torques
follow:
Lower shock mount to control arm. New nut, 66 ft lb.
Bentley says to do this with the car on the ground to avoid putting stress
on the bushing. I just jacked up the suspension a few inches.
Upper
control arms to upright. New nut, 30 ft lb.
Upper shock mount to
mounting plate. New nuts, 15 lb ft.
Bonus info: If you happened to
use the three bolt method, the torque value for the 17mm bolts is 48 ft
lb.

33. Before you put
your wheels back on, adjust the preload on the springs so that both sides
match. The big ring is for adjusting, the small ring is for locking the
big ring in place. The more threads showing below the rings, the higher
your car will sit. This is a lot of fun, 1/8 of a turn at a time, about 16
turns per inch.

34. I
started with one inch of threads showing below the lock ring.

35. A lot of people might think this
is too low. I agree with them. I think a better starting point is 2.5
inches or so of threads showing. Personal preference, wheels, tires,
driving environment, etc. will all play a part in how you set
up.
36. Put your wheels on and get the car on the ground. If you
didn't totally mangle the covering plugs, you can put them back in
(<cough> duct tape). Re-install that tab that was blocking one of
the top nuts on the passenger side. Put the plastic cover and the sealing
strip back on. You're done!
[1] [2] [3] [4]
[5]
|