| Tech Article Title |
Author |
Date |
| Floating Brake Caliper Service |
Grant Lenahan |
2008 |
For
those who want to work on their own (Audi) brakes, but don’t have a ton of
experience, I thought I’d write this introduction and how-to directed
specifically at the floating property of floating calipers. Get this right and your brakes work much
better.
There
are fundamentally two types of caliper designs. Fixed calipers and floating
calipers.
Fixed
calipers work as you might imagine all bakes work: a piston (or two, or three)
on each side pushes its respective pad into the rotor. The caliper does not
move. Fact is, these are rare.
Floating
calipers are a very clever simplification that saves cost and complexity. In a
floating caliper, there is only one piston. The caliper itself floats on guide pins/rails, and physics helps us out:
for each action there is an equal and opposite reaction. So as the piston pushes against the inner
pad, the caliper gets pushed away, sliding inboard on its guide pines/rails,
which pulls the outer pad against the outside of the rotor. If there were no friction, this
would work perfectly.
Almost all Audi calipers are floating designs, unless you have an RS6 or RS4 or
R8. And then we don’t feel sorry for you. So the following, based on a C4
(1995 a6q) illustrates the issues and the steps pretty well for most of our cars.
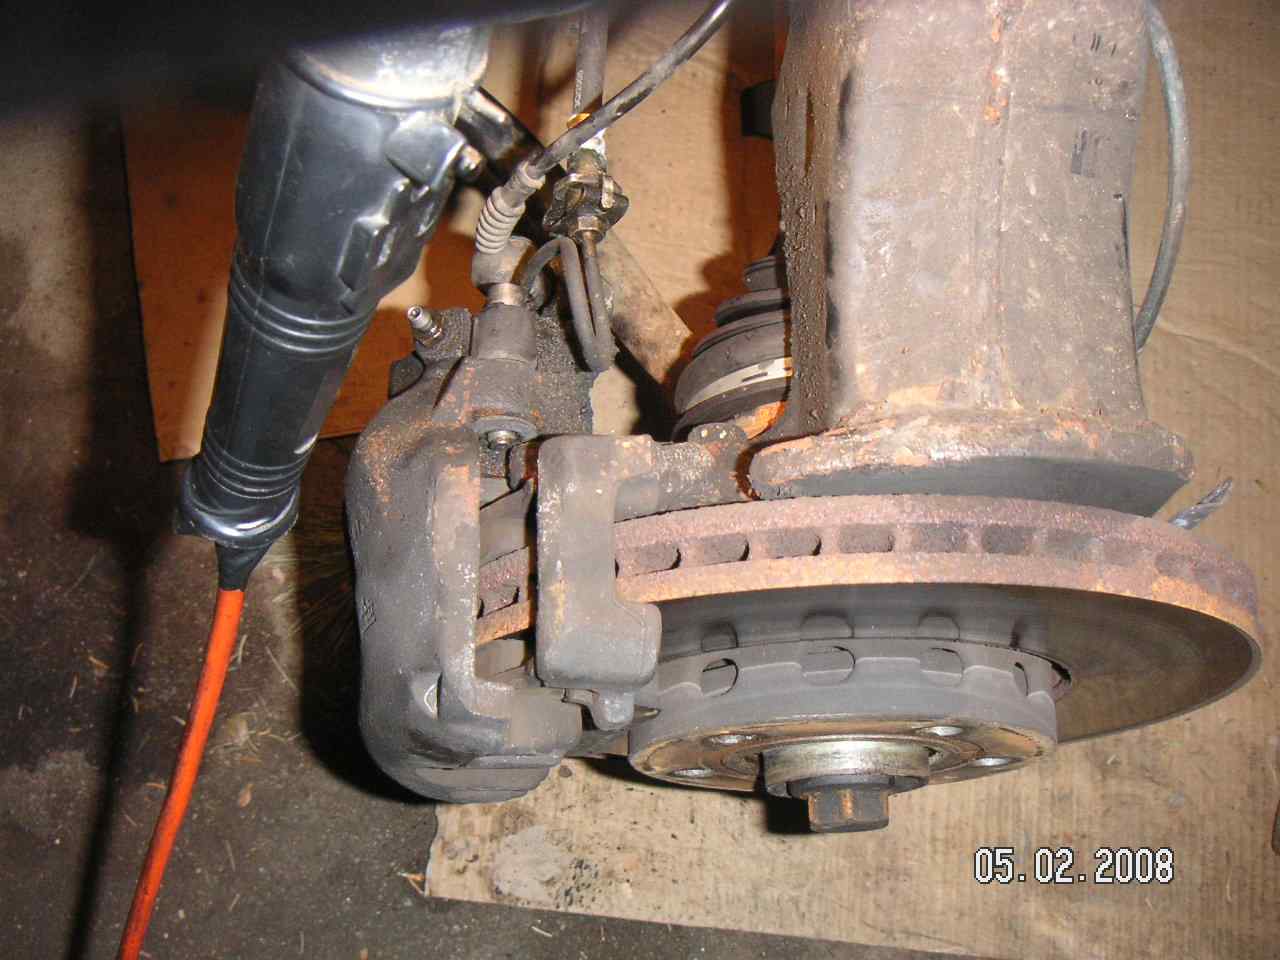
The picture below shows the front left caliper from a 1995 a6q partially removed.
The caliper is attached to the caliper bracket / pad carrier by the guide pins
themselves. The guide pins slide inside rubber bushings. In the picture below the guide pins have been
unscrewed from the bracket, and the caliper partially pulled away. You can see the guide pins just to the right of the handle of the droplight.

As
noted above, in a world without friction floating calipers would be great. If
maintained, they work quite well. But over time, the guide pins get corroded and dirty; the grease is used up; and
the rubber bushings get worn. All this means more play, more binding and more
friction.
In this case, I cleaned the calipers, replaced and lubricated the guide pins and
bushings, and re-installed nearly new pads (a pro had done the job less then
5k miles ago, but neglected all the niceties I’m writing up here). The result was smoother, more powerful and
more progressive brake action.
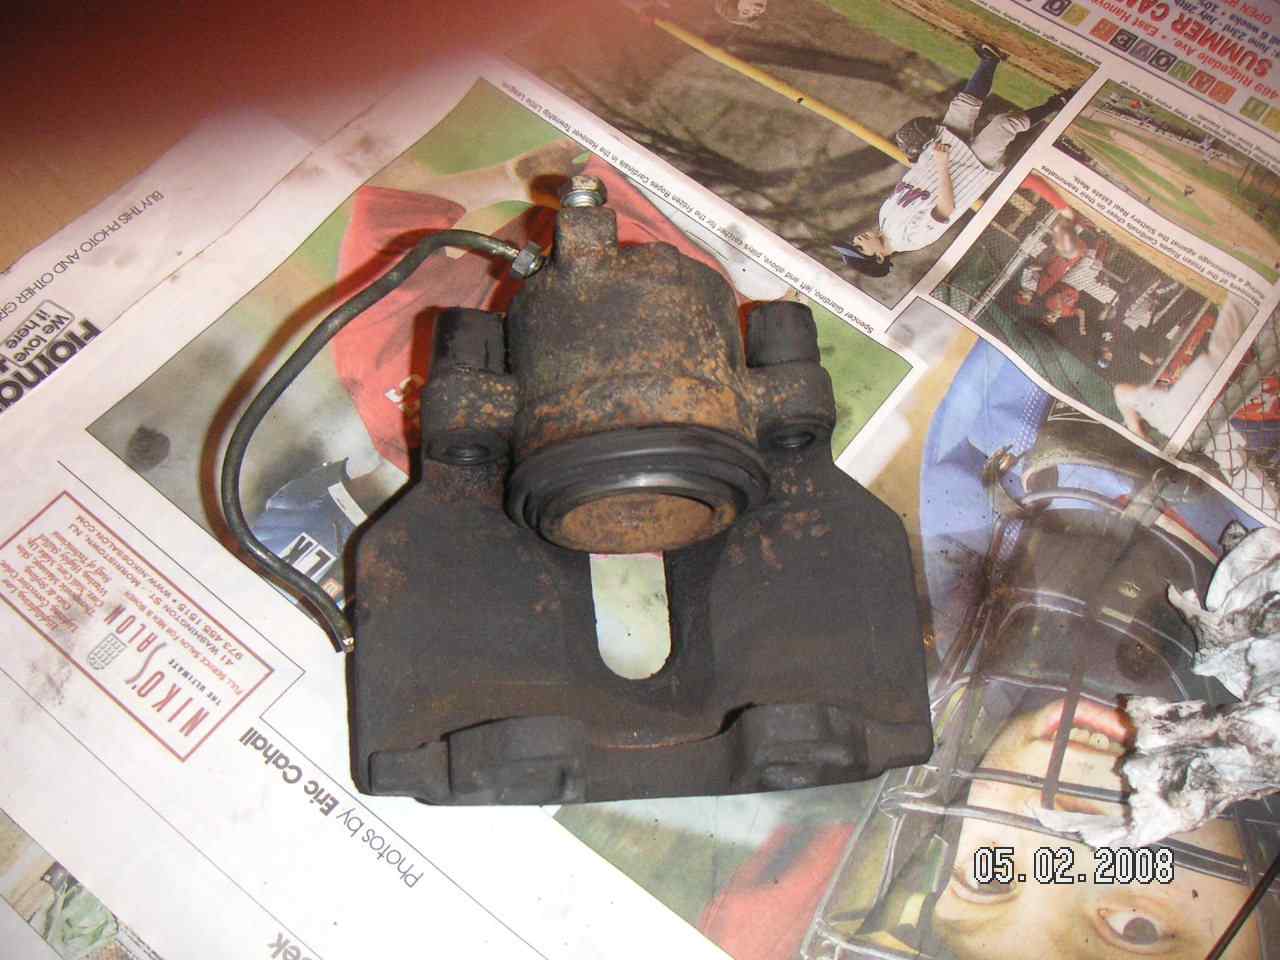
The
next picture shows the caliper lying on my bench. Note a few things. The old ratty brake line is just that – an
old ratty brake line keeping dirt out of the caliper. Useful
junk. Also note the two rubber
bushings. These allow the caliper to slide on the pins. They also keep dirt
out, sorta. There are plastic end caps. Finally, look at the caliper makeup. You can see the piston and
visualize it pushing against the rotor, which pulls the other side TOWARD the
other side of the rotor, applying the 2'nd pad.

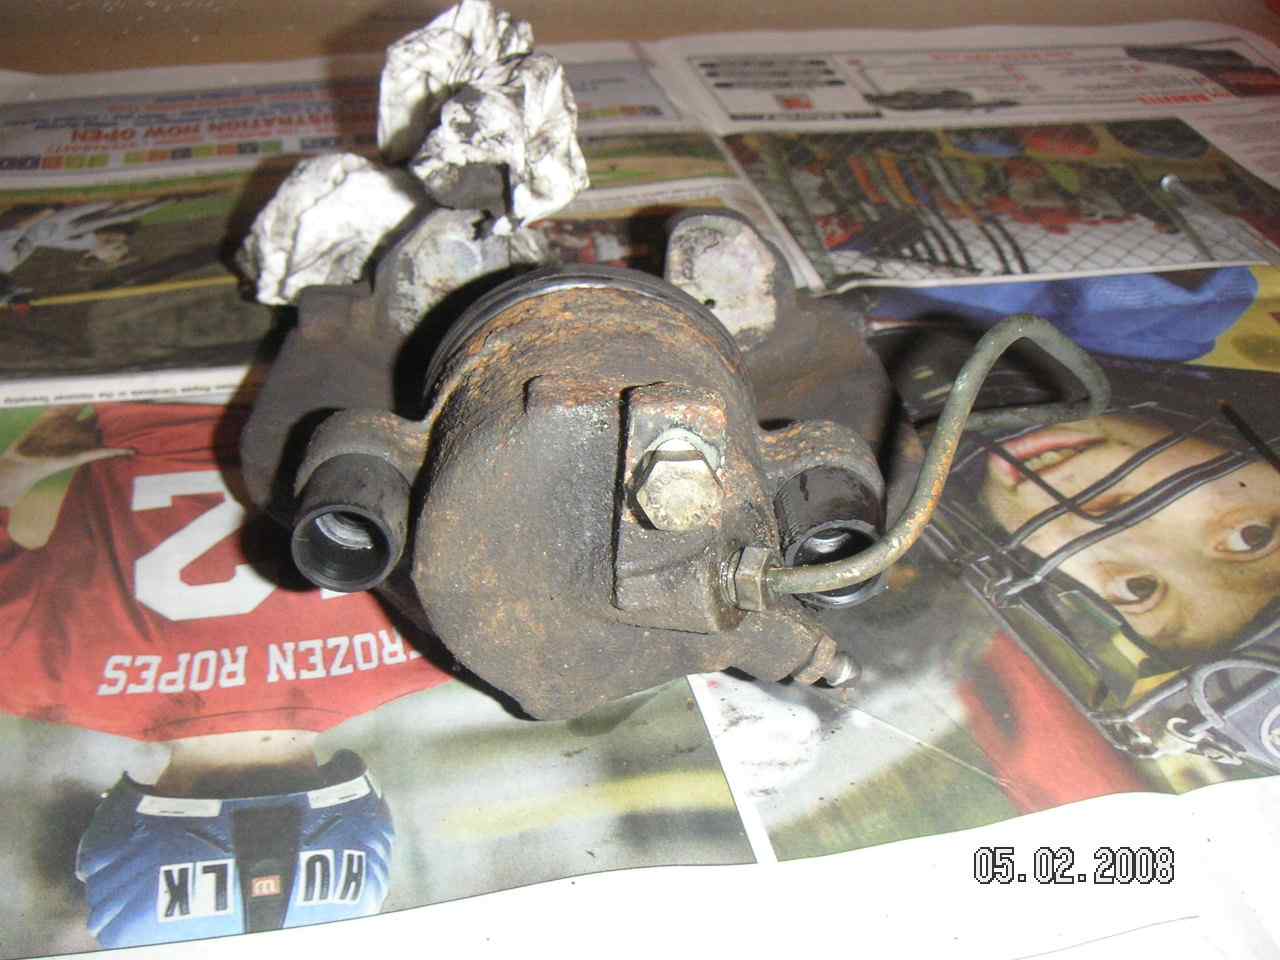
The next photo is the same caliper, with a better view of the two rubber
bushings. A guide pin replacement kit
for this particular caliper costs about $20. It includes 4 guide pins and 4
bushing s, enough for both L & R calipers. The old ones pull out relatively easily. I first pushed the inside
through, then took pliers and pulled the old bushing out by its dust collar
(the outside part). The new ones just
push in. I coated it with brake fluid first, so that it would slide in more
easily. Brake fluid’s a fairly good lubricant and you have the assurance that
it is compatible with the rubbers used and with your brake fluid. Duh.
You
could also clean the old rubber bushings, although they will have worn /
compressed. You can clean (alcohol and steel wool) the old guide pins too. In
either case you need to grease them well with brake-part specific grease,
usually moly based and very high temperature. And they have no petroleum
distillates to attack the rubber.


At this point its reassembly time. There
are good tutorials on pad/caliper assembly so I won’t go into it except to note
three things:
1.
The spring clip is a bear. Make sure you know exactly how it goes before you
take it off. A pic is nice.
2.
You want to bleed everything well. In fact, this is a good time to do your
b-annual flush. Make sure you seat the pads BEFORE you open the bleeder nipple.
Oh, and have a top quality 11mm flare nut line wrench for all this work
3.
Make sure that the caliper truly floats now. It will be stiff, but should move
a bit. No? Something’s wrong.
In
my opinion, this should be a part of any brake refresh. Pads alone are only
half the job.
Enjoy,
Grant