|
|
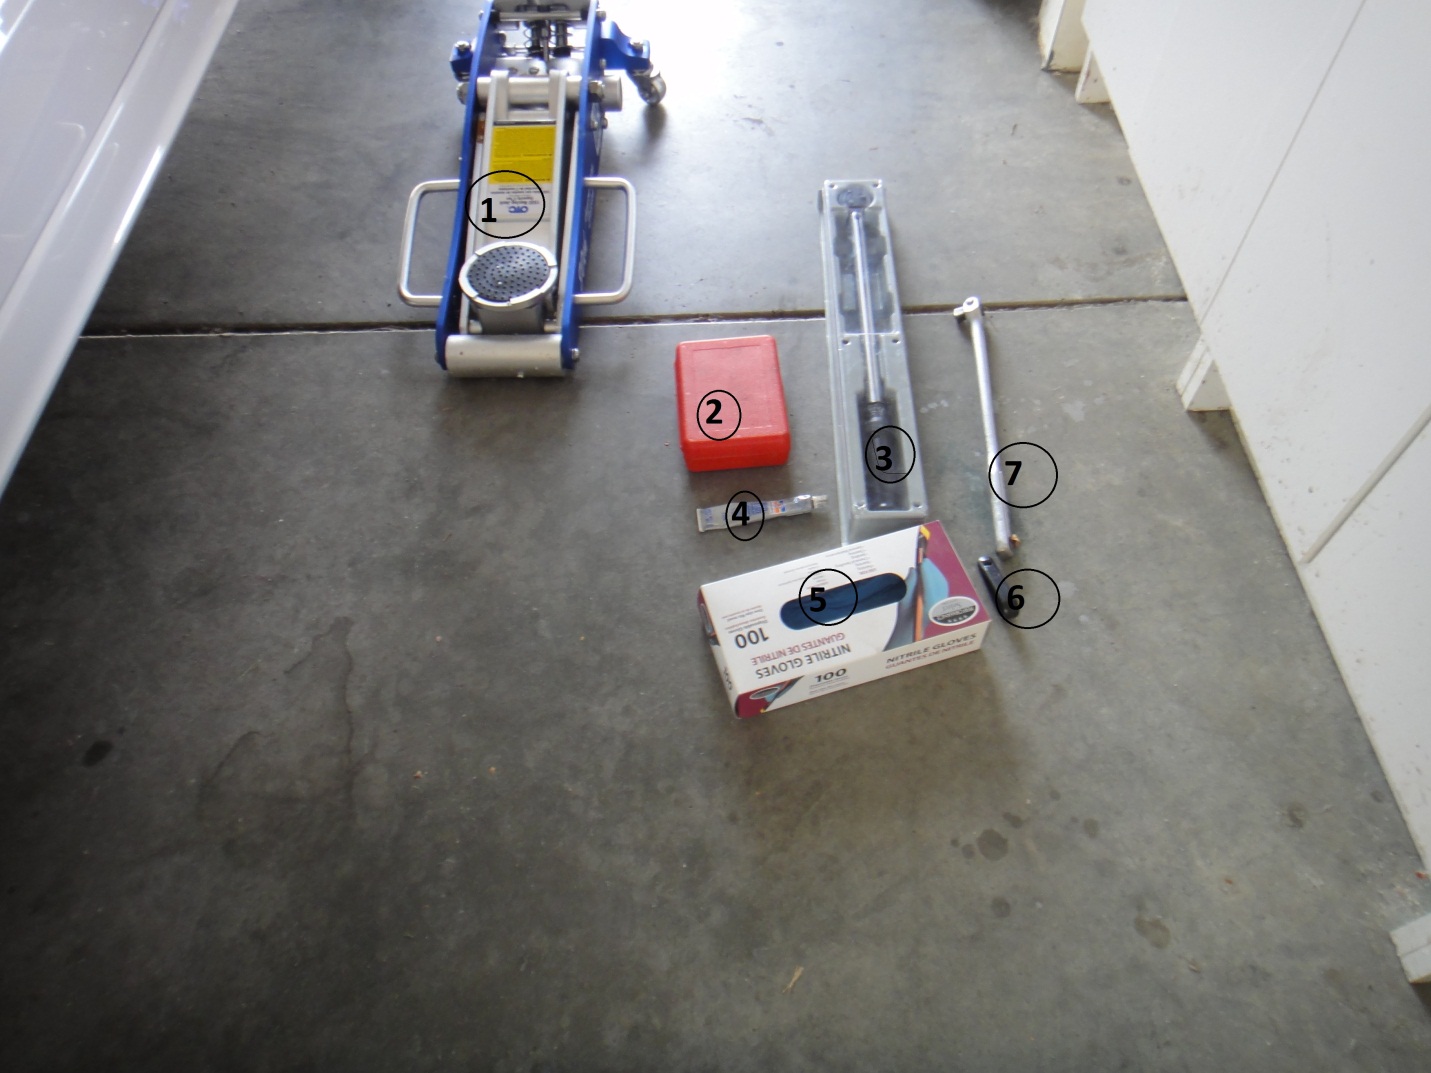
Let’s start with the tools needed – First you need the proper
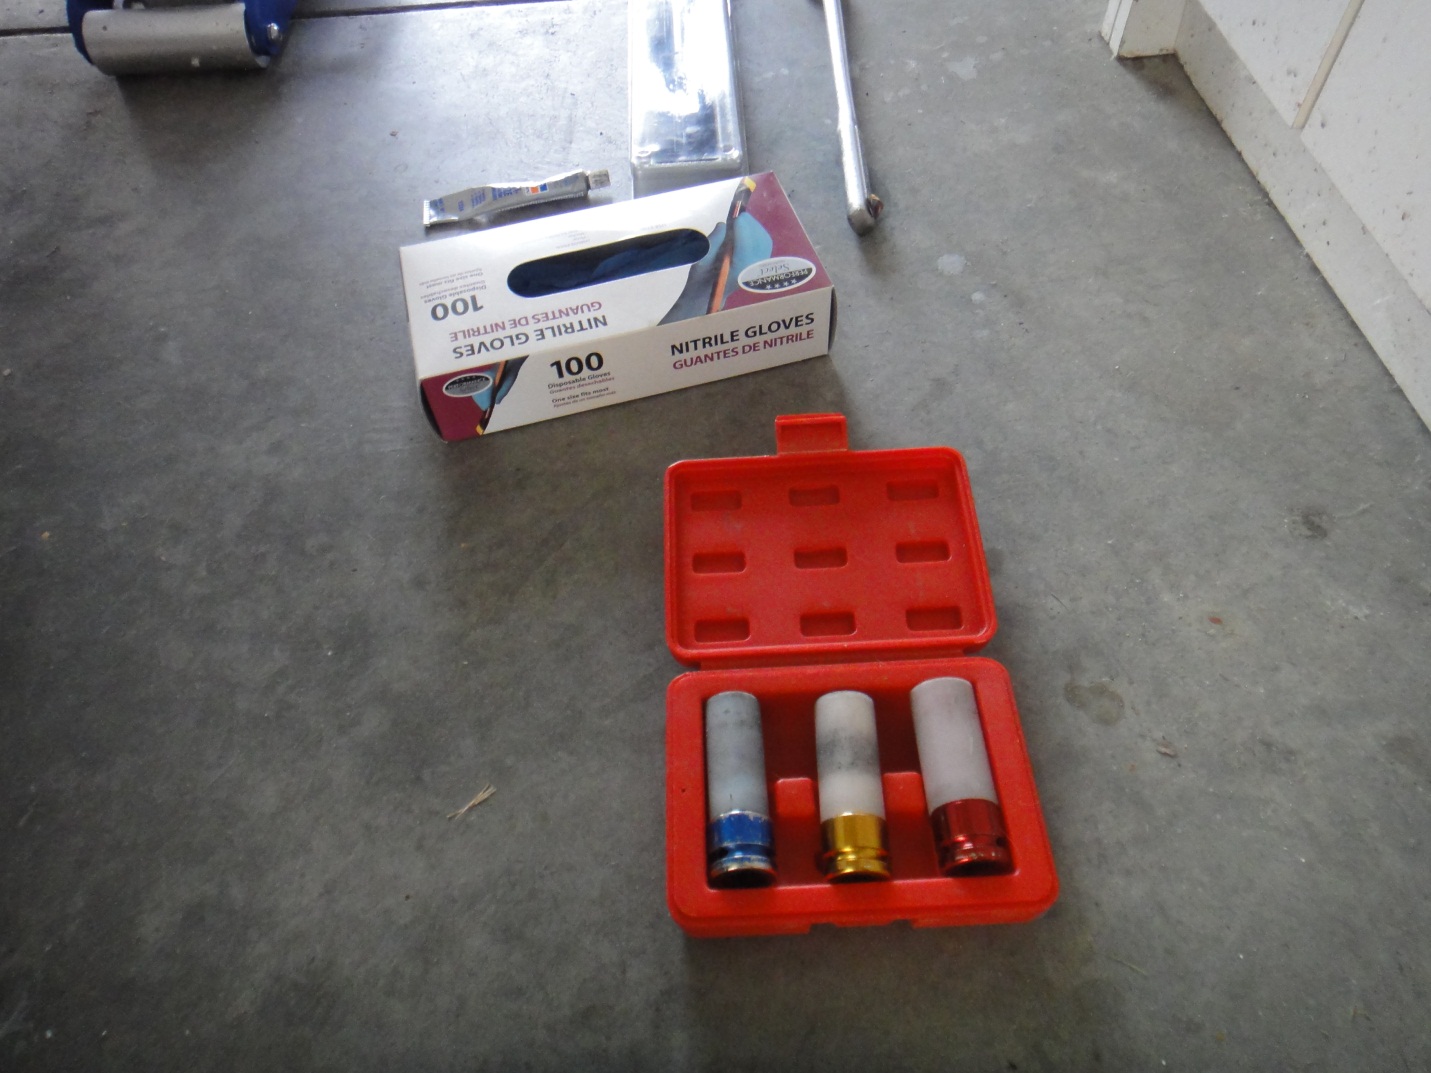
place to work on your Q5 1. Hydraulic Jack 2. Wheel sockets (Have plastics to protect the wheel) 3. ½" Torque Wrench 4. Antisieze compound 5. Gloves 6. Wheel Bolt Cover Remover 7. ½" Breaker Bar
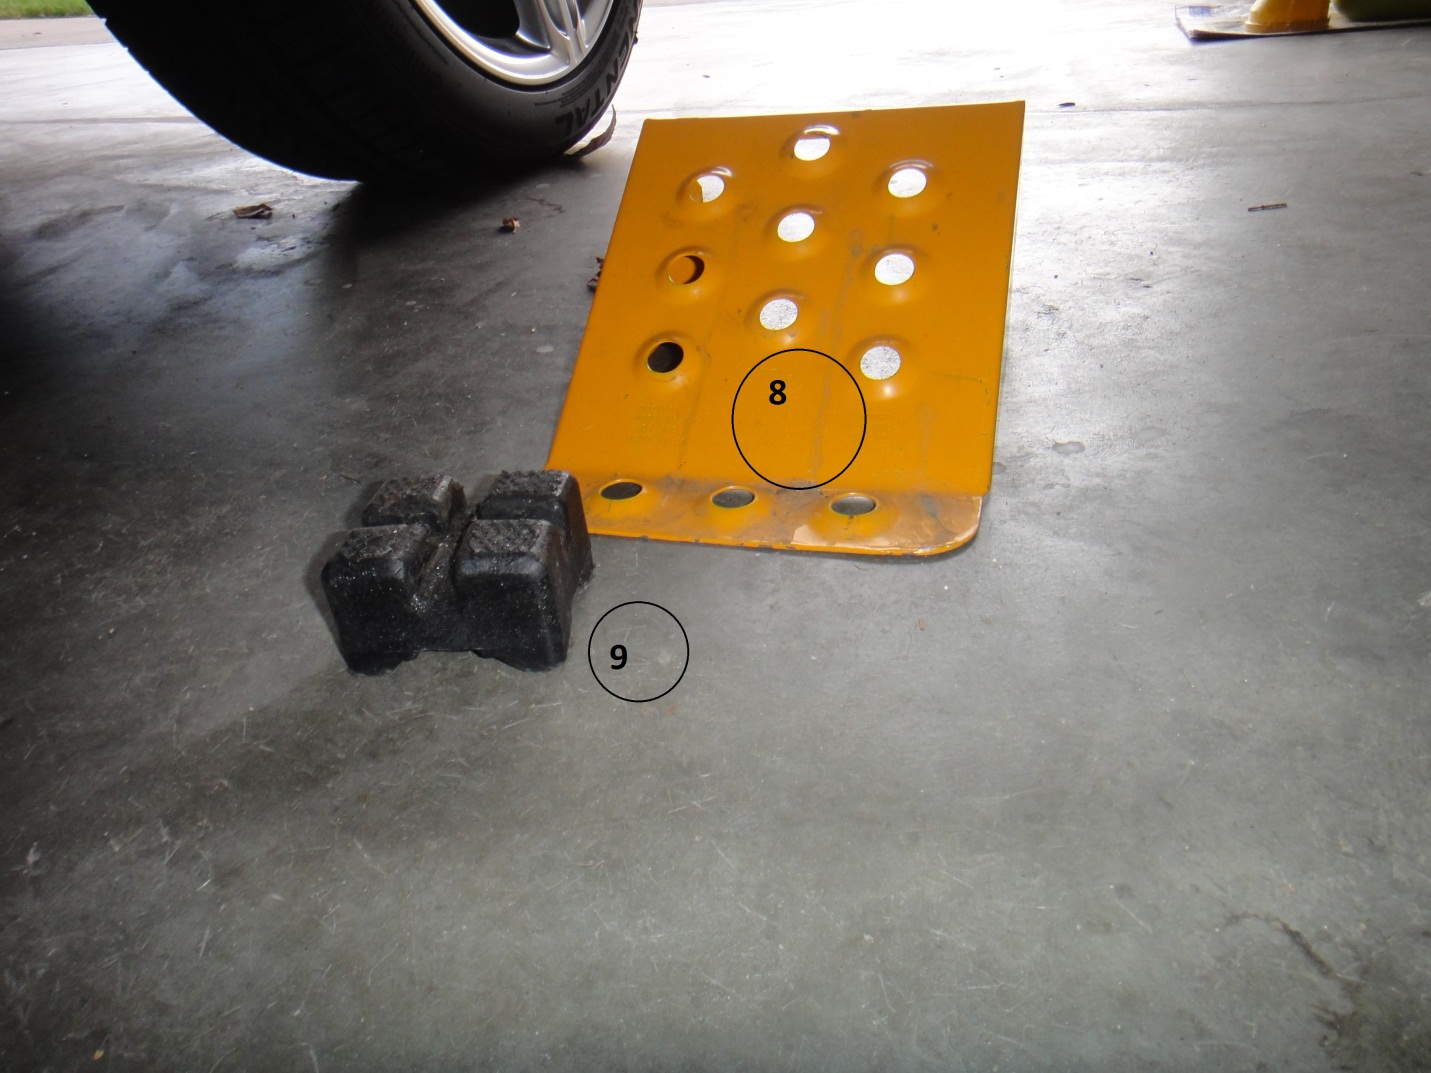
8. Wheel Chock 9. Jack accessory for Audis (not necessary)
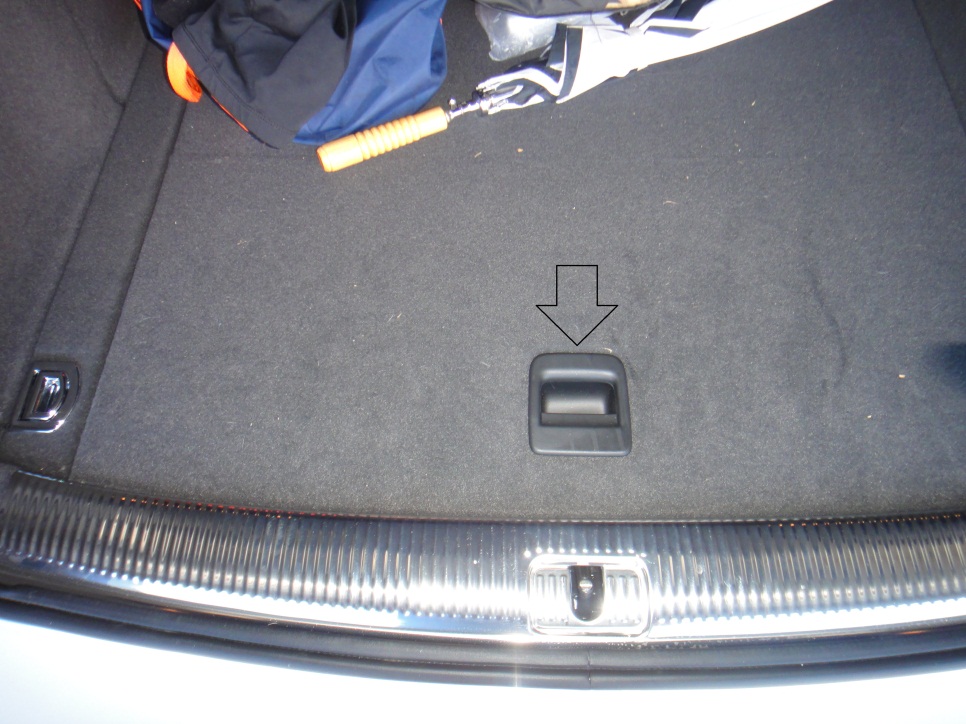
10. Wheel Alignment Bolt 11. Flashlight This tool is located in the tool kit/jack location of the Q5 in the trunk area. I have added the way to find the tool kit at the end of this write-up as I could not see where it was located in my manual and had to go to the dealer to have them locate it – and it took them some time too.
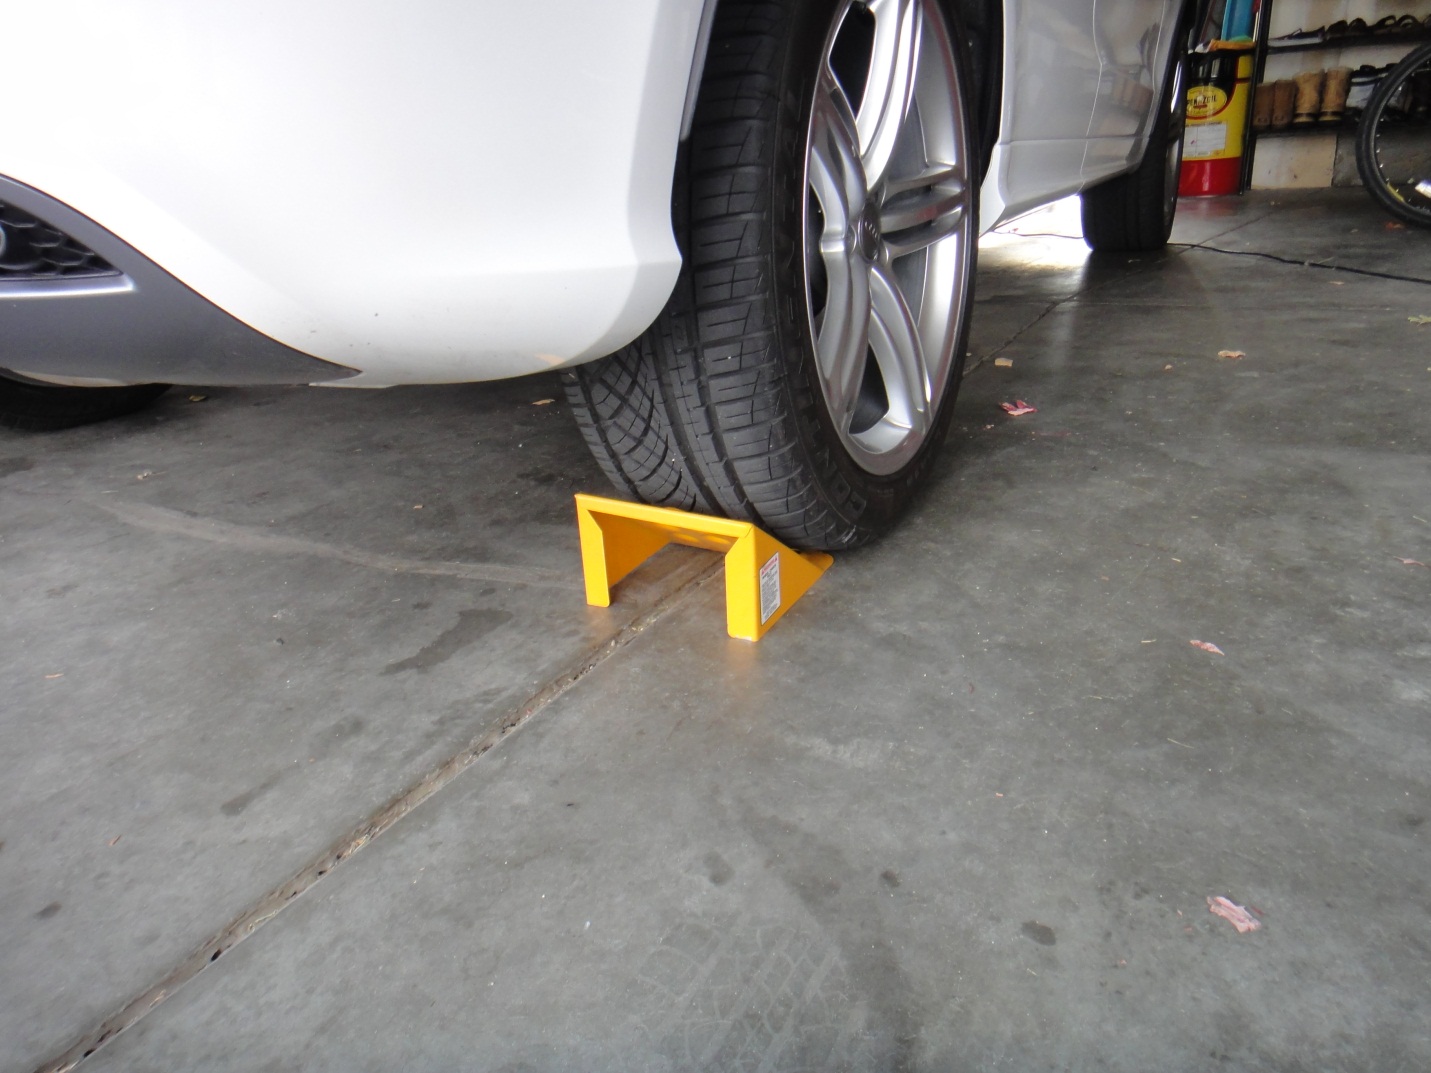
Put the wheel chock on the opposite side from the wheel being removed. In this case I am removing the driver side front so the chock goes on the rear passenger side.
Select the 17mm socket from your socket kit.
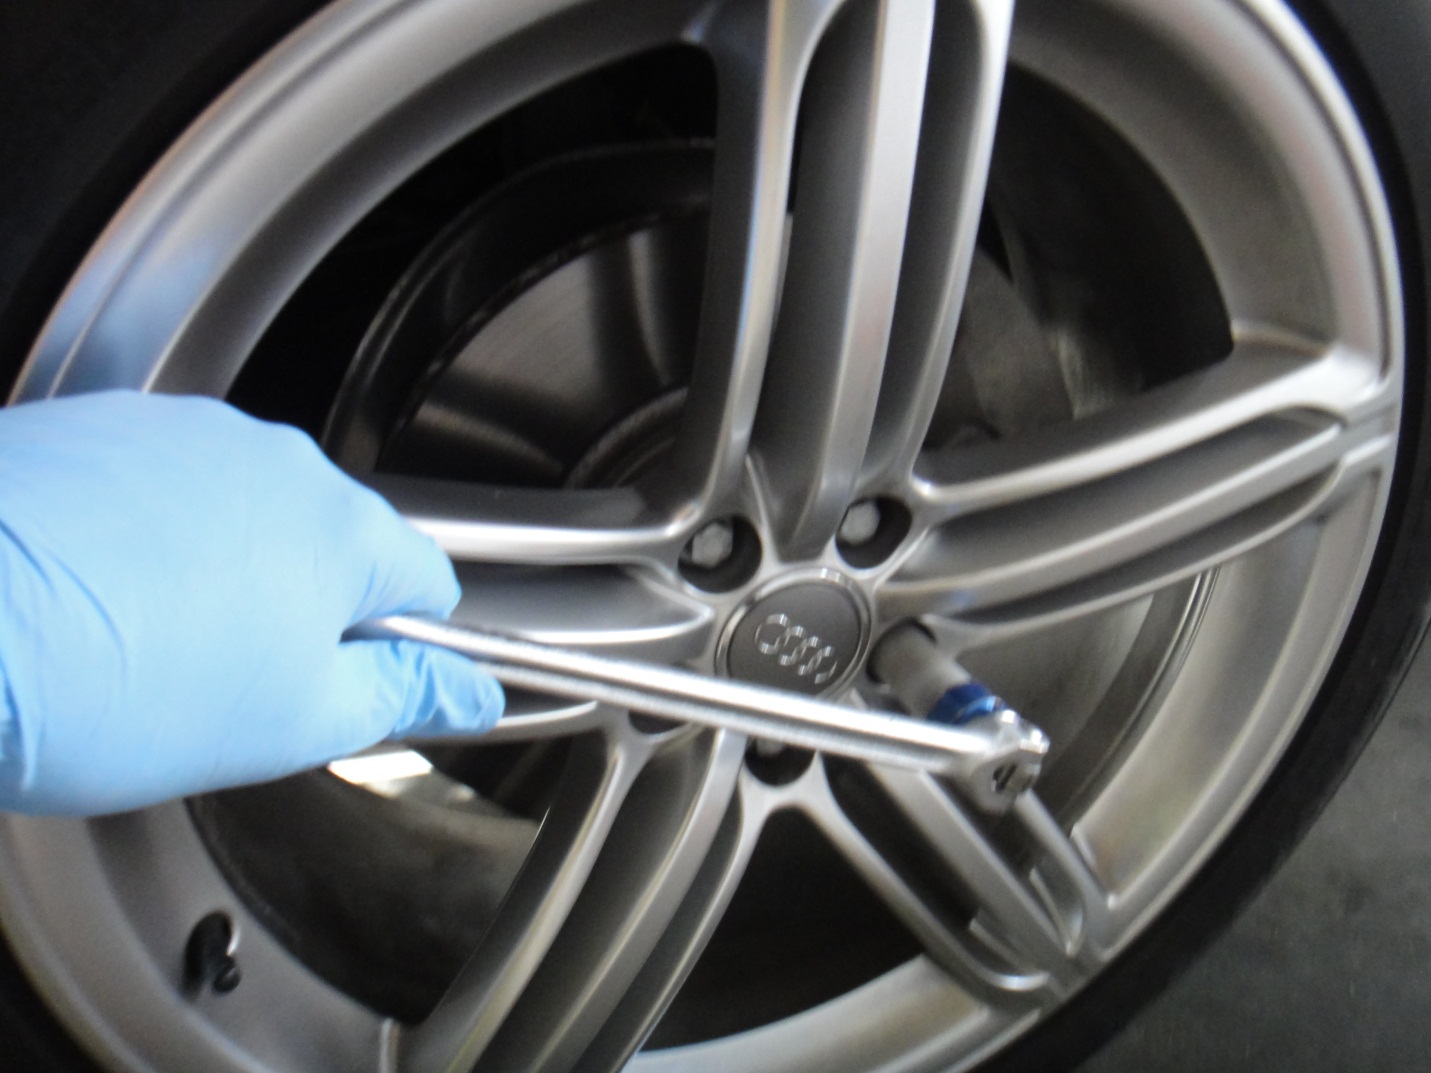
Loosen all five bolts but do not back out the bolts. Use the ½” breaker bar – do not use the torque wrench – they are reserved for final tightening only.
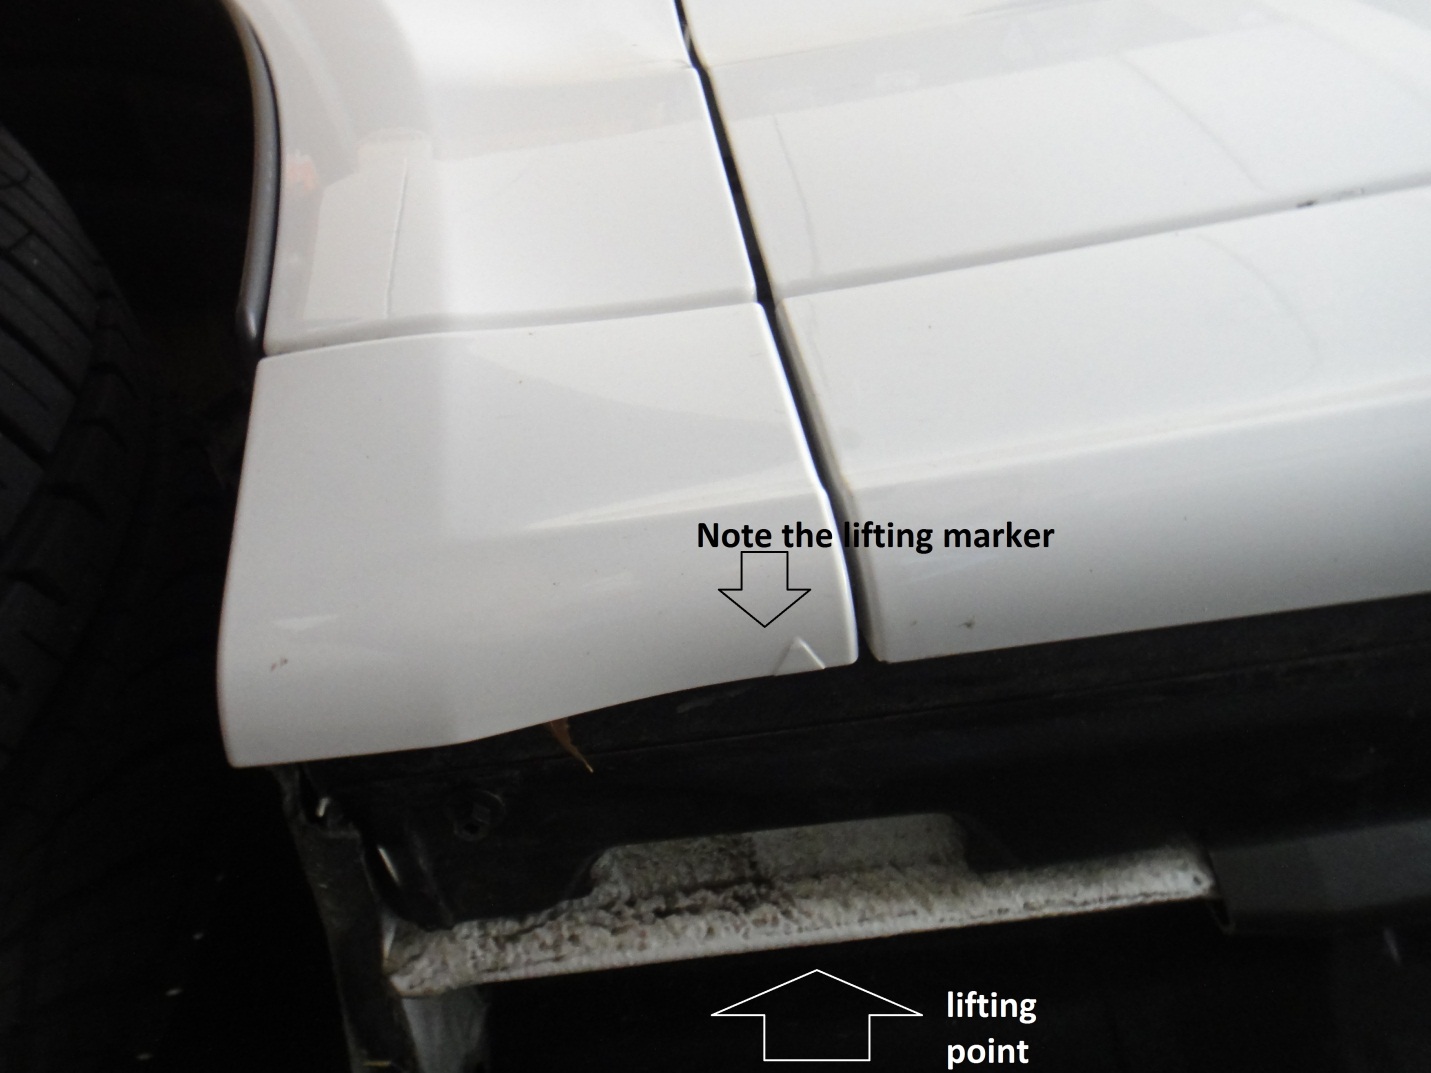
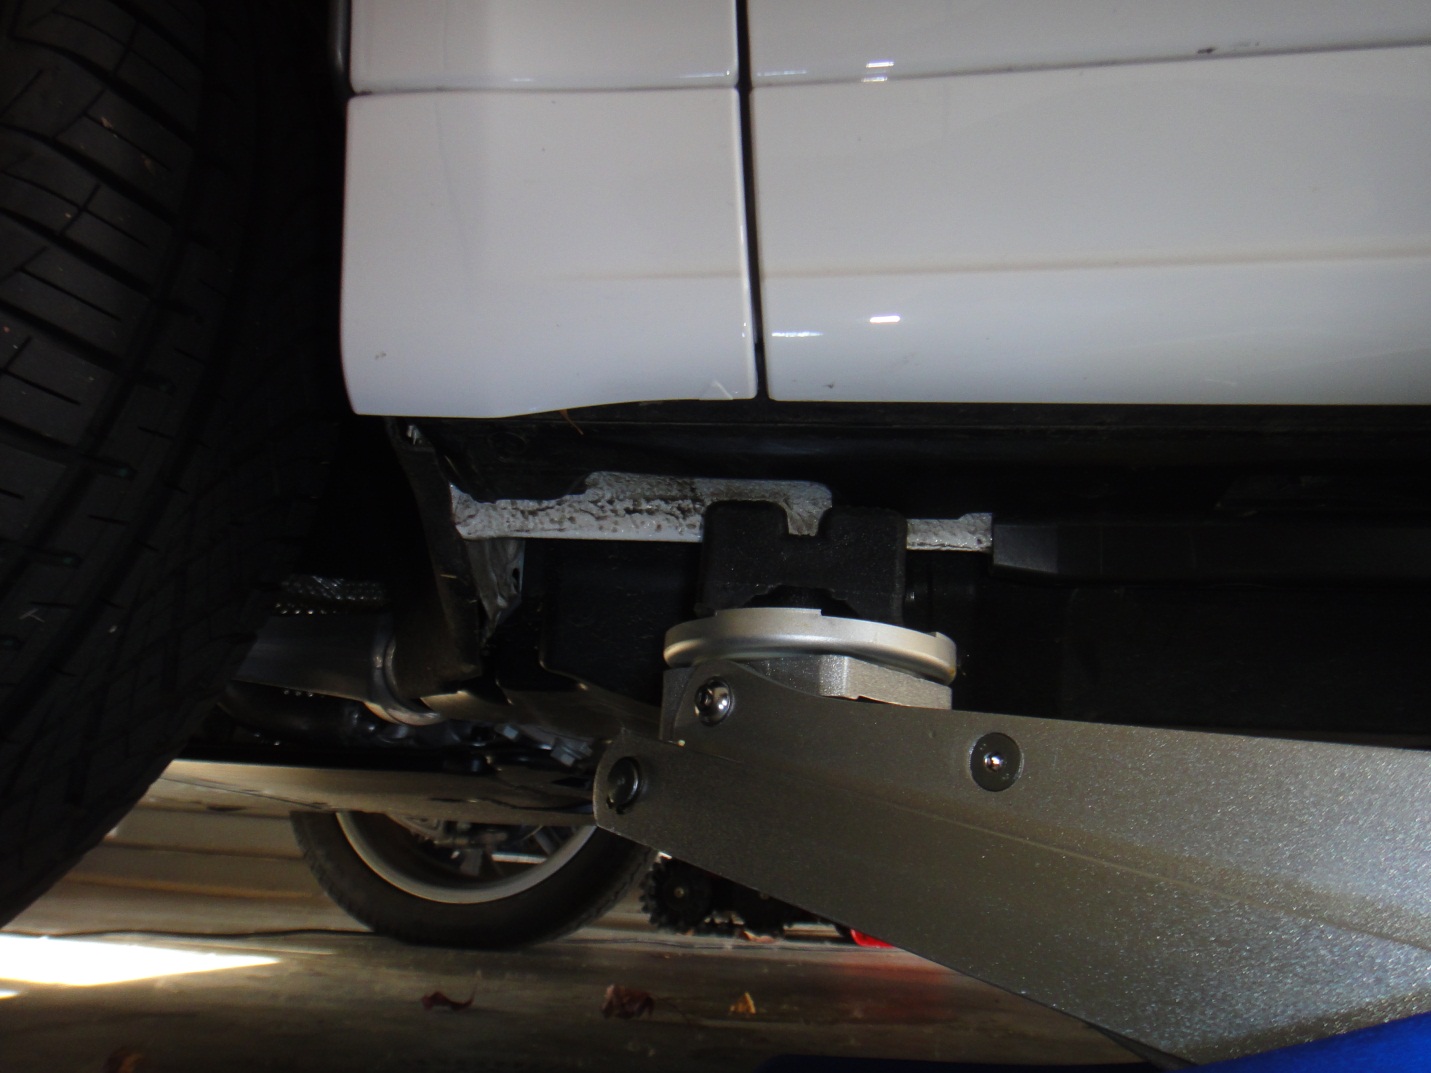
Locate the lifting point and use the Jack and the lifting accessory
Start the lifting
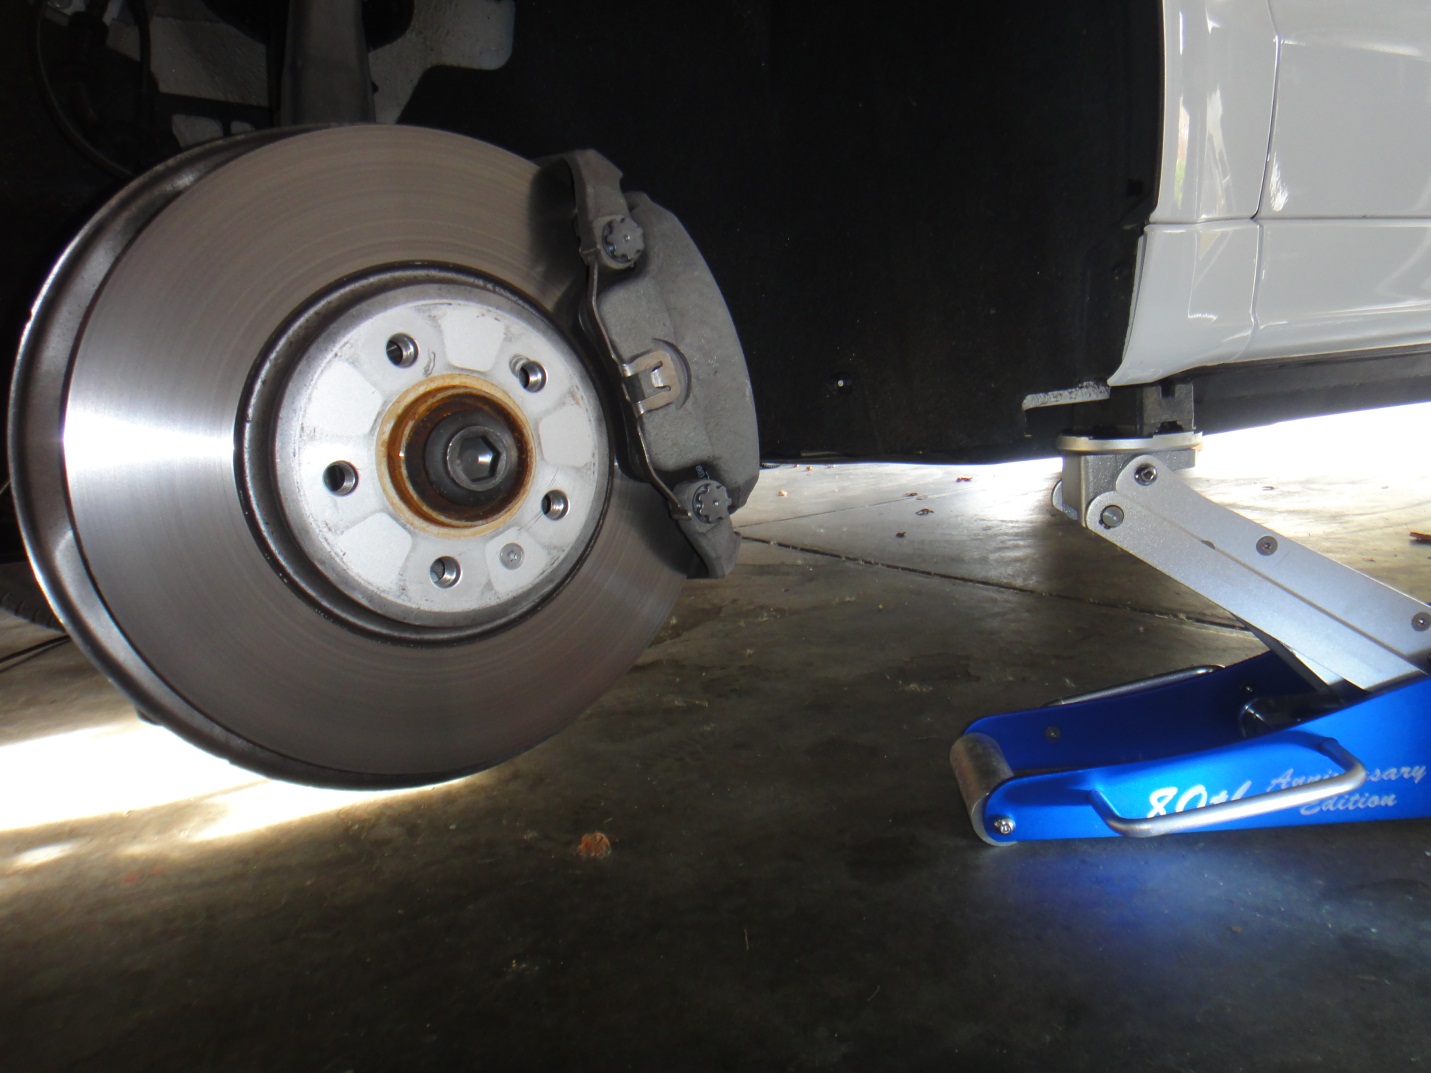
Remove the five bolts
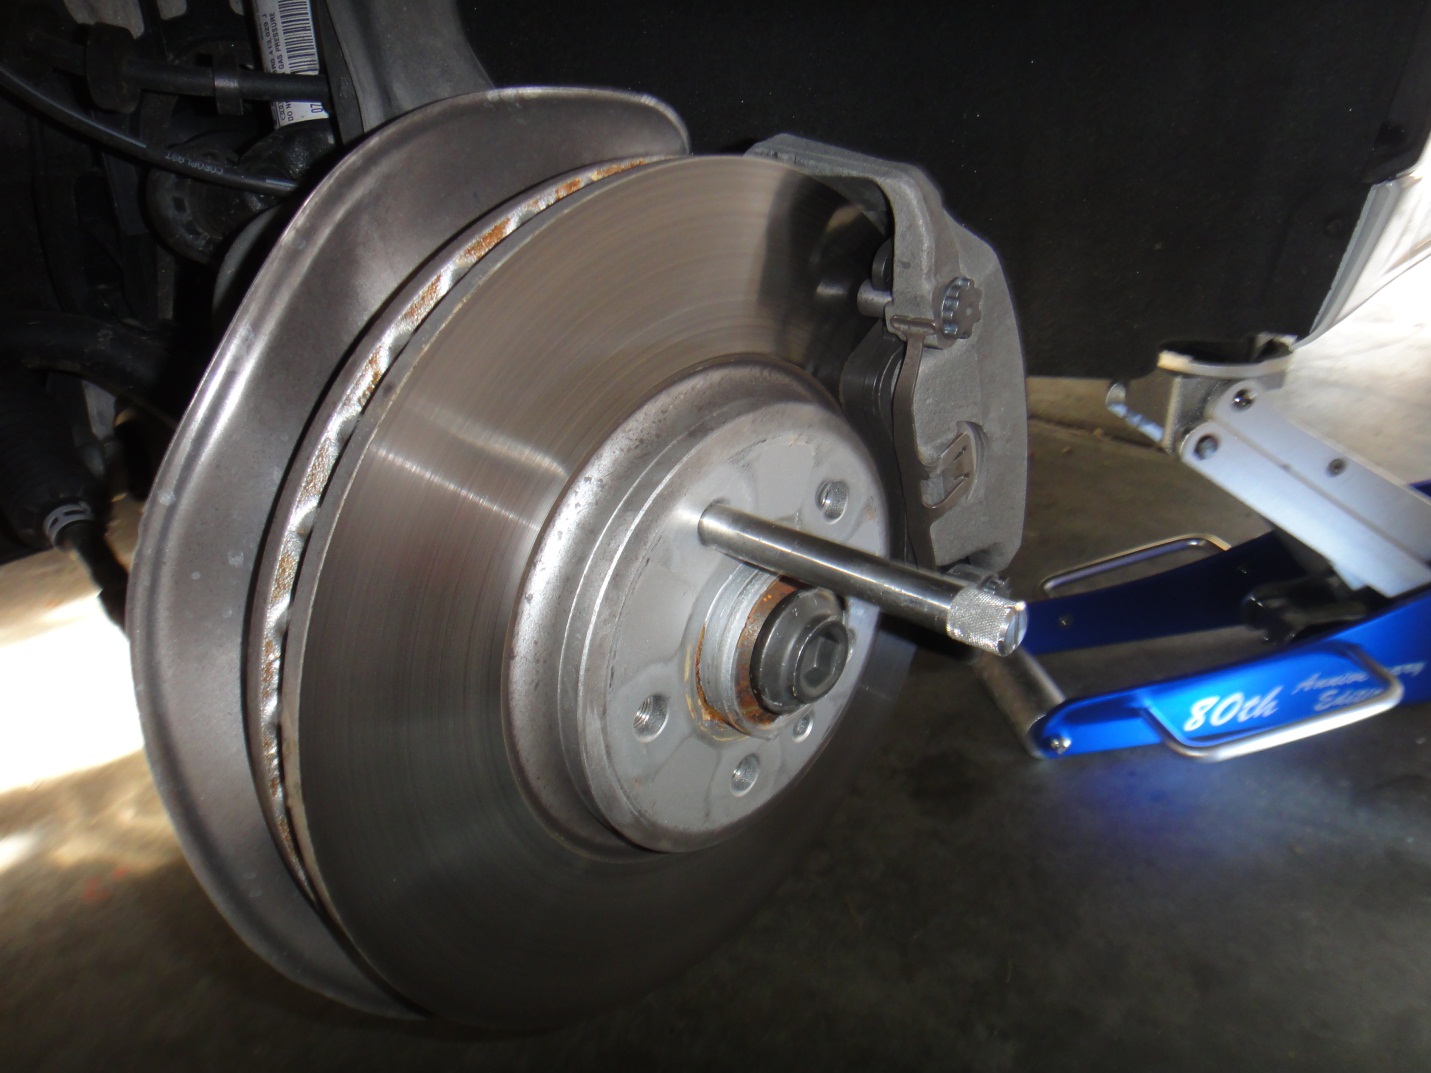
Installing a Wheel Note the rust on the wheel hub and the wheel itself. This made for a difficult time removing the wheel.
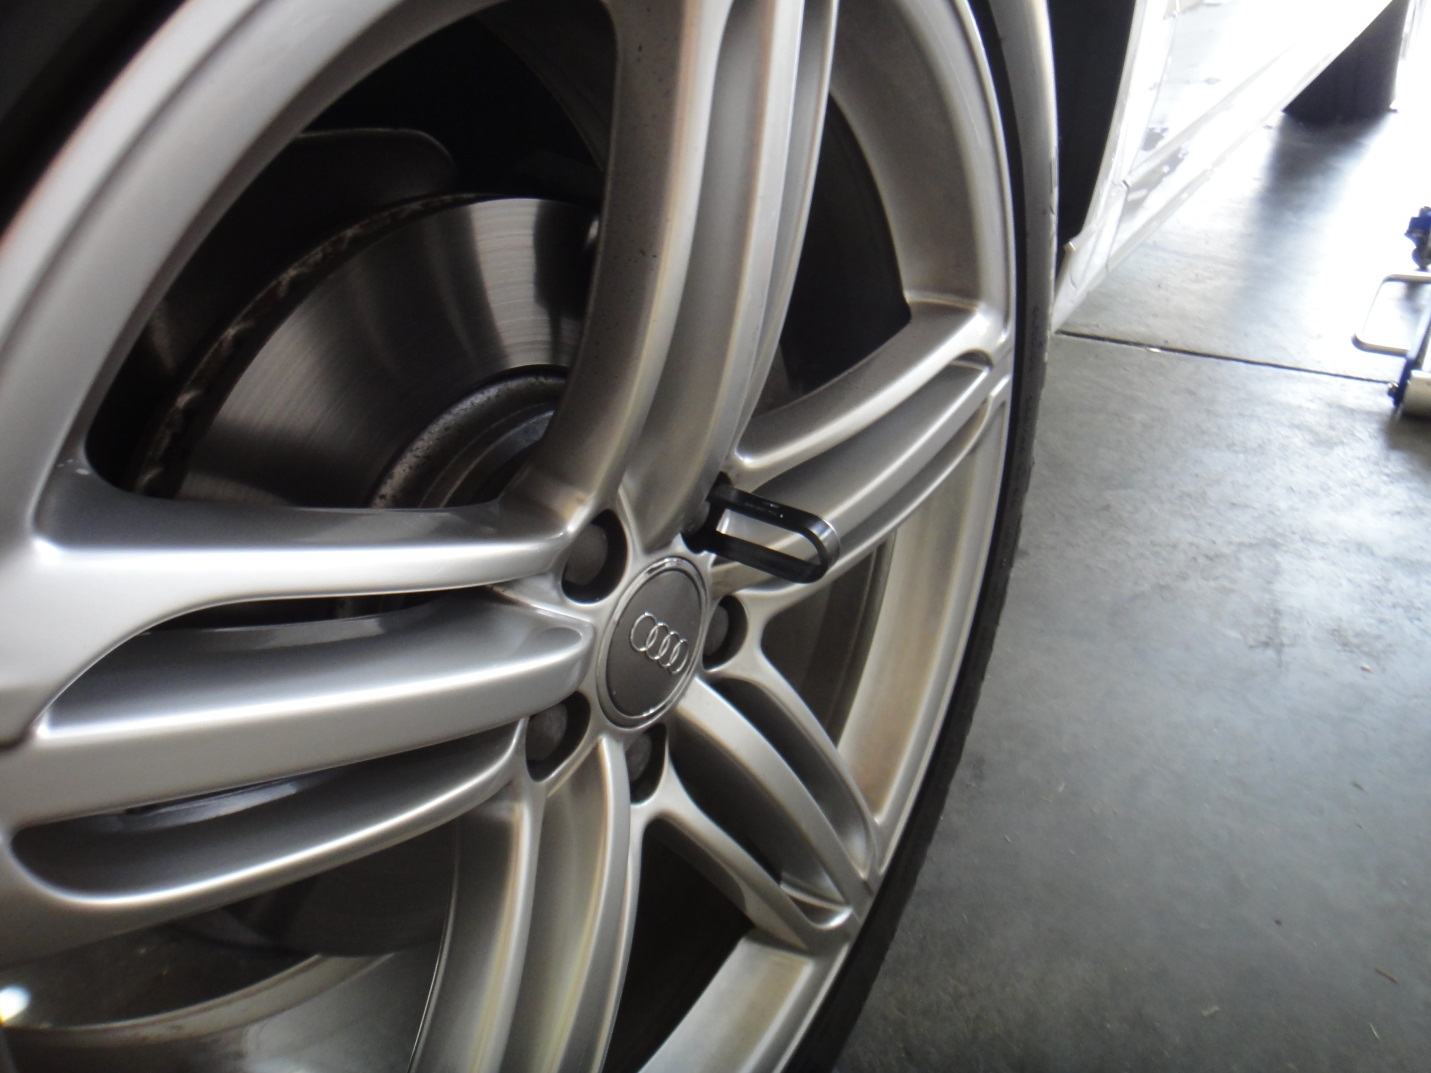
Screw on the wheel alignment bolt if you have one. I purchased an aftermarket steel one.
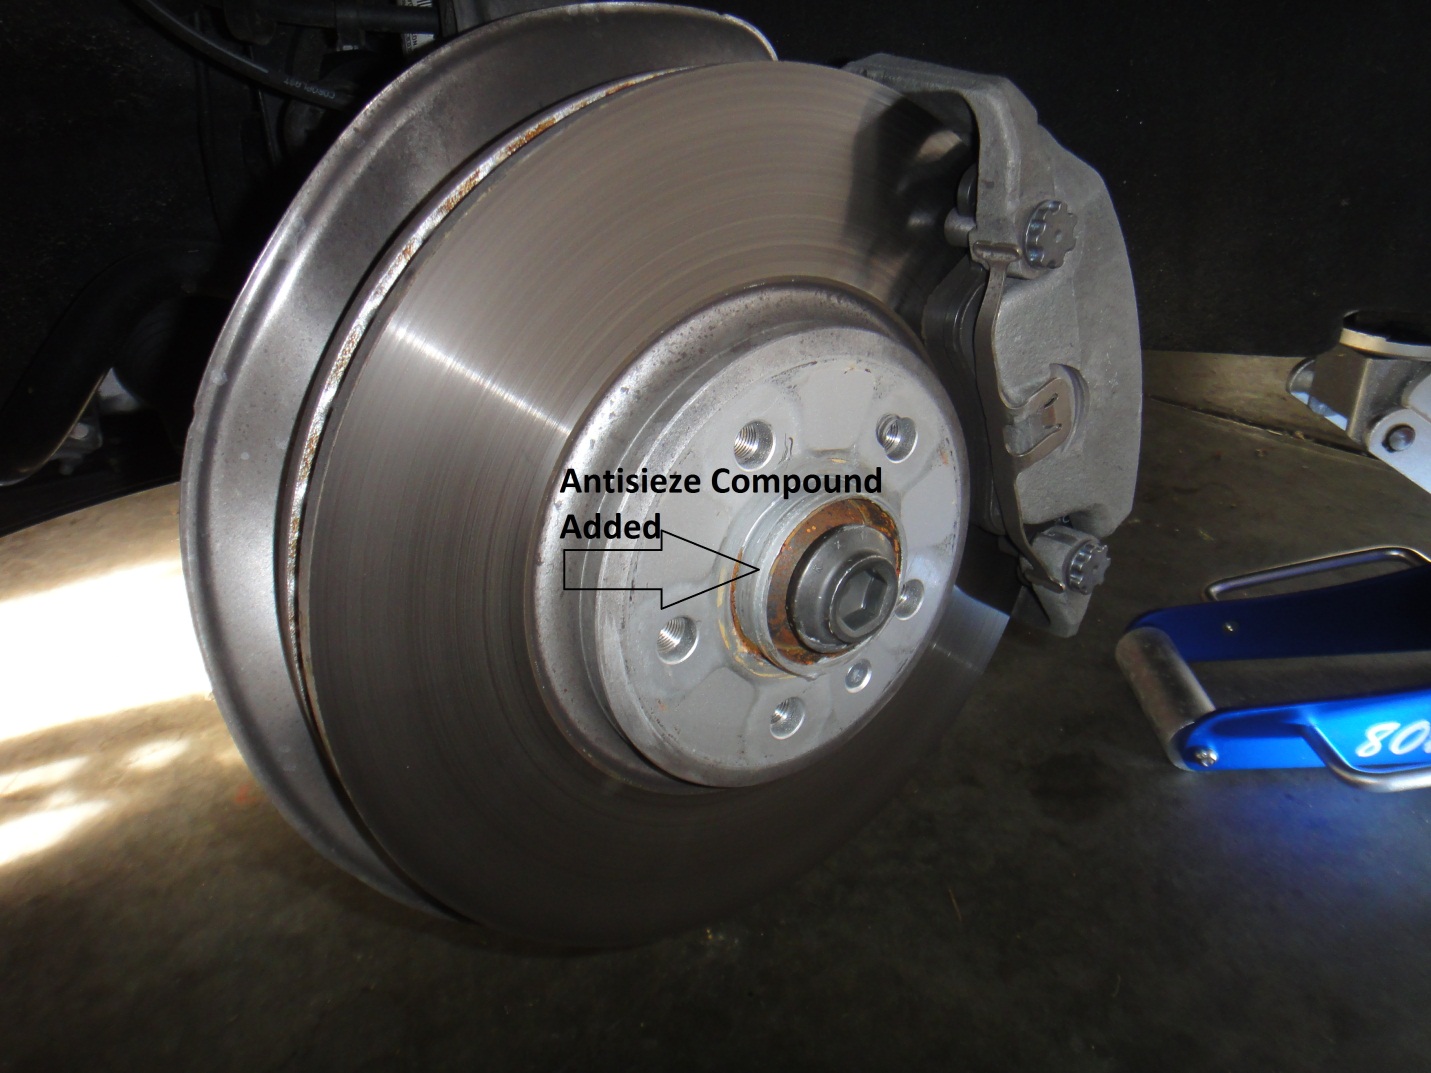
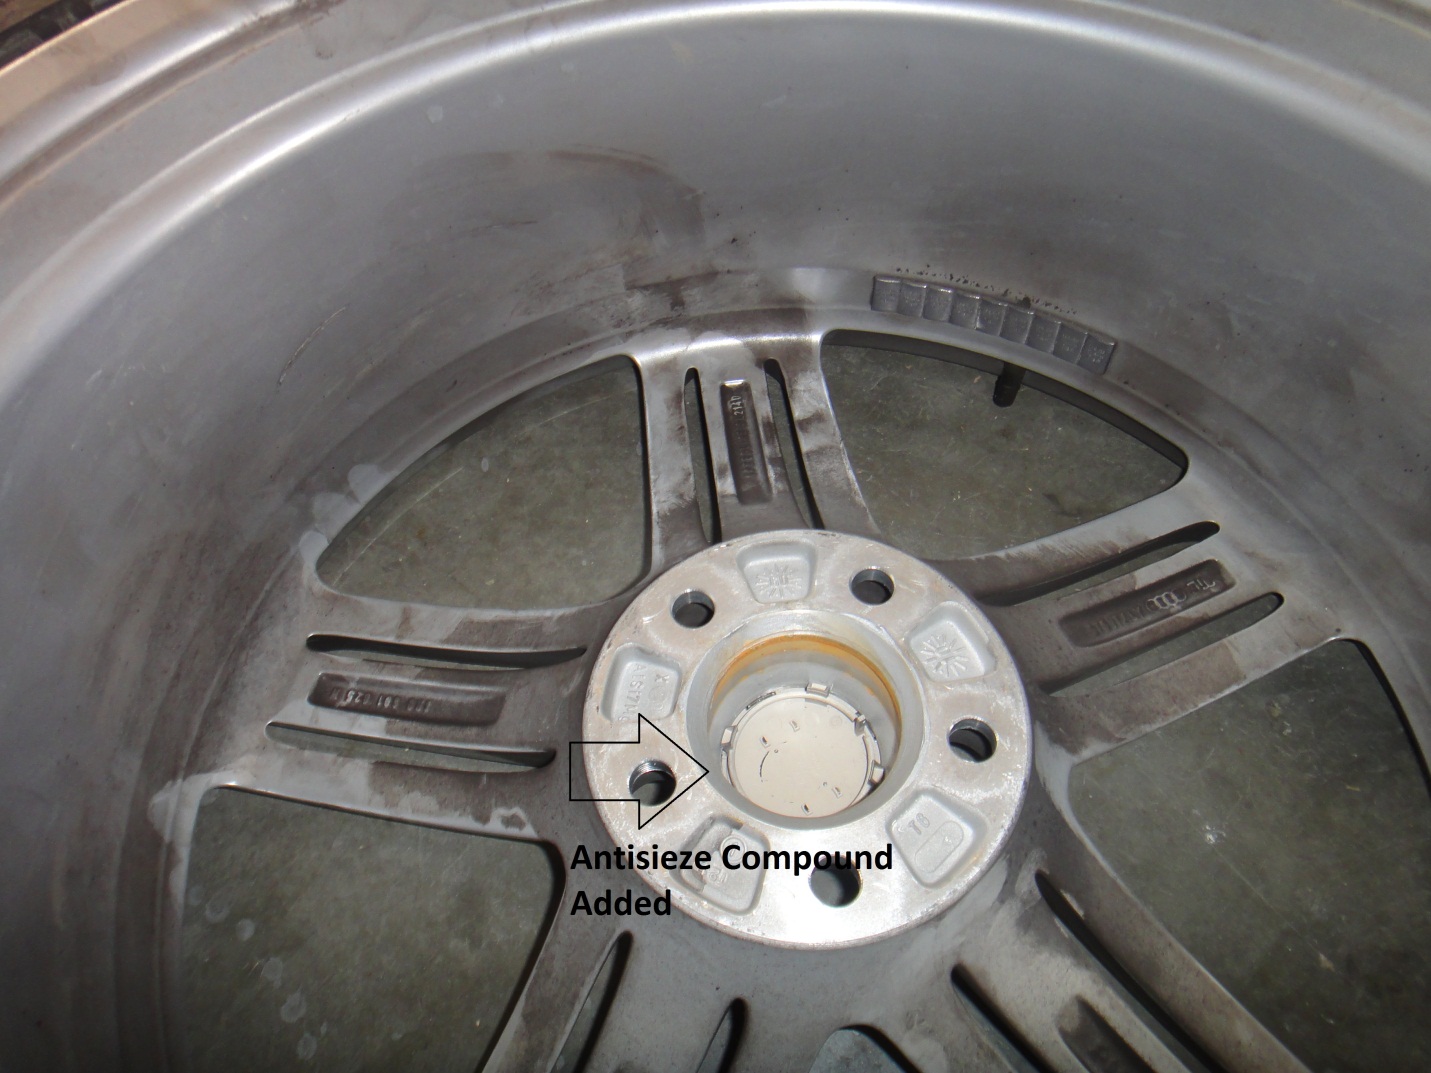
Put Antisieze compound on each of the wheel bolts as shown.
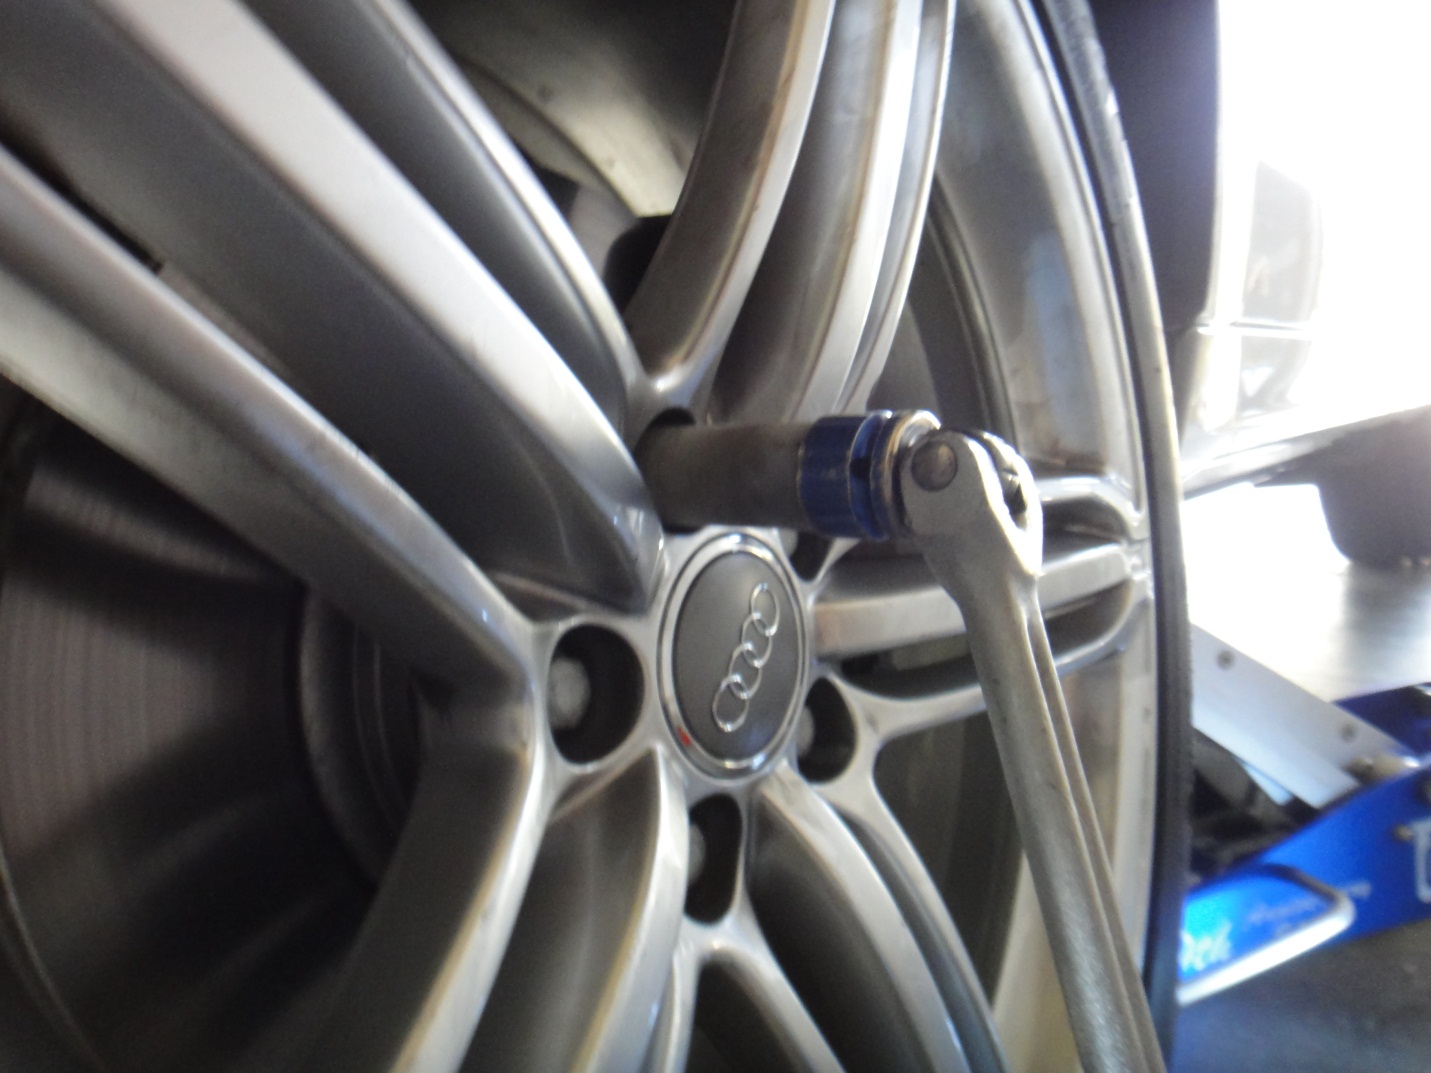
Slip the Wheel on the alignment bolt and then install one bolt hand tight using the wheel socket. Do not use any power equipment to do this.
Use your ½” breaker bar and snug the bolts to make the wheel flush with the hub.
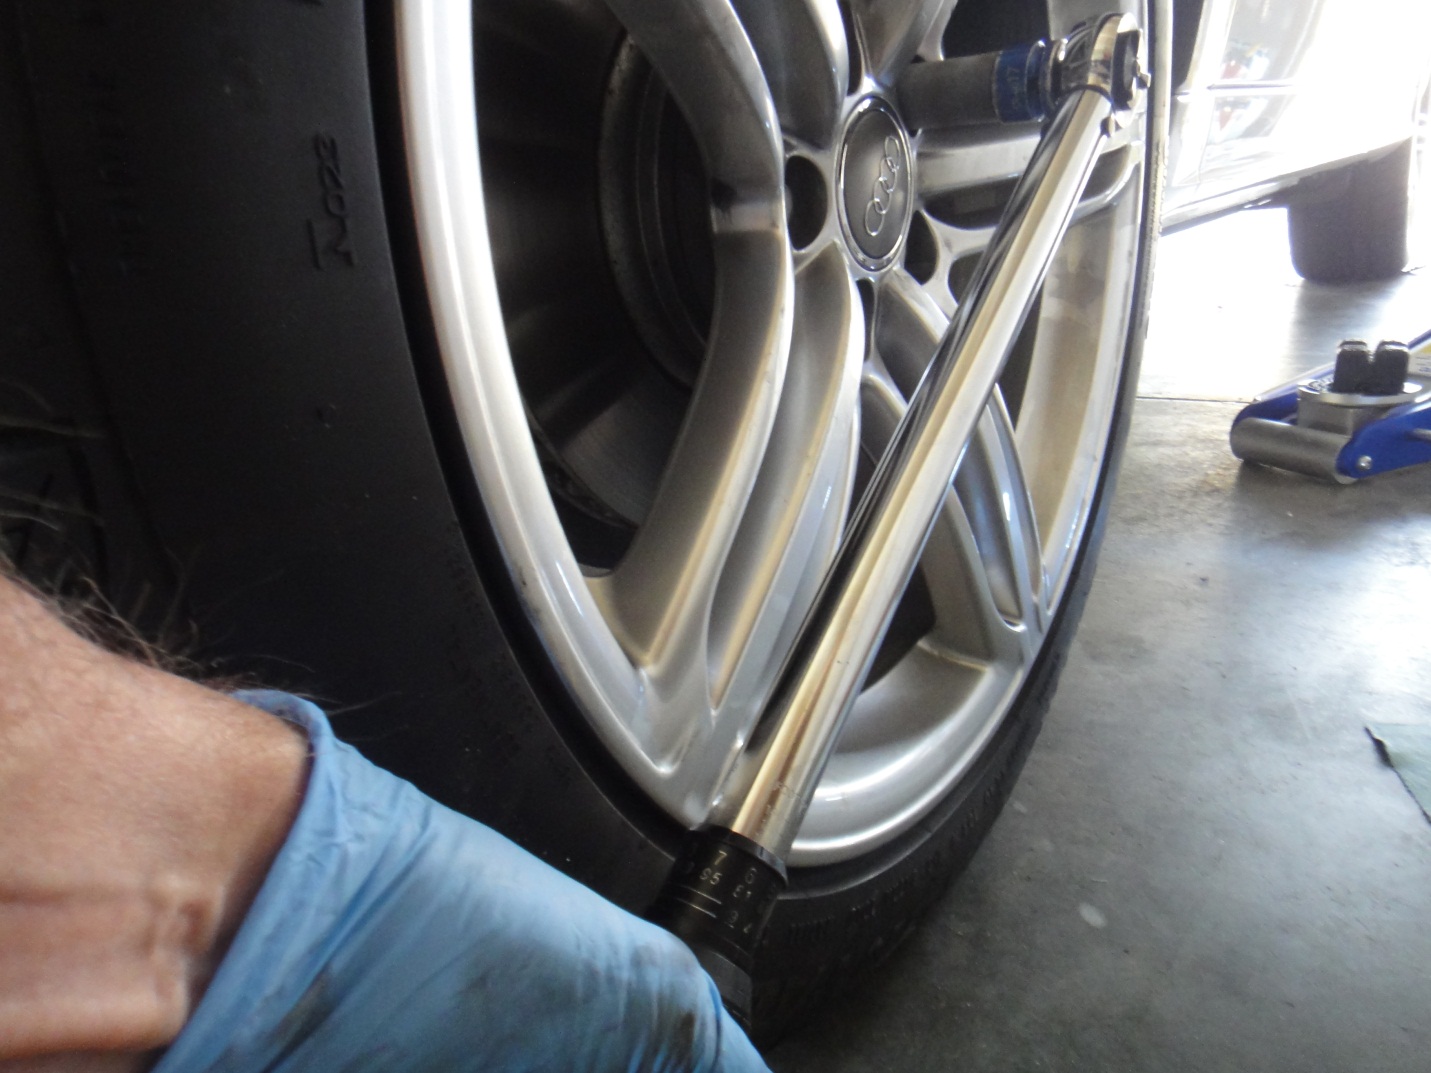
After the wheel is snug – lower the car and then use the torque wrench to tighten the bolts. The spec is 105 ft-lbs for the Q5. Not the typical 89-90 ft-lbs for Audi Sedans.
Make sure you are applying pressure perpendicular to the wheel.
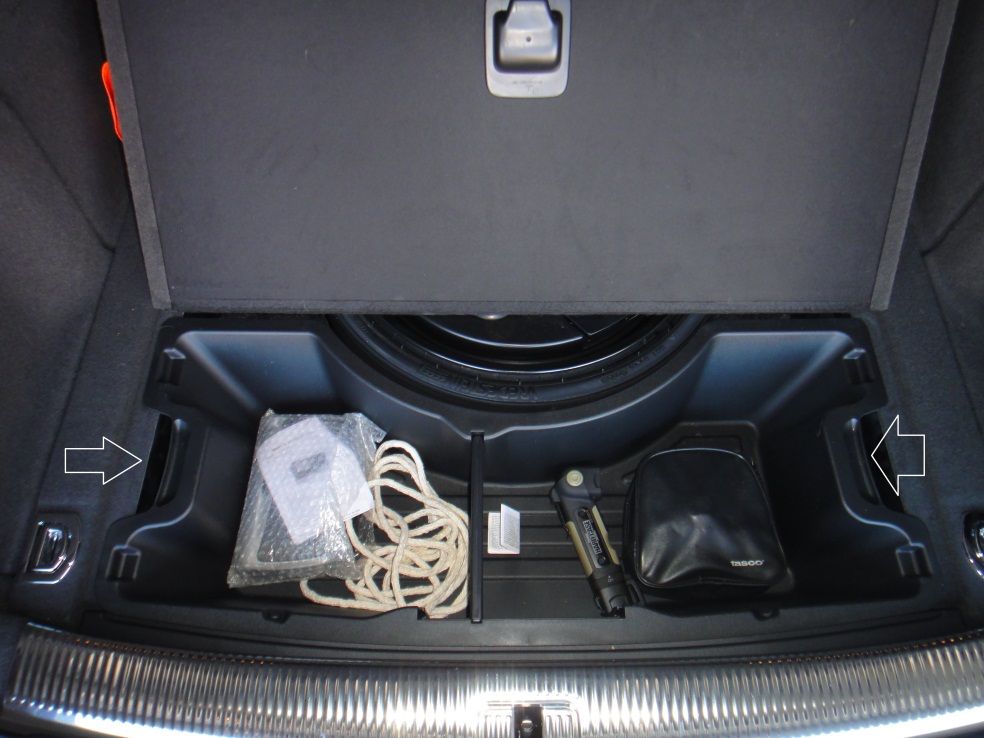
After all bolts have been torqued – verify the torque by going in a circle pattern and check that the bolts are correctly at the proper torque. Remove the wheel chock and you are set to do the next wheel. Location of the Tool Kit Open the Trunk
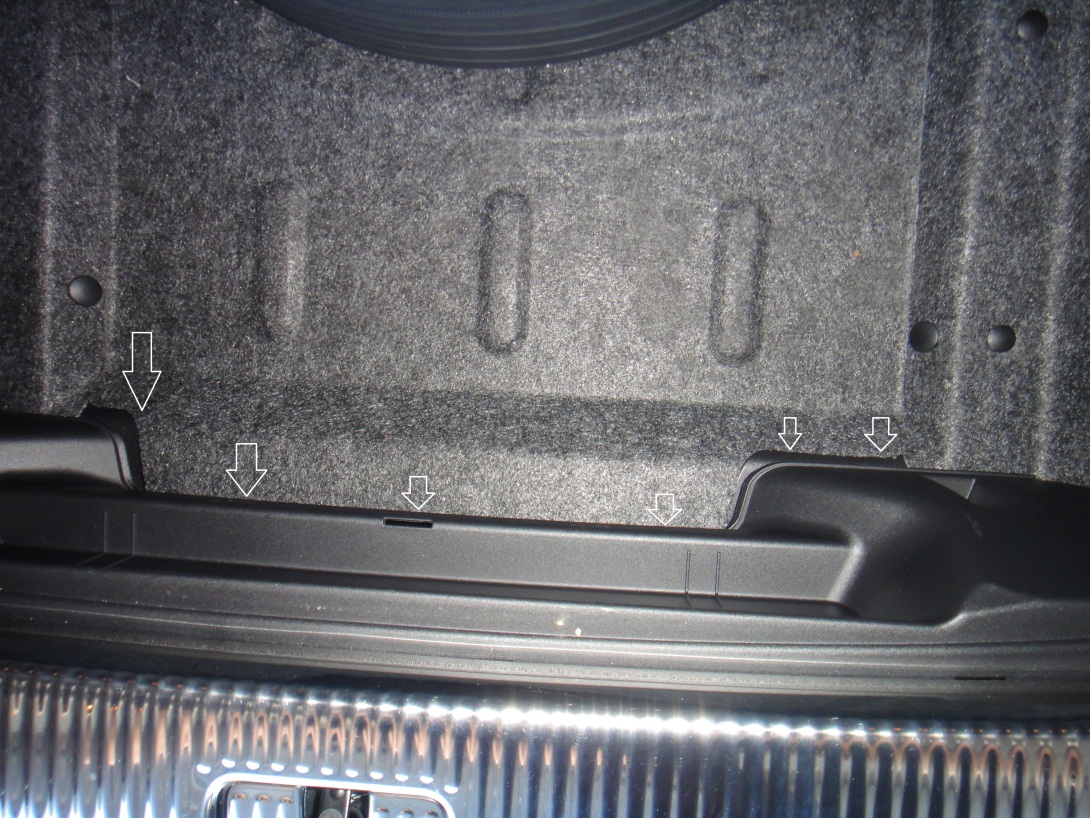
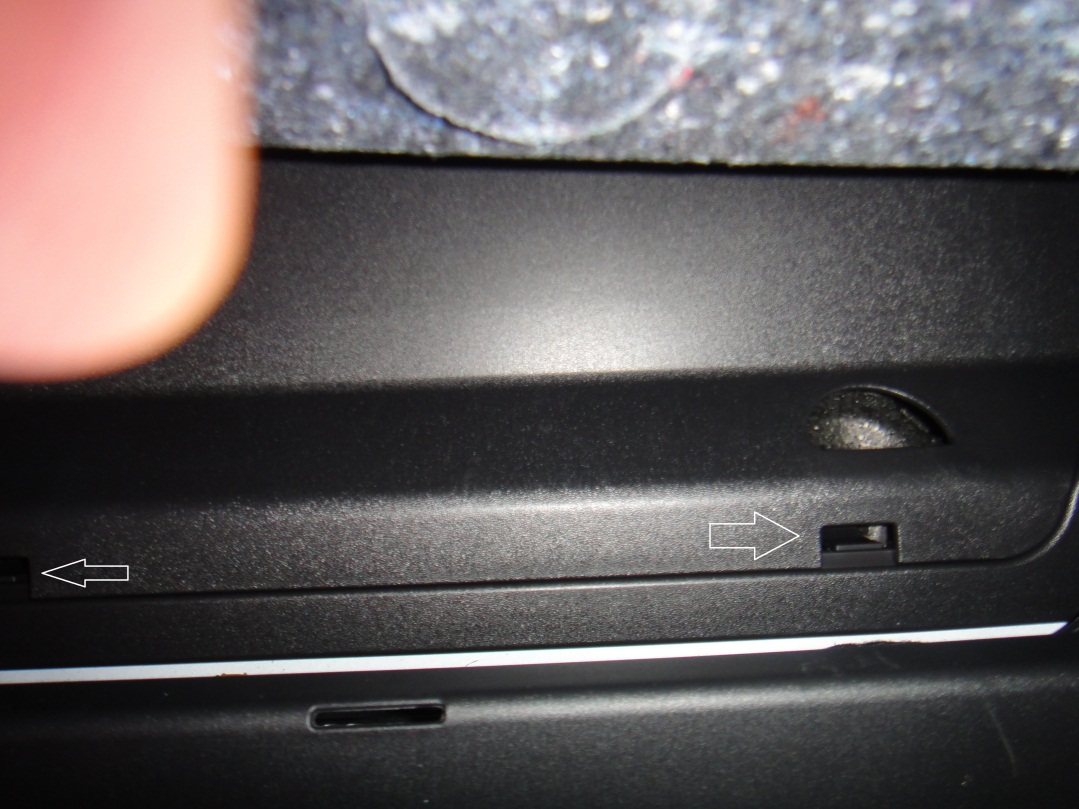
Remove the tray
Notice the floor mat – Peel it back
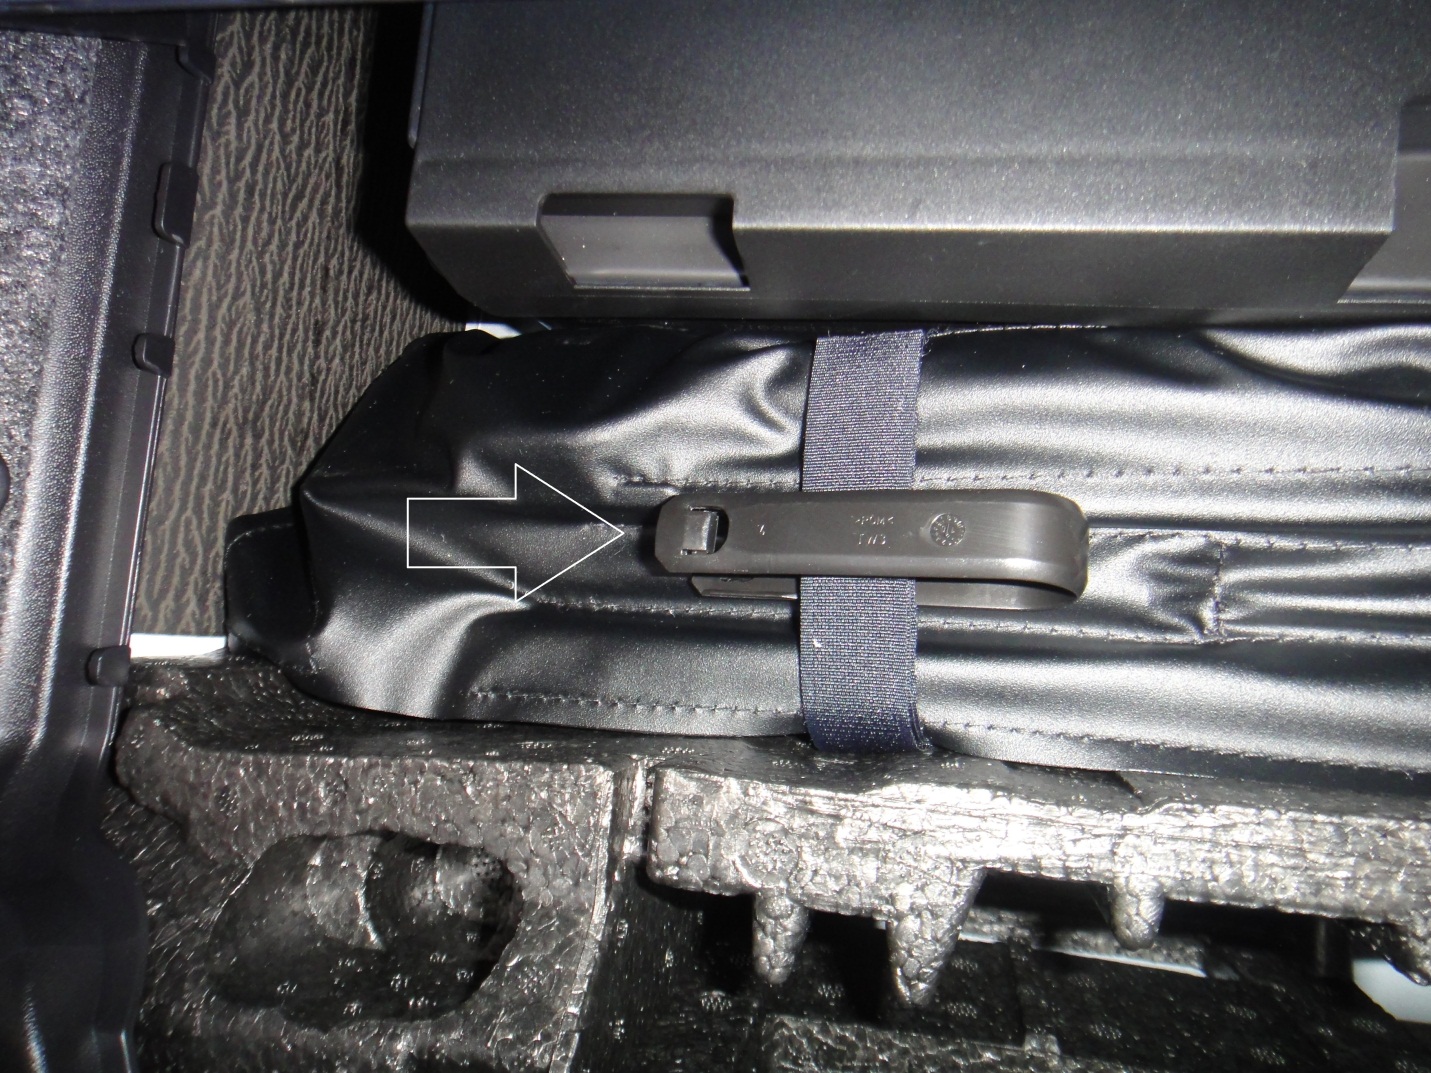
Revealing the Tool kit/Jack
|
|
Advertising |
Contact Us |
Cookie Policy |
Privacy Statement |
Terms of Service |
Do Not Sell My Personal Information
© 2020 MH Sub I, LLC dba Internet Brands |