When you click on links to various merchants on this site and make a purchase, this can result in this site earning a commission. Affiliate programs and affiliations include, but are not limited to, the eBay Partner Network.
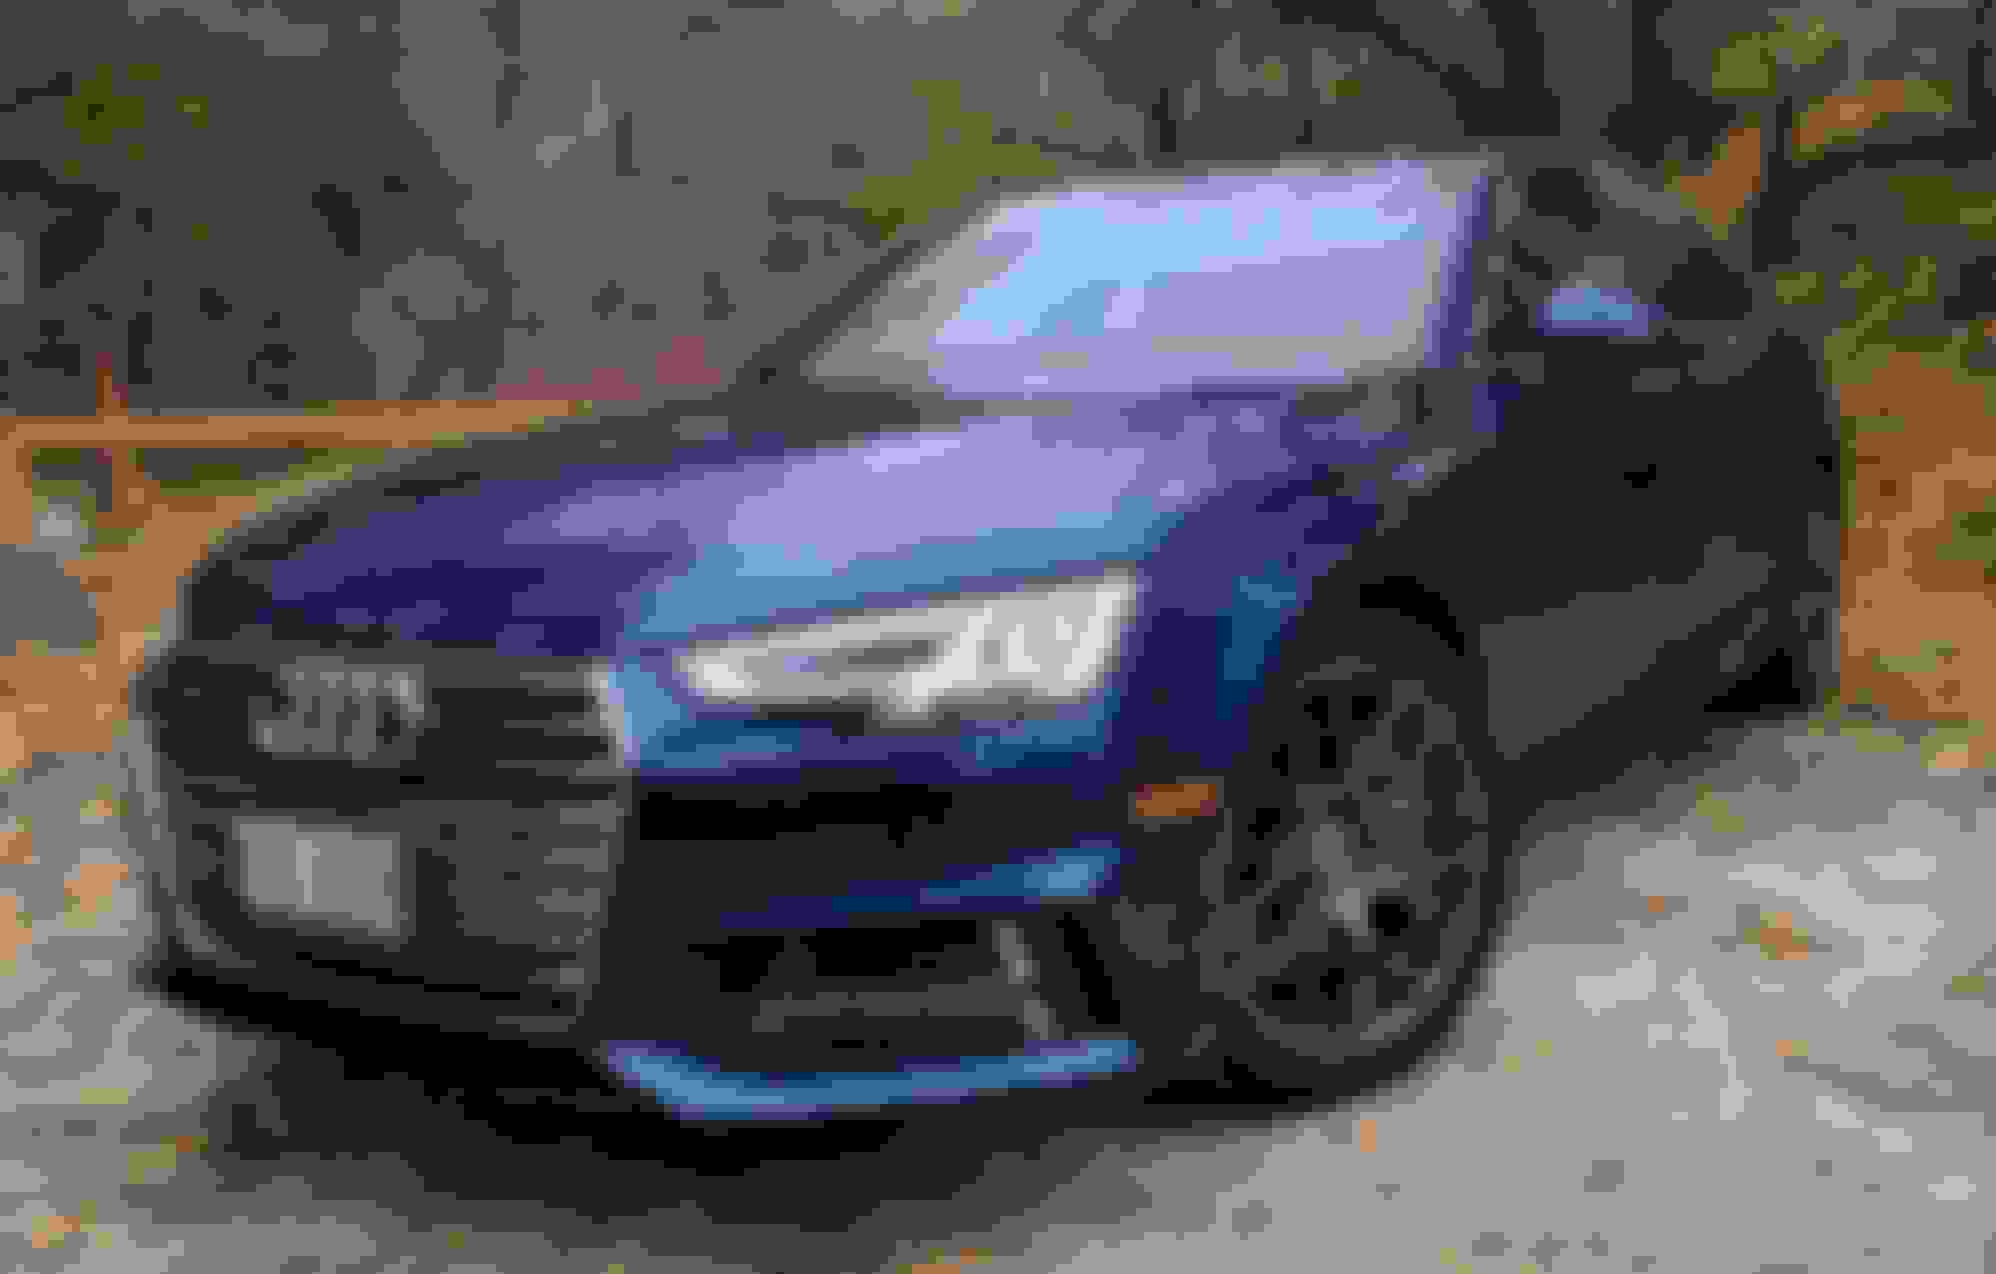
Hey guys, today, for the first time, I went all the way (well I guess... I didn't buff and polish the car cause there were no swirl marks on the car). Just thought I'd share cause I was kind of against doing this on my own, but after spending $400 on having it done twice, and with all the time spent going, dropping car off, etc, it still took like 1.5 hours in total, so I decided to invest in doing it myself. The investment in the dual action polisher was worth it. Seeing as how I'm going to wax my car about 3 times a year, down the line this will save me a vacation to Cuba (almost) every year instead of wasting it on getting someone to detail the car for me. It took me from start to finish about... 2.5 hours.
First, a few things I've learned:
- around the parts where the car gets more dirty naturally, make sure you go over twice when washing the car, ie, around wheel wells
- dry car properly - you get a good chance of doing this when you are clay-barring the car, but make sure it is dry
- doing a good job in washing the car will make clay barring it much easier. The bar will just slide across the car when it is clean. Make sure to not clay on a dry surface of the car
- do not put too much wax on - every single post I've read out there talking about how much wax to use, mentions beginners will use too much wax... Well... that was me too today to start. I started on the hoot/bonnet, and getting the wax off was much more work than it needed to be. I would say, put on enough so that it applies easily and you can tell it's there, but not so much that you're starting to change the colour of the car due to the amount of wax. Even then... you'll need to get the hang of it. After I did the hood, teh rest of the car was quite easy.
- if you're using a dual action polisher to apply the wax, do not make the rotor head turn too quickly - 1) i found the wax doesn't apply as well 2) I found the micro fibre bonnet will just fly off - happened with the 1st one, landed on the ground, threw it out.
Process...
To wash the car:
- Simons car wash soap with some kind of wax feature... but we all know that's mostly bs. I like it
- 2 buckets for the 2 bucket system - 1 with soap bubbling up, the other with clean water. Warm toward hot, but closer to warm water (outside temp was about 6 degrees C)
- Something very similar to:
- Amazon microfibre cloths (small ones) to dry the car. I like using quite a few of these, probably like 10, to dry the car. I find I'm always working with a dry-ish cloth and leaves the finish much nicer
- Water Hose for rinsing the dirt off before the wash and to get the soap off before drying
- I didn't wash the wheel's cause I just put the winters on like 2 days ago and they were washed before I put them away for the summer, but otherwise I use
. It is a tad heavy I'd say, but I also don't have a comparison. It worked really well though. I'm very happy with the purchase
- I used these bonnets to apply the wax Detailer's Choice 6-356 Microfiber Bonnets - 5 and 6-Inch - 2 Pack - I would have gotten through one waxing all right with just 1 pad, but it fell off as I mentioned above, so I had to use the 2nd. Not sure I would use each pad for waxing the car more than once.
- I used
- Because this was a paste and I have a polisher to apply, I used a butter knife to put the wax on the polisher, It worked really well. I would then dab the area with the wax that I wanted to cover with the polisher off, and then wax it on. After starting off with only the bonnet and seeing how fast it was with the dual action polisher, I decided on this split of the car for waxing:
1) Half the hood (bonnet), respective to hood side wheel well/fender, respective to hood side front bumper.
2) both doors on side of the car
3) A/B/C pillars with the back fender on one side
4) full back of car (trunk, bumper, rear window)
5) Repeat 1, 2, and 3 for other side of car
6) Roof (including sunroof) and mirrors, including the actual mirror as well (I don't know how this will work out, but why not try it I though)
RainX
- I thought I ordered this in one big package, but I didn't so I didn't get the change to apply the Rain X today. I'll have to clay bar the windshield at one point once I get it and apply it. I've had it on once before and loved it.
I have the same Scuba Blue and I love it when it is clean and just waxed.
I recommend not using RainX on the windshield. I never liked how it works with the wipers. If you have used it before and you like it great, if not, I recommend that you try it on the passenger side only the first time and see if you like its behavior. In my experience it works very well until you turn on your wipers and allows you to wait longer to use the wipers but if leaves a fine film which scatters headlights after each wipe. I find that good wipers on a clean windshield provide better visibility.
I do use RainX on all of the other glass on the car as it helps the water run off.
I followed a very similar procedure for my last car, albeit once a year, as I used a 3-stage polish/polishing-sealant/sealant that generally lasted 12 months without any difficulty. The PC 7424 is a great little tool, and although I used buffing pads rather than bonnets, your approach would certainly cut down on the storage space and pad-cleaning regimen I had to follow.
Although there was nothing quite like the look of a freshly-sealed car, I wasn't a fan of the 5hr+ process (wash, clay, rinse, dry, mask, polish, polish/seal, seal), so for my current car I decided to try a local semi-automated car wash that has a monthly subscription service. The convenience can't be beat (10-15min weekly) and the cost is reasonable, but while the car looks just as good from 10 feet away, once you get closer the swirl marks and clear coat scratches are noticeable.
With the next car I'm going to try one of those multi-year paint protection coatings and a return to hand-washing to see if that can split the difference in appearance and effort between the two above routes.
If you are going to go through this process, you should consider using R1 Coatings
Based on what I read here, this is trying to claim that an application of a chemical to the paint, once applied once, will not to be done ever again, with no waxing of the car, etc? Seems far fetched IMO, no?
The site says this:
"
This is a professional-grade product and the same formula that is used by national franchises, chains, and professional auto detailers. With proper care and maintenance, this coating will outlive the life of your vehicle and maintain a brilliant shine - permanently! The best part is that with R1 Coatings� Street, all you need to keep your vehicle clean is water and mild soap.
"
I just don't see how a paste or whatever this is, applied to the car once, will get me through 2 yearly winter road trips + all the salt that's already on the roads in Toronto, for the life of my car, for $100. If it was that good, I'd hear more talk about this...
This is what people are having professionally done to their cars but you can now do it yourself. It is a 9H product and bonds with your paint. This is NO gimmick! Do your research and you will never wax your car again. People pay, on average, between $1000 - $1500 to have it done...not hard but does take time and some put more than one coat on at the initial sealant. Some on this site have had it done professionally from what I remember coming across in threads. This is PERFECT for folks like you in cold, snowy areas.
I'm not sold on "lifetime". Most ceramic coatings should absolutely last a few years though. I'll ask around on the detailing forum.
Anyway that scuba blue GLOWS now. Nice job!
Agree, good coatings properly applied should last a few years...and yes, you don't have to "wax" your car after that. A few thoughts and caveats, having applied a few coating to my last cars and my current Allroad done professionally. I'm a huge proponent of coatings - saves tons of time and offers by far more protection than waxes and sealants.
Much depends on prepping your cars finish before the coating. That means clay, swirl remover, etc, etc. Technique with application is essential or you will get high spots. Generally, professional applied coatings will last longer than the do it yourself coatings. Longevity after application with very much depend on routine and careful washing.I would avoid commercial car washes unless absolutely no alternative, and even then try to find a touch-less car wash. Lifetime - nah, a few good years - yep.
 11-12-2017, 12:03 PM