
 07-25-2016, 09:21 AM
Last edit by: IB Advertising
See related guides and technical advice from our community experts:
- Audi Q5 How to Replace Brake Fluid<br>Step by step instructions for do-it-yourself repairs.

DIY Brake Fluid Flush
01-26-2010, 11:25 PM
#11
AudiWorld Super User

One comment � you don't need to pop the screen out of the reservoir to remove the old brake fluid. The large yellow screw to the left of the main opening is the extraction port for evacuating the old fluid out. Also, you should always push the new fluid thru the pressure bleeder so you'll never introduce air into the system. One other point is that you need to mark the original fluid level before doing the flush so that you don't overfill the reservoir (the fluid level is basically based on teh amount of brake pad wear).
 01-28-2010, 12:00 PM
#12
AudiWorld Senior Member
Thread Starter

Good info. I didn't know what the yellow screw was but taking the screen out worked.
As far as putting fluid in the pressure bleeder, there really is no reason why you shouldn't put your fluid in it unless:
1) You wish to push some of the old fluid out first becuase you don't have a turkey baster
2) You don't want to clean the brake fluid out of the bleeder.
As far as putting fluid in the pressure bleeder, there really is no reason why you shouldn't put your fluid in it unless:
1) You wish to push some of the old fluid out first becuase you don't have a turkey baster
2) You don't want to clean the brake fluid out of the bleeder.
 05-17-2015, 10:30 AM
#16
AudiWorld Senior Member
Table - sequence for changing brake fluid / quantities
Sequence of opening bleeder screws Amount of brake fluid to bleed off
Brake caliper
Front left 0.20 ltr.
Front right 0.20 ltr.
Brake caliper
Rear left 0.30 ltr.
Rear right 0.30 ltr.
Clutch slave cylinder 0.15 ltr.
Total quantity (automatic gearbox): approx. 1.00 ltr.
Total quantity (manual gearbox): approx. 1.15 ltr.
05-18-2015, 12:26 AM
#17
AudiWorld Newcomer

Join Date: May 2015
Posts: 2
Likes: 0
Received 0 Likes
on
0 Posts
From ElsaWin
Table - sequence for changing brake fluid / quantities
Sequence of opening bleeder screws Amount of brake fluid to bleed off
Brake caliper
Front left 0.20 ltr.
Front right 0.20 ltr.
Brake caliper
Rear left 0.30 ltr.
Rear right 0.30 ltr.
Clutch slave cylinder 0.15 ltr.
Total quantity (automatic gearbox): approx. 1.00 ltr.
Total quantity (manual gearbox): approx. 1.15 ltr.
Does it matter if it right hand drive or left
05-18-2015, 04:43 AM
#18
AudiWorld Member

From ElsaWin
Table - sequence for changing brake fluid / quantities
Sequence of opening bleeder screws Amount of brake fluid to bleed off
Brake caliper
Front left 0.20 ltr.
Front right 0.20 ltr.
Brake caliper
Rear left 0.30 ltr.
Rear right 0.30 ltr.
Clutch slave cylinder 0.15 ltr.
Total quantity (automatic gearbox): approx. 1.00 ltr.
Total quantity (manual gearbox): approx. 1.15 ltr.
Table - sequence for changing brake fluid / quantities
Sequence of opening bleeder screws Amount of brake fluid to bleed off
Brake caliper
Front left 0.20 ltr.
Front right 0.20 ltr.
Brake caliper
Rear left 0.30 ltr.
Rear right 0.30 ltr.
Clutch slave cylinder 0.15 ltr.
Total quantity (automatic gearbox): approx. 1.00 ltr.
Total quantity (manual gearbox): approx. 1.15 ltr.
Bob
05-04-2016, 12:05 PM
#19

[QUOTE=r1racer;23876378]Brake Fluid Flush- 1 Hour. You will need 1 liter of recommended dot 4 brake fluid. I used ATE Super Blue so I could see when the gold fluid was flushed out. I will use the OEM gold on my next flush. You will also need a Motive pressure bleeder (recommended), about a � inch bleed plastic tube (comes with Motive pressure bleeder), catch container of some sort, light, flathead screwdriver, funnel. rubber gloves, towel and an 11mm wrench
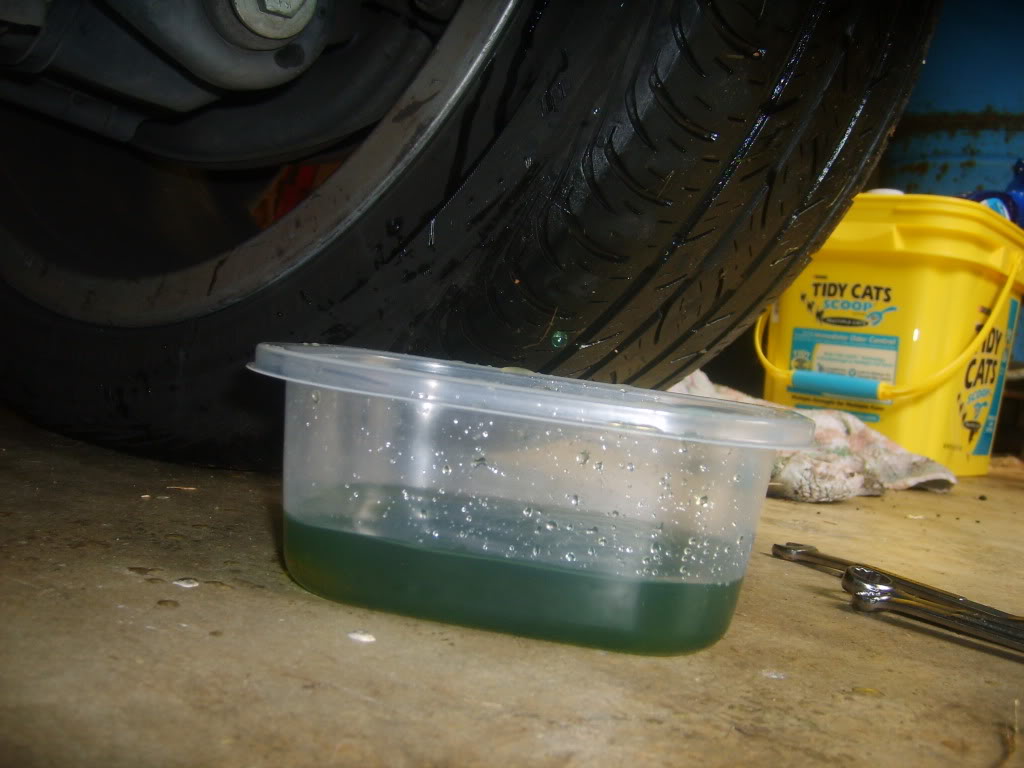
So there are about 4 ways to do a brake fluid flush. These methods include gravity flushing/bleeding, pressure flushing/bleeding, vacuum flushing, brake pedal bleeding. I cover the pressure flush/bleed method as it�s the best overall way to do the flush for the DIY. However, if you don�t want to spend 50 bucks (trust me it�s worth it) on a pressure bleeder, then the gravity method is the safest, but most time consuming method as all you have to do is open all the bleeder nipples and let gravity drain the fluid out. Just make sure the car is jacked up and that the bleed line and catch container are below the caliper. Also make sure that the reservoir NEVER runs empty. The other two methods, using the brake pedal (can damage the seals in the master cylinder if the brake pedal is depressed too far) and vacumming (requires expensive tools) are not recommended for the DIY.
So first things first, DO NOT LET THE BRAKE FLUID RESERVOIR GO EMPTY!!! I cannot stress this enough. If you do, then you have to use vag-com to bleed your ABS pump. I will post instructions at the end in the event this happens. If you don�t have vag-com then your car will have to be towed to your mechanic / dealer as the car will not be drivable. Also, be careful not to get any brake fluid on your paint, clothes, hands�as brake fluid will ruin just about anything it touches.
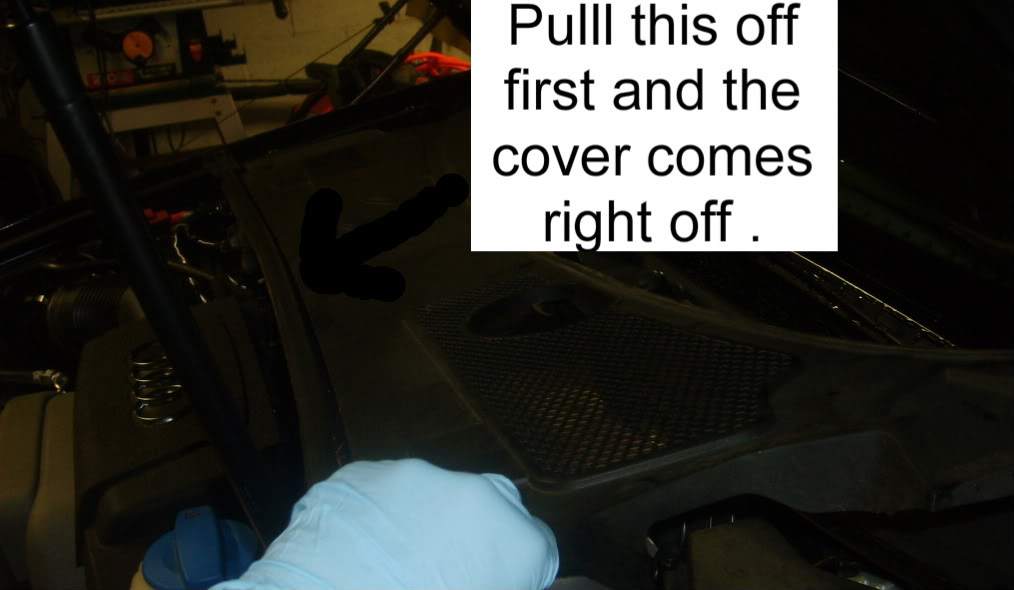
1) Throw on some rubber gloves, pop the hood and remove the black cover over the brake fluid reservoir by pulling off the rubber gasket that is holding it in place and the simply pulling it out.
2) Next, pop the hood, rap some towels around the brake fluid reservoir, takeoff the brake reservoir cap, pop out plastic screen. Again make sure brake fluid doesn't get on your paint.
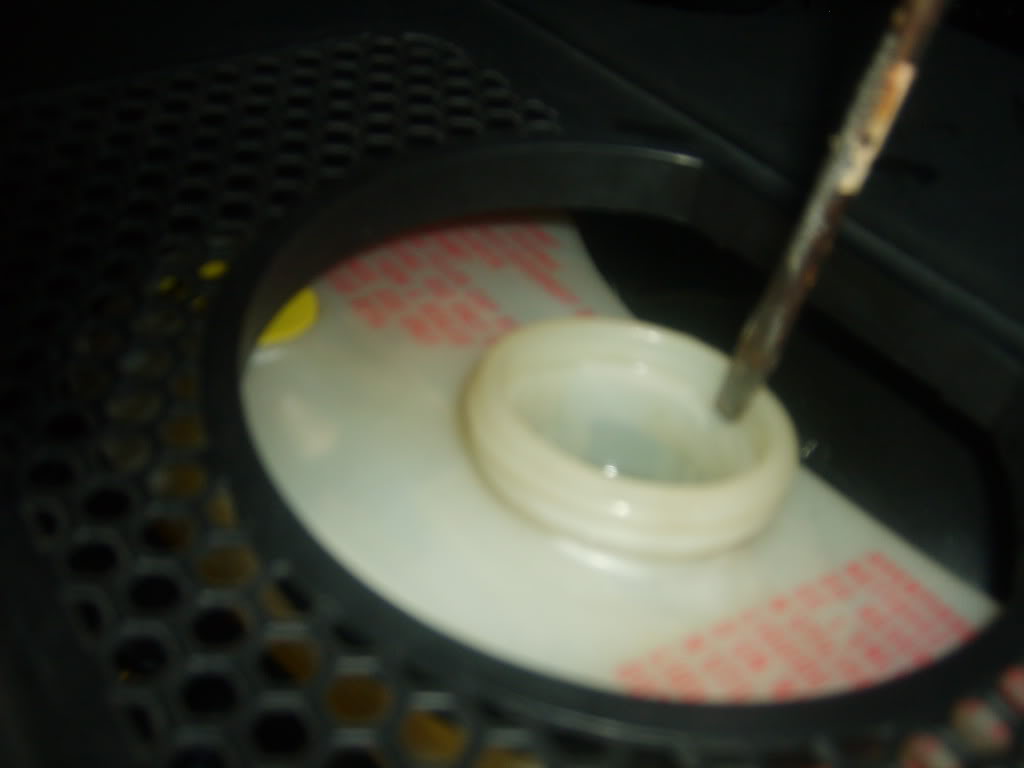
3) Remove most of the brake fluid using a turkey baster, syringe, a baby snot sucker thing (I used one of my daughters, lol). DO NOT SUCK IT ALL OUT, leave some as you do not want air entering the system. Also, obviously DO NOT REUSE the turkey baster in the house. If you don't have one you can just bleed it out. Sucking it out just saves a little time.
4) Fill the reservoir with your new fluid and leave the cap off.
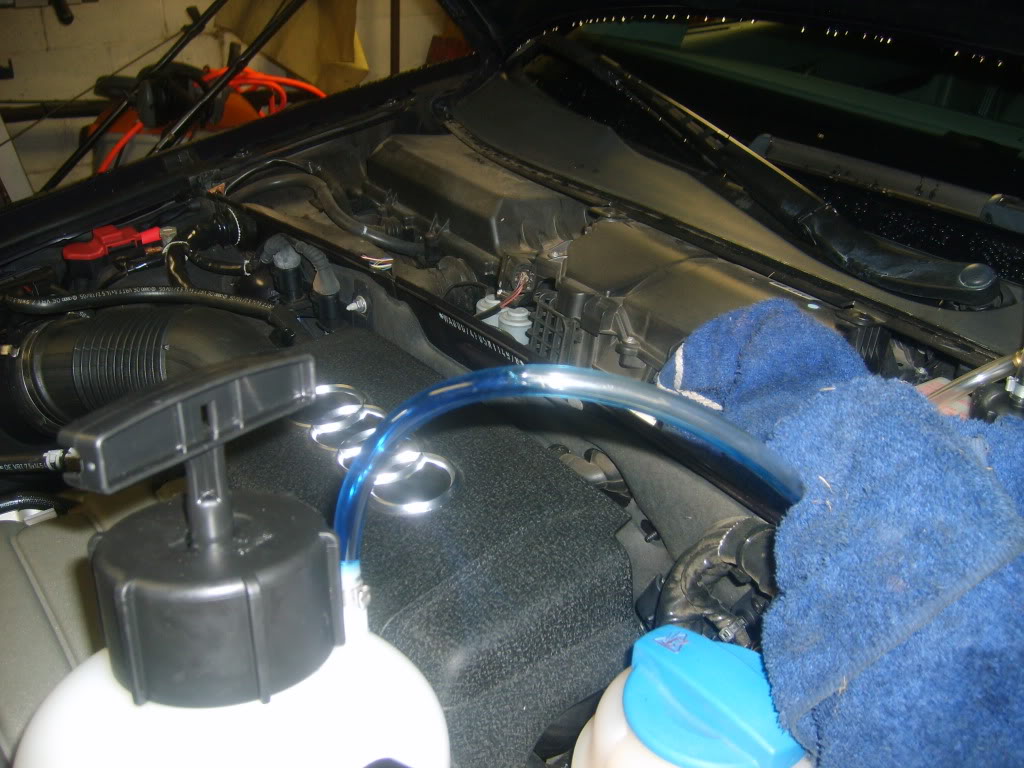
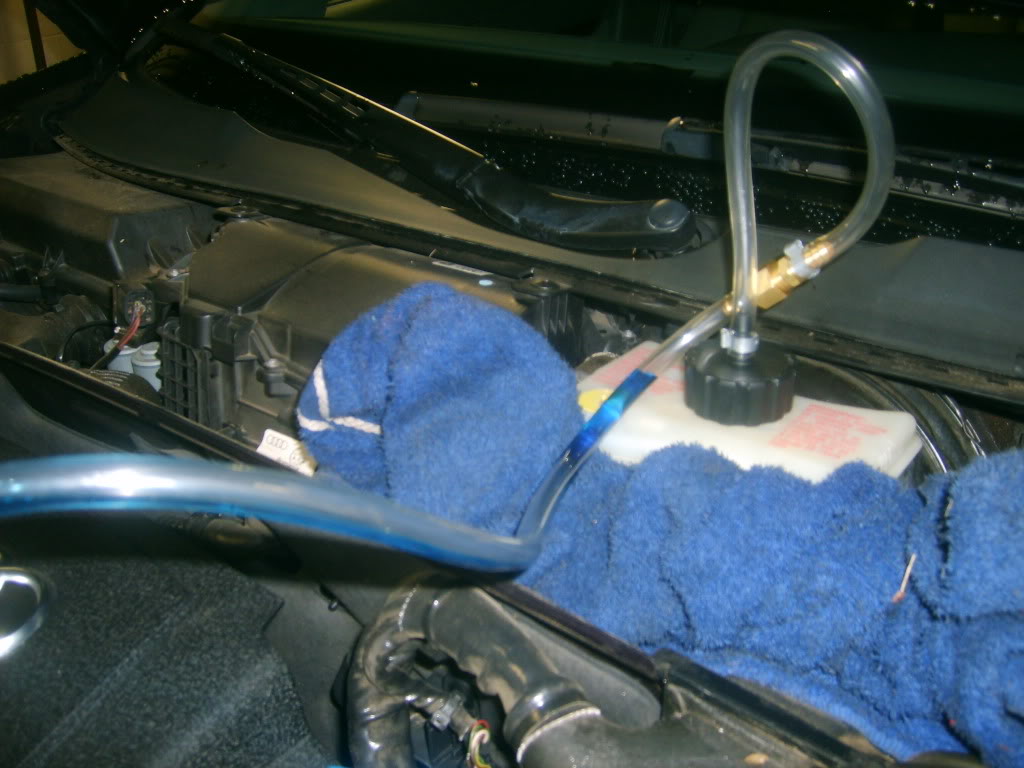
5) Attach your EMPTY pressure bleeder to the reservoir and pressurize to 10-15 psi. Check the pressure for about 30 seconds to make sure the pressure remains constant. If the pressure drops, then there is a leak somewhere. Tighten all connections and make sure the pressure remains constant.
6) Next depressurize the bleeder by removing the cap to the BLEEDER, not the cap connected to the reservoir. ALWAYS depressurize by opening the cap on the bleeder, not on the reservoir!
7) At this point you have the option of filling your pressure bleeder with brake fluid or leaving it empty and just using the pressure to push the fluid through. Placing 1 liter of fluid in the bleeder ensures that the reservoir will not run dry. Connect to the reservoir and pressurize to 10-15psi. Do not go over or you could bust some **** up.
8 ) Jack up the rear of the car if you want more space when getting under the car. I didn't bother to jack up the rear of the car. I just slid underneath the car. I really didn't even have to do this as you can work next to the wheel and reach behind the wheel and access the nipple. That's how I later did the fronts.
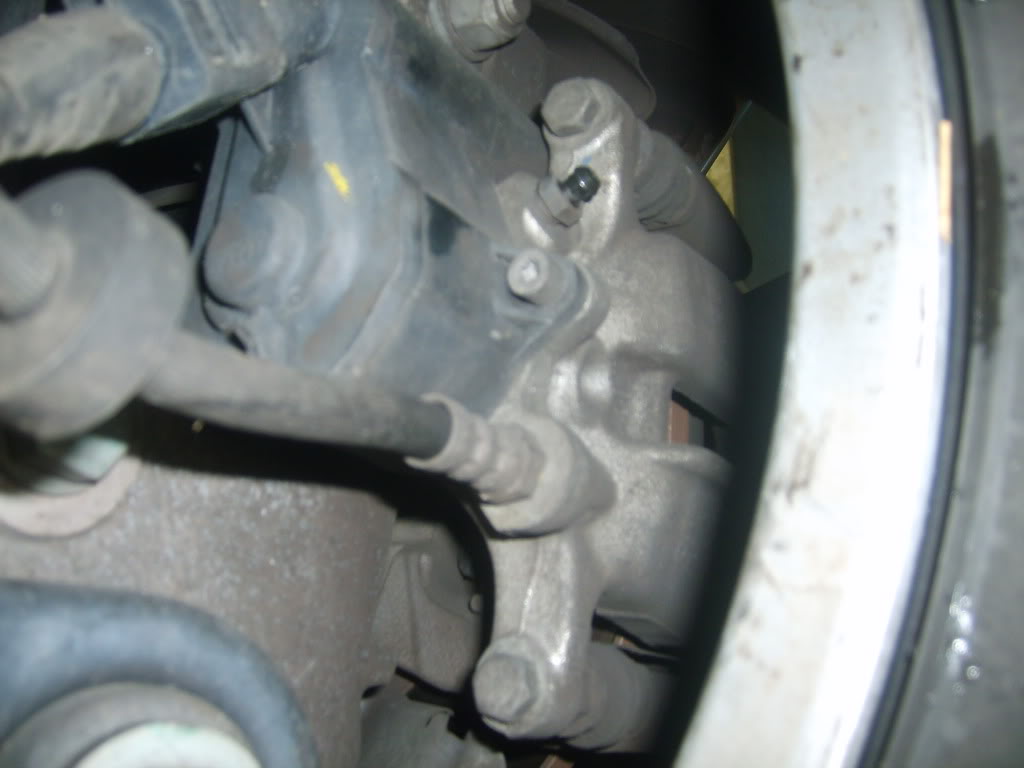
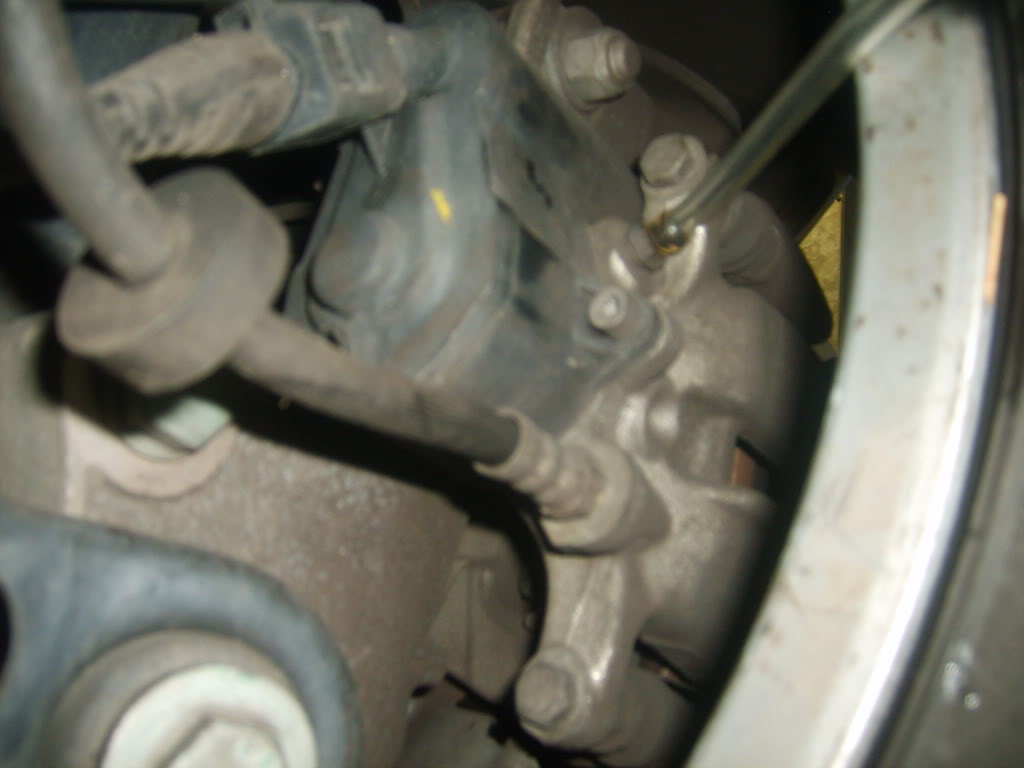
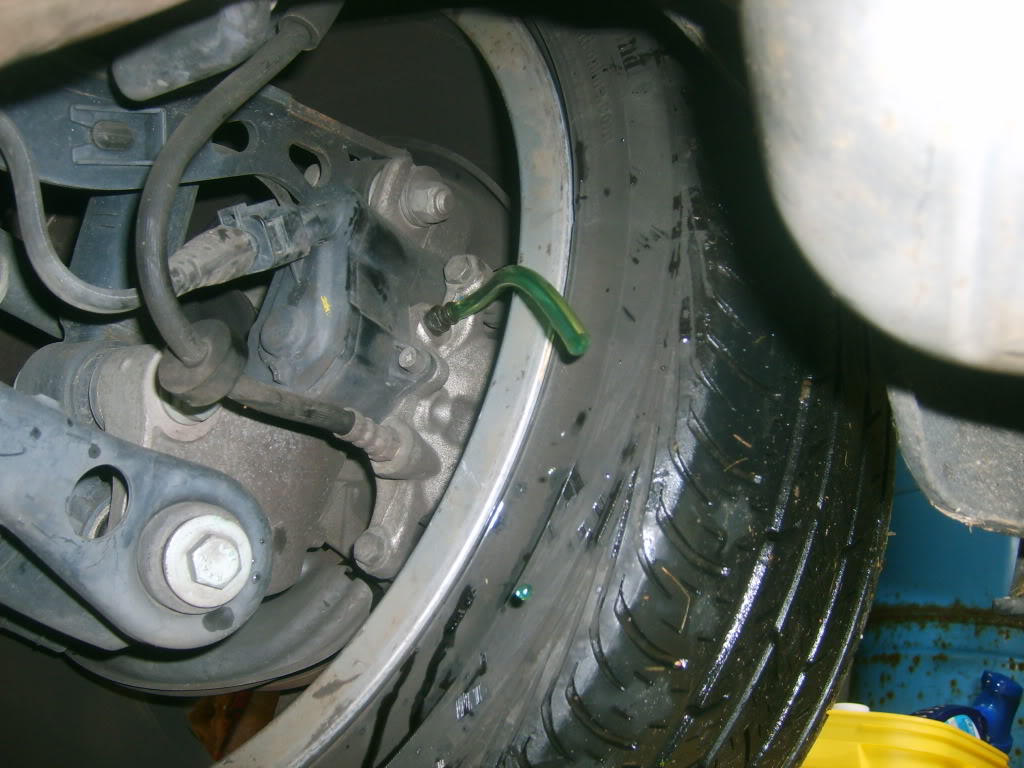
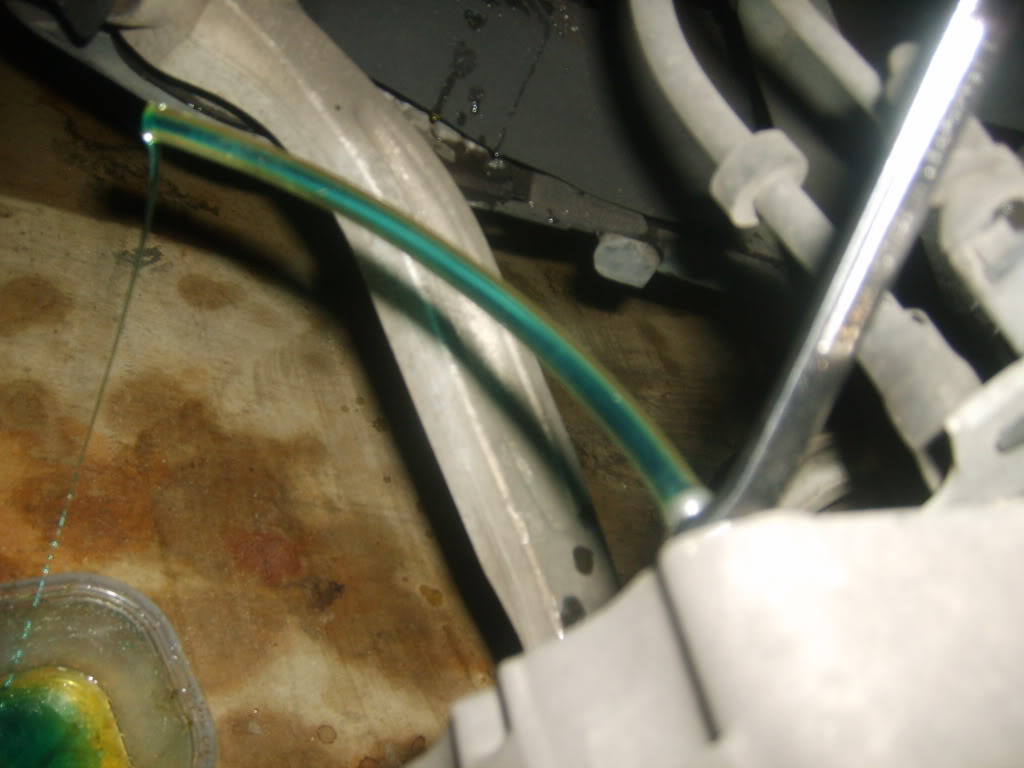
9) If you choose not to fill the bleeder be sure to check and refill your reservoir at least once or twice when doing each of the rear lines. This ensures your reservoir does not run dry. Starting with the right rear of the car (if you are sitting in the driver seat), locate the bleed screw on the caliper.
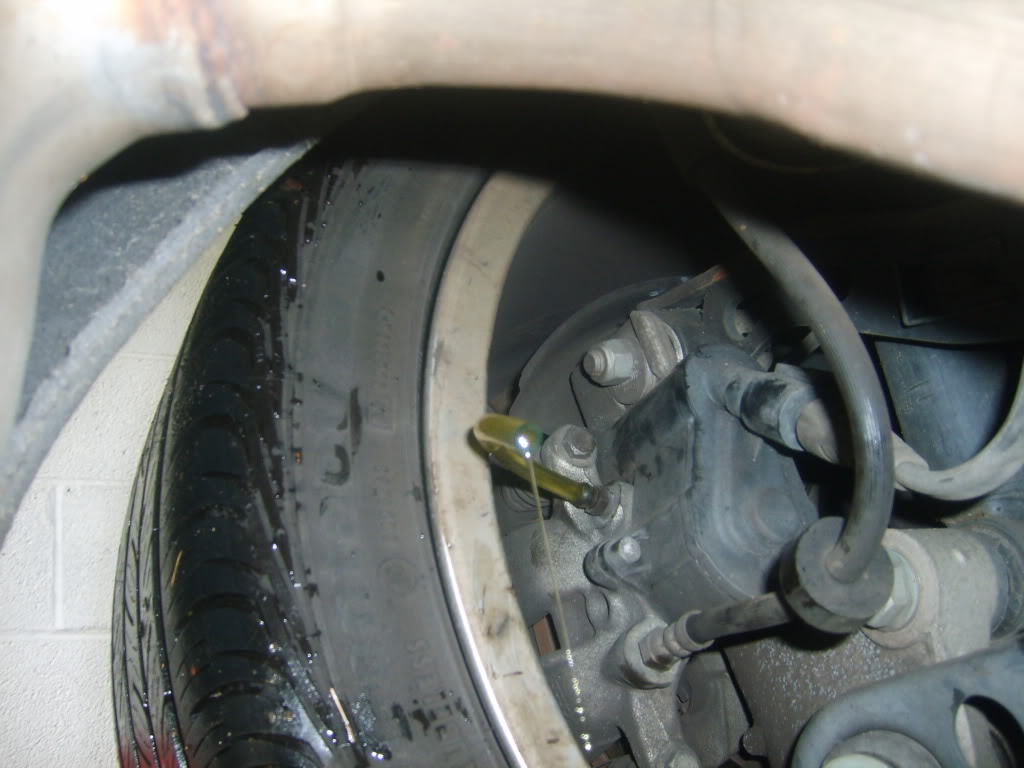
10) Remove the nipple cover. Place your 11mm wrench on the screw. Connect your bleed tube, then loosen the screw. Again, for the rears, if u r opting not to put fluid in the bleeder, allow some of the old fluid to drain out (about 20 to 30 seconds) then close the nipple and add more fluid. If you are putting fluid in the pressure bleeder just allow it to drain until you see the new fluid being flushed. Again I used the blue fluid to see when all of the old fluid was flushed out. Without it, it will be difficult to determine when the new all of the old fluid is flushed out unless you know how much should be drained, Once I saw the blue fluid draining out, I continued to let it drain for an additional ten to twenty seconds to be sure all of the old fluid was out of the line.
11) Repeat the process for the left rear, right front, left front, IN THIS ORDER. Next go to the front and jack up the car. No need to take the wheels off but you do have to jack the car. It gives you more room in the wheel well to just reach around the wheel and pull the nipples off, attach my wrench and tube and loosen the screw. The front will flush quickly so if you are not using fluid in the bleeder you don't have to worry about the reservoir running out of fluid. Just make sure you add fluid after each line.
12) Now that all of the fluid has been flushed you need to check the level in the reservoir and either add or remove fluid so that it falls in between the min / max levels.
14) Check brake pedal pressure (should feel the same or better), check for leaks and dispose of unused / old brake fluid properly,
15) Vaccum out any leaves before you put the black cover back on, clean up, test drive and you are done!!!
Instructions from ross-tech for bleeding your ABS pump if you accidentally allow the reservoir to go dry:
This procedure details how to bleed the ABS pump when replacing brake fluid. This procedure is NOT necessary unless your ABS pump has gone completely dry. For normal brake work including fluid replacement, hose replacement, pad replacement, etc. this procedure is NOT necessary
There are certain test conditions that must be met before doing this procedure:
Vehicle must on a lift or safe jack stands with no wheels touching the ground
Ignition should be in the "On" position
Procedure for Bleeding the ABS Brake Pump on VW Passat and Audi A4/S4, A6/S6, and A8/S8:
[Select] [03 - ABS Brakes] [Basic Settings - 04] Group 002 [Go!]
This will trigger the ABS pump to turn on for about 10 seconds. You should hear the fairly loud pump clicking during this time.
Click the [Done, Go Back] button and you're all set[/Qfollow.
Good evening,
My problem started after replacing all brake pads, and bleeding them in "pedal pushing" procedure as usual.
At first the Red flasher and alarm warning came on but the brakes worked fine. After 10 minutes of driving with the warnings, the brake pedal hit the floor.
Okay I went on another bleeding process on all wheels and nothing has changed. The nipples bleed fluid very well but the brake pedal keeps hitting the floor and hardly stop unless u apply 2 or 3 pumps.
Please help me with some advice specifically on this matter. I'll gladly follow.
My car is the 1998 Audi A6 2.8 Quattro C5 series. Its old but still preferred to my 09 Toyota Camry.
Pls help me
So there are about 4 ways to do a brake fluid flush. These methods include gravity flushing/bleeding, pressure flushing/bleeding, vacuum flushing, brake pedal bleeding. I cover the pressure flush/bleed method as it�s the best overall way to do the flush for the DIY. However, if you don�t want to spend 50 bucks (trust me it�s worth it) on a pressure bleeder, then the gravity method is the safest, but most time consuming method as all you have to do is open all the bleeder nipples and let gravity drain the fluid out. Just make sure the car is jacked up and that the bleed line and catch container are below the caliper. Also make sure that the reservoir NEVER runs empty. The other two methods, using the brake pedal (can damage the seals in the master cylinder if the brake pedal is depressed too far) and vacumming (requires expensive tools) are not recommended for the DIY.
So first things first, DO NOT LET THE BRAKE FLUID RESERVOIR GO EMPTY!!! I cannot stress this enough. If you do, then you have to use vag-com to bleed your ABS pump. I will post instructions at the end in the event this happens. If you don�t have vag-com then your car will have to be towed to your mechanic / dealer as the car will not be drivable. Also, be careful not to get any brake fluid on your paint, clothes, hands�as brake fluid will ruin just about anything it touches.
1) Throw on some rubber gloves, pop the hood and remove the black cover over the brake fluid reservoir by pulling off the rubber gasket that is holding it in place and the simply pulling it out.
2) Next, pop the hood, rap some towels around the brake fluid reservoir, takeoff the brake reservoir cap, pop out plastic screen. Again make sure brake fluid doesn't get on your paint.
3) Remove most of the brake fluid using a turkey baster, syringe, a baby snot sucker thing (I used one of my daughters, lol). DO NOT SUCK IT ALL OUT, leave some as you do not want air entering the system. Also, obviously DO NOT REUSE the turkey baster in the house. If you don't have one you can just bleed it out. Sucking it out just saves a little time.
4) Fill the reservoir with your new fluid and leave the cap off.
5) Attach your EMPTY pressure bleeder to the reservoir and pressurize to 10-15 psi. Check the pressure for about 30 seconds to make sure the pressure remains constant. If the pressure drops, then there is a leak somewhere. Tighten all connections and make sure the pressure remains constant.
6) Next depressurize the bleeder by removing the cap to the BLEEDER, not the cap connected to the reservoir. ALWAYS depressurize by opening the cap on the bleeder, not on the reservoir!
7) At this point you have the option of filling your pressure bleeder with brake fluid or leaving it empty and just using the pressure to push the fluid through. Placing 1 liter of fluid in the bleeder ensures that the reservoir will not run dry. Connect to the reservoir and pressurize to 10-15psi. Do not go over or you could bust some **** up.
8 ) Jack up the rear of the car if you want more space when getting under the car. I didn't bother to jack up the rear of the car. I just slid underneath the car. I really didn't even have to do this as you can work next to the wheel and reach behind the wheel and access the nipple. That's how I later did the fronts.
9) If you choose not to fill the bleeder be sure to check and refill your reservoir at least once or twice when doing each of the rear lines. This ensures your reservoir does not run dry. Starting with the right rear of the car (if you are sitting in the driver seat), locate the bleed screw on the caliper.
10) Remove the nipple cover. Place your 11mm wrench on the screw. Connect your bleed tube, then loosen the screw. Again, for the rears, if u r opting not to put fluid in the bleeder, allow some of the old fluid to drain out (about 20 to 30 seconds) then close the nipple and add more fluid. If you are putting fluid in the pressure bleeder just allow it to drain until you see the new fluid being flushed. Again I used the blue fluid to see when all of the old fluid was flushed out. Without it, it will be difficult to determine when the new all of the old fluid is flushed out unless you know how much should be drained, Once I saw the blue fluid draining out, I continued to let it drain for an additional ten to twenty seconds to be sure all of the old fluid was out of the line.
11) Repeat the process for the left rear, right front, left front, IN THIS ORDER. Next go to the front and jack up the car. No need to take the wheels off but you do have to jack the car. It gives you more room in the wheel well to just reach around the wheel and pull the nipples off, attach my wrench and tube and loosen the screw. The front will flush quickly so if you are not using fluid in the bleeder you don't have to worry about the reservoir running out of fluid. Just make sure you add fluid after each line.
12) Now that all of the fluid has been flushed you need to check the level in the reservoir and either add or remove fluid so that it falls in between the min / max levels.
14) Check brake pedal pressure (should feel the same or better), check for leaks and dispose of unused / old brake fluid properly,
15) Vaccum out any leaves before you put the black cover back on, clean up, test drive and you are done!!!
Instructions from ross-tech for bleeding your ABS pump if you accidentally allow the reservoir to go dry:
This procedure details how to bleed the ABS pump when replacing brake fluid. This procedure is NOT necessary unless your ABS pump has gone completely dry. For normal brake work including fluid replacement, hose replacement, pad replacement, etc. this procedure is NOT necessary
There are certain test conditions that must be met before doing this procedure:
Vehicle must on a lift or safe jack stands with no wheels touching the ground
Ignition should be in the "On" position
Procedure for Bleeding the ABS Brake Pump on VW Passat and Audi A4/S4, A6/S6, and A8/S8:
[Select] [03 - ABS Brakes] [Basic Settings - 04] Group 002 [Go!]
This will trigger the ABS pump to turn on for about 10 seconds. You should hear the fairly loud pump clicking during this time.
Click the [Done, Go Back] button and you're all set[/Qfollow.
Good evening,
My problem started after replacing all brake pads, and bleeding them in "pedal pushing" procedure as usual.
At first the Red flasher and alarm warning came on but the brakes worked fine. After 10 minutes of driving with the warnings, the brake pedal hit the floor.
Okay I went on another bleeding process on all wheels and nothing has changed. The nipples bleed fluid very well but the brake pedal keeps hitting the floor and hardly stop unless u apply 2 or 3 pumps.
Please help me with some advice specifically on this matter. I'll gladly follow.
My car is the 1998 Audi A6 2.8 Quattro C5 series. Its old but still preferred to my 09 Toyota Camry.
Pls help me
05-04-2016, 02:45 PM
#20
AudiWorld Member
Join Date: Jan 2014
Location: Coastal Florida
Posts: 212
Likes: 0
Received 0 Likes
on
0 Posts
From ElsaWin
Table - sequence for changing brake fluid / quantities
Sequence of opening bleeder screws Amount of brake fluid to bleed off
Brake caliper
Front left 0.20 ltr.
Front right 0.20 ltr.
Brake caliper
Rear left 0.30 ltr.
Rear right 0.30 ltr.
Clutch slave cylinder 0.15 ltr.
Total quantity (automatic gearbox): approx. 1.00 ltr.
Total quantity (manual gearbox): approx. 1.15 ltr.
Table - sequence for changing brake fluid / quantities
Sequence of opening bleeder screws Amount of brake fluid to bleed off
Brake caliper
Front left 0.20 ltr.
Front right 0.20 ltr.
Brake caliper
Rear left 0.30 ltr.
Rear right 0.30 ltr.
Clutch slave cylinder 0.15 ltr.
Total quantity (automatic gearbox): approx. 1.00 ltr.
Total quantity (manual gearbox): approx. 1.15 ltr.
ELSAwin clearly states to start with the RF for RHD.
I know this is counterintuitive for a lot of us oldies who grew up on start with the furthest point from the master cyl.
I honestly haven't taken the time to trace down the hydraulic path to convince myself that Audi is having us do it this way (furthest point from the distribution point, which may be the ABS pump servo block, not the master), but clearly they want the fronts bled first, then the rear.
on my Infiniti's (LHD) I bleed LEFT rear/right rear/left front/right front, because the ABS manifold is on the passenger side firewall.....
realmexi- don't have much for you--your car is a C5--might have better luck in that forum. did you let the master go dry?