When you click on links to various merchants on this site and make a purchase, this can result in this site earning a commission. Affiliate programs and affiliations include, but are not limited to, the eBay Partner Network.
ECS poly snub mount pics and airbag light/code question
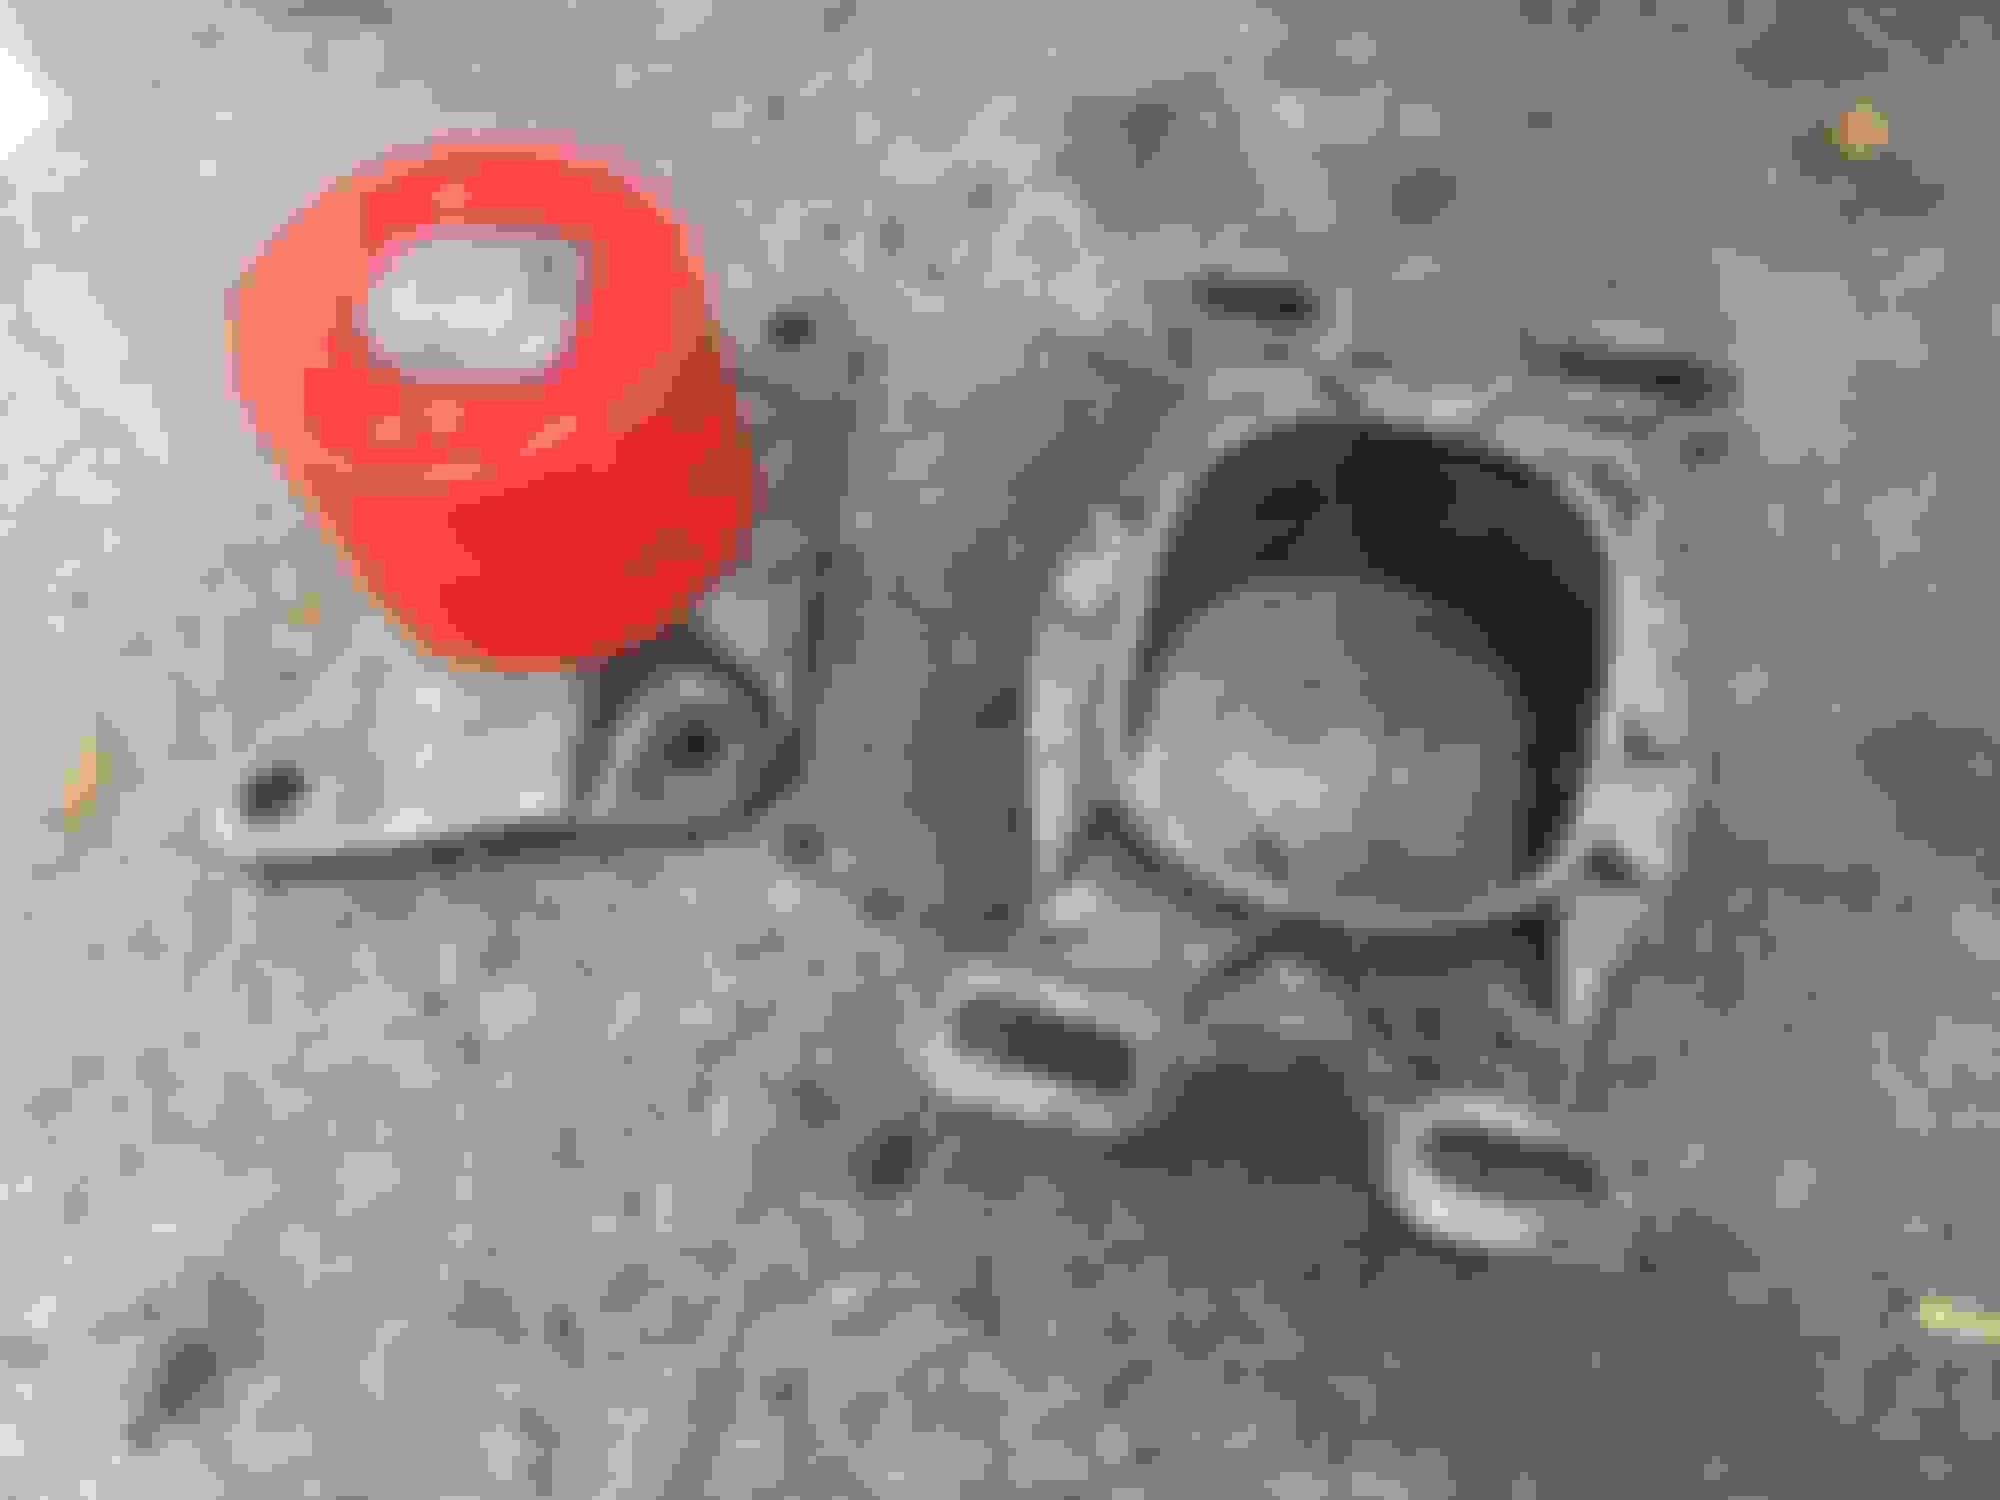
...finally got around to installing this last week...my stock one was worn to nothing. Really amazing what a difference a $40 part can make. It was tricky to get it in there, but when I finally figured it out, no force was required. Since the post on the motor side was sitting slightly below center of the cup inside the crossmember before the install, motor had to be raised slightly for bolts to line up. I just used a floor jack with a piece of wood under the oil pan.
I also had the airbag light come on recently. It will go off when car is started, but comes right back on as soon as "passenger air bag off" light on the dash comes on. Vag-com scan says "driver front crash sensor defective"....I called a dismantler, and they have them, but I need a P/N#- does anyone know this? They said if I called Dealer, they would give me a newer superseding P/N...and they can't reference the original from that. Also, where is this part located? A picture is worth a thousand words!
While I cannot help you with the sensor part #, I am most appreciative of your snub mount pictures. I'll be changing mine this summer.
What was the "secret" to removing the original one?
...finally got around to installing this last week...my stock one was worn to nothing. Really amazing what a difference a $40 part can make. It was tricky to get it in there, but when I finally figured it out, no force was required. Since the post on the motor side was sitting slightly below center of the cup inside the crossmember before the install, motor had to be raised slightly for bolts to line up. I just used a floor jack with a piece of wood under the oil pan.
I also had the airbag light come on recently. It will go off when car is started, but comes right back on as soon as "passenger air bag off" light on the dash comes on. Vag-com scan says "driver front crash sensor defective"....I called a dismantler, and they have them, but I need a P/N#- does anyone know this? They said if I called Dealer, they would give me a newer superseding P/N...and they can't reference the original from that. Also, where is this part located? A picture is worth a thousand words!
All you need is a short hex 8mm socket, a short 13mm socket and the snub mount: part# 8E0199339
Place a square piece of would onto a pump jack, preferably a 2x6, and jack up the engine right underneath the oil pan.
Get the engine up enough so that the mount is right in the middle of the other piece.
Undo all the bolts, removing portion mounted to the engine first, then loosen the core support portion.
Remove old one mount, slip on new one. Then re-mount the core support portion so that it can slide up and down. Re-mount engine portion.
Tighten everything back(not too much on the engine side as it IS aluminum that it's mounted to) and wala! 30 minutes max, even if it's you first time.
Raj,
I'm about to get my drivers side exhaust flex pipe replaced.
I need a new Snub mount too. I was going to wait until I did my summer maintenance routine to replace that Snub mount.
Then, I thought about it. If, I do the flex pipe now, & the Snub mount later, I'd be stretching the flex pipe to accommodate the position of the new Snub mount.
so, I'll do the Snub mount immediately. Then, get my flex pipe replaced.
I'll bet that the looseness of my present Snub mount aggravated the flex pipe & hastened it's faillure...
Something to consider...
I'm seeing a round bushing and a rounded rectangle outer receiver that the bushing is in. Anyone know why it wouldn't be a tighter fit? Am I missing something?
I'm seeing a round bushing and a rounded rectangle outer receiver that the bushing is in. Anyone know why it wouldn't be a tighter fit? Am I missing something?
Apparently, the snub mount is intended to limit vertical movement of the engine, not lateral movement. The other mounts must be the one's to deal with those forces,
I installed the ecs snub mount this past week, while I was doing an oil change & other maintenance. It really does take less than a half hours work. The hardest part is to get the new bushing slipped onto it's mount. I squeezed it on using my bench vice. It, also, took me a few minutes to figure out how to slip the mount & bracket back into their original positions. That was a bit of a "rubits cube" to figure out, but only took a couple of tries.
So, I do have to encourage that it's an easy upgrade!
 03-16-2017, 08:47 PM