When you click on links to various merchants on this site and make a purchase, this can result in this site earning a commission. Affiliate programs and affiliations include, but are not limited to, the eBay Partner Network.
The kit came in about 3 days after I placed my order and was very well packaged and furthermore, clearly labelled with the bulbs for each section.
I decided to try the sun visors first, I used my own trim tools, which I had from a recent install of a RVC in my dad’s Q5. But another really handy tool was a small flat head screw driver.
The visor light popped out with ease and was VERY easy to simply swap the bulb in, the LED comes with a heat sink on one side and the SMDs on the other, so it’s common sense how it’ll fit in and as you can see by the pics…WHAT A DIFFERENCE!
Before
After dent,
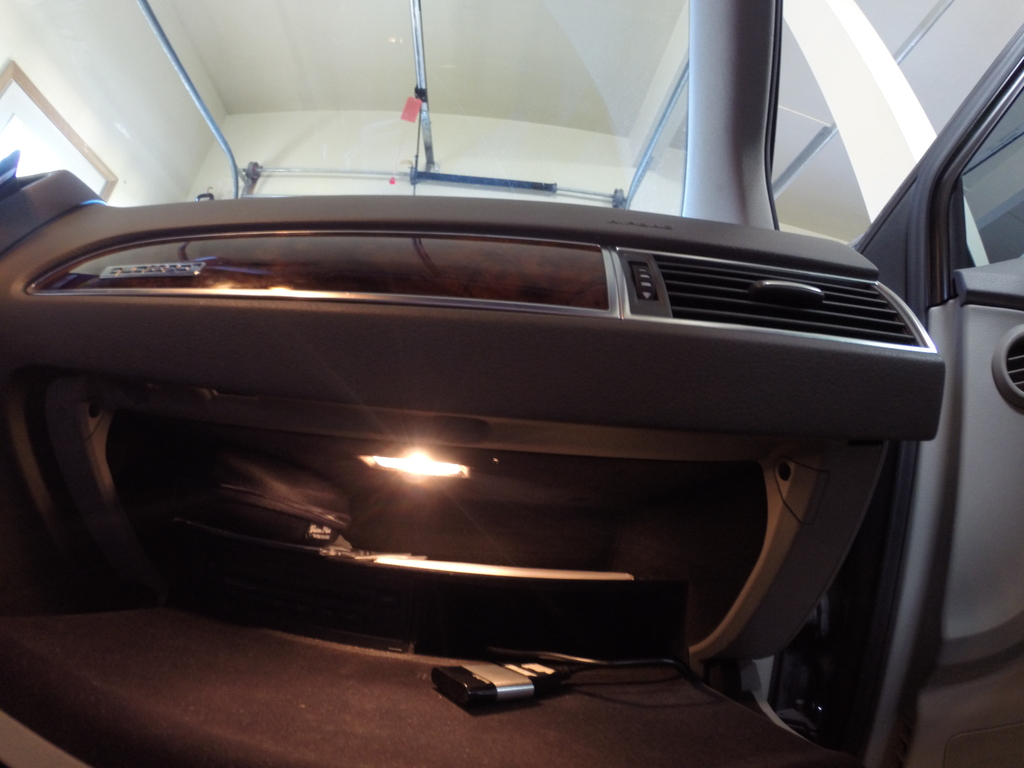
Feeling confident, with how easy this was the glove box was next…and that came out just as easy as the previous lights.
Before
This light pops out from the right and just use your small screw driver to press down on the connector which releases the fixture from the cabling.
And after replacing the bulb…I can actually SEE everything in my glove box. Prior to that the light in there served little to no purpose, but what a difference the LED made.
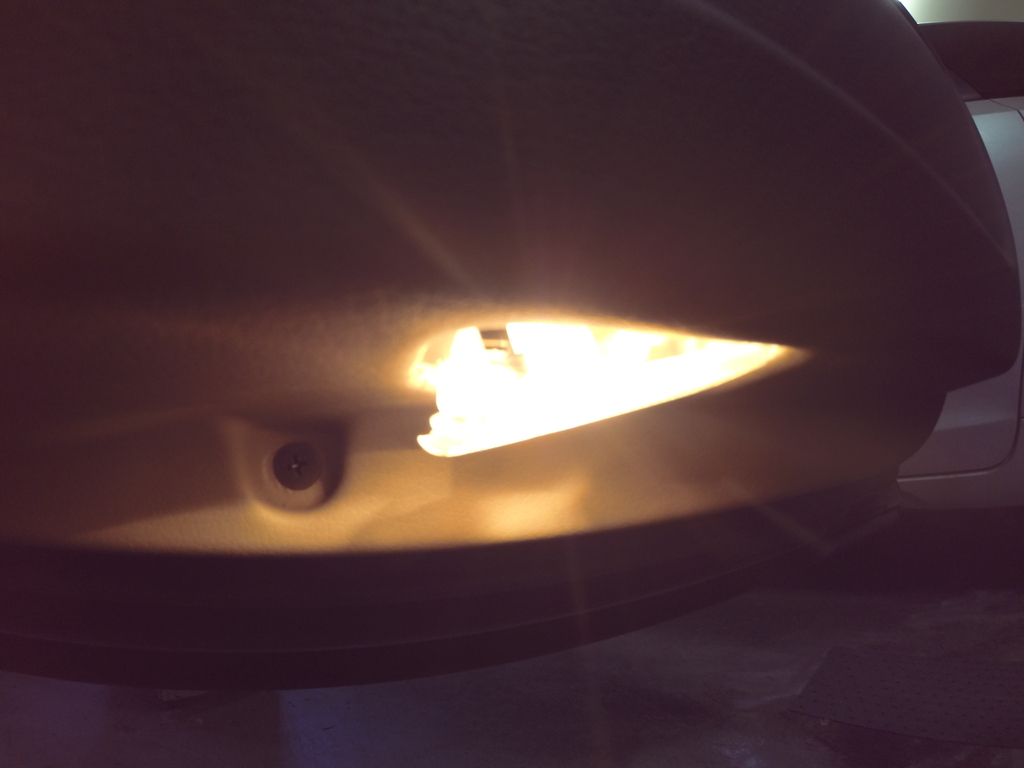
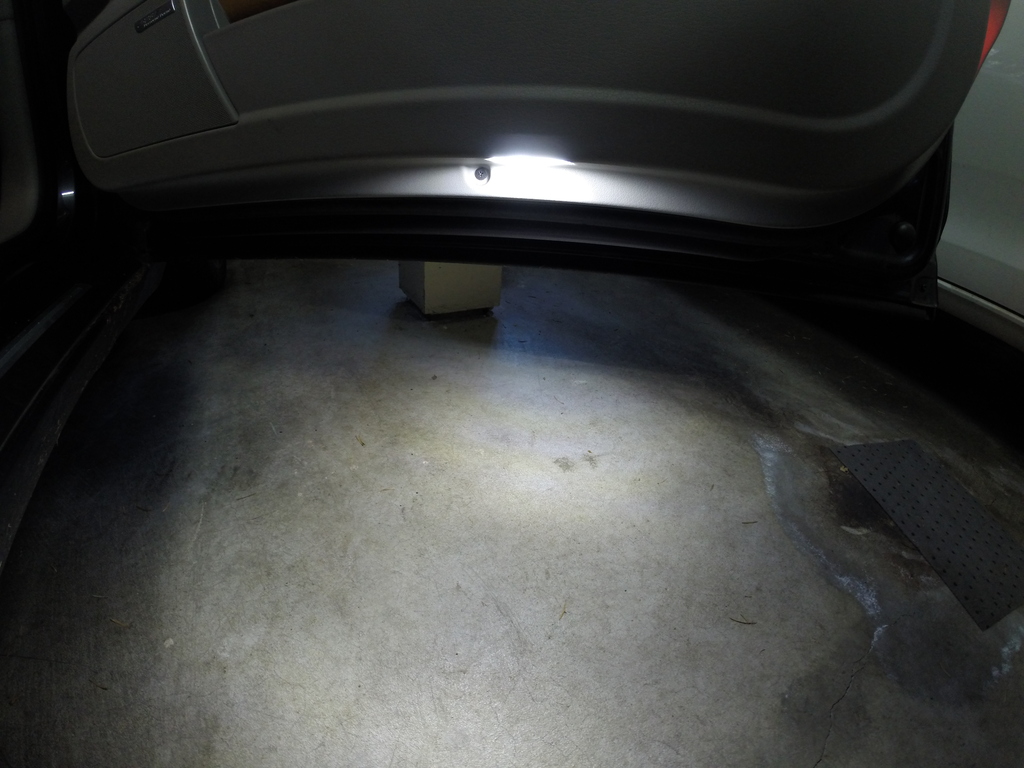
I was on a roll now and up next PUDDLE LIGHTS…those little lights that turn on when you open the doors of the car and illuminate the floor. They’ve been ok in the past, but I never thought much of them.
The front 2 doors went in the same way. Whereby you pry the fixture out and then release, using a small screw driver from the wiring and change the bulb with the fixture out.
Before
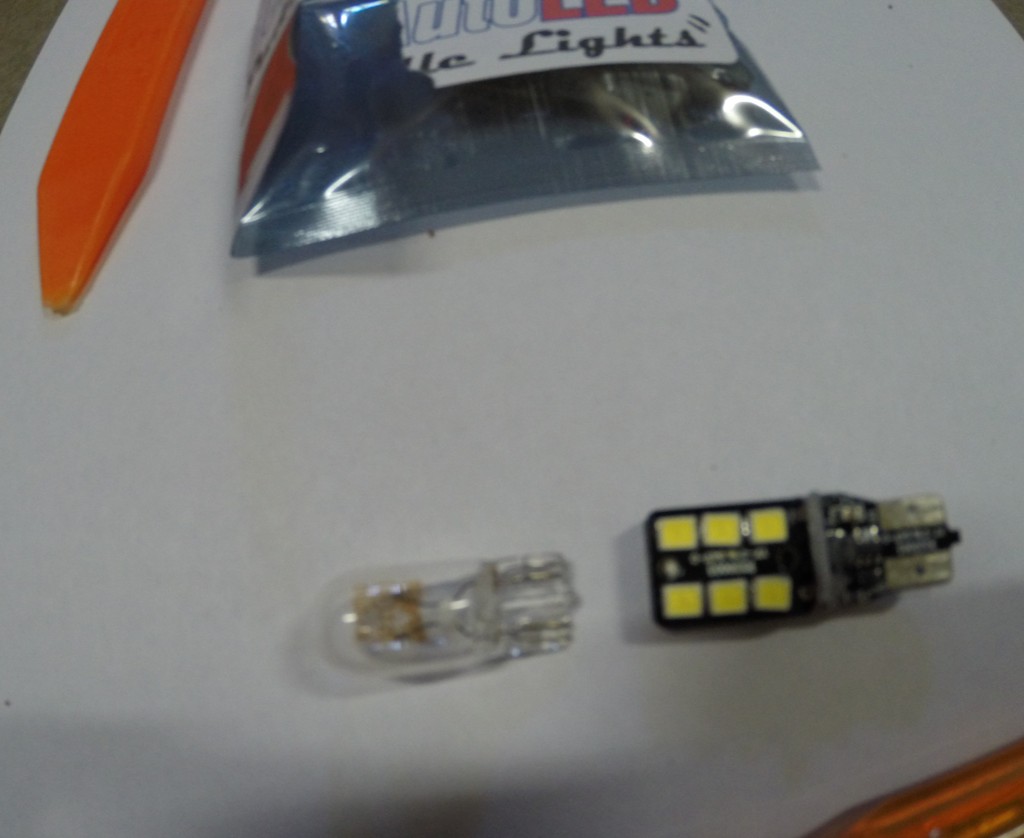
The difference in the bulbs
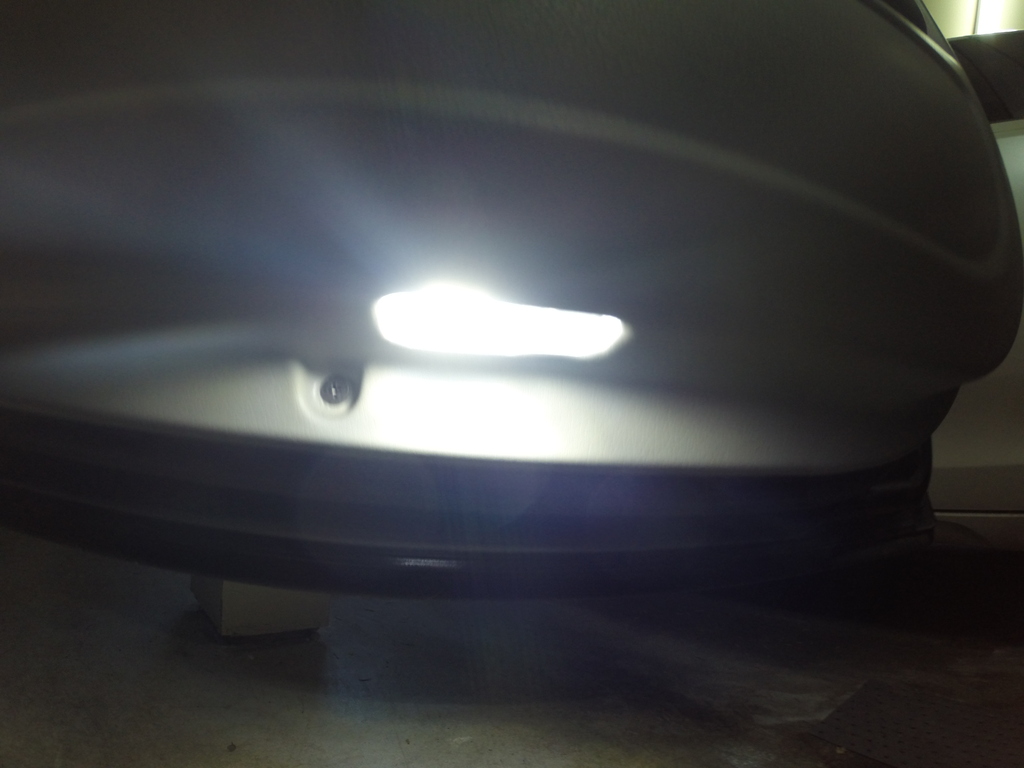
After
I couldn’t believe the difference the lights made…it was as if the clouds had parted and there was LIGHT. I could see everything on the floor!
BTW, I must add at the point that the quality of the products being offered was far better than what I’ve personally used in the past, when it comes to LED lights. They not only were built better, but also didn’t feel as flimsy as the usual items you see on eBay.
I decided to move onto the passenger puddle lights next, but as soon as I pryed the fixture out I noticed that the wiring behind the fixture was so short it prevented the fixture from being removed from the door panel. I realized this AFTER I forced one of the fixtures out and realized that I can’t get it back into the wiring So, I’m planning on removing the door panel in the next week and addressing it that way. If the Audi engineers had simply added another 2” of wire I would have been home-free, but alas it is what it is.
Up next, the REAR DOME fixture.
It came out easy enough and requires you to disconnect the wiring and once it’s out it gets “interesting”.
You need to push the silver holders out, I used my trust small flat head screw driver, and when they pop-out the bulb being held in place will also be released.
You then insert the replacement LED and push the silver holder back in. Be SURE TO SEAT THE BULB CORRECTLY, since it need to wedged into the quasi-socket for it.
And here was the difference between the lights.
Before
After
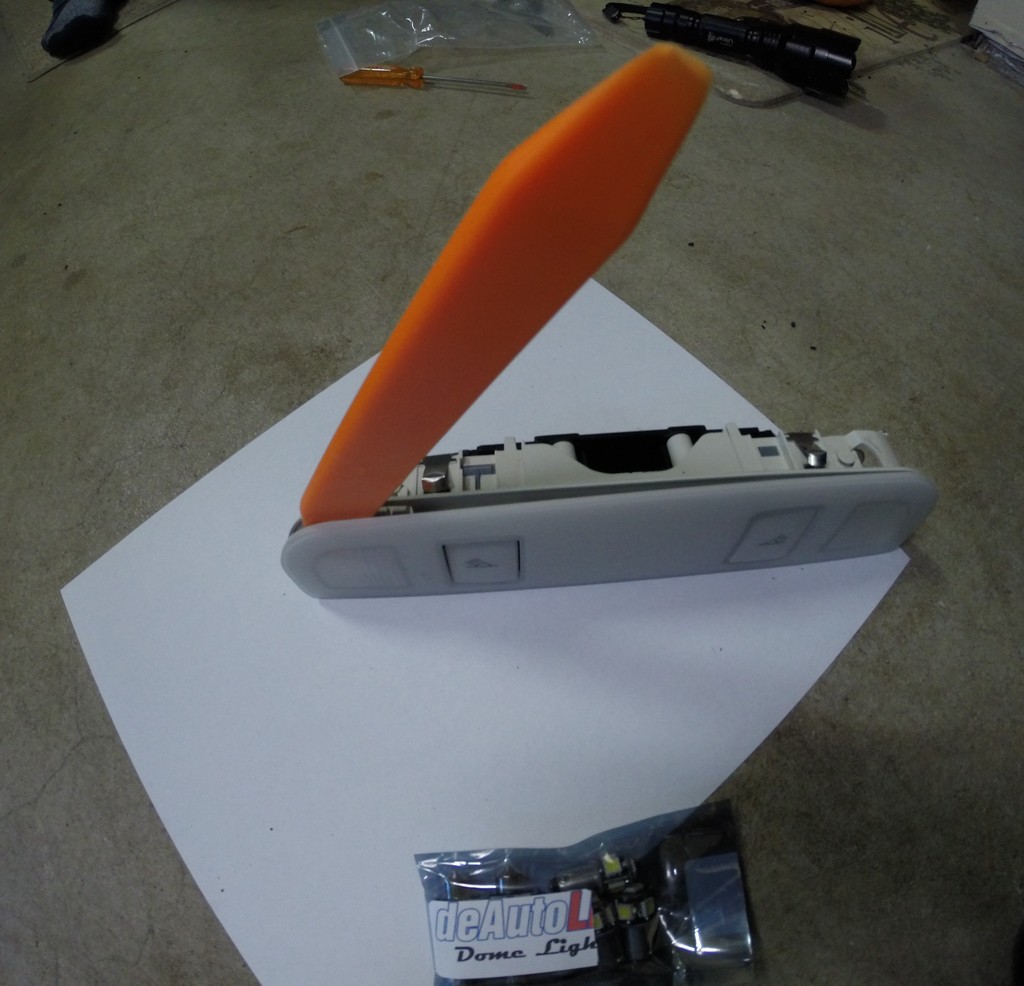
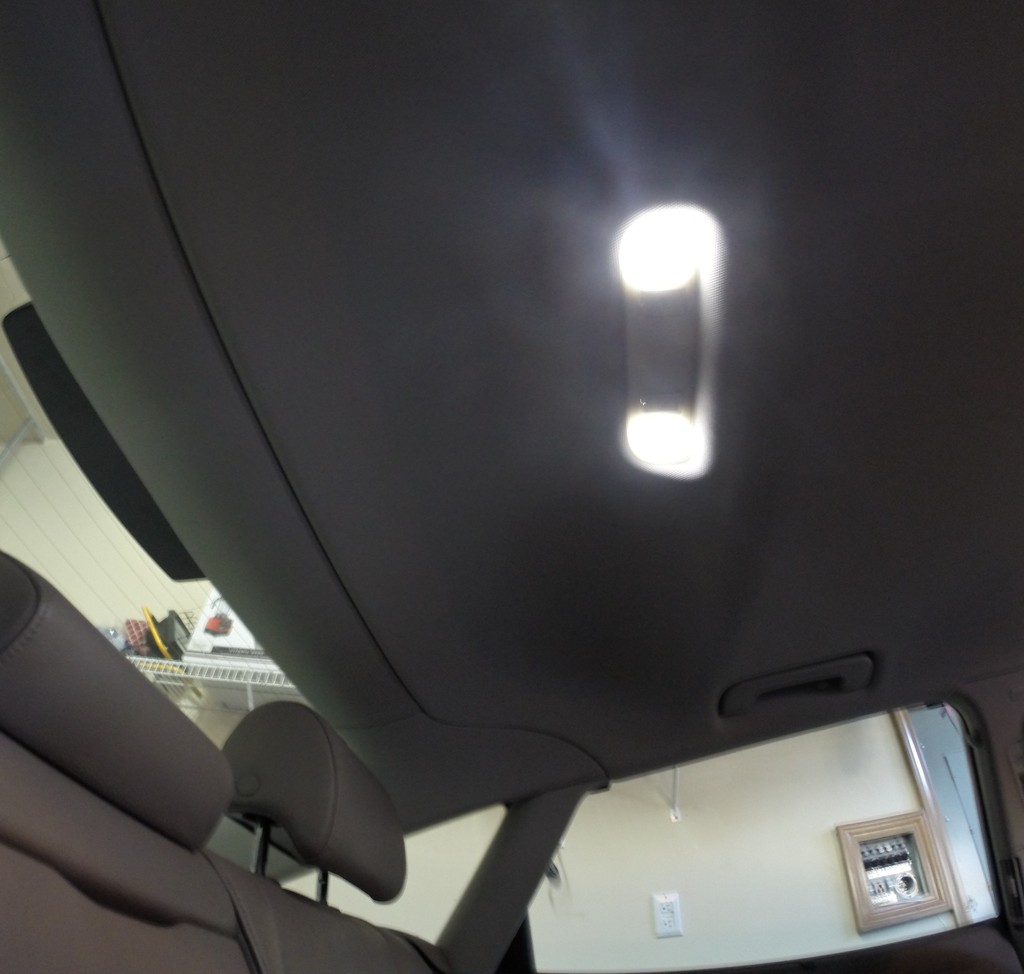
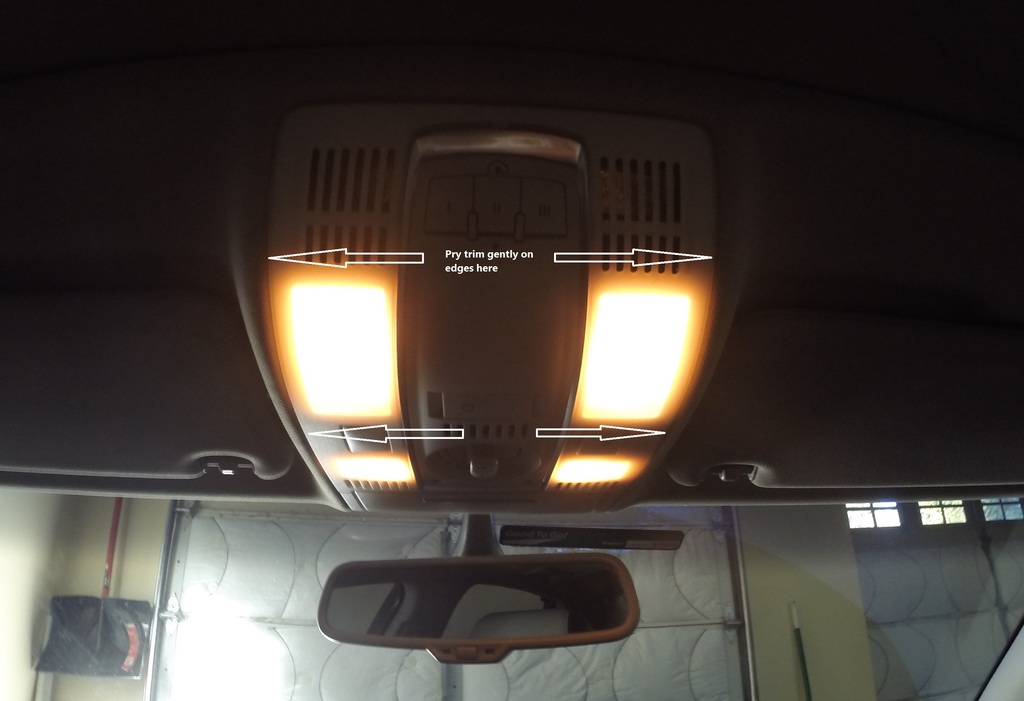
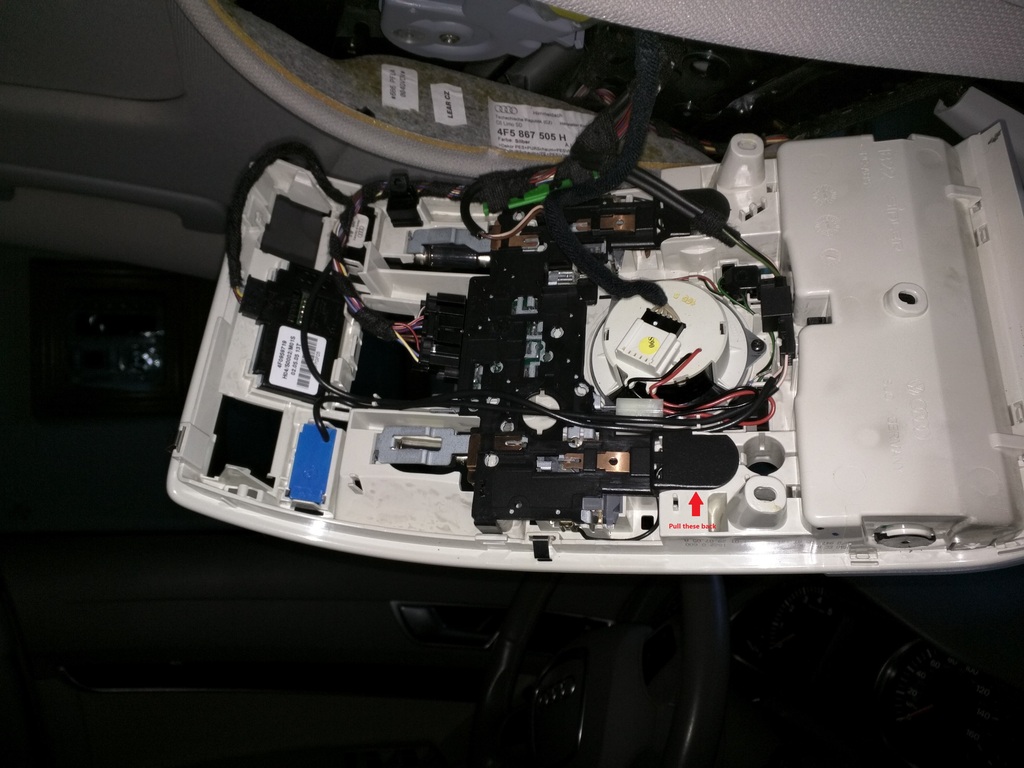
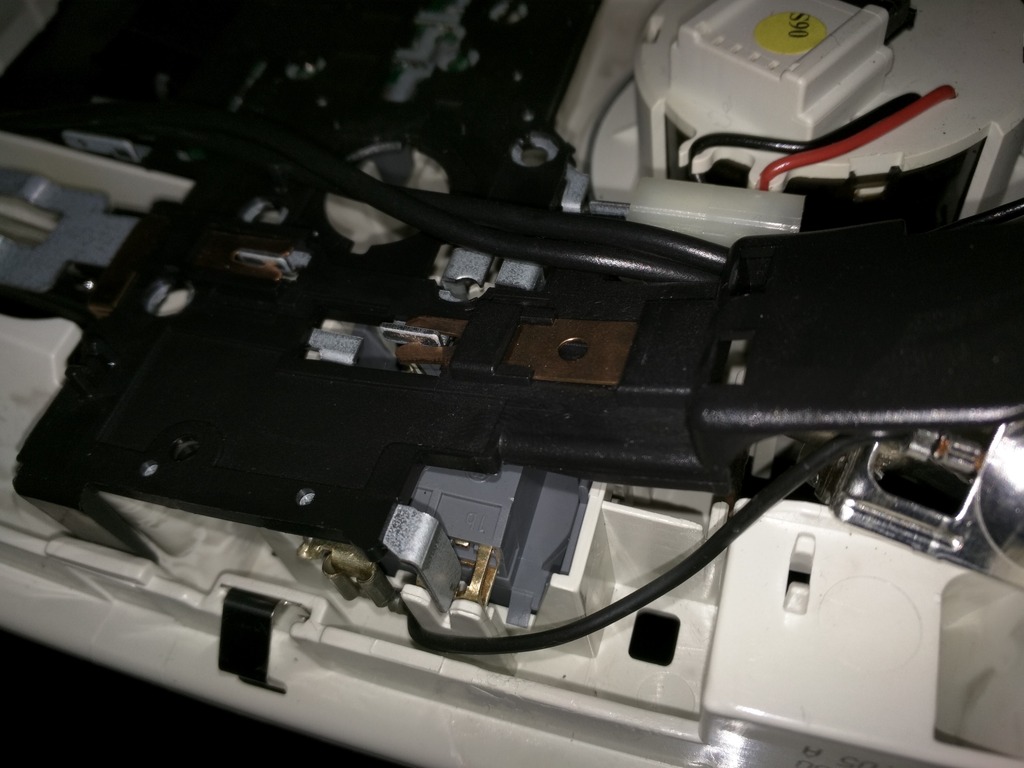
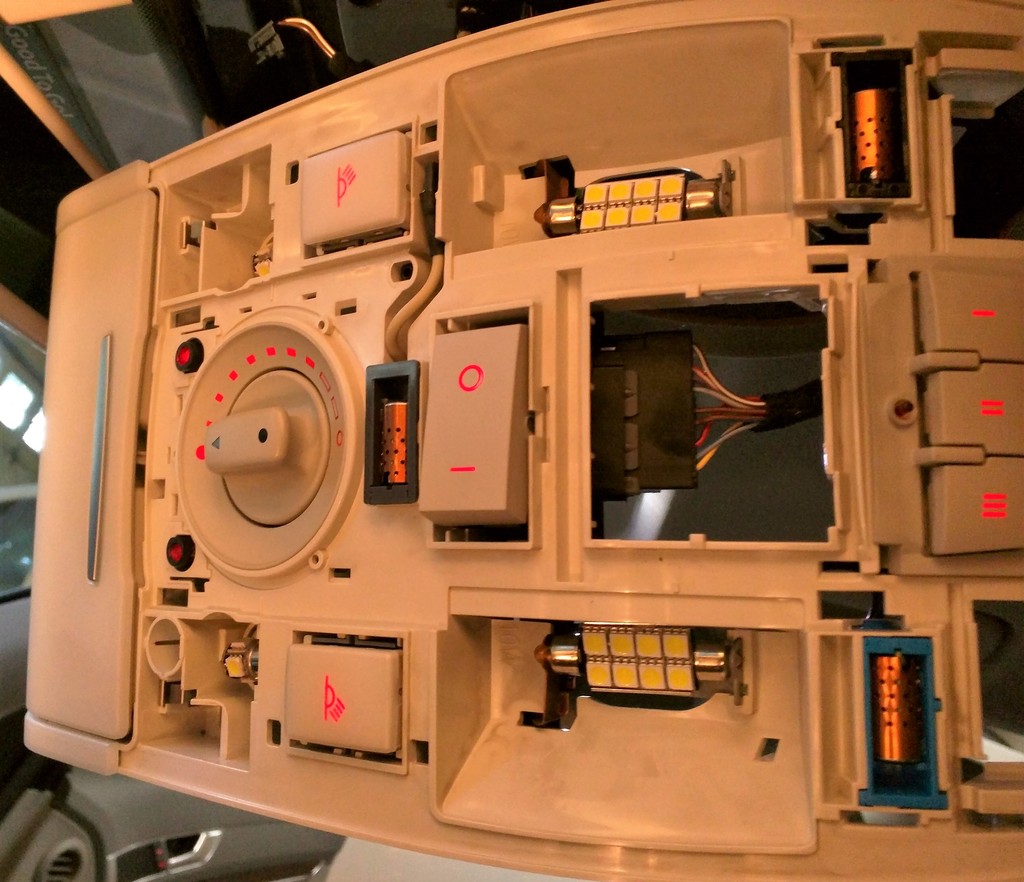
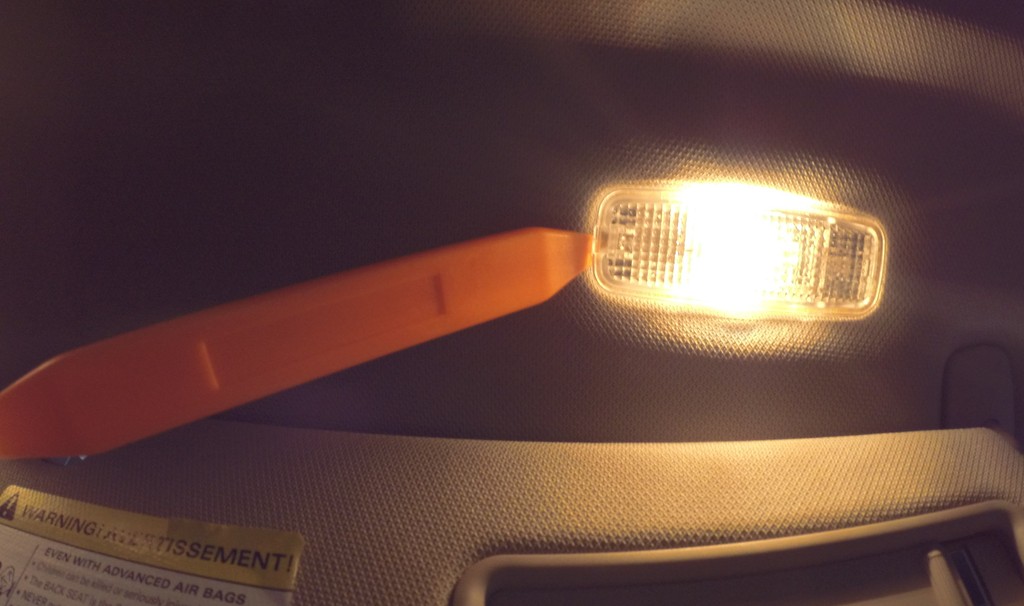
Now I was set to try my hand at the FRONT DOME LIGHTS and this was both the hardest, but once you knew what to do, could be done in seconds.
Removal was easy enough and there’s no need to disconnect the entire fixture and can be changed while it’s in the car.
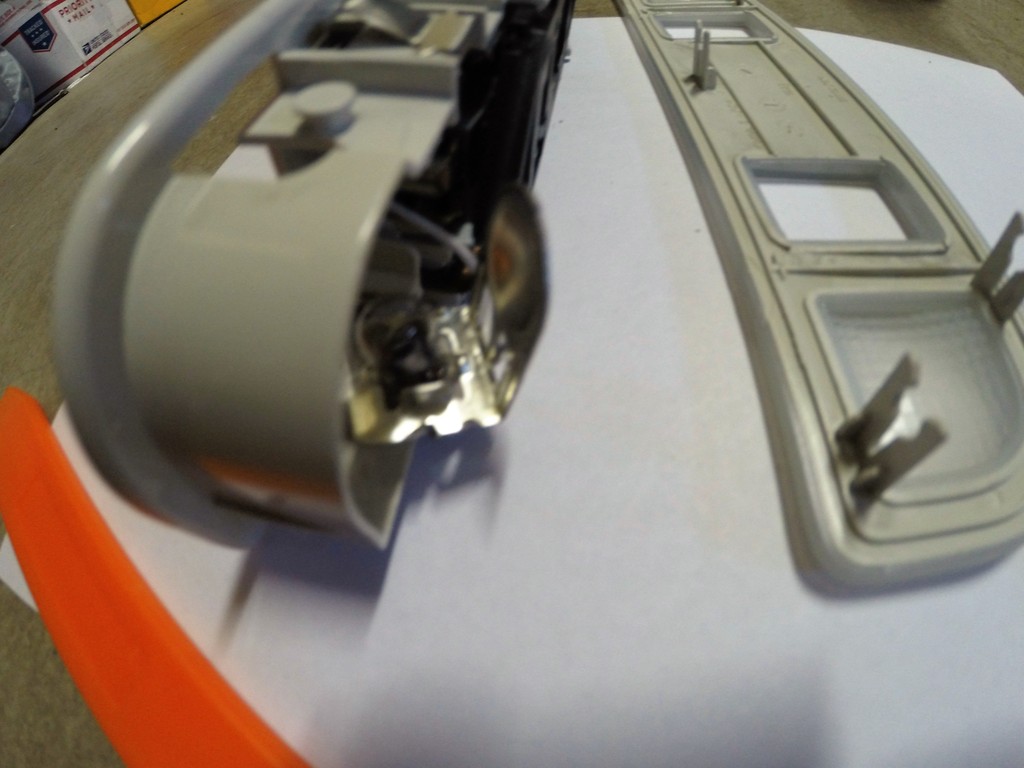
I decided to change the small bulbs first, since the big ones were super easy, but the small ones were identical to the ones in the rear dome. Therefore the same process is required to remove these – by pushing up on the silver color bulb holder and pushing it out through the black backing.
Getting the bulb out was easy enough but getting the new LED was a PITA. It’s no fault of the bulb but it was just hard getting the little bulb into the fixture socket and the ‘trick’ that worked for me was once I had the bulb seated I kept pressure on it from the top and no matter did not release that pressure until was firmly moving forward in the guides for the silver colored bracket…once you are there…you are gold! Mind you the first one took my 20 mins, the second took me about 45 seconds
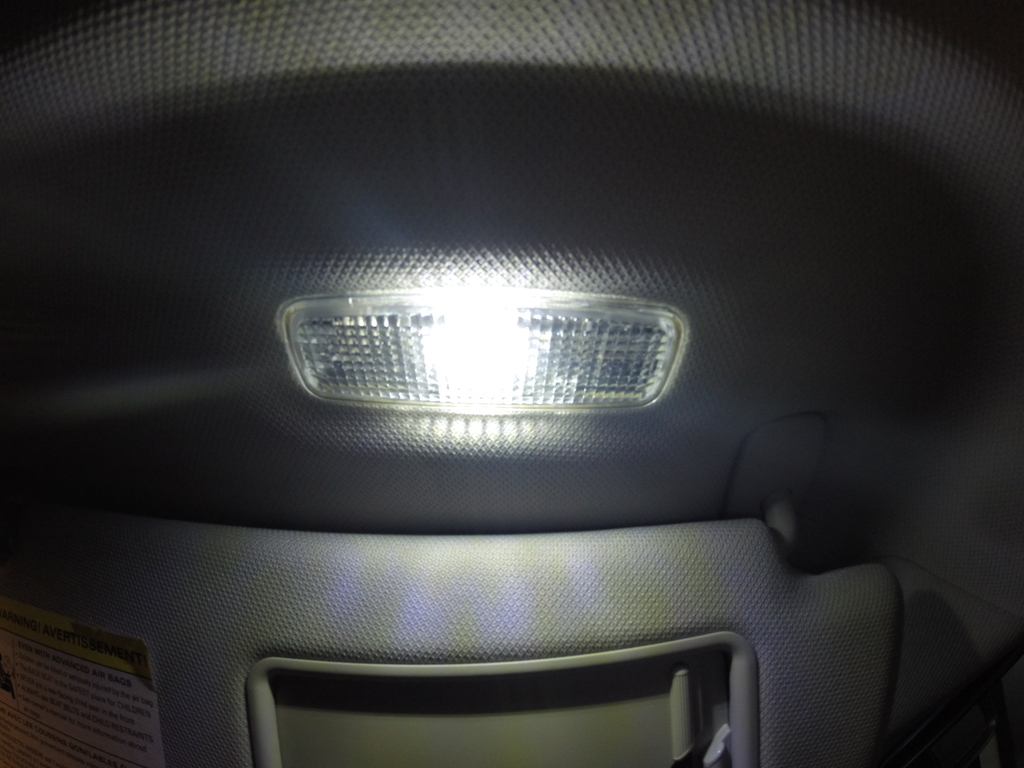
FWIW, the larger bulbs are very easy to simply pop-out with your fingers and replace with the new LED ones. The LEDS have the same heat sinks on the back and fit perfectly!
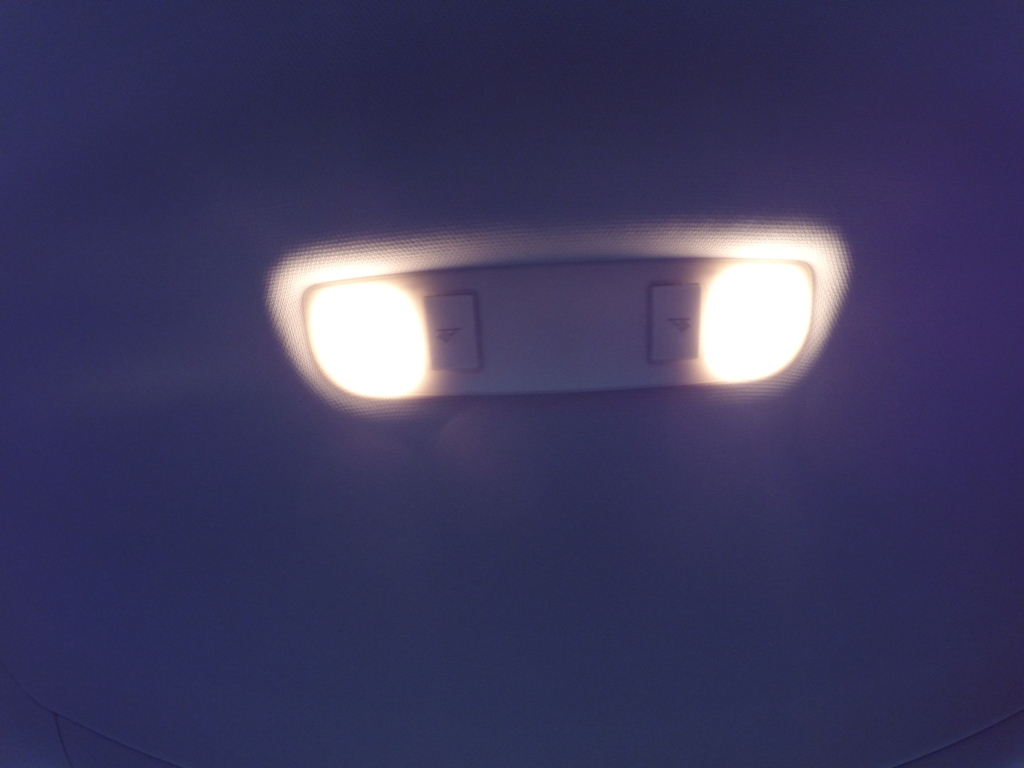
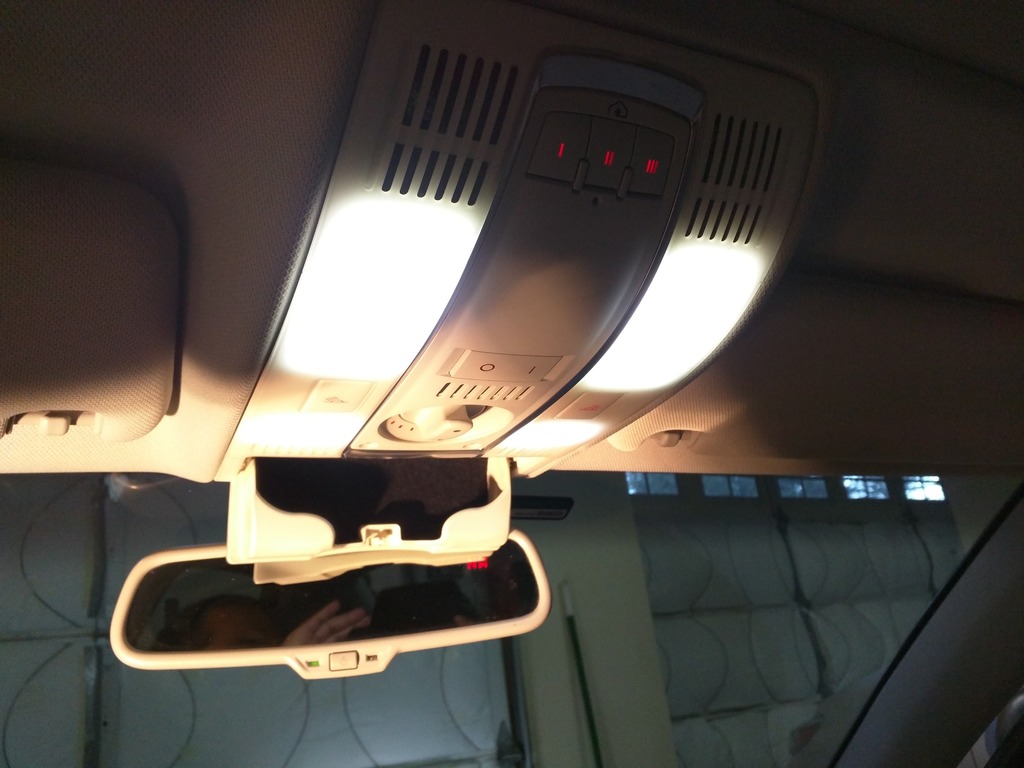
After
The pictures don’t do this justice, but the difference is quite pronounced and you can see everything in the car. PLUS, the lights transition very elegantly from on to off vs. a harsh binary on / off. There’s a subtle fade in and out which looks just like OEM.
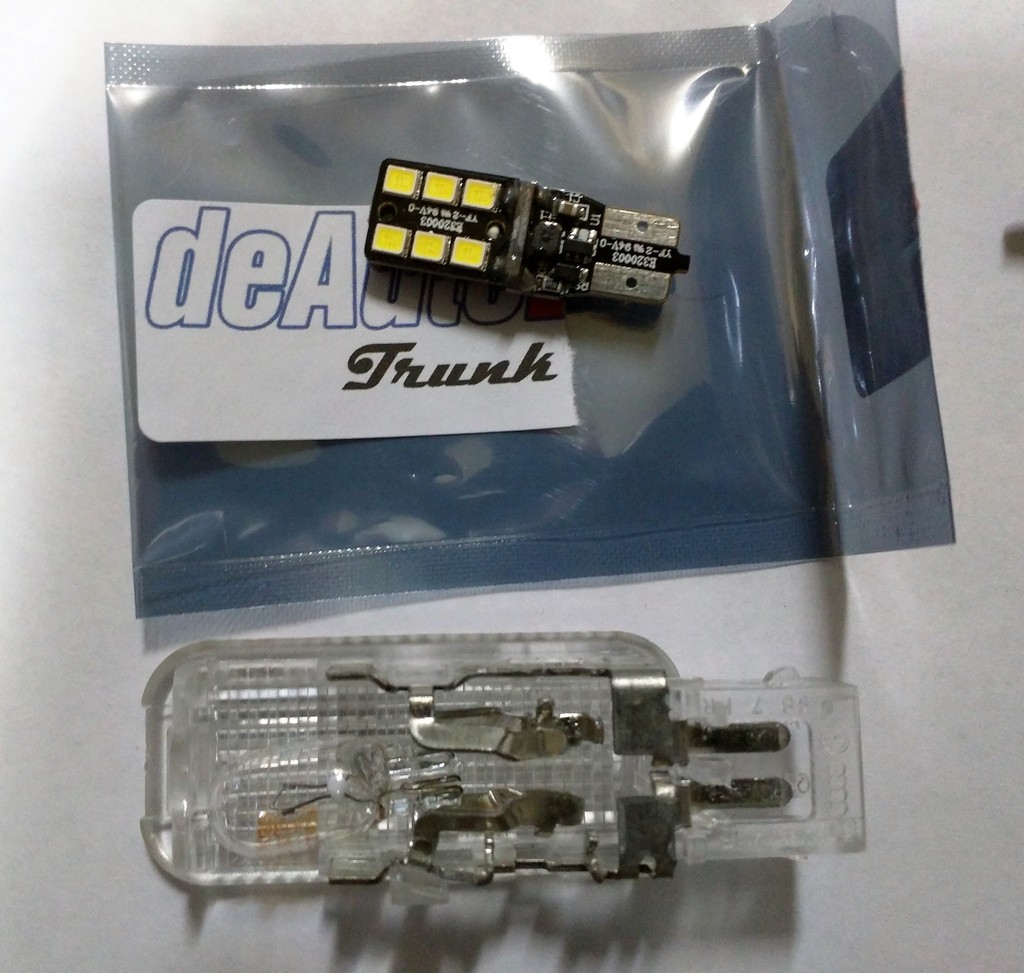
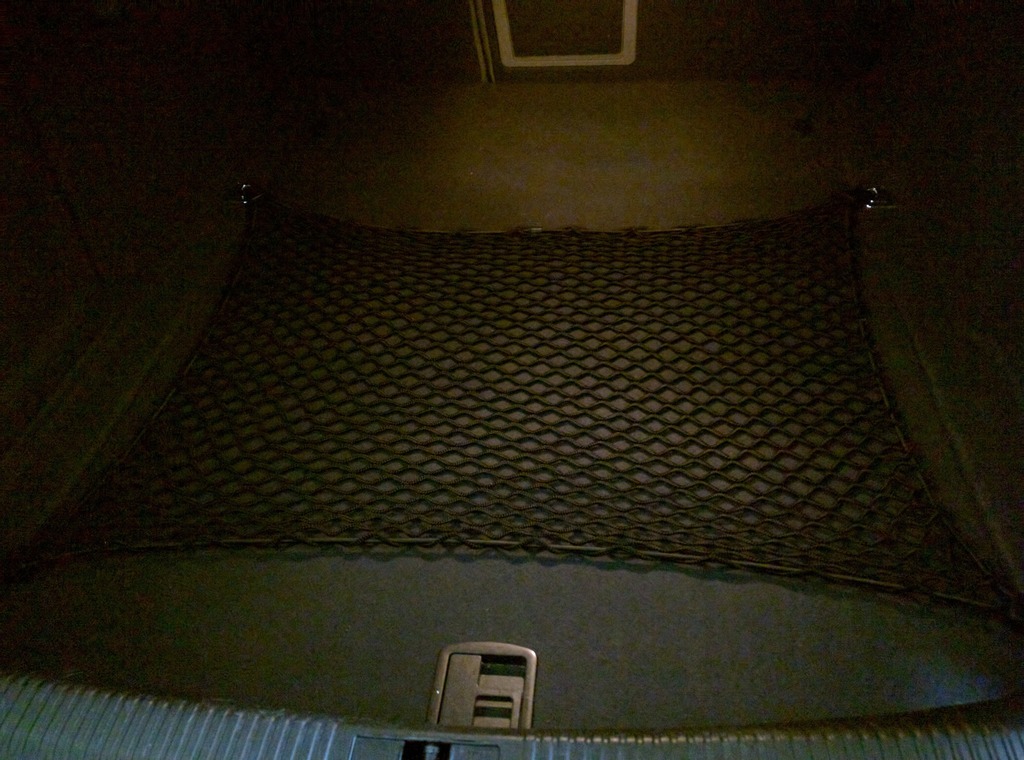
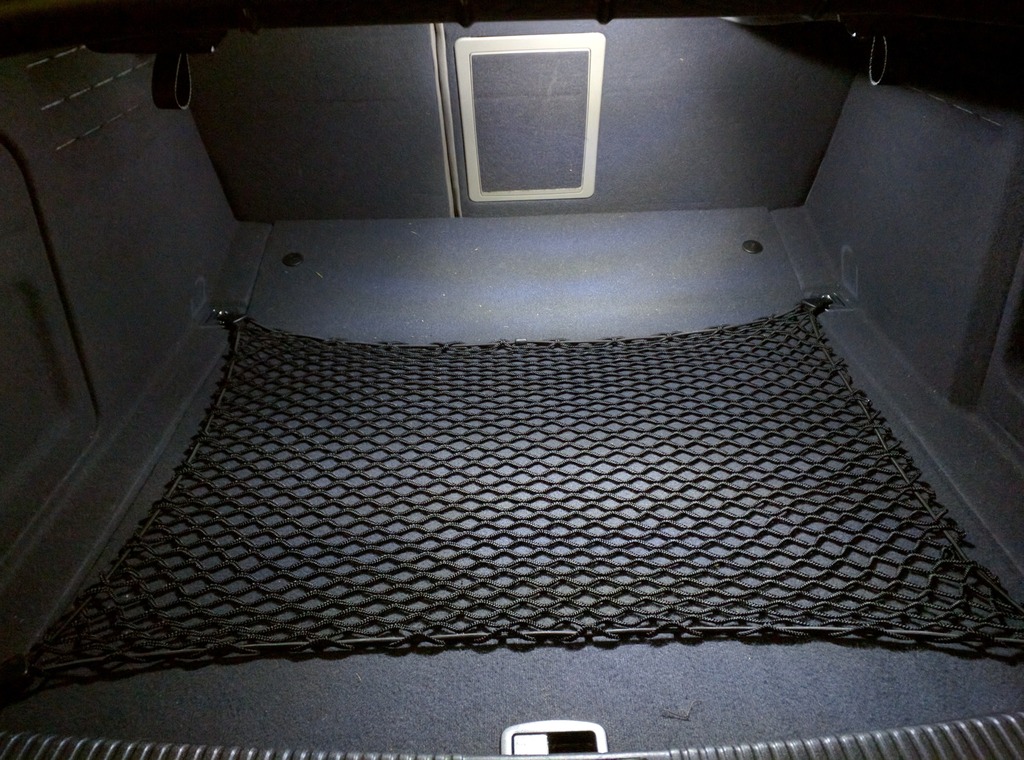
Well I finally made my way to one thing I’ve wanted to address from day 1. The TRUNK light.
It’s the exact same way to remove as the puddle lights and they say a picture is worth a thousand words, so I’ll just let them do the talking.
The lights
Before
After
HUGE difference! The one drawback is that I now know how dirty my trunk is!
I’ll do the foot well light write-up later, but for now all I can say is 5 stars for this product.
Awesome write-up Raj!! I've been wanting to make the transition to LED for a while now, but have come across nothing but cheap china crap. Love the pics, and step-by-step instructions. Not a bad price for the set either! Just one question: I think you already kind-of mentioned it, but I wanted to confirm, you still have the "movie-theater style" dimming? I thought with LED's the dim on and off feature would be rendered inoperable. I assumed the LED would just go on or off.
Awesome write-up Raj!! I've been wanting to make the transition to LED for a while now, but have come across nothing but cheap china crap. Love the pics, and step-by-step instructions. Not a bad price for the set either! Just one question: I think you already kind-of mentioned it, but I wanted to confirm, you still have the "movie-theater style" dimming? I thought with LED's the dim on and off feature would be rendered inoperable. I assumed the LED would just go on or off.
Glad you liked the write-up. As for your question re: dimming. Yes, these do dim slowly akin to "movie-theater style". I hadn't expected that either, but it's really nice and not like the abrupt on/off of the typical LEDs you see when buying those off of eBay. BTW, I ordered the Stage 2 trunk light and it certainly lives up to my expectations.
Glad you liked the write-up. As for your question re: dimming. Yes, these do dim slowly akin to "movie-theater style". I hadn't expected that either, but it's really nice and not like the abrupt on/off of the typical LEDs you see when buying those off of eBay. BTW, I ordered the Stage 2 trunk light and it certainly lives up to my expectations.
Raj! thanks a lot for the write up i have been looking to upgrade my interior lights for a long while now and i wasn't sure which one to go with. I didn't buy any foot well lights because they already seem to be LED and white in color. I barely go in the trunk i like the low light i don't want people seeing what i got in there haha just kidding. I also got a trim set and used DAautokey3off as a coupon code for $3 discount. Very happy with this purchase. I will gladly post the before and after once i get them in. Raj do you have any idea if we can make our reverse lights like the new Audi A3 reverse lights? And what about our license plate lights? Can they also be changed with error free bulbs.
Lights are super bright. I love them. The only problem is the aren't an exact perfect fit. There is a little tab that isn't as big as the OEM. in addition, the two prongs that stick up and make contact with the terminals were too far up, almost acting like a spring, pushing the light back out. With the combination of those 2 issues, the light would keep popping out of place, because it is only held in by the too small tab, and a screw. I bent prongs down a little bit, and used some double sided automobile trim tape. The lights are in there pretty securely now. So not exactly "Plug-n-play" but with a few minuets of effort, they can be made to work. If it weren't for that issue, I would have given 5 stars all the way. In the photo, you can see the comparisons. In the top pic, LED light is on right, and OEM on left. Of the bottom 2 pics, OEM is on left, and LED on right. Notice in the LED pic, the amount of light cast on the bumper, compared to OEM.
Last edited by Mr. Bizzle; 01-07-2016 at 03:42 AM.
Thanks for the feedback folks...I'm going to try the rear license plate light as well...Although that will mean I'll have to wash my car BEFORE I post pics and a review The trunk pictures were funny, since it was a forcing factor for me to take the time and clean out all the stuff that's been sitting there for awhile, such as 3 brand new never opened mouth guards (lacrosse), my alma mater sweatshirt, and a couple of letters which I thought I'd lost. I suppose that's what happens when you have such a cavernous trunk
I had LED lights in my C6 in the trunk, but make sure you get ones that are warrantied. Mine ultimately failed after a few years and it was harder than expected to get the right ones again.
 01-03-2016, 10:10 PM


 dent,
dent,