When you click on links to various merchants on this site and make a purchase, this can result in this site earning a commission. Affiliate programs and affiliations include, but are not limited to, the eBay Partner Network.
I am gearing up to swap out one of the front struts this week. Also using this to repair to gauge how the control arm bushing replacements will go once those arrive. I'm lucky enough to have access to a lift for this job. When measuring the control arm ride height before unbolting, do I just note the distance between the arms and the top of the wheel well? Should I not bolt everything down 100% until the vehicle is sitting normally, similar to the sway bar links?
Yes, full bolt down only with weight on it is preferred. But, for KISS approach I found basically straight out horizontal is what does it. Look at your car now just parked normally on flat surface; what you will probably see is they are basically horizontal. Any measurement you can take to a static point can be used if you want to go that way; again loaded at rest post replace will be best anyway if you have a drive on lift (or pit) to get at.
If work is coming up, you should literally be spraying the pinch bolts now on the ball joint ends. Have you tried to remove bolt to see if it will go well (or poorly)? That can be most frustrating part of job, and happens right at start. Buy new pinch bolt and nut for each side in advance too. Also, if you are doing bushings stand alone, make sure you have access to a press. WAY easier to do control arms BTW while a strut comes out given hassle getting to inner bushing bolt up points otherwise.
Thanks for the clarification! I might end up marking the liners too, just to be sure. I don't want to tear the new bushings right out on day one.
I've been reading about the strut removal/bushing replacement for a few weeks now. Going on week two of hitting everything I can find with PB blaster. I ordered replacement pinch bolts from ECS; hoping they're the correct ones. Their parts compatibility have been hit or miss for me. I haven't tried removing the bolts yet, but I'm hoping if they do end up stuck the torch and impact driver will be sufficient to remove them. I don't have access to one of the hydraulic presses, but I'm planning on renting/buying one of the hand ones. I'm hoping that won't be a huge pain. This is only my second time replacing bushings; first on this car.
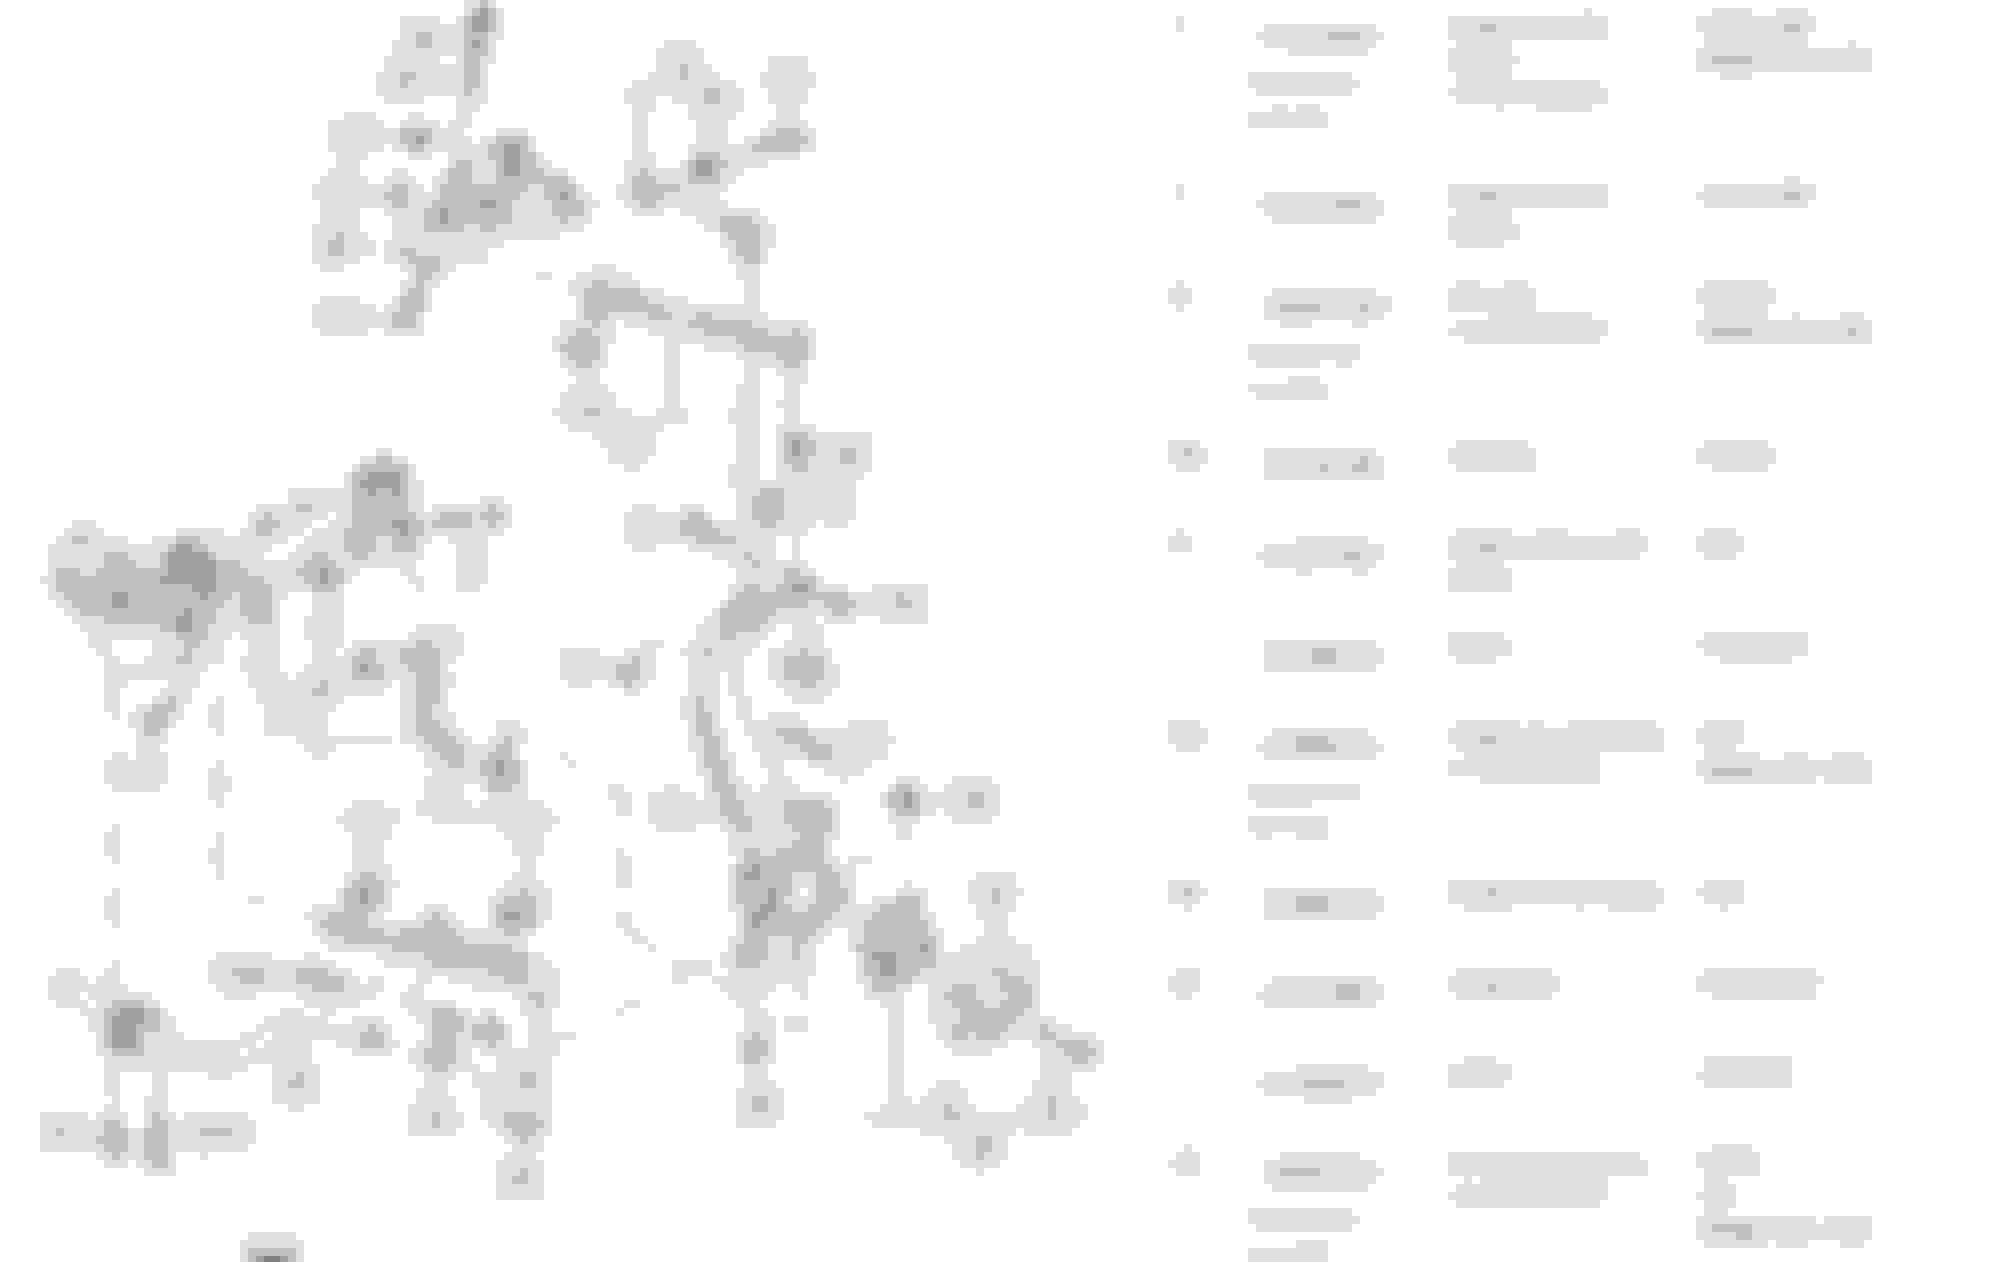
See pic below for pinch bolt #10 and nut #9. I think it is same part # regardless of year or motor.
When doing arms, my experience is easiest way to get the inner bolts out is to pull fender liner. There is a clearance problem in removing them w/ liner in there. If pulling liner in turn, I buy about 5 push pins per liner; way hard to re use old deformed ones and sometimes they break anyway. All cheap parts. Besides that, I bring it up because you don't want to put reference marks on a piece of plastic you will remove and may go back w/ slightly different alignment.
Also making sure we are working from same info: when you pull a front strut, you are pulling the upper carrier area that is under the fender too. What shows up in the illustration as part 29 below. You do that to get at the final nuts buried under that assembly. The upper control arms then come out with it. It makes it a piece of cake to do the control arms incrementally as far as unbolt and reinstall, vs. more a distinct project if you don't do it at same time. One other bonus area BTW if you go down the pull the fender liner route: it can make access to the headlight assemblies a lot easier for bulb changes. Unless yours are refreshed already, can often get improved lighting with Nightbreaker Extremes or other similar bulbs with then easier work.
Good plan. I watched another member on here video of the control arm replacements, and it looks like the liners absolutely have to come out, and the strut mount dropped a bit. The bolts I ordered from ECS matched the ones in that diagram, so we'll see. Worst case scenario I drive to the dealer and buy them for double the price. (they've been increasing their prices a lot lately).
After seeing those pics, I might actually wait until I get the bushings. I'm sure a few more days of soaking everything in PB blaster won't hurt. The leaking strut/compressor have held on for dear life for two months now, so I bet they can last a few more days until I stop being lazy and find a source for those. Super helpful pics, thank you!
 04-17-2018, 07:32 AM