DIY: EVO-XR 2.0 Projector swap (headlight junkies / lighting addicts)
 01-27-2019, 09:30 PM
#1
AudiWorld Senior Member
Thread Starter

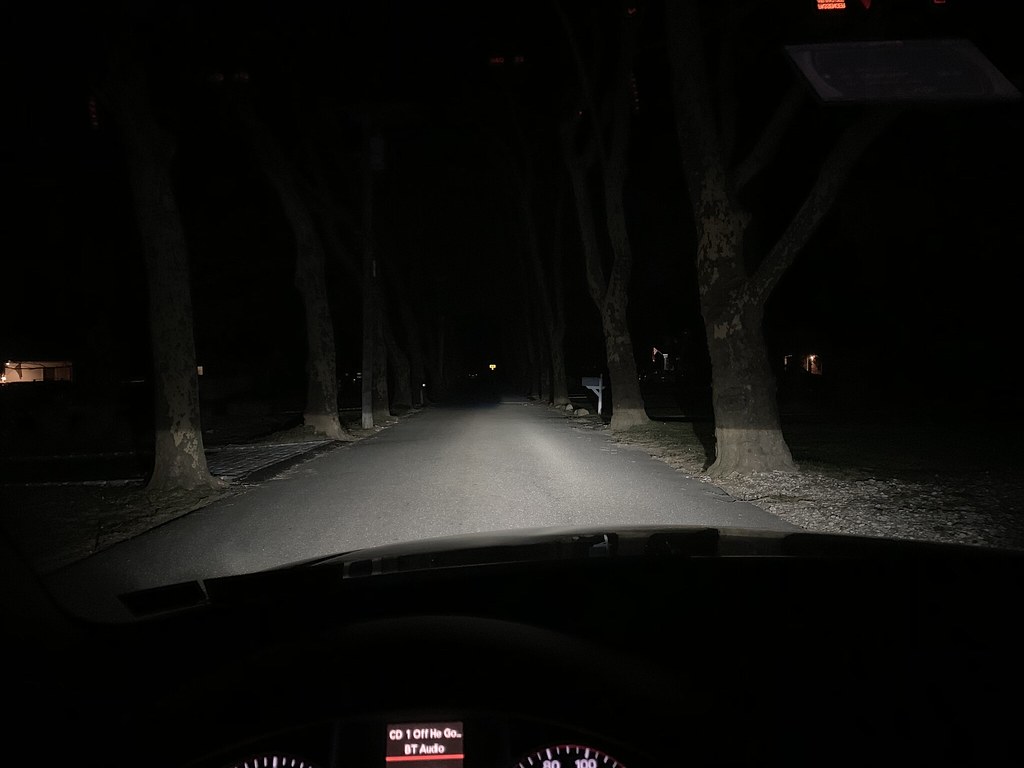
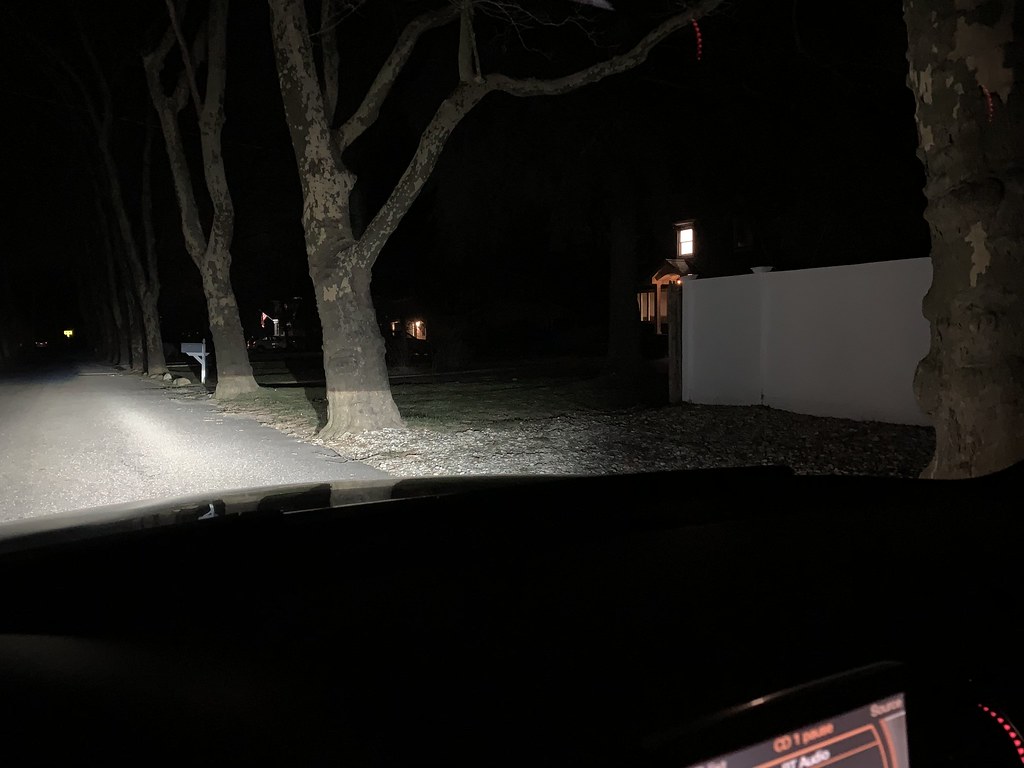
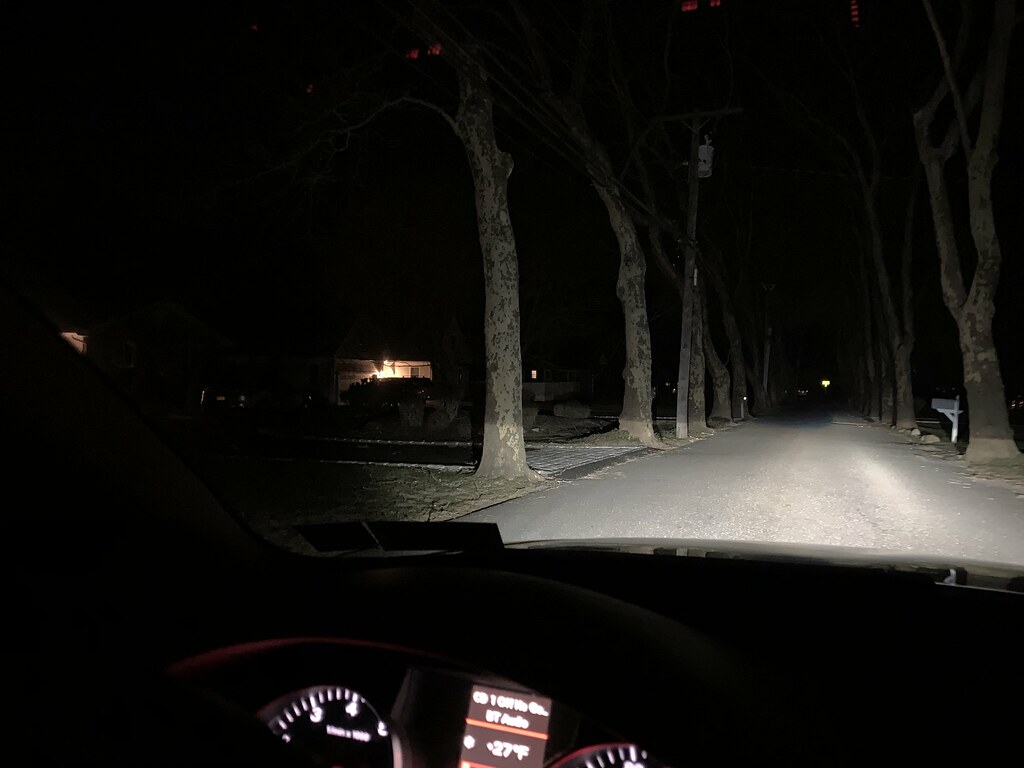
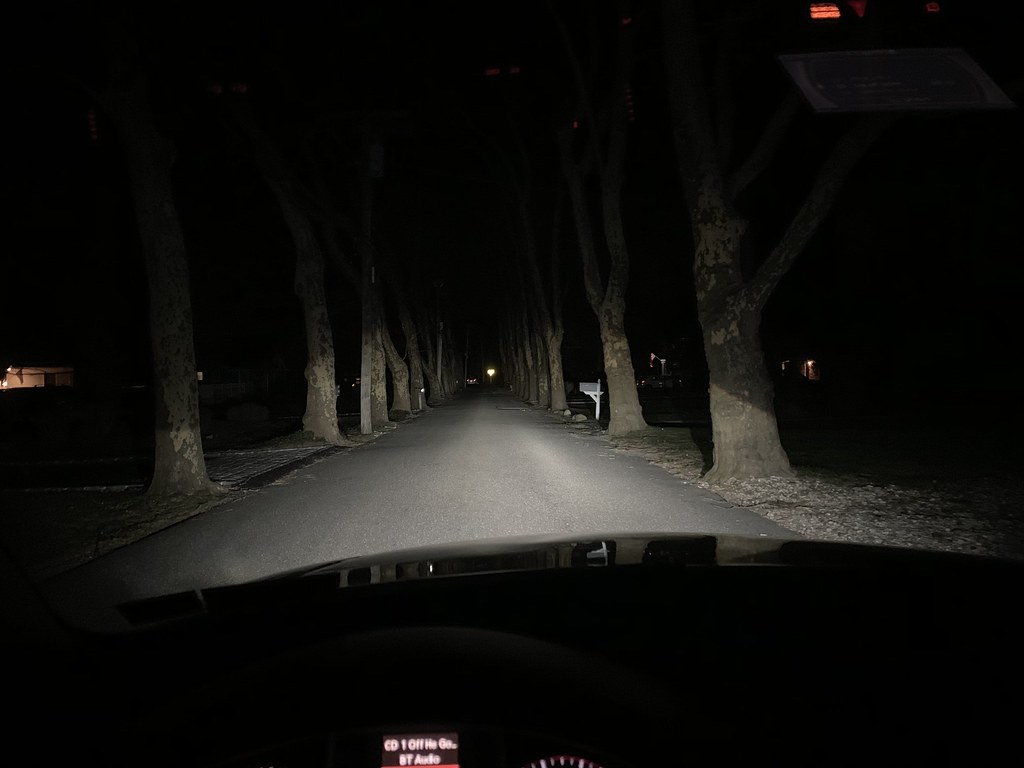
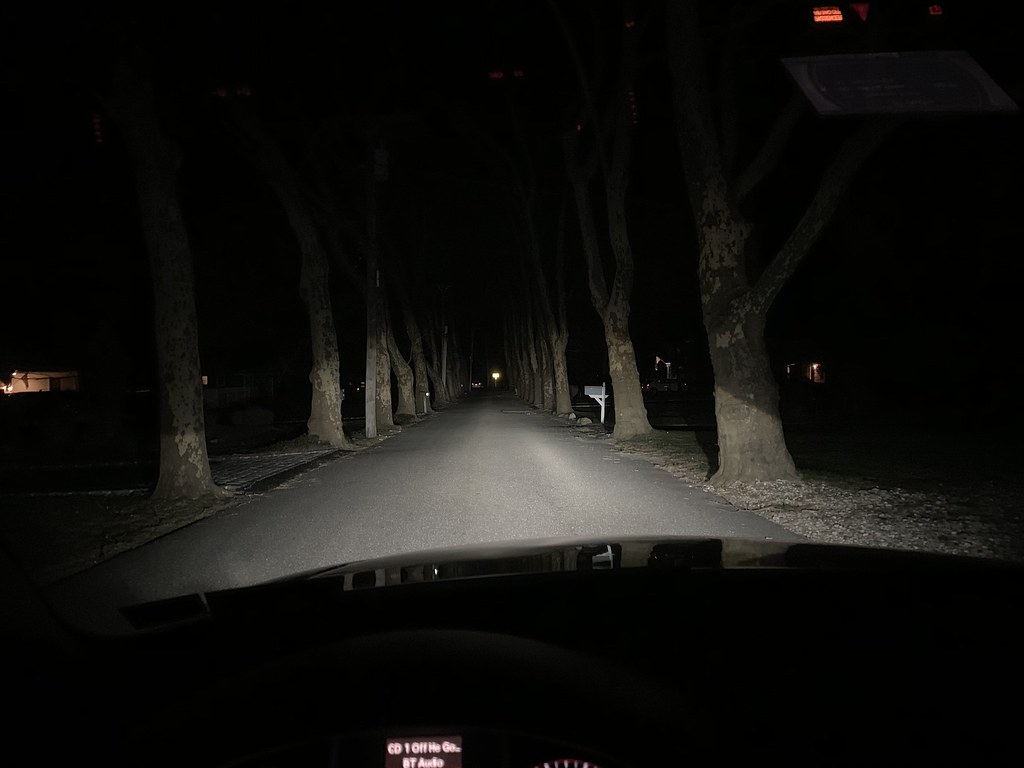
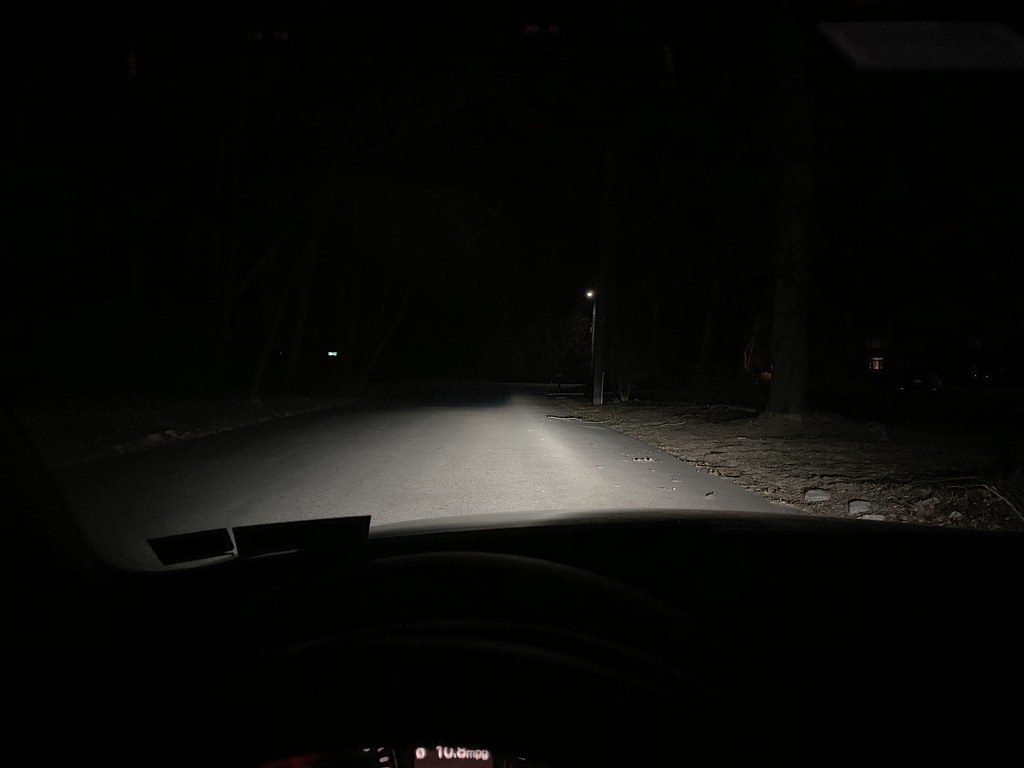
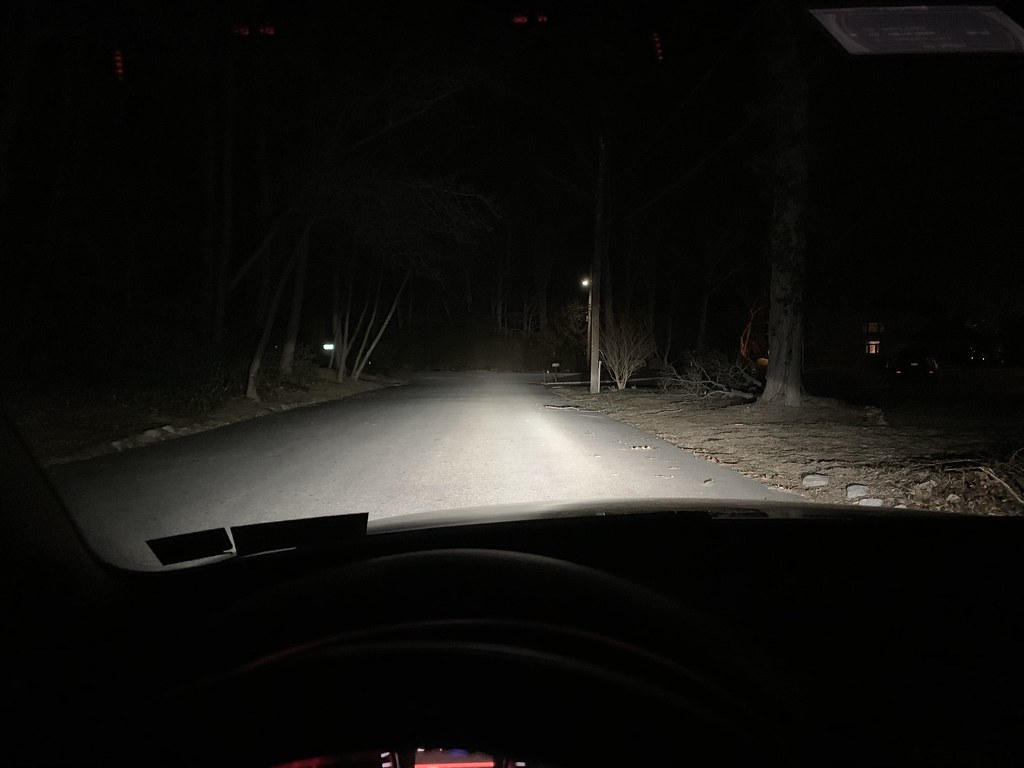
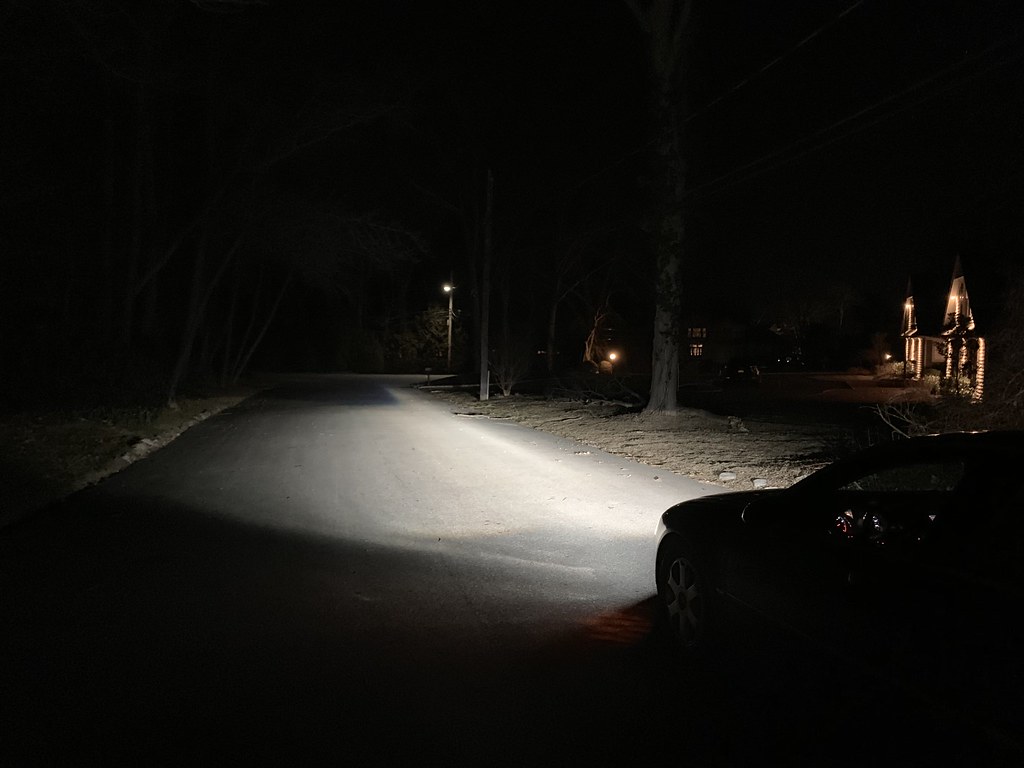
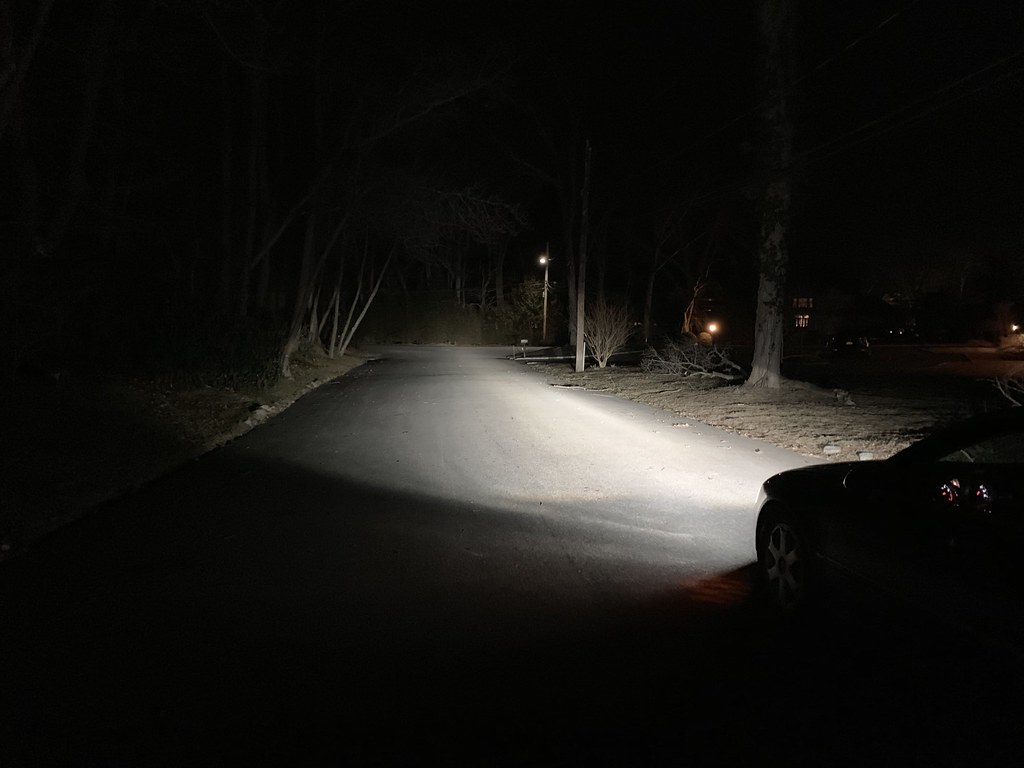
I'll start off by saying I never intended to make a DIY-ish post, sorry for the lack of quality here. I honestly didn't think there was an even semi-active enthusiast site for A8 owners in general. So if you're a headlight nerd a feel like you want an upgrade maybe this will give you a good idea of what you can do. I need to get post-install lighting output pictures but they won't do it justice. Compared to a stock, unmodified projector even with upgraded bulbs- this is night and day.
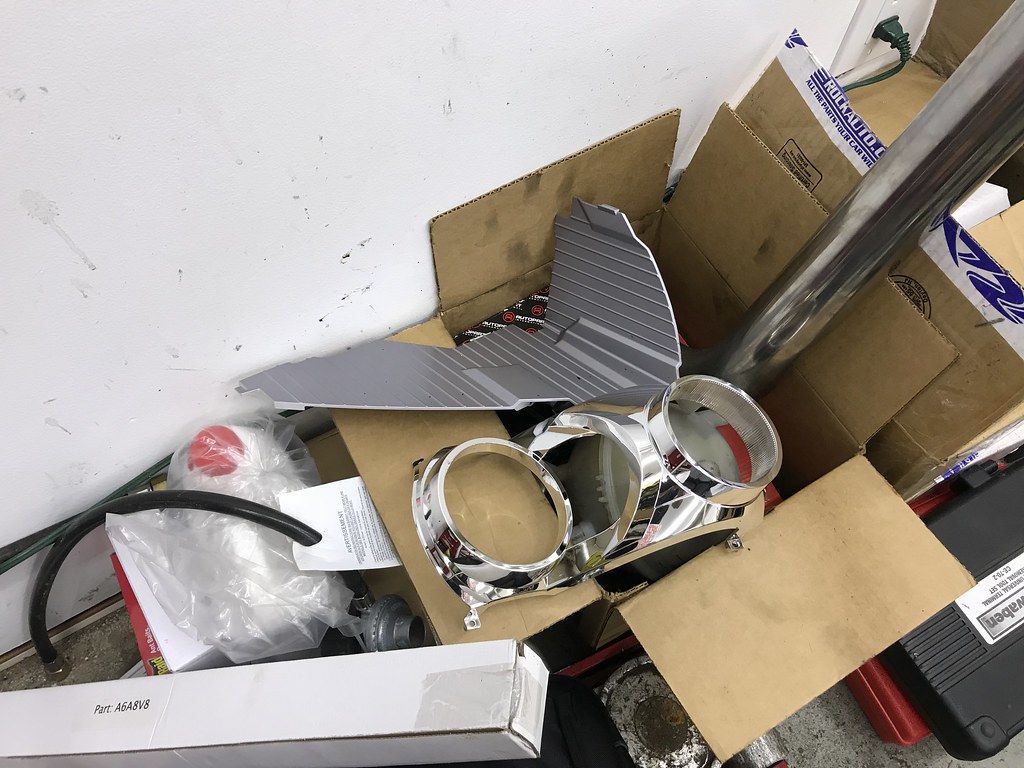
I opened my headlights originally to do a clear lens and bulb swap. When I had the projector out the first time I realized that it looked very familiar to what The Retrofit Source (no, I don't work for them) calls an EVO-XR. Took a bunch of measurements and ended up ordering uprated EVO-XR 2.0 Projectors from Lightwerks Global. They take the same bulb as stock - D2S and are nearly identical minus 3 holes to drill and 2 more to bore out. Oh and the projector to lens is 10mm shorter.
Tools you'll need:
Dremel / rotary tool with sanding and plastic cutting disks
Heatgun
A complete torx driver set including an T8 IIRC. The lights are largely T20, T10, T8 (from poor memory).
Your average screwdriver collection
Painters tape
Nice drill bit kit
A slide caliper is a nice to have
Vagcom 100% required
Sharpie marker
wire cutters / dykes
needle nose pliers
magnet tool
a punch
A whole lot of patience, beer and time. The first light took me 6 hours. Second light 1:45 (timed it, nerd status).
Parts:
The projects
D2S bulbs - I used Morimoto XB 5500k
Alcohol prep pads to clean lens (don't clean the bowl, just keep it free of debris!)
New Butyl rubber
Any bulbs you plan to replace while you're in there or spray paint if you want to paint the housings (I didn't)
Those headlight clips that retrofit source sells they use Allen head bolts to tighten
The general gist of what will be modified:
The EVO-XR 2.0's will need 3x holes drilled in them and two threaded screw holes bored out. That's it.
The basket that the project screws into will need parts of the lower mounting plastic ground down a little with the sanding disk
The trim shroud that clips on to the projector will need 1 tab removed and a LOT of it will need to be ground down.
--The trim shroud needs to be ground down due to the 2.0 projectors being 10mm shorter from reflector bowl front to lens and AFS moves the headlights.
--Don't worry, you'll never notice when it's all together.
Heads up. These lights are sealed with permaseal. Hence the necessity for the new Butyl rubber. If you don't know what it is, it's a super strong glue that holds the headlight lens to the housing. Watch some youtube videos for some tips and tricks.
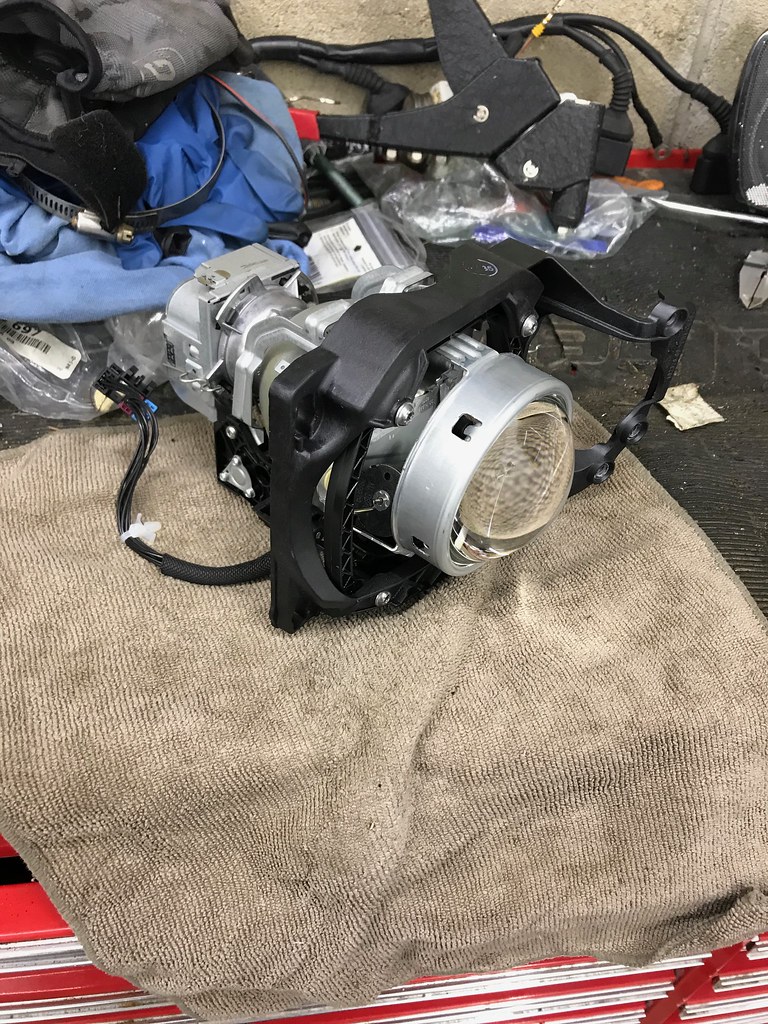
Crappy photos and directions (sorry again, I never thought I'd be sharing them)
Below: After you remove the bumper, headlights and heatgun/pry/curse/drink/fight the headlight lens off you will remove these two next. First the grey trim piece has 2-3 T20's holding it on and second the chrome trim has another 2-3 T20's holding it on. These are all accessible from the front of the light and the magnet tool will come in handy. Pat attention to where the mounting tabs sit for both pieces. The chrome trim sits into some of the sealant IIRC. Good knowledge for reassembly- take photos and do one at a time.
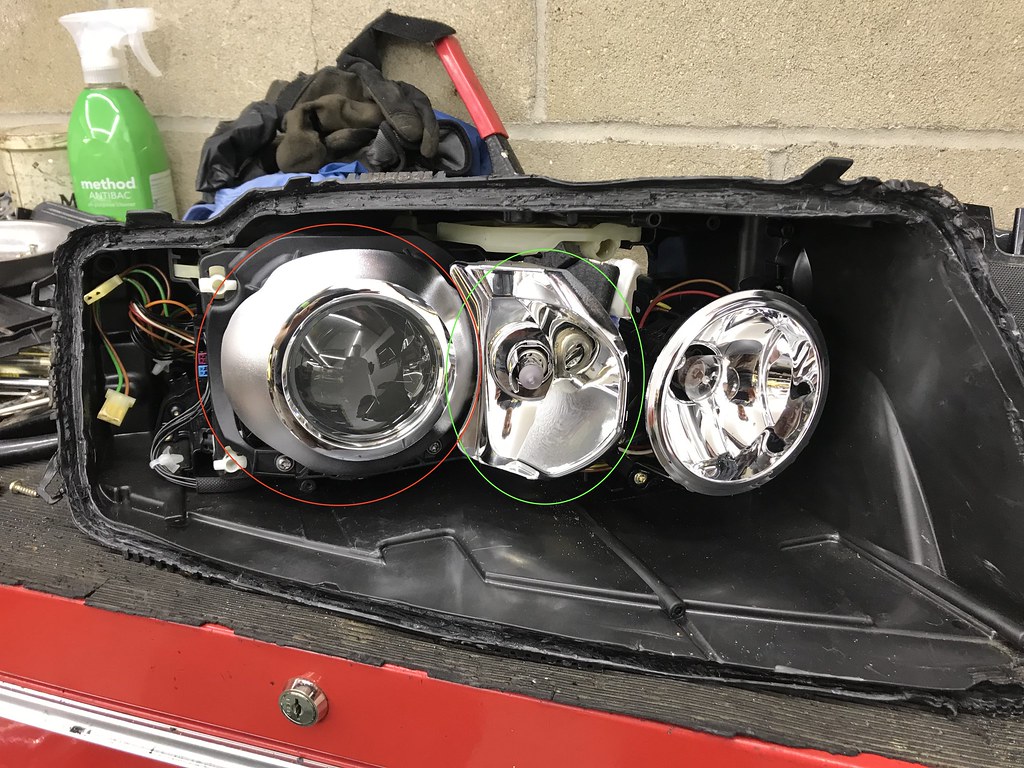
Below: At this point you'll see this. The red-circled projector trim ring pops off. Get a small flathead in there to assist so you don't break the plastic. Needless to say everything you're dealing with is 10+ year old heat cycled plastic- be careful and take your time.
The green-circled reflector bowl for the AFS+ side illumination bulb has to come out next. First remove the bulb from the back. Then again from the back there are 4 or 5 T20's holding bolt the bulb holder and reflector bowl to the larger black plastic auto-leveling assembly. Remove the bulbs and the reflector falls right out. Set aside somewhere clean and again remember how it goes back together.
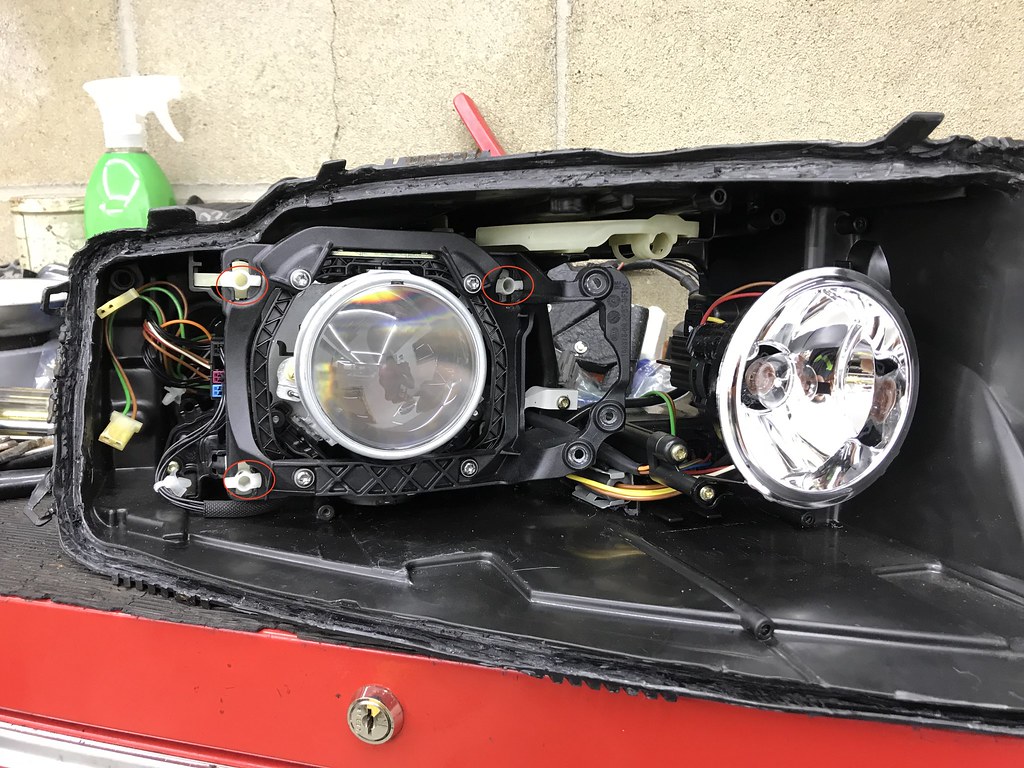
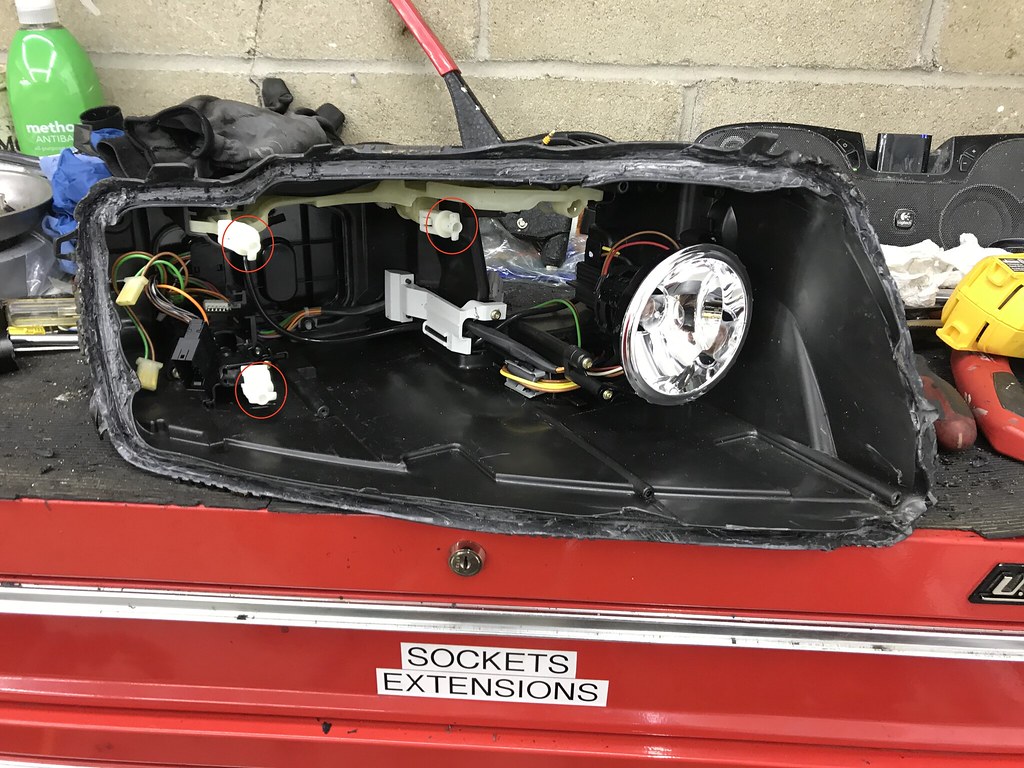
Below: With the trim ring and reflector bowl out of the way you now have to get the automatic leveling assembly disconnected from the motors. Before you do that pull the electrical connector from the ignitor and the igniter itself from the back of the HID bulb. You twist it. There are directions of it to tell you which way (Only part of this DIY Audi anticipated being serviced). The automatic leveling assembly is is held on by the three plastic T shaped lock mechanisms circled below. I chose to use a small flathead screwdriver to work the white plastic T just far enough from the black plastic housing that I could get a needle nose plier in there. Use the needle nose like a screw driver. Place one side of the plier on either side of the T so you have even force and gently turn counter clockwise. After you turn all three of them the auto leveling assembly should come right out. Oh, there is a large wiring connector you'll see a few pictures down. You'll have to disconnect this and there is a tab in there you gently push on with a screwdriver then slide backwards I think.
A8's Ignitor for D2S bulbs for those that don't know the term:

Below: The automatic leveling assembly. Crap photo for this but you can see the three screw holes where you removed the reflector bowl from a few steps ago on the right. This step you unscrew the four silver and obvious Torx screws holding the projector AFS basket to the automatic leveling assembly.
found a better photo:

Another angle:

Below: The AFS basket and projector still screwed into it and an EVO XR GEN 1 aftermarket light behind it. This is where I run out of good photos. I'll try to bullet out how this works then what to do.
A. First off AFS is the technology where when you turn the wheel above 15mph the headlight turns to shine light in the direction of which you're driving.
B. It works by one motor on a worm gear in the back of the headlight and sensors of course. The worm gear turns the projector inside the AFS basket which remains in one place.
C. The lower half of the projector screws into a bracket that attaches to the worm gear motor assembly. The upper half just articulates on a post that goes through the hole in the top of the projector lens arms. Look at the EVO XR 1.0 in this photo for the hole.
D. That upper mounting assembly has two parts to it. A lower plastic piece that serves to hold the projector lens to the reflector bowl and as a female receptacle for the ball-stud male side from the upper gold-ish piece you can see in my photo. Two torx screws hold the upper and lower piece together.
What to do:
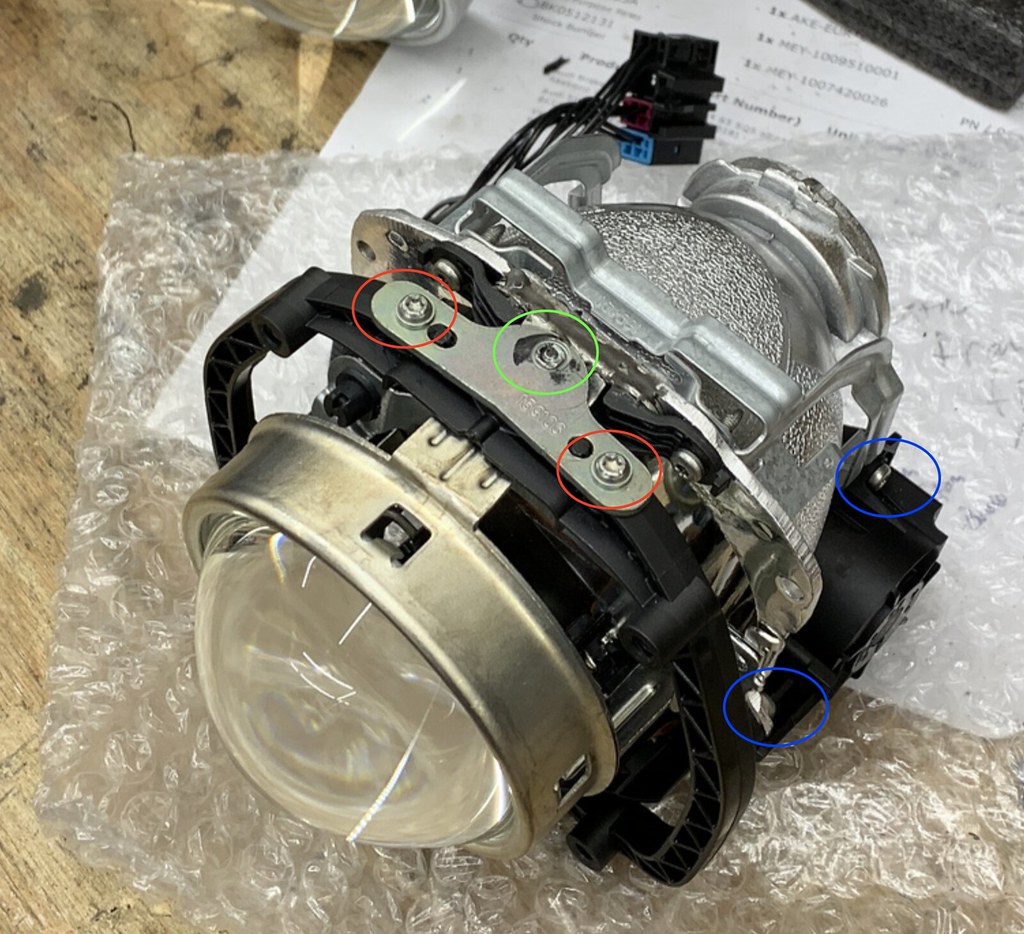
1. Remove the two torx screws holding the upper ball assembly to the lower part described in D above. (Red circles)
2. Get a small thin wrench in there and pop the ball out of the mount. (Green circle)
3. Get the projector out of the AFS Basket.
3.1 You're going to be removing 3 small but very long T8's from the long metal mounting arms. Two on one side where the motor is and one on the other side for the same style arm. The motor comes out, it's OK (blue circle, back)
3.2. I think Phillips heads from the back but probably T20's, I forgot hold the lower part of the projector to the AFS basket. remove these two from each side (blue circle, front)
4. Work the projector assembly out of the basket. You're going to need to take your time and figure it out.
4.1. There is a small 2 wire plug on the lower part of the projector housing that operates the hi/low beam shutter.
5. Once the projector is out remove the two T8's that are holding the metal arms to the lower black plastic bracket on the top of the projector described in part D above.

Zoomed in with circles:
NOTE: This is actually reassembled with the EVO XR 2.0 projector in place
Modifying the EVO-XR 2.0 Projector
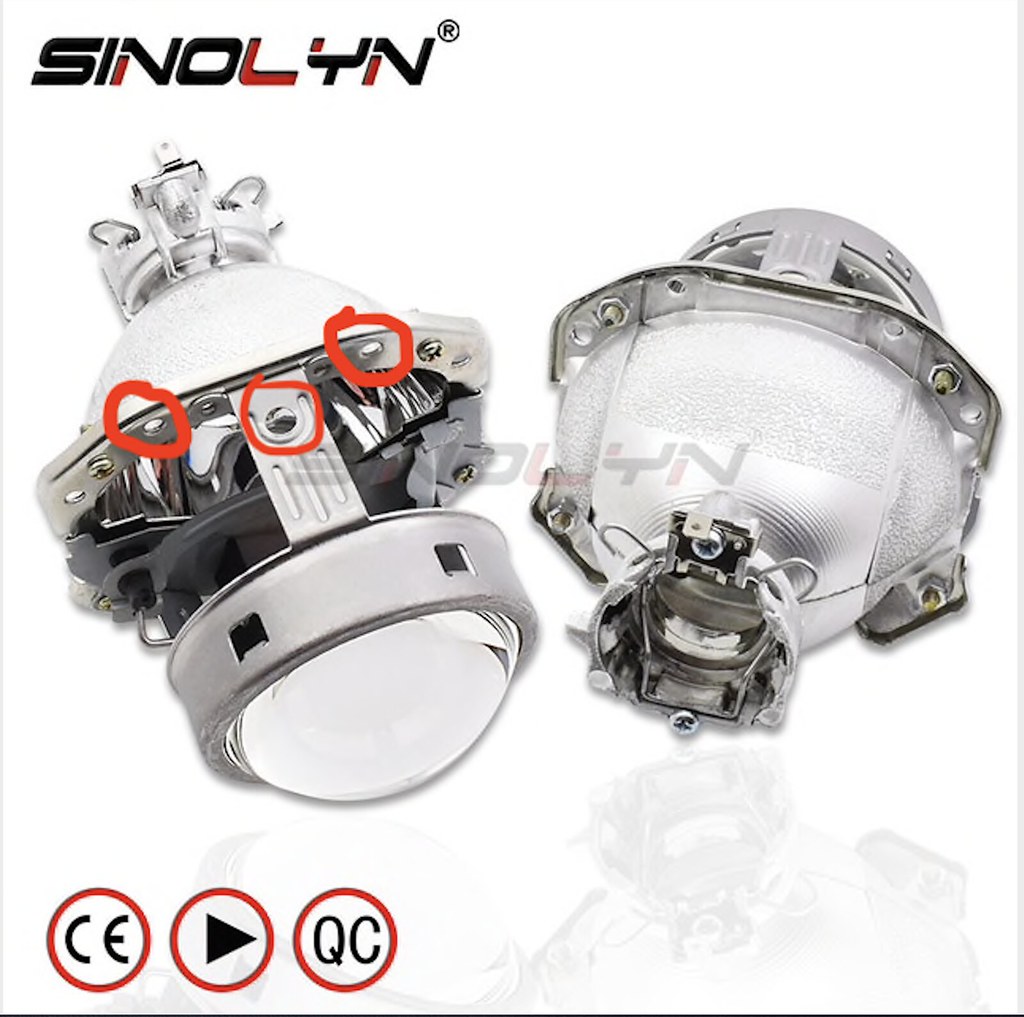
Below: Photo of an EVO XR original which by the way is a knock-off of the OEM projector found in our A8's and many other early 2000's European cars of the time.
The three red circles are identifying the three holes we will be drilling because the EVO XR 2.0 doesn't have these mounting provisions.
The two on the sides are for the mounting of that lower black plastic small bracket through the projector bowl to the metal mounting arms you removed in step 5 above.
The one large in the middle is obviously for the ball to go through.
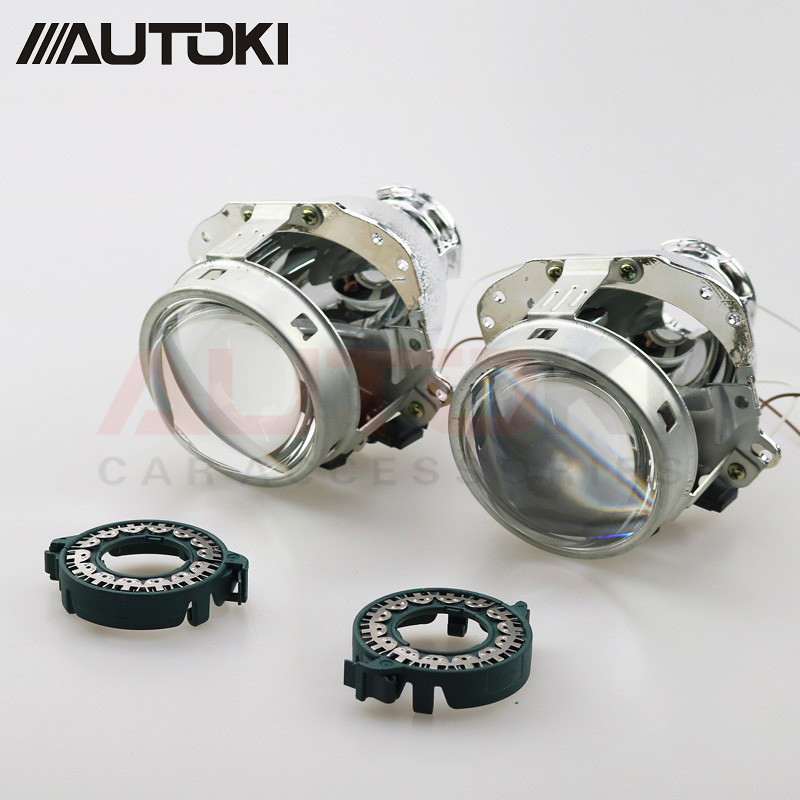
Below: Photo of an EVO XR 2.0 aftermarket projector.
Note: Try not to get your optics (lens) dirty. Always clean with alcohol prep pads before final assembly/use. You don't even want to wipe down the reflector bowl- at the most blow debris out of it.
1. Unscrew the four Phillips head screws that hold the projector lens to the reflector bowl. Set aside someplace clean.
2. Tape off the reflector with painter tape. The light hole in the back and the entire front except for the top area where the two upper screws from were going to drill holes here.
2.1. READ: Don't put tape INSIDE the reflector bowl, just on the front face. Overlap the tape.
3. Look at that lower black small plastic bracket that accepts the pin. It has 2 studs on it that need to fit into where those screw holes formally were.
3.1. Use the slide caliper, choose a drill bit and bore out those two screw holes till the plastic brackets studs fit in.
4. Time to drill holes for the plastic bracket's two through holes that you removed T8's from that attach to the metal arms.
4.1. With the bracket's studs now holding in in place eye out the center of the two holes. Use a punch to make a center mark. Slide caliper to size you drill bit. Make your two holes.
Okay now your reflector bowl mods are complete. On to the big hole. This one kind of sucks. Keep in mind that when you drill things sometimes the bit catches and mangles the metal right? This is thin metal and that could happen. Didn't to me. Drill slow, use 3-4 different sized bits stepping up slowly. Also keep in mind that if you bend this bracket, and you will bend it a little you need to try to return it back to how the other undrilled EVOXR 2.0 bracket looks like. If you drastically change the lens distance from the bowl you will mess with your light output.
I used a slide caliper to find the center of the hole on the 1.0 projectors. It's going to be on the slanted part. Once again use the punch and a very small drill bit to get started.
I wrapped the entire rest of the projector with the bag it came in and taped it closed then used the Styrofoam the projector came with to guard the lens so I could lean on my workbench a little.
Drill your hole and return your bracket back to it's shape as best you can. Be slow, it won't be that bad!
The EVO XR 2.0 projector is just a little different on the bottom area. I had to mark the areas of the AFS basket I thought would be a problem and use my rotary tool and sanding bit to remove some plastic.
Reassemble is the reverse of dis-assembly here. Get the projector back into the AFS basket. Don't forget your two wire small connector for the bi-xenon shutter.
I tried to line up my worm gear to have the projector straight. Who knows if it matters.
When you go to put the HID bulb igniter back onto the new D2S bulb you'll notice the four plastic mounting tabs get in the way. Get your dykes and clip them. The D2S bulb has two mounting posts and mine hasn't had an issue for 4k miles now.
Before you place your whole lighting assembly back in the headlight housing get out a flat head screwdriver and remove all that hard glue in the female groove of the headlight housing.
Get a fresh blade on a utility knife and do the same to the lens lip that goes into that female groove.
I'd blow everything out with your air compressor or compressed air at this point and right before assembling your headlight too.
Now get the headlight re-assembled with the only exception of the lens and the grey/chrome trim pieces.
Okay your mod. The projector trim ring.
First at the bench figure out how it fits. You'll note that the 1.0 projector has 5 mounting tabs and the 2.0 only takes 4 (this is from memory). In short. Line it up and cut the one that doesn't have a home.
Now what I did was connect the headlight housing into the car. Grabbed my Vagcom and went through the output tests of the headlight until both the AFS went left/right and the auto leveling goes up and down. I noted with my sharpie where the trim ring was hitting and how much I had to take off. This was like a 10 step process for me. You're going to remove A LOT. pretty much a max of 1/4" of plastic will be left around the chrome trim ring center.
Once you have ran all your tests and verify visually the trim ring doesn't hit you're good.
Reassemble your headlight with your new butyl rubber and the two trim pieces. Use those headlight clamps and some channel locks to squeeze the housing together along. Obviously pre-heat all the butyl rubber with your heat gun.
If you've never done any of the above watch a few youtube videos of other guys doing this. I've done a handful of retrofits and this was by far the most complex, but also most rewarding.
Drink a lot because you just read an essay on how to modify headlights written by a headlight nerd.
I opened my headlights originally to do a clear lens and bulb swap. When I had the projector out the first time I realized that it looked very familiar to what The Retrofit Source (no, I don't work for them) calls an EVO-XR. Took a bunch of measurements and ended up ordering uprated EVO-XR 2.0 Projectors from Lightwerks Global. They take the same bulb as stock - D2S and are nearly identical minus 3 holes to drill and 2 more to bore out. Oh and the projector to lens is 10mm shorter.
Tools you'll need:
Dremel / rotary tool with sanding and plastic cutting disks
Heatgun
A complete torx driver set including an T8 IIRC. The lights are largely T20, T10, T8 (from poor memory).
Your average screwdriver collection
Painters tape
Nice drill bit kit
A slide caliper is a nice to have
Vagcom 100% required
Sharpie marker
wire cutters / dykes
needle nose pliers
magnet tool
a punch
A whole lot of patience, beer and time. The first light took me 6 hours. Second light 1:45 (timed it, nerd status).
Parts:
The projects
D2S bulbs - I used Morimoto XB 5500k
Alcohol prep pads to clean lens (don't clean the bowl, just keep it free of debris!)
New Butyl rubber
Any bulbs you plan to replace while you're in there or spray paint if you want to paint the housings (I didn't)
Those headlight clips that retrofit source sells they use Allen head bolts to tighten
The general gist of what will be modified:
The EVO-XR 2.0's will need 3x holes drilled in them and two threaded screw holes bored out. That's it.
The basket that the project screws into will need parts of the lower mounting plastic ground down a little with the sanding disk
The trim shroud that clips on to the projector will need 1 tab removed and a LOT of it will need to be ground down.
--The trim shroud needs to be ground down due to the 2.0 projectors being 10mm shorter from reflector bowl front to lens and AFS moves the headlights.
--Don't worry, you'll never notice when it's all together.
Heads up. These lights are sealed with permaseal. Hence the necessity for the new Butyl rubber. If you don't know what it is, it's a super strong glue that holds the headlight lens to the housing. Watch some youtube videos for some tips and tricks.
Crappy photos and directions (sorry again, I never thought I'd be sharing them)
Below: After you remove the bumper, headlights and heatgun/pry/curse/drink/fight the headlight lens off you will remove these two next. First the grey trim piece has 2-3 T20's holding it on and second the chrome trim has another 2-3 T20's holding it on. These are all accessible from the front of the light and the magnet tool will come in handy. Pat attention to where the mounting tabs sit for both pieces. The chrome trim sits into some of the sealant IIRC. Good knowledge for reassembly- take photos and do one at a time.
Below: At this point you'll see this. The red-circled projector trim ring pops off. Get a small flathead in there to assist so you don't break the plastic. Needless to say everything you're dealing with is 10+ year old heat cycled plastic- be careful and take your time.
The green-circled reflector bowl for the AFS+ side illumination bulb has to come out next. First remove the bulb from the back. Then again from the back there are 4 or 5 T20's holding bolt the bulb holder and reflector bowl to the larger black plastic auto-leveling assembly. Remove the bulbs and the reflector falls right out. Set aside somewhere clean and again remember how it goes back together.
Below: With the trim ring and reflector bowl out of the way you now have to get the automatic leveling assembly disconnected from the motors. Before you do that pull the electrical connector from the ignitor and the igniter itself from the back of the HID bulb. You twist it. There are directions of it to tell you which way (Only part of this DIY Audi anticipated being serviced). The automatic leveling assembly is is held on by the three plastic T shaped lock mechanisms circled below. I chose to use a small flathead screwdriver to work the white plastic T just far enough from the black plastic housing that I could get a needle nose plier in there. Use the needle nose like a screw driver. Place one side of the plier on either side of the T so you have even force and gently turn counter clockwise. After you turn all three of them the auto leveling assembly should come right out. Oh, there is a large wiring connector you'll see a few pictures down. You'll have to disconnect this and there is a tab in there you gently push on with a screwdriver then slide backwards I think.
A8's Ignitor for D2S bulbs for those that don't know the term:
Below: The automatic leveling assembly. Crap photo for this but you can see the three screw holes where you removed the reflector bowl from a few steps ago on the right. This step you unscrew the four silver and obvious Torx screws holding the projector AFS basket to the automatic leveling assembly.
found a better photo:
Another angle:
Below: The AFS basket and projector still screwed into it and an EVO XR GEN 1 aftermarket light behind it. This is where I run out of good photos. I'll try to bullet out how this works then what to do.
A. First off AFS is the technology where when you turn the wheel above 15mph the headlight turns to shine light in the direction of which you're driving.
B. It works by one motor on a worm gear in the back of the headlight and sensors of course. The worm gear turns the projector inside the AFS basket which remains in one place.
C. The lower half of the projector screws into a bracket that attaches to the worm gear motor assembly. The upper half just articulates on a post that goes through the hole in the top of the projector lens arms. Look at the EVO XR 1.0 in this photo for the hole.
D. That upper mounting assembly has two parts to it. A lower plastic piece that serves to hold the projector lens to the reflector bowl and as a female receptacle for the ball-stud male side from the upper gold-ish piece you can see in my photo. Two torx screws hold the upper and lower piece together.
What to do:
1. Remove the two torx screws holding the upper ball assembly to the lower part described in D above. (Red circles)
2. Get a small thin wrench in there and pop the ball out of the mount. (Green circle)
3. Get the projector out of the AFS Basket.
3.1 You're going to be removing 3 small but very long T8's from the long metal mounting arms. Two on one side where the motor is and one on the other side for the same style arm. The motor comes out, it's OK (blue circle, back)
3.2. I think Phillips heads from the back but probably T20's, I forgot hold the lower part of the projector to the AFS basket. remove these two from each side (blue circle, front)
4. Work the projector assembly out of the basket. You're going to need to take your time and figure it out.
4.1. There is a small 2 wire plug on the lower part of the projector housing that operates the hi/low beam shutter.
5. Once the projector is out remove the two T8's that are holding the metal arms to the lower black plastic bracket on the top of the projector described in part D above.
Zoomed in with circles:
NOTE: This is actually reassembled with the EVO XR 2.0 projector in place
Modifying the EVO-XR 2.0 Projector
Below: Photo of an EVO XR original which by the way is a knock-off of the OEM projector found in our A8's and many other early 2000's European cars of the time.
The three red circles are identifying the three holes we will be drilling because the EVO XR 2.0 doesn't have these mounting provisions.
The two on the sides are for the mounting of that lower black plastic small bracket through the projector bowl to the metal mounting arms you removed in step 5 above.
The one large in the middle is obviously for the ball to go through.
Below: Photo of an EVO XR 2.0 aftermarket projector.
Note: Try not to get your optics (lens) dirty. Always clean with alcohol prep pads before final assembly/use. You don't even want to wipe down the reflector bowl- at the most blow debris out of it.
1. Unscrew the four Phillips head screws that hold the projector lens to the reflector bowl. Set aside someplace clean.
2. Tape off the reflector with painter tape. The light hole in the back and the entire front except for the top area where the two upper screws from were going to drill holes here.
2.1. READ: Don't put tape INSIDE the reflector bowl, just on the front face. Overlap the tape.
3. Look at that lower black small plastic bracket that accepts the pin. It has 2 studs on it that need to fit into where those screw holes formally were.
3.1. Use the slide caliper, choose a drill bit and bore out those two screw holes till the plastic brackets studs fit in.
4. Time to drill holes for the plastic bracket's two through holes that you removed T8's from that attach to the metal arms.
4.1. With the bracket's studs now holding in in place eye out the center of the two holes. Use a punch to make a center mark. Slide caliper to size you drill bit. Make your two holes.
Okay now your reflector bowl mods are complete. On to the big hole. This one kind of sucks. Keep in mind that when you drill things sometimes the bit catches and mangles the metal right? This is thin metal and that could happen. Didn't to me. Drill slow, use 3-4 different sized bits stepping up slowly. Also keep in mind that if you bend this bracket, and you will bend it a little you need to try to return it back to how the other undrilled EVOXR 2.0 bracket looks like. If you drastically change the lens distance from the bowl you will mess with your light output.
I used a slide caliper to find the center of the hole on the 1.0 projectors. It's going to be on the slanted part. Once again use the punch and a very small drill bit to get started.
I wrapped the entire rest of the projector with the bag it came in and taped it closed then used the Styrofoam the projector came with to guard the lens so I could lean on my workbench a little.
Drill your hole and return your bracket back to it's shape as best you can. Be slow, it won't be that bad!
The EVO XR 2.0 projector is just a little different on the bottom area. I had to mark the areas of the AFS basket I thought would be a problem and use my rotary tool and sanding bit to remove some plastic.
Reassemble is the reverse of dis-assembly here. Get the projector back into the AFS basket. Don't forget your two wire small connector for the bi-xenon shutter.
I tried to line up my worm gear to have the projector straight. Who knows if it matters.
When you go to put the HID bulb igniter back onto the new D2S bulb you'll notice the four plastic mounting tabs get in the way. Get your dykes and clip them. The D2S bulb has two mounting posts and mine hasn't had an issue for 4k miles now.
Before you place your whole lighting assembly back in the headlight housing get out a flat head screwdriver and remove all that hard glue in the female groove of the headlight housing.
Get a fresh blade on a utility knife and do the same to the lens lip that goes into that female groove.
I'd blow everything out with your air compressor or compressed air at this point and right before assembling your headlight too.
Now get the headlight re-assembled with the only exception of the lens and the grey/chrome trim pieces.
Okay your mod. The projector trim ring.
First at the bench figure out how it fits. You'll note that the 1.0 projector has 5 mounting tabs and the 2.0 only takes 4 (this is from memory). In short. Line it up and cut the one that doesn't have a home.
Now what I did was connect the headlight housing into the car. Grabbed my Vagcom and went through the output tests of the headlight until both the AFS went left/right and the auto leveling goes up and down. I noted with my sharpie where the trim ring was hitting and how much I had to take off. This was like a 10 step process for me. You're going to remove A LOT. pretty much a max of 1/4" of plastic will be left around the chrome trim ring center.
Once you have ran all your tests and verify visually the trim ring doesn't hit you're good.
Reassemble your headlight with your new butyl rubber and the two trim pieces. Use those headlight clamps and some channel locks to squeeze the housing together along. Obviously pre-heat all the butyl rubber with your heat gun.
If you've never done any of the above watch a few youtube videos of other guys doing this. I've done a handful of retrofits and this was by far the most complex, but also most rewarding.
Drink a lot because you just read an essay on how to modify headlights written by a headlight nerd.
Last edited by VorsprungTT; 01-27-2019 at 09:34 PM.

The following 2 users liked this post by VorsprungTT:
BASARAB (03-03-2020),
Turbo Tony (06-03-2020)

 01-28-2019, 06:18 PM
#6
AudiWorld Senior Member
Thread Starter
01-29-2019, 04:27 AM
#7
AudiWorld Member
Thanks, this is a worthwhile upgrade, looks like you could adjust your aim a little higher.
As a former lighting designer (two careers ago), we would try for consistency in stationary wall mounted applications.
However, a more intense center point is valued in automotive low beam applications for reach, as long as the difference between that and the side to side isn't distracting.
Agreed that the stock Fresnel lens, that's there for consistency, hurts lumen output.
Trending Topics
03-01-2024, 07:45 AM
#9
AudiWorld Newcomer

Join Date: Mar 2024
Posts: 1
Likes: 0
Received 0 Likes
on
0 Posts
I'll start off by saying I never intended to make a DIY-ish post, sorry for the lack of quality here. I honestly didn't think there was an even semi-active enthusiast site for A8 owners in general. So if you're a headlight nerd a feel like you want an upgrade maybe this will give you a good idea of what you can do. I need to get post-install lighting output pictures but they won't do it justice. Compared to a stock, unmodified projector even with upgraded bulbs- this is night and day.
I opened my headlights originally to do a clear lens and bulb swap. When I had the projector out the first time I realized that it looked very familiar to what The Retrofit Source (no, I don't work for them) calls an EVO-XR. Took a bunch of measurements and ended up ordering uprated EVO-XR 2.0 Projectors from Lightwerks Global. They take the same bulb as stock - D2S and are nearly identical minus 3 holes to drill and 2 more to bore out. Oh and the projector to lens is 10mm shorter.
Tools you'll need:
Dremel / rotary tool with sanding and plastic cutting disks
Heatgun
A complete torx driver set including an T8 IIRC. The lights are largely T20, T10, T8 (from poor memory).
Your average screwdriver collection
Painters tape
Nice drill bit kit
A slide caliper is a nice to have
Vagcom 100% required
Sharpie marker
wire cutters / dykes
needle nose pliers
magnet tool
a punch
A whole lot of patience, beer and time. The first light took me 6 hours. Second light 1:45 (timed it, nerd status).
Parts:
The projects
D2S bulbs - I used Morimoto XB 5500k
Alcohol prep pads to clean lens (don't clean the bowl, just keep it free of debris!)
New Butyl rubber
Any bulbs you plan to replace while you're in there or spray paint if you want to paint the housings (I didn't)
Those headlight clips that retrofit source sells they use Allen head bolts to tighten
The general gist of what will be modified:
The EVO-XR 2.0's will need 3x holes drilled in them and two threaded screw holes bored out. That's it.
The basket that the project screws into will need parts of the lower mounting plastic ground down a little with the sanding disk
The trim shroud that clips on to the projector will need 1 tab removed and a LOT of it will need to be ground down.
--The trim shroud needs to be ground down due to the 2.0 projectors being 10mm shorter from reflector bowl front to lens and AFS moves the headlights.
--Don't worry, you'll never notice when it's all together.
Heads up. These lights are sealed with permaseal. Hence the necessity for the new Butyl rubber. If you don't know what it is, it's a super strong glue that holds the headlight lens to the housing. Watch some youtube videos for some tips and tricks.
Crappy photos and directions (sorry again, I never thought I'd be sharing them)
Below: After you remove the bumper, headlights and heatgun/pry/curse/drink/fight the headlight lens off you will remove these two next. First the grey trim piece has 2-3 T20's holding it on and second the chrome trim has another 2-3 T20's holding it on. These are all accessible from the front of the light and the magnet tool will come in handy. Pat attention to where the mounting tabs sit for both pieces. The chrome trim sits into some of the sealant IIRC. Good knowledge for reassembly- take photos and do one at a time.
Below: At this point you'll see this. The red-circled projector trim ring pops off. Get a small flathead in there to assist so you don't break the plastic. Needless to say everything you're dealing with is 10+ year old heat cycled plastic- be careful and take your time.
The green-circled reflector bowl for the AFS+ side illumination bulb has to come out next. First remove the bulb from the back. Then again from the back there are 4 or 5 T20's holding bolt the bulb holder and reflector bowl to the larger black plastic auto-leveling assembly. Remove the bulbs and the reflector falls right out. Set aside somewhere clean and again remember how it goes back together.
Below: With the trim ring and reflector bowl out of the way you now have to get the automatic leveling assembly disconnected from the motors. Before you do that pull the electrical connector from the ignitor and the igniter itself from the back of the HID bulb. You twist it. There are directions of it to tell you which way (Only part of this DIY Audi anticipated being serviced). The automatic leveling assembly is is held on by the three plastic T shaped lock mechanisms circled below. I chose to use a small flathead screwdriver to work the white plastic T just far enough from the black plastic housing that I could get a needle nose plier in there. Use the needle nose like a screw driver. Place one side of the plier on either side of the T so you have even force and gently turn counter clockwise. After you turn all three of them the auto leveling assembly should come right out. Oh, there is a large wiring connector you'll see a few pictures down. You'll have to disconnect this and there is a tab in there you gently push on with a screwdriver then slide backwards I think.
A8's Ignitor for D2S bulbs for those that don't know the term:
Below: The automatic leveling assembly. Crap photo for this but you can see the three screw holes where you removed the reflector bowl from a few steps ago on the right. This step you unscrew the four silver and obvious Torx screws holding the projector AFS basket to the automatic leveling assembly.
found a better photo:
Another angle:
Below: The AFS basket and projector still screwed into it and an EVO XR GEN 1 aftermarket light behind it. This is where I run out of good photos. I'll try to bullet out how this works then what to do.
A. First off AFS is the technology where when you turn the wheel above 15mph the headlight turns to shine light in the direction of which you're driving.
B. It works by one motor on a worm gear in the back of the headlight and sensors of course. The worm gear turns the projector inside the AFS basket which remains in one place.
C. The lower half of the projector screws into a bracket that attaches to the worm gear motor assembly. The upper half just articulates on a post that goes through the hole in the top of the projector lens arms. Look at the EVO XR 1.0 in this photo for the hole.
D. That upper mounting assembly has two parts to it. A lower plastic piece that serves to hold the projector lens to the reflector bowl and as a female receptacle for the ball-stud male side from the upper gold-ish piece you can see in my photo. Two torx screws hold the upper and lower piece together.
What to do:
1. Remove the two torx screws holding the upper ball assembly to the lower part described in D above. (Red circles)
2. Get a small thin wrench in there and pop the ball out of the mount. (Green circle)
3. Get the projector out of the AFS Basket.
3.1 You're going to be removing 3 small but very long T8's from the long metal mounting arms. Two on one side where the motor is and one on the other side for the same style arm. The motor comes out, it's OK (blue circle, back)
3.2. I think Phillips heads from the back but probably T20's, I forgot hold the lower part of the projector to the AFS basket. remove these two from each side (blue circle, front)
4. Work the projector assembly out of the basket. You're going to need to take your time and figure it out.
4.1. There is a small 2 wire plug on the lower part of the projector housing that operates the hi/low beam shutter.
5. Once the projector is out remove the two T8's that are holding the metal arms to the lower black plastic bracket on the top of the projector described in part D above.
Zoomed in with circles:
NOTE: This is actually reassembled with the EVO XR 2.0 projector in place
Modifying the EVO-XR 2.0 Projector
Below: Photo of an EVO XR original which by the way is a knock-off of the OEM projector found in our A8's and many other early 2000's European cars of the time.
The three red circles are identifying the three holes we will be drilling because the EVO XR 2.0 doesn't have these mounting provisions.
The two on the sides are for the mounting of that lower black plastic small bracket through the projector bowl to the metal mounting arms you removed in step 5 above.
The one large in the middle is obviously for the ball to go through.
Below: Photo of an EVO XR 2.0 aftermarket projector.
Note: Try not to get your optics (lens) dirty. Always clean with alcohol prep pads before final assembly/use. You don't even want to wipe down the reflector bowl- at the most blow debris out of it.
1. Unscrew the four Phillips head screws that hold the projector lens to the reflector bowl. Set aside someplace clean.
2. Tape off the reflector with painter tape. The light hole in the back and the entire front except for the top area where the two upper screws from were going to drill holes here.
2.1. READ: Don't put tape INSIDE the reflector bowl, just on the front face. Overlap the tape.
3. Look at that lower black small plastic bracket that accepts the pin. It has 2 studs on it that need to fit into where those screw holes formally were.
3.1. Use the slide caliper, choose a drill bit and bore out those two screw holes till the plastic brackets studs fit in.
4. Time to drill holes for the plastic bracket's two through holes that you removed T8's from that attach to the metal arms.
4.1. With the bracket's studs now holding in in place eye out the center of the two holes. Use a punch to make a center mark. Slide caliper to size you drill bit. Make your two holes.
Okay now your reflector bowl mods are complete. On to the big hole. This one kind of sucks. Keep in mind that when you drill things sometimes the bit catches and mangles the metal right? This is thin metal and that could happen. Didn't to me. Drill slow, use 3-4 different sized bits stepping up slowly. Also keep in mind that if you bend this bracket, and you will bend it a little you need to try to return it back to how the other undrilled EVOXR 2.0 bracket looks like. If you drastically change the lens distance from the bowl you will mess with your light output.
I used a slide caliper to find the center of the hole on the 1.0 projectors. It's going to be on the slanted part. Once again use the punch and a very small drill bit to get started.
I wrapped the entire rest of the projector with the bag it came in and taped it closed then used the Styrofoam the projector came with to guard the lens so I could lean on my workbench a little.
Drill your hole and return your bracket back to it's shape as best you can. Be slow, it won't be that bad!
The EVO XR 2.0 projector is just a little different on the bottom area. I had to mark the areas of the AFS basket I thought would be a problem and use my rotary tool and sanding bit to remove some plastic.
Reassemble is the reverse of dis-assembly here. Get the projector back into the AFS basket. Don't forget your two wire small connector for the bi-xenon shutter.
I tried to line up my worm gear to have the projector straight. Who knows if it matters.
When you go to put the HID bulb igniter back onto the new D2S bulb you'll notice the four plastic mounting tabs get in the way. Get your dykes and clip them. The D2S bulb has two mounting posts and mine hasn't had an issue for 4k miles now.
Before you place your whole lighting assembly back in the headlight housing get out a flat head screwdriver and remove all that hard glue in the female groove of the headlight housing.
Get a fresh blade on a utility knife and do the same to the lens lip that goes into that female groove.
I'd blow everything out with your air compressor or compressed air at this point and right before assembling your headlight too.
Now get the headlight re-assembled with the only exception of the lens and the grey/chrome trim pieces.
Okay your mod. The projector trim ring.
First at the bench figure out how it fits. You'll note that the 1.0 projector has 5 mounting tabs and the 2.0 only takes 4 (this is from memory). In short. Line it up and cut the one that doesn't have a home.
Now what I did was connect the headlight housing into the car. Grabbed my Vagcom and went through the output tests of the headlight until both the AFS went left/right and the auto leveling goes up and down. I noted with my sharpie where the trim ring was hitting and how much I had to take off. This was like a 10 step process for me. You're going to remove A LOT. pretty much a max of 1/4" of plastic will be left around the chrome trim ring center.
Once you have ran all your tests and verify visually the trim ring doesn't hit you're good.
Reassemble your headlight with your new butyl rubber and the two trim pieces. Use those headlight clamps and some channel locks to squeeze the housing together along. Obviously pre-heat all the butyl rubber with your heat gun.
If you've never done any of the above watch a few youtube videos of other guys doing this. I've done a handful of retrofits and this was by far the most complex, but also most rewarding.
Drink a lot because you just read an essay on how to modify headlights written by a headlight nerd.
hi good write up ide love t do ths to my a8 as the lights ar dim with new bulbs is this wht you ordered https://www.aliexpress.com/item/32780186731.html
where in the world are you based

Thread
Thread Starter
Forum
Replies
Last Post
sama4678
A4 (B5 Platform) Discussion
2
03-14-2001 12:33 PM