When you click on links to various merchants on this site and make a purchase, this can result in this site earning a commission. Affiliate programs and affiliations include, but are not limited to, the eBay Partner Network.
You are beyond kind to have taken the time to write that all up and look into it for me, very very much appreciated!
I am going to order the part and see if I can do it myself, I have built two Infinit g35 race cars from the ground up so I am decent with car work, but the Audi just seems to be a whole nother beast of engineering.
You wouldnt happen to have access to a diagram showing where the motor for the rear shade is located and or how to drop the rear portion of the headliner to gain access? I was told that the entire headliner does not need to come down to get access to just the rear roofs shade motor, which would be ideal
Originally Posted by laurent0613
Ridiculous, not the price but the attitude of this dealer.
Replaced by the shop only 5K prior the new issue and now motor dead?
Even if it was done 3 years ago they should have shown some concern about the quality of the work done at that time and offered you a signifiant drop in price as good will gesture.
Lame.
800� for the motor is expected I'm afraid. OEM parts are extremely expensive, and this is how companies like Audi are making profit.
Luckily we also have alternatives to the dealer.
You can easily find online the part you need :
I just found one online for $256 from Casper, WY
Of course you will need a full day to replace it, but it is very doable.
BTW, I also have an A8L with pano roof.
My car was part of a recall for the roof sealants. Check if your car was not part of this recall too. Water could have leaked in the cabin and shorted the motor...
It would then be covered by warranty (I presume)
Use this Link to TSB Audi NA
I really believe you only have to remove the sunroof glass panels !
No need to remove the headliner !
Steps to follow :
�Tilt glass panel and detach side trim panels.
�Starting at rear of sunroof frame, pull seal (rear) off at sides and proceed halfway towards front.
�Remove bolts on both sides of glass panel.
�Lift glass panel off tilt arms.
To remove the trim :
�Press trim panel -1- outwards -arrow b- and at the same time pull it out of fastener towards rear -arrow a-.
�When installing, recess in glass panel must engage at rear edge of trim panel -arrow-.
Has anyone done this? My new to me '14 has the rear shade detached from the cable. Motor runs but shade doesn't move. I can tilt the rear roof up but the directions here don't make a lot of sense with what I see.
What trim piece? What seal? Nothing seems to want to move.
There don't seem to be many sunroof threads so I'll close the loop on this one.
My rear sunshade would not close. The motor ran but nothing moved. I disassembled everything to learn what was wrong.
The sunshade is driven by a pair of worm gears running down the sides. They mate to plastic pieces installed on the ends of the metal bar at the edge of the shade.
If the mating part wears/breaks it no longer engages the worm gear. It only takes one side to fail as that creates enough slop to allow the other side to not engage.
Consulting the online parts guide the plastic piece is not sold separately. It looks like you have to buy a new shade. $573 in black, other colors vary.
This is my first Audi. I hope this experience is not typical, otherwise it's back to BMW where things break all the time but are DIY fixable for a fair price.
Closing this conversation with a fairly simple DYI solve. A. Remove Front Sunroof Glass Panel
1 - Bolt (5.5 Nm)
2 - Guide rail (right-side)
3 - Glass panel (front)
� Removing
- Open glass panel (front) approx. halfway.
- Starting at front, pull seal (front) off sunroof frame and proceed half* way towards rear.
- Unscrew bolts on sides of glass panel. (take pictures of each bolt before unscrewing if multiple tightening patterns exist, this will speed up panel alignment when installing)
- Lift glass panel off guide rails.
4 - Guide rail (left-side)
B. Remove Rear Sunroof Glass Panel (see post #15 instructions)
1 - Bolt (5.5 Nm)
2 - Tilt arm (right-side)
3 - Trim panel
� Removing
- Press trim panel -1- outwards -arrow b- and at the same time pull it out of fastener towards rear -arrow a-.
- When installing, recess in glass panel must engage at rear edge of trim panel -arrow-.
4 - Glass panel (rear)
� Removing
- Tilt glass panel and de*tach side trim panels.
- Starting at rear of sun* roof frame, pull seal (rear) off at sides and proceed halfway to*wards front.
- Remove bolts on both sides of glass panel.
- Lift glass panel off tilt arms.
5 - Tilt arm (left-side) C. Remove Sunroof Sun Blind Mounting Frame
1 - Electrical wiring
� Secure in retainers -arrows-.
2 - Sunroof frame
4 - Bolt (3 Nm)
5 - Mounting frame for sunroof sun blind
- Move sunroof sun blind (front and rear) to serv*ice position (see instructions below)
- Pull seal off to the side in area of mounting frame.
- Unplug electrical con*nector for motors.
- Remove bolts -4-.
- Lift out mounting frame.
:Sunroof sun blind service position procedure:
Note: First move sunroof sun blind (front) to service position; then move sun blind (rear) to service position.
Service position for sunroof sun blind (front)
- Open sunroof sun blind completely; then let go of button, press into "open" position again and hold.
- After approx. 10 seconds, sunroof sun blind (front) will move to service position.
Service position for sunroof sun blind (rear)
- Open sunroof sun blind (rear) completely.
- Press and hold "REAR MODE" button.
- Press button for sunroof sun blind into "open" position and hold.
- After approx. 10 seconds, sunroof sun blind (rear) will move to service position.
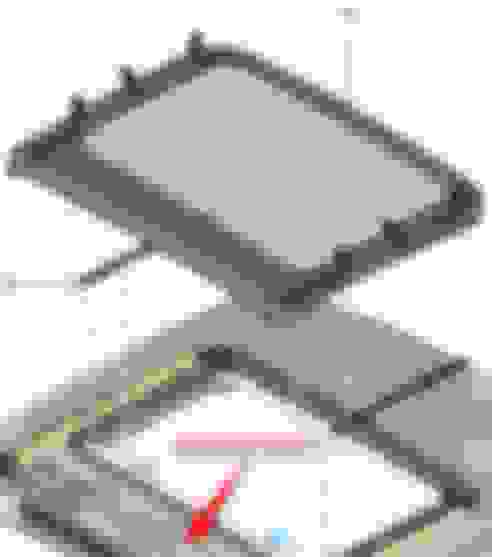
Your roof should look like this:
D. Solder Broken Plastic Pieces back to Sun Blind Metal Bars
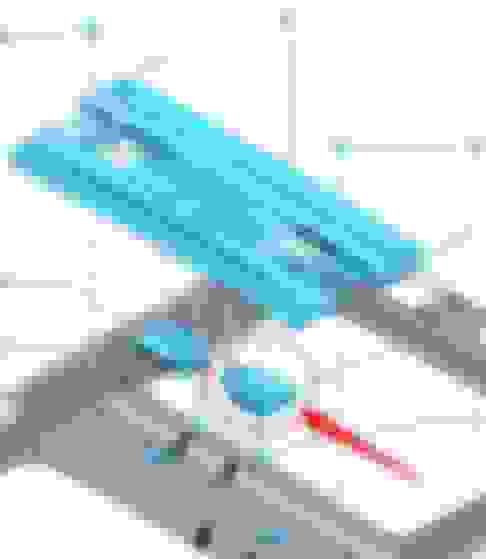
Your mounting frame with blinds should look like this (top - front blind; bottom - rear blind disconnected from metal bars):
Note: Plug motor electrical connectors back to the car in order to roll metal bars out of the service position. This will give enough clearance for soldering.
Close ups of broken ends:
Unscrew broken plastic pieces out of sun blind assembly (#2 below):
Solder broken ends to metal bars:
Results below:
Pull sun blind and reattach to soldered end pieces. Assemble everything in reverse order. E. Adjust Glass Panels
� Arrow points towards front of vehicle.
� If both glass panels have to be adjusted, adjust the rear glass panel first.
- Adjust glass panel (rear) so that its rear edge protrudes over the roof (-dimension b-).
- Adjust panel so that its front edge is flush with roof on both sides.
- Adjust glass panel according to specified dimension via bolts in tilt arms/guide rails.
- Glass panel recessed by -dimension a- to roof (front).
- Glass panel protruding by -dimension b- to roof (rear).
- Glass panel (rear) recessed by -dimension c- to glass panel (front).
� Dimension -a- = 1.5 mm � 1 mm
� Dimension -b- = 0.5 mm � 1 mm
� Dimension -c- = 1 mm � 0.5 mm
� Dimension -d- = 2.5 mm � 0.5 mm
This guide was perfect. I got the job done in about 2hrs start to finish. It was a very straightforward repair. I used a plastic bumper repair tool. It heats the metal "wiggle" and bonds the crack/split together. I sealed with a 5min epoxy for extra support and sanded it all smooth. 2015 A8L.


 04-27-2019, 09:56 AM